Since yesterday, Windows Update Update encountered an error, unable to download and install the Update patch, error code 80246008.
As shown in figure

= = = = = = = = = = = = = = = = = = = = = = = = = = = = = = = = = = = = = = = = = = = =
Click “Get Help information about the error” in the figure to get the following:
You must log in as an administrator to perform these steps.
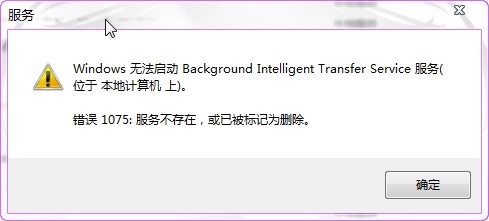
If you receive a Windows Update error 80246008 while downloading the Update, you may need to change the backend Smart Transfer Service (BITS) or Windows Event log service Settings, and then restart each service.
The steps to change or restart the backend intelligent Transport Service (BITS)
1.
By clicking the Start button
, then click Control Panel to open Administration Tools. In the search box, type Administrative Tools, and then click Administrative Tools.
2.
Double-click Services.
Disk read error solution for new hard disk installation
(Problems arise)
In response to my mother’s strong request, I bought some accessories on JINGdong two weeks ago and installed a new machine. I officially eliminated the old desktop computer that I had used for nearly 10 years at home. My mother said that I would not be able to play QQ dream now.
The neighbor saw, also want to update his machine, I basically the same as before and under a single (at the request of the neighbor to add an OPTICAL drive, my home machine is not equipped with optical drive), the weekend back home to install the machine. The installation went well, but there was a very strange problem when installing the OS.
Listen to me slowly.
The hard disk USES Seagate 1TB (ST1000DM003) disk, and the motherboard USES Giga GA-A75KM-D2H disk. At first, I found some problems with these models, but I found it has nothing to do with the hard disk model after I studied it.
First of all, everything worked fine when I installed the system myself.
In the neighbor installed, I use my pre-carved rain forest wind Win7 Ghost plate, the first use of a key in four areas, four areas. (In fact, this function is to do a complete partition image, disk to disk, ghost will automatically adjust the size of the partition in proportion). Then use a key will win7 Ghost to c disk installation, but ghost is always a failure, generally go less than 50% of the card is dead, after a while optical drive read disk also stopped.
Later, if you boot from hard Disk, sometimes failure will prompt that OS cannot be detected, and sometimes failure will prompt “A Disk Read Error Occurred. Press Ctrl+Alt+del to RESTART”.
(Disc-Mounted system)
But the hard disk can only be unplugged, attached to my machine as a slave disk, the system installed in.
Now that I’m hanging them all off the slave disk, I’ll use Disk Genius to reprogram the slave disk partitions.
(The knowledge of primary partition, extended partition, logical partition is very important in manual partition, also not complex, a diagram plus three or two sentences can be explained, do not understand the students please baidu yourself first)
Specific methods:
1, copy win7 ghost from the disc image to the hard disk (or mount the image to the virtual optical drive)
2, if you use GHost32, you can directly ghost-> To partition – & gt; From image, when you select the target hard drive, don’t select your own hard drive or it will be a tragedy
(This is what I did for the first time since I already use Disk Genius.) To use the disk image widget, you need to first use software like Disk Genius to convert the primary partition from the disk to a logical partition and assign a drive letter.
3, ghost, note that the drive letters from each partition are probably not in order, need to pay attention to who is the first partition (Disk Genius, Win7 comes with disk management tools can be).
4. Convert from the first partition of the disk to the primary partition and set it to Active.
(New questions)
Restart and start from Disk. Once again, “A Disk Read Error Occurred. Press Ctrl+Alt+del to RESTART”. At first I thought I had damaged the hard drive, so I was taken aback (I had just dropped it accidentally). However, after starting with the master disk and entering the system, it was found that each partition of the slave disk was working normally and the files could be read and written normally.
Suspect is the new motherboard problem, will my hard disk unplug, put the neighbor’s disk on my motherboard to restart again, still invalid.
Put my hard drive on the neighbor’s machine and everything’s fine. It’s not the motherboard.
Things have come to an impasse.
(Real solution)
When depressed, use Disk Gunius to observe the partition parameters of two hard disks. Because I used to practice assembly when I wrote the operation of the partition table program, on the disk structure and various parameters or more familiar, boring want to calculate the partition capacity and it is not the same. Suddenly it is found that the starting head and sector from the first partition of the disk is not 1,1, but 31,1. This is not normal!
While the normal should be something like this (this picture was re-cut by the laboratory machine when I posted to illustrate the point) :

This means that after the BIOS has read Boot Sector, the primary partition of the boot partition should start at an abnormal position, with an inexplicably blank space in front of it. Disk Read Error occurs when the BIOS loads the operating system with a strict check and thinks it has read something wrong.
This explains why the BIOS will load the OS incorrectly, while the BIOS will load the OS correctly when it is suspended from the disk (follow the boot Sector start/stop parameter, regardless of OS loading).
I think: this may be caused by my conversion of the primary partition to logical partition, and then to the primary partition. Since this logical partition needs an extended partition header to record the starting and ending positions of each logical partition under it, naturally its real free space is moved back, and the primary partition is not moved back.
After knowing this is easy, I manually modify the partition parameters in the software, will start magnetic head and sector to 1,1, so the partition of the natural thing is not, with a new ghost into a system. Mount startup, everything is OK!
Some other information on the Internet is summarized as follows:
Occurred: “A Disk Read Error Occurred once again. Press Ctrl+Alt+del to RESTART”, there are generally several possibilities:
1. Hardware failure: Data line aging, interface loosing, motherboard aging (capacitor)
Performance: normal use, sudden occurrence of this problem, on and off.
Solution: Clean the ash and reinsert. Check the capacitance. In addition, someone on the Internet said that UDMA support was cancelled in the BIOS. I found the original post, and the original author said that the capacitor was found to swell, and this capacitor is UDMA circuit, so this method is not common, or fix the motherboard/replace the motherboard.
2. Hard disk failure:
Performance: normal use, suddenly this problem, and then continue to do so, and recall the case (hard disk) recently received a large impact.
Solution: Hard disk low grid.
3. Hard disk setup:
Performance: the new system appears, and is likely to be normally accessible from the slave disk on other machines.
Solution: Check the hard disk partition parameters, set the partition of the operating system installation as the primary partition, Active, non-hidden, start cylinder: 0, start head: 1, start sector: 1.
SQL Server 2005, unable to log in, forget sa password, 15405 error!
can not be connected to./SQLEXPRESS.
Additional information:
user ‘sa’ login failed. This user is not associated with a trusted SQL Server connection. (18452), Microsoft SQL Server Error:)
— — — — — — — — — — — — — — — — — —
it’s mapping times wrong:
failed to create for user “sa”. (Microsoft) is essentially) express. The smo)
Additional information:
perform Transact_SQL statements or abnormal happened when the batch. (Microsoft) is essentially) express. ConnectionInfo)
unable to use special groups’ sa ‘. The (15405), Microsoft SQL Server Error:
2, the concrete solving steps:
the first step: open the SQL2005 with administrator login first, then right-click the selected attributes in the service name & gt; Security & gt; The login mode option on the right has been changed to authentication OK!
step 2: select safety (expand)> Login name & gt; Double-click the sa> Password change the password you need to confirm! Then turn off SQL2005 or disconnect.
. Step 3: start > Application & gt; Choose SQL2005 & gt; Configuration tool & GT; Open the configuration manager> Expand SQL Server2005 network configuration
note: select MSSQLSERVER if SQMEXPRESS
> TCP/IP options & gt; Enable and right click > Property & gt; Ip address TAB & GT; Change all disabled options to enabled & GT; Then restart the SQL2005 service!
configure: error: C compiler cannot create executables See `config.log’ for more details
Install MPI on your MAC, where GCC is already installed.
install the following blog instructions to install MPI.
https://blog.csdn.net/yaochuyi/article/details/86939352
S1 double-click the downloaded file openmpi-4.0.0.tar.gz
S2 open CMD, CD to the unzipped folder.
S3 type CD/Users/ycy/Desktop/openmpi – 4.0.0
S4 installed under/usr/local, execute./configure.
S5 enter./configure –prefix=/usr/local
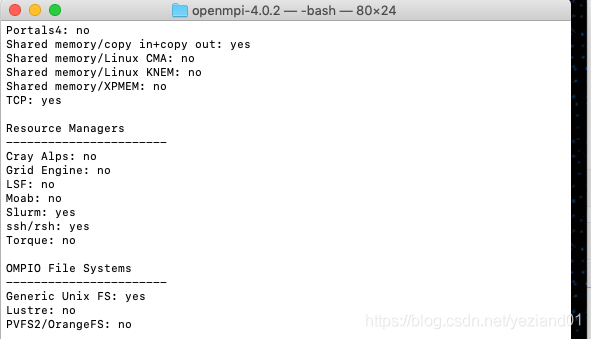
But it turns out that something went wrong, and it went as follows:
*** Startup tests
checking build system type... x86_64-apple-darwin18.5.0
checking host system type... x86_64-apple-darwin18.5.0
checking target system type... x86_64-apple-darwin18.5.0
checking for gcc... x86_64-apple-darwin13.4.0-clang
checking whether the C compiler works... no
configure: error: in `/Users/xxx/openmpi-4.0.2':
configure: error: C compiler cannot create executables
See `config.log' for more details
What’s wrong with the C compiler?But my GCC is clearly installed correctly.
check, may be a permission problem. Then change the S5 command to
sudo./configure –prefix=/usr/local
. Installation successful.
Jython installation
Jython installation is a bit bumpy
Jython installation small bumpy background software configuration installation process encountered problems in the last episode
Jython installation is a bit bumpy
background
Since Jython is required to use MonkeyRunner, let’s take a look at the bumps in the Android process.
Software configuration
Operating system: Windows 7 64-bit
Java version: 1.8.3
Python version: 2.7.8
The installation process
To get started, go to Jython’s official website and download the latest version of Jython, which comes in a.JAR.
in CMD directly with java-jar + jar command to install
Problems encountered
After using the latest version of Jython installation, an Error was reported in CMD, indicating Error loading python27.dll (Error code 14001). The search engine searched and found the reason on stackoverflow. Jython2.7.1 does not support Windows 7. You can only download version 2.7.0 or lower. You found 2.7.0 here and downloaded the JAR package.
is installed directly in CMD with the java-jar + jar command, as before.
error was reported again this time. The error was reported as follows:
Error: Registry key 'Software\JavaSoft\Java Runtime Environment'\CurrentVersion'
has value '1.8', but '1.7' is required.
Error: could not find java.dll
Error: Could not find Java SE Runtime Environment.
This does not need the search engine to know is Java is too high, alas, have no way, have to change the environment variable of the system Java in the computer to 1.7.
thought this would be fine,
did not expect, after changing the Java version to reinstall the same prompt, I wonder. I read the Java version in CMD with java-version, 1.7. Why not?Have no way, have to turn to search engine again. [results] (https://stackoverflow.com/questions/29697543/registry-key-error-java-version-has-value-1-8-but-1-7-is-required) found the answer in this: the reason is that in the system path, Windows\System32 or Windows\SysWOW64 there are java.exe, javaw.exe, javaws.exe0 these files are still 1.8.3.
in this case, I guess the cache, although the environment variable has changed, but the path has not been changed.
The last
Finally, it is installed successfully. To check whether it is installed, you need to configure the environment variable. jython.exe· the path is in the /bin file of the installation path. After configuring it, just like Python, enter jython ‘in CMD directly and see if it enters jython.
episode
When the installation failed at the beginning, I went to the official installation guide on the official website. Jar –help java-jar jythn-installer -2.7.1.jar –help
I found that -help or -help is very useful, sometimes do not know what command, you can type this parameter in the back, see if it is useful. “Hee hee”
usage:
       java -jar jython-installer-2.7.0.jar [-c | -s | -A] [-d dir] [-t type] [-i
       part(s)] [-e part(s)] [-v] [-h | -?]

No option at all will start the interactive GUI installer, except:
Options respected in GUI mode are 'directory', which serve as default values
in the wizard.
In non-GUI mode the following options are available:
 -c,--console             console based installation (user interaction)
                          any other options will be ignored (except 'verbose')
 -s,--silent              silent installation (without user interaction)
 -A,--autotest            automatic stress tests for the installer
                          most of the other options are ignored
                          allowed additional options: 'verbose
 -d,--directory <dir>     target directory to install to
                          (required in silent mode,
                          used as default in GUI mode)
 -t,--type <type>         installation type
                          one of the following types is possible
                          (see also include/exclude parts):
                          - all: everything (including src)
                          - standard: core, mod, demo, doc, ensurepip
                          standard is the default
                          - minimum: core
                          - standalone: install a single, executable .jar,
                          containing all the modules
 -i,--include <part(s)>   finer control over parts to install
                          more than one of the following is possible:
                          - mod: library modules
                          - demo: demos and examples
                          - doc: documentation
                          - src: java source code
                          - ensurepip: install pip and setuptools
 -e,--exclude <part(s)>   finer control over parts not to install
                          more than one of the following is possible:
                          - mod: library modules
                          - demo: demos and examples
                          - doc: documentation
                          - src: java source code
                          - ensurepip: install pip and setuptools
                          (excludes override includes)
 -v,--verbose             print more output during the installation
                          (also valid in GUI and autotest mode)
 -h,--help                print this help (overrides any other options)
 -?                      print this help (overrides any other options)

example of a GUI installation:
        java -jar jython-installer-2.7.0.jar

example of a console installation:
        java -jar jython-installer-2.7.0.jar -c

example of a silent installation:
        java -jar jython-installer-2.7.0.jar -s -d targetDirectory

examples of a silent installation with more options:
        java -jar jython-installer-2.7.0.jar -s -d targetDirectory -t minimum -i src
        java -jar jython-installer-2.7.0.jar -s -d targetDirectory -t standard -e demo doc -i src

example of an autotest installation into temporary directories:
        java -jar jython-installer-2.7.0.jar -A
        (uses java.awt.Robot; make sure you do NOT touch mouse NOR keyboard
         after hitting enter/return!)
In the end, I deliberately installed it without a graphical interface, using -C to install it with the console, and found that there were more options to choose than the graphical interface, so I won’t expand it here.
be interested in yourself to try.
compile error in hidden module: link
When Word 2016 for Mac is opened and quit, the popover always tells us “Compile error in Hidden Module: link”.
in the Finder press Shift + Command + G, enter the following address enter:
~/Library/Group Containers/UBF8T346G9 Office/User Content/Startup/Word/
then watch it. Is there a call linkCreation dotm file, so can be deleted. Don’t move the other files.
Refer to
https://zhidao.baidu.com/question/364609475164188372.html
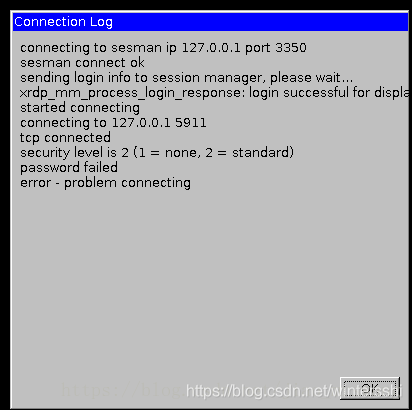
(Windows+xrdp+ubuntu16.04) Remote server error: “password failed error-problem connecting”
Don’t be long-winded, give the problem and solution directly.
Problems that arise
The solution
Modify /etc/xrdp/sesman.ini
- open file
/etc/xrdp/sesman.inisudo vim /etc/xrdp/sesman.ini
sesman.ini file contents are as follows:
[Globals]
ListenAddress=127.0.0.1
ListenPort=3350
EnableUserWindowManager=1
UserWindowManager=startwm.sh
DefaultWindowManager=startwm.sh

[Security]
AllowRootLogin=1
MaxLoginRetry=4
TerminalServerUsers=tsusers
TerminalServerAdmins=tsadmins

[Sessions]
X11DisplayOffset=10
MaxSessions=10
KillDisconnected=0
IdleTimeLimit=0
DisconnectedTimeLimit=0

[Logging]
LogFile=/var/log/xrdp-sesman.log
LogLevel=DEBUG
EnableSyslog=0
SyslogLevel=DEBUG

[X11rdp]
param1=-bs
param2=-ac
param3=-nolisten
param4=tcp

[Xvnc]
param1=-bs
param2=-ac
param3=-nolisten
param4=tcp
param5=-localhost
param6=-dpi
param7=96
- under
[Xvnc] param8= -securitytypes and param9=None[Xvnc]
param1=-bs
param2=-ac
param3=-nolisten
param4=tcp
param5=-localhost
param6=-dpi
param7=96
param8=-SecurityTypes
param9=None
- restart XRDP service
sudo service xrdp restart
win10 unable to start ssh-agent service, error :1058 solution
Reference [https://help.github.com/articles/generating-a-new-ssh-key-and-adding-it-to-the-ssh-agent/] set up SSH key, use the command SSH - add ~ /. SSH/id_rsa result Error
Error connecting to the agent: Unable to start ssh-agent: ssh-agent, error:
unable to start ssh-agent service, error :1058
win+R opens the service to see if the "OpenSSH Authentication Agent" service is enabled. If it is "disabled", set the service to "Automatic" and then open the service
Pychar error: Error:failed to find libmagic. Check your installation
today, Pycharm reported this error while debugging the program.
use the command
PIP uninstall python-magic
PIP install python-magic-bin==0.4.14
solution 2:
uninstall python-magic
and download the corresponding 64-bit installation package on the official website. WHL
then use the command
PIP install python_magic_bin-0.4.14-py2. Py3-none-win_amd64. WHL
is now python-magic working.
joke, now this kind of domestic solution to the problem of the post is really not good, to stackoverflow, hit the key points…
GitHub desktop upload file error commit failed – exit code 1 received
colleague handover Java project, want to upload to GitHub
USES GitHub DeskTop to clone the warehouse to local
ready to upload file, popup error report Commit failed – exit code 1 received
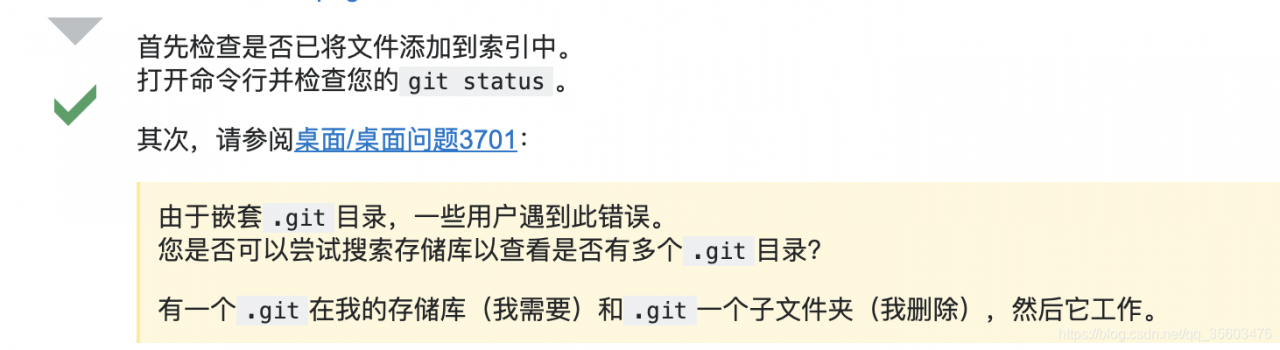
after I learned that this project may exist on GitHub before, the. Git file in the project needs to be deleted
.git is a hidden file. Windows sets to display the hidden file in view attribute. Mac can see
directly in access
delete it, note here that there is a. Git, do not delete this, to delete the project exists. Git [has been tested]
but after I deleted it, GitHub DeskTop was unable to detect the uploaded project
remove the project repository, reintroduce the project, remove.git, and list all options in your file
these project files uploaded to GitHub, will automatically organize the folder, do not worry, smooth upload.
JS Ajax request is successful, the response displays “failed to load response data”
# accident site
js ajax request succeeds, response shows “failed to load response data”

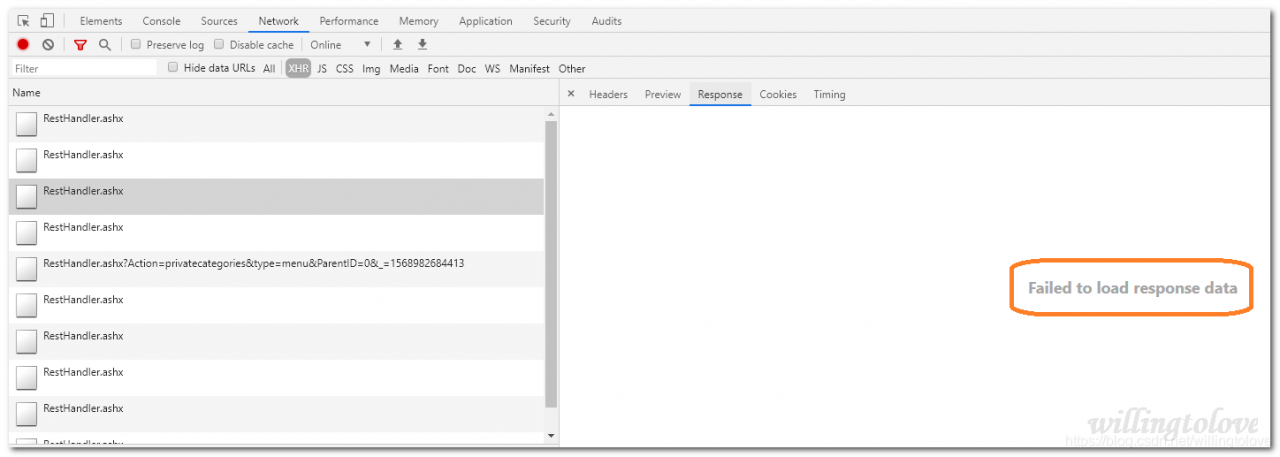
# reason
server returns too much data, resulting in data cannot be displayed;

# view the returned data by “open in new TAB “
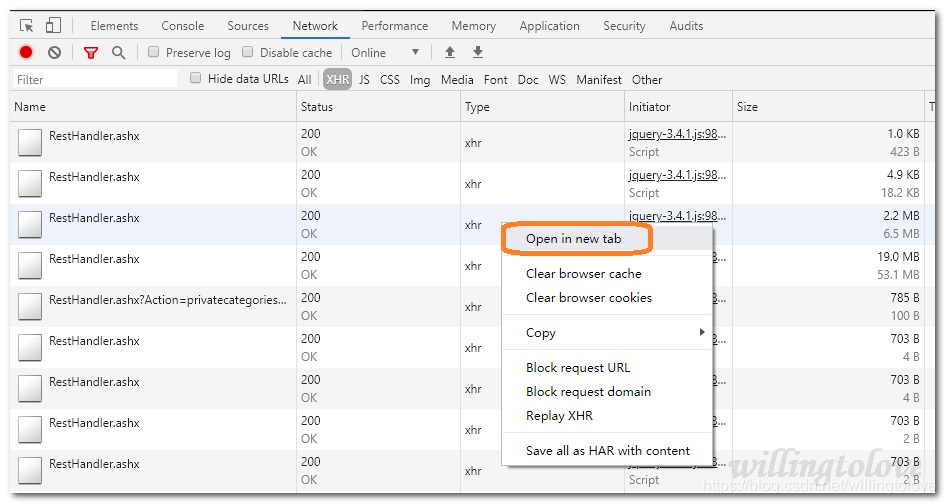
note:
if this request is a Get request, that’s ok;
if the request is posted and has form data, then open in new TAB only opens the url of the request, without the form data information.
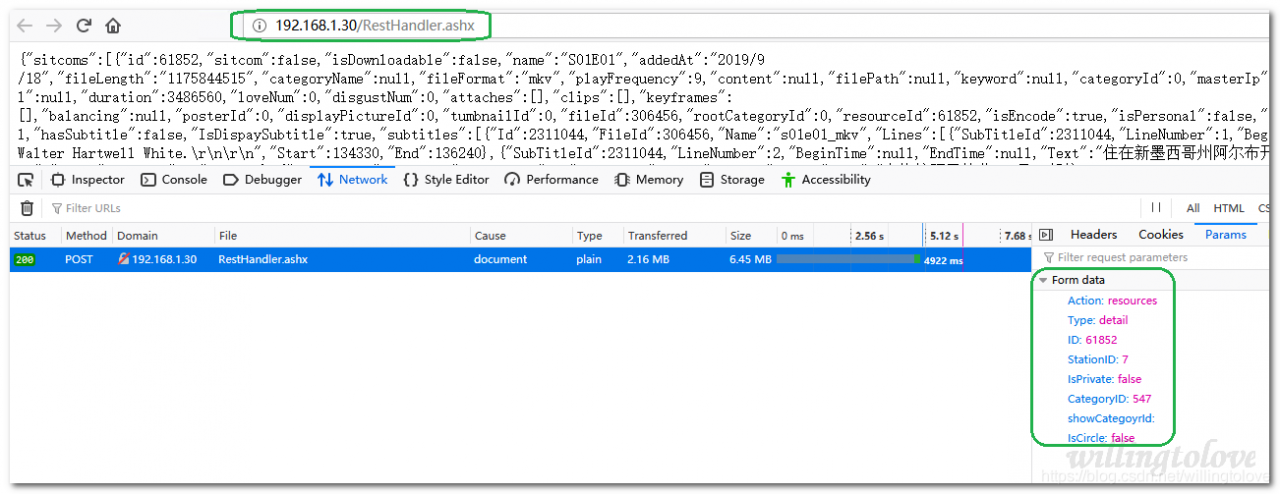
So,
, how do you do , open in new TAB , with formdata?The solution: use firefox firefox

IntelliJ idea debugging Java 8 stream
IntelliJ IDEA has actually been supported for Java 8 Stream debugging, which has not been used much before. Today IntelliJ IDEA demonstrates how to debug the Stream chain calls in Java 8.
Stream code:
        String[] words = new String[]{"Hello", "World"};
        List<String> collect1 = Arrays.stream(words)
                .map(e -> e.split(""))
                .flatMap(Arrays::stream)
                .distinct()
                .collect(Collectors.toList());
set a breakpoint on the first line, then enter debug mode. When the breakpoint enters, click Trace Current Stream Chain button:
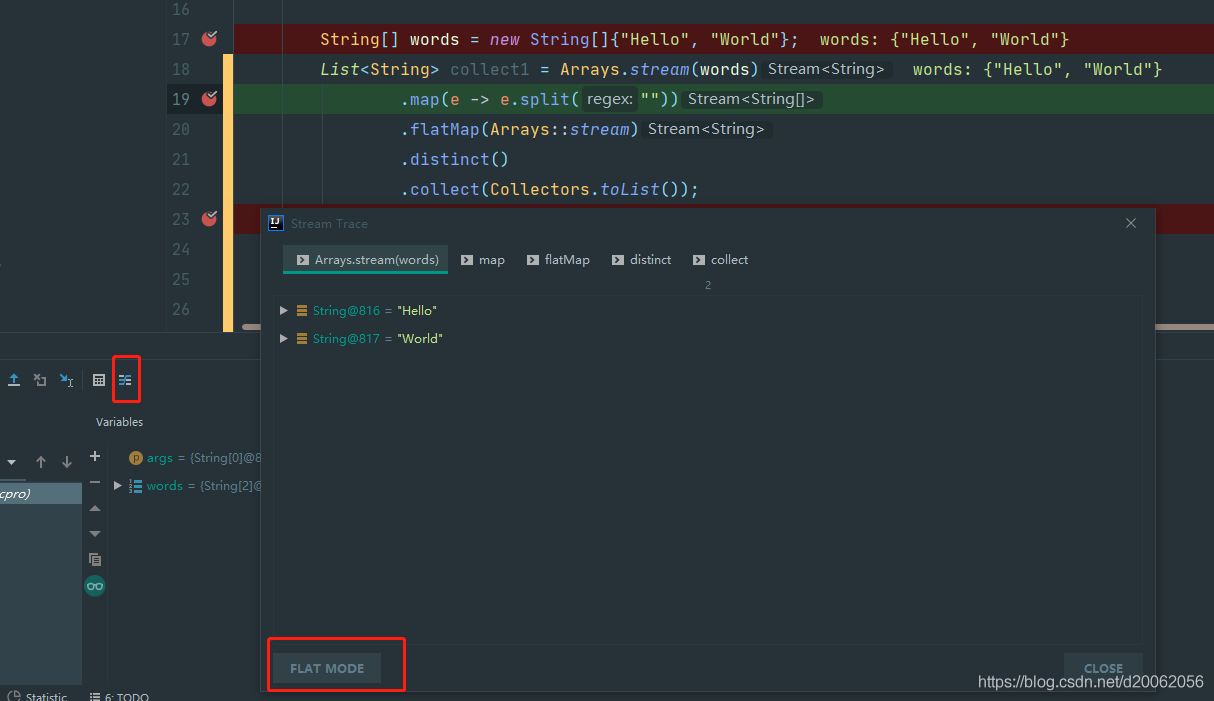
then it will automatically enter the current Stream tracking debugging window, which will show the tabs of each chained call. Click each TAB to see the tracking results of each step.
can also click Flat Mode to enter Flat Mode and display all tracking results at once:
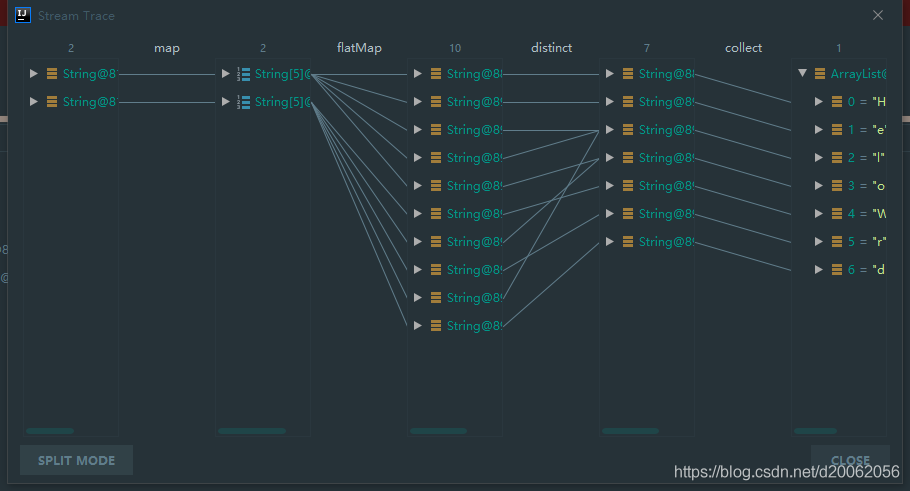
OK, very convenient!