Tag Archives: Android studio

[Solved] The application could not be installed: INSTALL_FAILED_NO_MATCHING_ABIS

The application could not be installed: INSTALL_FAILED_NO_MATCHING_ABIS when running the project to the Android emulator, the reason for this problem is that the Android emulator is not set to This problem is caused by not setting the Android emulator to support x86.

How to Solve:

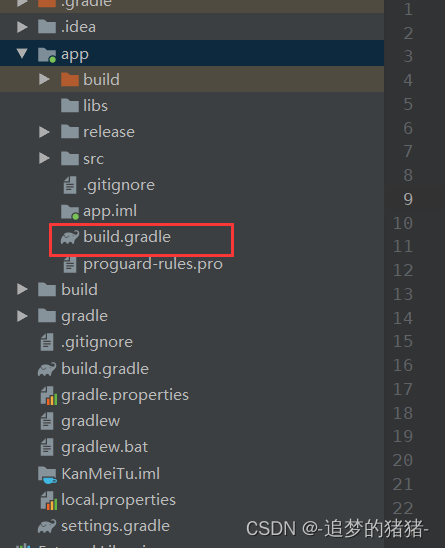
In the build.gradle file of the module, under the android tag, add the defaultConfig tag:

ndk {
            //Select the .so library of the corresponding cpu type to add.
            abiFilters 'armeabi', 'armeabi-v7a', 'arm64-v8a', 'x86'
            // You can also add 'x86', 'x86_64', 'mips', 'mips64'
        }

If there has been an ndk tag before, you only need to add it (see Figure 1 below).

, 'x86'

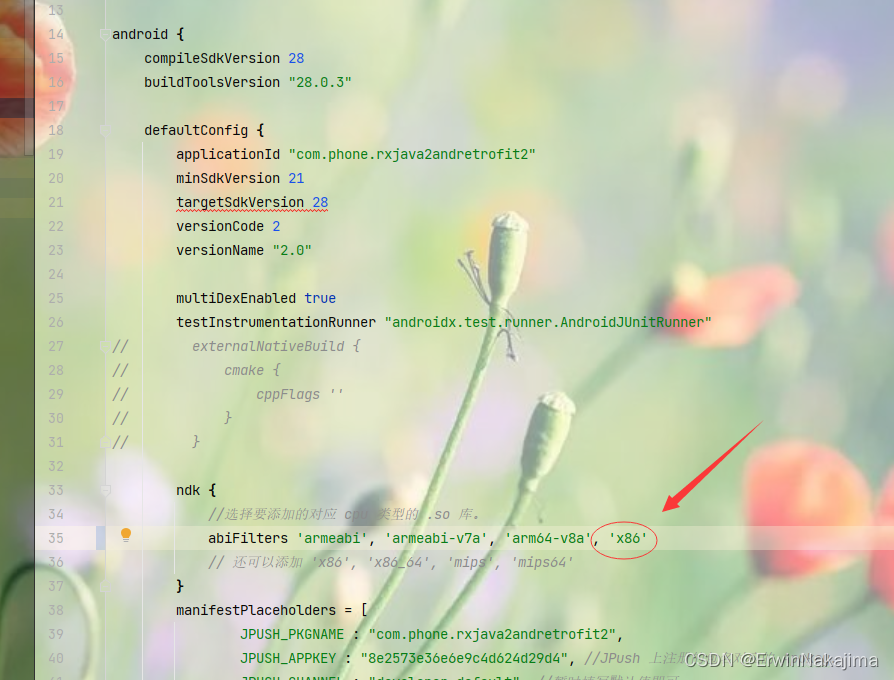
Finally, please note: if you use the emulator, even after adding, ‘x86’, some third-party sdk still can’t work properly (for example, the gps location function of Gaode map, because the emulator has no gps), so for some important functions, if you have a cell phone, try to use it to test.

[Solved] org.gradle.api.internal.plugins.PluginApplicationException: Failed to apply plugin

This problem sometimes occurs when opening Android files written by others:

Caused by: org.gradle.api.internal.plugins.PluginApplicationException: Failed to apply plugin [id 'com.android.internal.application']

The solution is as follows:

1. In Project view mode, select gradle.properties file.

2. On the last line (or any line in the file), enter the following code.

android.overridePathCheck=true

This line of code means “overlay path checking”.

3. Then click ‘Sync Now’ in the upper right corner and wait a few seconds to solve the problem.

[Solved] Android-android studio apk Install Error: INSTALL_PARSE_FAILED_MANIFEST_MALFORMED

I simply wrote a program today and found that it could not run all the time, prompting that the installation failed on the physical device

INSTALL_PARSE_FAILED_MANIFEST_MALFORMED
Installation failed due to: ‘null’

After checking on the Internet, most of the brothers said that it was a problem with the test mark, so just add it

android:testOnly="false"

But there are still problems after trying

Another brother said that this problem is related to the manifest file. It may be that there is a problem with the configuration of the manifest file. Therefore, I checked it from here. However, I was also very curious about how a hello world program has a configuration problem. I didn’t see any exceptions in the xml. I went to the apk generation directory to directly try to install it:

adb install -r -d a.apk

here I saw the error messages:

adb: failed to install app-debug.apk: Failure [INSTALL_PARSE_FAILED_MANIFEST_MALFORMED: Failed parse during installPackageLI: /data/app/vmdl631790294.tmp/base.apk (at Binary XML file line #20): com.leonard.goot.MainActivity: Targeting S+ (version 31 and above) requires that an explicit value for android:exported be defined when intent filters are present]

Find the problem, because the activity does not have the export property caused by the modification can be installed after debugging, Done!

Android activity Fail to Switch to androidx AppCompatActivity Error

java.lang.IllegalStateException: You need to use a Theme. AppCompat theme (or descendant) with

Error reason:

1, style.xml file has properties that are inherited from ordinary android, however, your activity has inherited AppCompatActivity, so the properties of style should also be changed to the properties below androidx.

Solution:

Find the properties of the normal android package in the style.xml file and replace them with the properties of androidx.

Execution failed for task ‘:app:processDebugMainManifest‘.> Manifest merger failed : Apps targeting

If the following error occurs:

Execution failed for task ':app:processDebugMainManifest'.
> Manifest merger failed : Apps targeting Android 12 and higher are required to specify an explicit value for `android:exported` when the corresponding component has an intent filter defined. See https://developer.android.com/guide/topics/manifest/activity-element#exported for details.

This following method can solve the problems above:

Add the following codes in app->manifests->AndroidManifest.xml:
android:exported="true"


Source:
java – Android Studio error: “Manifest merger failed: Apps targeting Android 12” – Stack Overflow

[Solved] Execution failed for task ‘:app:uploadCrashlyticsMappingFileRelease‘

Problem: Recently, when doing a project, an error occurred in the online package of release:

 Execution failed for task ':app:uploadCrashlyticsMappingFileRelease'


Reason: This problem is caused by the use of Google’s firebase library, which is the culprit:

com.google.firebase:firebase-crashlytics


Solution: Add the following code to Android {} of gradle of app

gradle.taskGraph.whenReady {
    tasks.each { task ->
        if (task.name.contains("uploadCrashlyticsMappingFileRelease")) {
            task.enabled = false
        }
    }
}

Note: this method can only solve this issue temporary, if you know other solutions, please leave a comment and let me know!

APK Install Error: Failure [INSTALL_FAILED_TEST_ONLY: installPackageLI]

When using the AS autorun, the test APK: app-debug.apk will be automatically generated under the app\build\outputs\apk\debug folder.

Use the command adb install app-debug.apk reports an error: Failure [INSTALL_FAILED_TEST_ONLY: installPackageLI]

Solution:

1. Add the -t parameter: Enter the command adb install -t app-debug.apk

2. In the gradle.properties (project root or gradle global configuration directory ~/.gradle/) file add

android.injected.testOnly=false
Causes.

Android Studio 3.0 will automatically add the android:testOnly=”true” property to the application tag of the debug apk’s manifest file

[Solved] Android Studio 3.0 Error: Error: INSTALL_FAILED_TEST_ONLY

Reason: After Android Studio 3.0, when generating debug apk, the android:testOnly=”true” attribute is automatically added in the application tag of the apk’s manifest file. android:testOnly=” true” This tag was originally used for testing, so packages with this tag cannot be installed in general, and need to be installed in a special way (by adding the -t flag).

Solution:

Method 1: Set: android.injected.testOnly=false in the global configuration gradle.properties file in the project

Method 2: Add -t property: adb install -t app-debug.apk


[Solved] Android Studio Generate APK Error: error_prone_annotations.jar (com.google.errorprone:error)

Android Studio failed to generate apk error:

Could not download error_prone_annotations.jar (com.google.errorprone:error)


Solution:

Modify the buildscript and allprojects in build.gradle file of your project:

google()jcenter()

to

maven { url ‘https://maven.aliyun.com/repository/google’ }maven { url ‘https://maven.aliyun.com/repository/jcenter’ }maven { url ‘http://maven.aliyun.com/nexus/content/groups/public’ }

Done!