Tag Archives: windows

[Solved] Windows Nginx Startup Error: bind() to 0.0.0.0:80 failed (10013: An attempt was made to access a socket

Solution 1:

(1) Check the error.log in the nginx-1.19.2\logs directory, and learn that the error message is: bind() to 0.0.0.0:80 failed (10013: An attempt was made to access a socket in a way forbidden by its access permissions)

(2) Press win+r, type cmd, and open the administrator interface

(3) type netstat -aon|findstr :80, find the port number 0.0.0.0:80 is occupied, check the pid value of 4

(4) Enter tasklist | findstr “4” to find the name corresponding to port 4, which is System

(5) after viewing the System system occupancy can not be manually terminated, the reason is SQLServer Reporting Services, stop this service and set to start manually can, after starting nginx, need to restart SQLServer Reporting Services

Disadvantage: This approach requires you to stop SQLServer Reporting Services again after each boot, and then start nginx

Solution 2:

Modify the default port number under nginx.conf

(1) Open the nginx.conf file in the nginx directory with Notepad

(2) Press win+r, type cmd, open the administrator interface, type netstat -aon|findstr :expected port number to see if your expected port number is occupied

(3) Modify nginx.conf, and then save it

(4) At the command prompt, type nginx -s reload (an important step)

(5) Then type start nginx at the command prompt

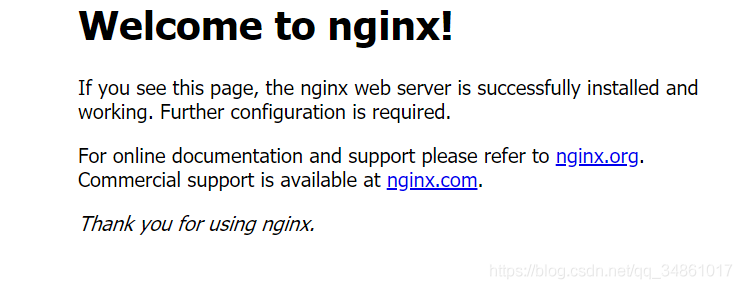
(6) in the browser localhost:81, if the following page appears in the modified successful

Win10 System migrate and restart error 0xc000000e [How to Solve]

Background

When migrating (cloning) the system to a new SSD and using the DiskGenius tool to complete the system migration, the last step reports an error, “Error in starting update parameters.”. When using a new solid state startup, the error 0xc000000e is reported.

Environment

Microsoft Windows [Version 10.0.19043.2006] Microsoft DiskPart Version 10.0.19041.964

Preparation

Prepare a removable storage disk (U disk, removable hard disk, pssd) with the official Win10 system installation media.

Solution:

  1. Insert a new solid state into the motherboard
  2. When booting, use the Win10 installation media disk as the boot disk, select “Repair Windows” and find the “Command Prompt”.
  3. Go to diskpart to get the disk letter and disk ID
diskpart
      1. List the attached disks, obtain the disk number of the system file, and record it as N (Number)
DISKPART> list disk

View the volume list, obtain the drive letter of the system file, mark it as C (Char)

Select the disk, and obtain the disk ID

DISKPART> select disk N
DISKPART> uniqueid disk

N is the disk number mentioned above

Exit diskpart

DISKPART> exit

If you cannot exit by typing exit on the command line, use Ctrl+c

Reassign the disk ID corresponding to the drive letter

bcdboot c:\windows /l zh-cn
bcdboot c:\windows /m {73B9D7DD-59F7-4483-8B77-EED47E457C18}

C is the drive letter C mentioned above

{73B9D7DD-59F7-4483-8B77-EED47E457C18} is the disk ID mentioned above

Close the command prompt and restart

Jupyter notebook Failed to Switch to the Virual Environment: DLL load failed python.exe could not find the entry

I. Error reporting

I originally installed Anaconda3, with python3.7 and Jupyter-notebook, and installed tf2.0 environment.

Later I created a new virtual environment tf_1 based on tf2.0 environment and installed tf.14, so that

tf1.0 and tf2.0 versions can be switched flexibly on Jupyter-notebook.

If you log in to notebook directly with cmd, see the following:

At this point, I directly create a new python3, which means that the default tf2.0 environment is Ok, as shown below:

But I new a tf_1_jjupyter is reported the following error, also open a tf2.0 version of the notebook file in the change kenerl will also report the same error.

The error is reported as follows.

ImportError: DLL load failed: The specified module could not be found

II. Solution

Solve the Jupyter notebook startup error or running code error

1. ImportError: DLL load failed : The specified module could not be found
Solution.

cmd-windows console-enter conda activate virtual environment name

For example, the name of the virtual environment here is tf_1

If you don’t remember, you can find it in the Anaconda installation directory

D:\software\Anaconda_candy\envs\tf_1

2. solve python.exe can not find the entrance can not locate the program input point
After entering the virtual environment if it still reports an error as follows.

This error pops up when I enter jupyter notebook, but I can enter jupyter notebook to debug the code normally when I cross it out. Initially, I think there is a problem with the dll file. After reading some online solutions, the following is the solution:

Solution: pythoncom37.dll is a file of pywin32 located in the path Anaconda3\envs\your virtual environment\Lib\site-packages\pywin32_system32, the location of my file here is shown below.

And there is a file with the same name ythoncom37.dll in D:\python\Anaconda3\envs\tf_1\Library\binp.

After deleting this file, there will be no pop-up error!

After deleting the pythoncom37.dl file according to the file path in the pop-up box, the error is still reported as follows.

[premise conda activate tf_1 under virtual environment

We follow the file path given in the pop-up box to find pythoncom37.dl and delete it again, and that’s the end of it.

The above solution has been successfully solved as follows.

Switching kernel in the file will also not report errors

Select tf2.0 and virtual environment tf1.0 in the drop-down box by creating a new, and you can switch versions freely, or switch environments in the current file, as shown below:

How to Solve UE5 Compile Error: Error MSB3073

Error Messages:

Severity Code Description Project File Line Suppression State

ErrorUnhandled exception: Dependency file “F:\unrealengine-release\Engine\Intermediate\Build\Win64\UnrealHeaderTool\Development\Core\Module.Core.14_of_18.cpp.json” version (“1.2”) is not supported version
UE5 F:\unrealengine-release\Engine\Intermediate\ProjectFiles\UnrealBuildTool 1

Severity Code Description Project File Line Suppression State

Error MSB3073 The command “…\Build\BatchFiles\Build.bat UnrealGame Win64 Development -WaitMutex -FromMsBuild” exited with code 6.
UE5 C:\Program Files\Microsoft Visual Studio\2022\Enterprise\MSBuild\Microsoft\VC\v170\Microsoft.MakeFile.Targets 44


Cause:
The problem occurs in the MSVC compiler (14.32.31326:MSVC v143-VS 2022 C++v14.32-17.2)
Visual Studio 2022 17.3.3 latest version, version too high
Locate.
/Engine/Source/Programs/UnrealBuildTool/System/CppDependencyCache.cs#L454
if (!String.Equals(Version, “1.1”) && !String.Equals(Version, “1.0”))
{
thrownew BuildException($”Dependency file “{InputFile.Location}” version (“{Version} “) is not supported version”);
}

Solution:
Use the following version of MSVC compiler and recompile it.
14.29.30133: MSVC v142 – VS 2019 C++ v14.29-16.11
14.30.30705: MSVC v143 – VS 2022 C++ v14.30-17.0
14.31.31103: MSVC v143 – VS 2022 C++ v14.31-17.1


[Endnote X9 Error] Unable to search online – prompt windows error 12029

Endnote failed to search online, prompting Windows error 12029. The solution is as follows:

In the IE browser, click the Internet option, select Advanced, and then select TLS1.2 from the drop-down box of Settings.

The official solution is invalid on my computer:

You can download the file using the link below :-

Connection Files

#Update Pubmed File

Proceed to open the downloaded file, and then click File > Save as and proceed to remove the copy and save to override this file.

[Solved] fatal error C1083: Cannot open included files: “stdafx.h”: No such file or directory


1. Error reporting

“Cannot open include file:” StdAfx. H “: no such file or directory”

The error here is that you included the header file # include generated by “StdAfx.h”. Presumably, you created an empty project but included this header file.

2. Solution

Method 1
replace the header file (this method is recommended, which is simpler); The contents of “StdAfx.h” are:

#include < stdio.h>
#include < tchar.h>
just delete your # include “StdAfx.h” here. Replace with what it contains. Namely:

#include < stdio.h>
#include < tchar.h>

method 2:
in your project, find the header file and add a header file named StdAfx.h: After adding successfully, click and add content:

#include < stdio.h>
#include < tchar.h>
save, compile again, and resolve the error~


[Solved] FATAL ERROR:Network error: Software caused connection abort

SSH client to connect, stuck or pscp command report an error as follows in pscp.exe  XXXXXX    XXXXXXX  windows:

FATAL  ERROR:Network  error:Software  caused  connection  abort


How to Solve:

1. Please check the firewall policy of Linux host;

2. Add a line sshd: all at the end (or add by IP address and address segment) in /etc/hosts.allow file, and save it;

3. systemctl restart   sshd. service; Restart the ssh service;

[Solved] docker Error response from daemon driver failed programming external connectivity on endpoint lamp

Docker containers do port mapping error:

docker: Error response from daemon: driver failed programming external connectivity on endpoint lamp3 (46b7917c940f7358948e55ec2df69a4dec2c6c7071b002bd374e8dbf0d40022c): (iptables failed: iptables --wait -t nat -A DOCKER -p tcp -d 0/0 --dport 86 -j DNAT --to-destination 172.17.0.2:80 ! -i docker0: iptables: No chain/target/match by that name.


Solution:

The custom chain DOCKER defined at the start of the docker service is cleared

Restart and it will be OK! systemctl restart docker

[Solved] RuntimeError: CUDA error: CUBLAS_STATUS_ALLOC_FAILED when calling `cublasCreate(handle)`

[problem description]

The previous code can run normally. After the data set is expanded, the following errors are reported in the GPU program running the deep learning training model, but CUDA out of memory error is not prompted.

RuntimeError: CUDA error: CUBLAS_STATUS_ALLOC_FAILED when calling `cublasCreate(handle)`

[solution 1]

Change the program to run on the CPU and find that it can run normally, but the speed will be very slow and it will take a long time.

--device cpu

[solution 2]

Try to reduce the batch size used in the training model, and it can run normally.

[FAILED] Failed to start Raise network interfaces

[FAILED] Failed to start Raise network interfaces. 

The following error occurred during startup. Linux and windows cannot communicate. The reason may be that DHCP and static IP conflict. Use the ifconfig command to check that there is only IPv6 address but no IPv4 address.


Solution:

Modify the following file: /etc/network/interfaces.d/eth0, remove static IP settings or DHCP settings:
for example:

remove DHCP and replace it with:

auto eth0
iface eth0 inet static
address 192.168.2.99
netmask 255.255.255.0

Restart and the problem is solved.

How to Solve Remote Desktop Protocol 0xd06 Error

My environment:

Target computer win11 virtual machine vm16.2.0 (win10 in the virtual machine is copied from the original computer)

The original computer is win10 virtual machine vm15.5.0

Error reporting process:

Connect the win10 system in the virtual machine with the remote desktop connection tool mstsc provided by win11. The error is as follows:

The session will be disconnected due to a protocol error. Please reconnect to the remote computer
error code: 0xd06
extended error code: 0x0

Solution:

After a series of searches, no solution was found on the Internet. After careful consideration, considering that the win10 system in the virtual machine is copied from another original computer and the original computer uses the vm15.5.0 version of the virtual machine, it may be that the driver has a problem.

Solution:

Uninstall the display driver of win10 system in the virtual machine.