because of the problem of the computer system, the entire 8G memory of the computer running Android Studio was consumed, so I just reinstalled the computer and re-installed Android Studio.
error message
11:44	Gradle sync failed: Failed to find Build Tools revision 27.0.3
		Consult IDE log for more details (Help | Show Log) (1 m 17 s 505 ms)
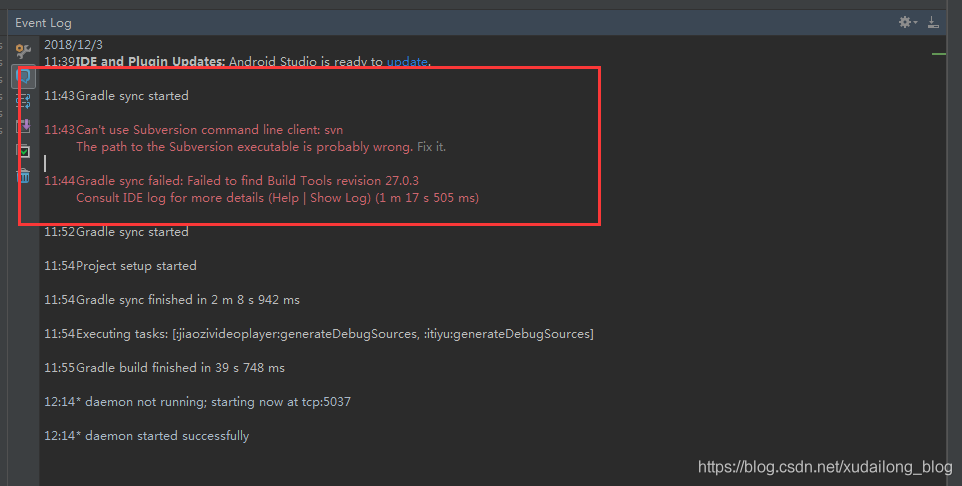
when Android studio was installed and the project was imported, Failed to find Build Tools revision 27.0.3 which caused the compilation to fail. The main problem is that the APT tool compiled by Android Studio is inconsistent with the tool imported by the target project. My download is a compilation tool of 28.0.3, while the target Android project USES a compilation tool of 27.0.3, so we need to download such a compilation tool.
download address:
http://mirrors.neusoft.edu.cn/android/repository/
select version (since I have a Windows PC) :

unzip and place in the corresponding folder:

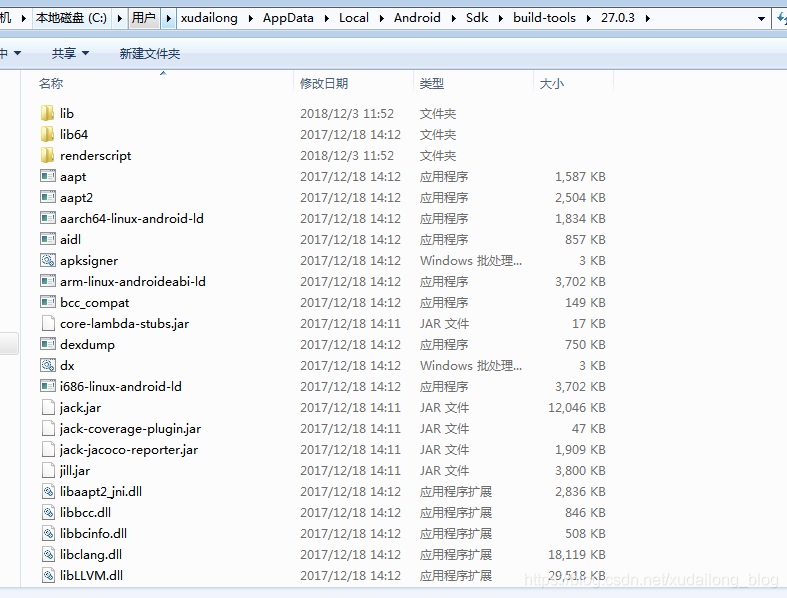
28.0.3 folder here can be deleted without
copied content

now after we rebuild, we find that the small compiled triangle lines in the project can be used

Failed sending reply to debugger: Broken pipe
E / Art: failed sending reply to debugger: a solution to broken pipe
E/art: Failed remote reply to debugger: Broken pipe solution
explanation error:
E/ART:向调试器发送回复失败:管道损坏。
what is E/ART?
ART is </ strong> A ndroid – [R not Ť IME. This is the Android phones bytecode interpreter. E just means the ERROR record level. </ strong> </ strong> </ strong> </ p>
what is the send reply debugger?
debugging on Android phones is using adb (Android debugging bridge). Adb processes run on your development computer (your laptop or PC), and daemons run on Android devices (that is, emulators or phones).
what is a broken pipe?
Your development machine and Android device communicate like a client server. corrupt pipe indicates that the communication has become invalid. For example, the client (Android device) is trying to send a reply to the server (adb process running on the development machine), but the server has closed the socket.
how to repair </ strong> </ strong> </ strong> </ h3>
First make sure your application builds
by performing cleanup/rebuild
Then, if you are running an application using USB debugging on a real phone, you can usually solve the problem by unplugging the USB cable and re-inserting it to re-establish the client/server connection.
If this doesn’t work, you can disconnect the USB cable (stop the emulator if necessary) and close Android Studio. This is usually enough to block the ADB process. Then, when you open Android Studio again, it will restart and re-establish the connection.
if this does not work, you can try to use the instructions to manually stop the adb server in this problem. For example, you could try to open a command prompt or terminal, then go to the SDK/platform-tools directory and type:
adb kill-server
adb start-server
*The daemon is not running; tcp:5037 is now started.
*Successful start of the daemon
When this appears.
Stopping ADB server failed(code -1)
What went wrong:
CMD cannot find adb command in path path,
is because the adb.exe file exists in the android-sdk installation directory platform-tools/ subdirectory, and this path is configured into the environment variable.
Solutions:
Add environment variables as described in the book: C:\ Android-SDK-Windows \ Tools, then add
platform-tools to the environment variable
. For example, if The Android-SDK is installed in the root directory of C disk, then add the environment variable: C:\ Android-SDK-Windows \ platform-Tools
Solve Android studio connection dl.google.com Timeout problem
error as follows
Connect to dl.google.com:443 [dl.google.com/120.253.255.33] failed
problem:
is an IP whose DNS is not resolved to the domain name dl.google.com or an error occurs during the resolution.
solution:
1. Baidu an IP query url, enter the domain name dl.google.com, find the corresponding IP

2. Let’s look at the first few pings to see if they work, so let’s pick the first one
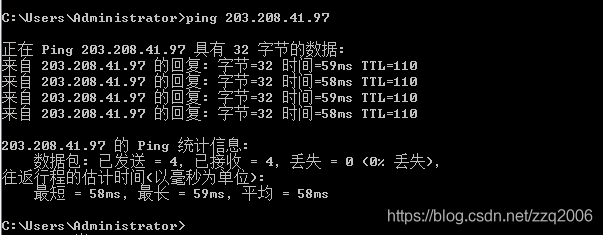
3. Find the file hosts of your computer, C:\Windows\System32\drivers\etc\hosts
write the domain name and the corresponding IP into the file.

Android project error: could not resolve com.android.support .c onstraint:constraint-layout :2.0.2.
error message
Unable to resolve the dependency for ': app @ the debug/compileClasspath: Could not resolve com. Android. Support. The constraint, the constraint - layout: 2.0.2. & lt; a href="disable.gradle.offline.mode"> Disable offline mode and sync project< /a> < br> < a href="Unable%20to%20resolve%20dependency%20for%20&%20#%2039;%20:app@debug/compileClasspath&%20#%2039;%20:%20Could%20not%20resolve%20com.%20Android.%20Support.%20The%20constraint,%20the%20constraint%20-%20layout:%202.0.2.%20"& gt; Show Details< /a> Affected Modules: < a href="openFile:D:/android3/app/build.gradle"> app< /a>
solution :
change build. Gradle (:app) (note with app suffix)
to
![]()
Android studio failed to resolve: com.github.CymChad :BaseRecyclerViewAdap terHelper:2.9.46
1, error message is as follows
Failed to resolve: com.github.CymChad:BaseRecyclerViewAdapterHelper:2.9.46
Show in Project Structure dialog
Affected Modules: app
2,解决办法
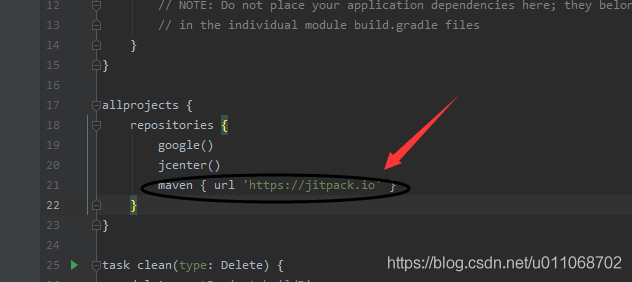
在项目的build.gradle里面加入
maven { url 'https://jitpack.io' }Viewing Android dependency tree using gradle
the command
has been used to view the android dependency tree until now
./gradlew: app: dependencies

or operate
directly in the gradle shortcut command on the right
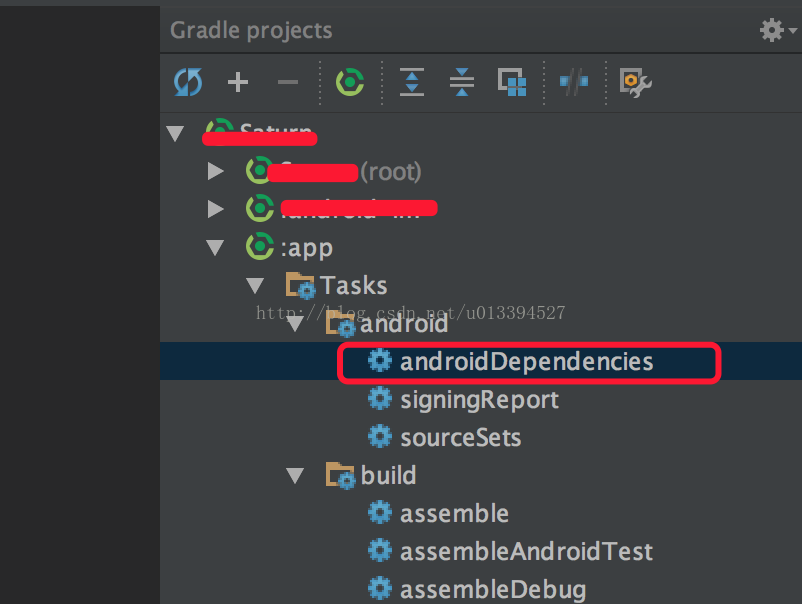
although this command does the job, it prints out all the dependency trees under every step gradle executes, including debugApk, debugCompile, releaseApk, releaseCompile, compile, etc. It takes a long time, but the final result set is also a large one, not to be looked at.
, but we actually only need the dependency tree from the compile time, so we can configure a parameter after the command.
command:
./gradlew :app:dependencies –configuration compile
where the compile configuration compile says you only need to print out the dependencies in the compile environment
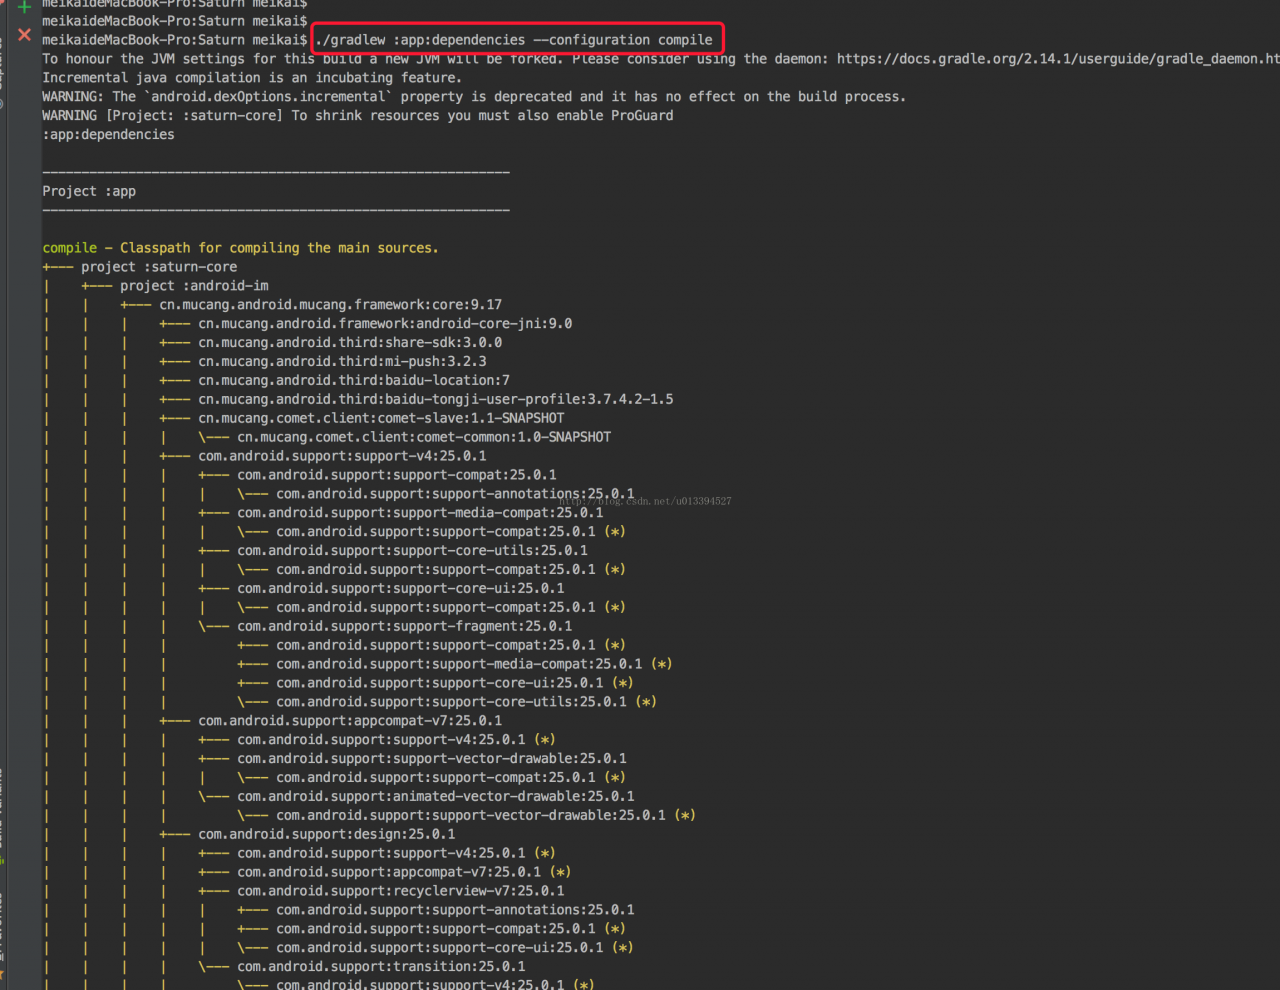
it is important to note that when the same stock is in multiple versions, gradle will automatically use the highest version of the library applied everywhere. The library with “(*)” in the figure above indicates that the library has been overwritten.
Android ADB simulates click events of sliding buttons
mock events are all implemented through the input command, starting with the use of the input command:
usage: input … input text & lt; string>
input keyevent & lt; key code number or name>
input tap & lt; x> < y>
input swipe & lt; x1> < y1> < x2> < y2>
1. Keyevent refers to the corresponding android keycode, such as the home key keycode=3 and the back key =4.
please refer to < Android Keycode Details & GT; http://blog.csdn.net/huiguixian/article/details/8550170
is easy to use, for example, if you want to simulate the home button:
adb shell input keyevent 3
please refer to the above article and edit according to the specific keycode.
2. For tap, it simulates events on the touch screen, giving only x and y coordinates.
this x and y coordinate corresponds to the real screen resolution, so it should be seen according to the specific phone. For example, if you want to click the screen (x, y) = (250, 250) position:
adb shell input tap 250 250
3. Swipe is the same as tap, except that it is a simulated sliding event, and the coordinates of starting point and ending point are given. For example, going from screen (250, 250) to screen (300, 300) is
adb shell input swipe 250 250 300 300
Error: unable to resolve dependency for… Could not resolve project
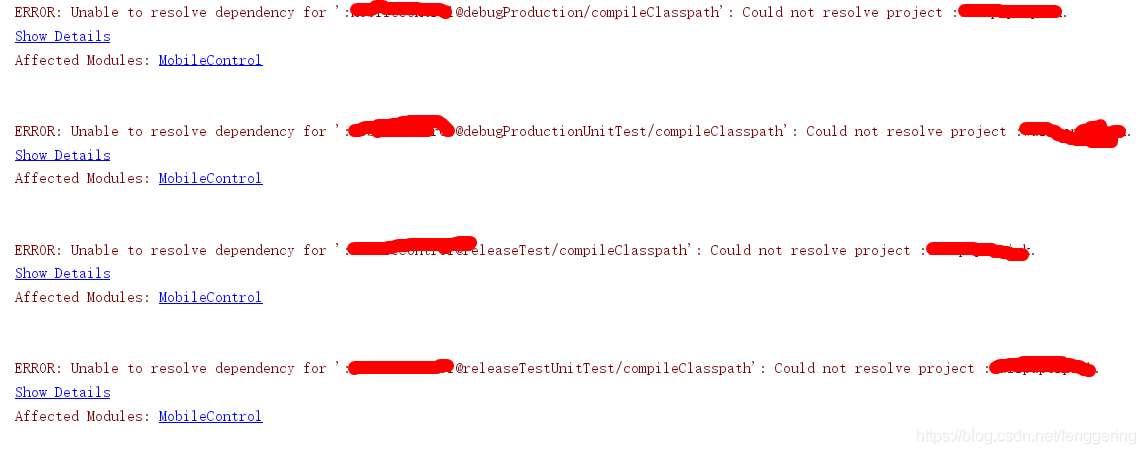
changed some things of the project two days ago. After submitting, I found that the compiler always reported errors, but the packaging was ok. Error message is as follows:
ERROR: Unable to resolve the dependency for ‘: XXX @ debugProduction/compileClasspath’ : Could not resolve project: yyy.
Show Details
Affected Modules: XXX
where ‘XXX’ and ‘yyy’ are the two modules in my project. I looked for many ways on the Internet, but I couldn’t solve them.
later went back to the last change and found that I had changed build.gradle for module x, but not for module y, and the configuration of buildTypes for the two modules was inconsistent.
so the obvious solution is to copy the configuration of buildTypes in build.gradle of module x into build.gradle of module y.
does not have to be copied exactly, only has to be configured in the same format as the two modules . My error was caused by the buildTypes in Module X, which added the configuration of the releaseTest mode, but not in Module Y.
Failed to notify ProjectEvaluationListener.afterEvaluate(), but primary configuration failure takes
Failed to notify ProjectEvaluationListener.afterEvaluate(), but primary configuration failure takes precedence.
today with Qt development of android application present such a wrong
Failed to notify ProjectEvaluationListener. AfterEvaluate (), but primary configuration failure takes precedence.
Java lang. IllegalArgumentException: android.buildToolsVersion is missing!
at com.android.build.gradle.internal.SdkHandler.initTarget(SdkHandler.java:84)
at com.android.build.gradle.BasePlugin.ensureTargetSetup(BasePlugin.groovy:467)
at com.android.build.gradle.BasePlugin.access$0(BasePlugin.groovy)
at com.android.build.gradle.BasePlugin$_createTasks_closure9.doCall(BasePlugin.groovy:372)
at sun.reflect.NativeMethodAccessorImpl.invoke0(Native Method)
at sun.reflect.NativeMethodAccessorImpl.invoke(NativeMethodAccessorImpl.java:62)
at sun.reflect.DelegatingMethodAccessorImpl.invoke(DelegatingMethodAccessorImpl.java:43)
at java.lang.reflect.Method.invoke(Method.java:498)
at org.codehaus.groovy.reflection.CachedMethod.invoke(CachedMethod.java:90)
at groovy.lang.MetaMethod.doMethodInvoke(MetaMethod.java:324)
at org.codehaus.groovy.runtime.metaclass.ClosureMetaClass.invokeMethod(ClosureMetaClass.java:278)
at groovy.lang.MetaClassImpl.invokeMethod(MetaClassImpl.java:1016)
at groovy.lang.Closure.call(Closure.java:423)
at org.gradle.listener.ClosureBackedMethodInvocationDispatch.dispatch(ClosureBackedMethodInvocationDispatch.java:40)
at org.gradle.listener.ClosureBackedMethodInvocationDispatch.dispatch(ClosureBackedMethodInvocationDispatch.java:25)
at org.gradle.listener.BroadcastDispatch.dispatch(BroadcastDispatch.java:83)
at org.gradle.listener.BroadcastDispatch.dispatch(BroadcastDispatch.java:31)
at org.gradle.messaging.dispatch.ProxyDispatchAdapter$DispatchingInvocationHandler.invoke(ProxyDispatchAdapter.java:93)
at com.sun.proxy.$Proxy12.afterEvaluate(Unknown Source)
at org.gradle.configuration.project.LifecycleProjectEvaluator.notifyAfterEvaluate(LifecycleProjectEvaluator.java:79)
at org.gradle.configuration.project.LifecycleProjectEvaluator.evaluate(LifecycleProjectEvaluator.java:65)
at org.gradle.api.internal.project.AbstractProject.evaluate(AbstractProject.java:504)
at org.gradle.api.internal.project.AbstractProject.evaluate(AbstractProject.java:83)
at org.gradle.execution.TaskPathProjectEvaluator.configureHierarchy(TaskPathProjectEvaluator.java:42)
at org.gradle.configuration.DefaultBuildConfigurer.configure(DefaultBuildConfigurer.java:35)
at org.gradle.initialization.DefaultGradleLauncher.doBuildStages(DefaultGradleLauncher.java:129)
at org.gradle.initialization.DefaultGradleLauncher.doBuild(DefaultGradleLauncher.java:106)
at org.gradle.initialization.DefaultGradleLauncher.run(DefaultGradleLauncher.java:86)
at org.gradle.launcher.exec.InProcessBuildActionExecuter$DefaultBuildController.run(InProcessBuildActionExecuter.java:80)
at org.gradle.launcher.cli.ExecuteBuildAction.run(ExecuteBuildAction.java:33)
at org.gradle.launcher.cli.ExecuteBuildAction.run(ExecuteBuildAction.java:24)
at org.gradle.launcher.exec.InProcessBuildActionExecuter.execute(InProcessBuildActionExecuter.java:36)
at org.gradle.launcher.exec.InProcessBuildActionExecuter.execute(InProcessBuildActionExecuter.java:26)
at org.gradle.launcher.cli.RunBuildAction.run(RunBuildAction.java:51)
at org.gradle.internal.Actions$RunnableActionAdapter.execute(Actions.java:171)
at org.gradle.launcher.cli.CommandLineActionFactory$ParseAndBuildAction.execute(CommandLineActionFactory.java:237)
at org.gradle.launcher.cli.CommandLineActionFactory$ParseAndBuildAction.execute(CommandLineActionFactory.java:210)
at org.gradle.launcher.cli.JavaRuntimeValidationAction.execute(JavaRuntimeValidationAction.java:35)
at org.gradle.launcher.cli.JavaRuntimeValidationAction.execute(JavaRuntimeValidationAction.java:24)
at org.gradle.launcher.cli.CommandLineActionFactory$WithLogging.execute(CommandLineActionFactory.java:206)
at org.gradle.launcher.cli.CommandLineActionFactory$WithLogging.execute(CommandLineActionFactory.java:169)
at org.gradle.launcher.cli.ExceptionReportingAction.execute(ExceptionReportingAction.java:33)
at org.gradle.launcher.cli.ExceptionReportingAction.execute(ExceptionReportingAction.java:22)
at org.gradle.launcher.Main.doAction(Main.java:33)
at org.gradle.launcher.bootstrap.EntryPoint.run(EntryPoint.java:45)
at sun.reflect.NativeMethodAccessorImpl.invoke0(Native Method)
at sun.reflect.NativeMethodAccessorImpl.invoke(NativeMethodAccessorImpl.java:62)
at sun.reflect.DelegatingMethodAccessorImpl.invoke(DelegatingMethodAccessorImpl.java:43)
at java.lang.reflect.Method.invoke(Method.java:498)
at org.gradle.launcher.bootstrap.ProcessBootstrap.runNoExit(ProcessBootstrap.java:54)
at org.gradle.launcher.bootstrap.ProcessBootstrap.run(ProcessBootstrap.java:35)
at org.gradle.launcher.GradleMain.main(GradleMain.java:23)
at sun.reflect.NativeMethodAccessorImpl.invoke0(Native Method)
at sun.reflect.NativeMethodAccessorImpl.invoke(NativeMethodAccessorImpl.java:62)
at sun.reflect.DelegatingMethodAccessorImpl.invoke(DelegatingMethodAccessorImpl.java:43)
at java.lang.reflect.Method.invoke(Method.java:498)
at org.gradle.wrapper.BootstrapMainStarter.start(BootstrapMainStarter.java:33)
at org.gradle.wrapper.WrapperExecutor.execute(WrapperExecutor.java:130)
at org.gradle.wrapper.GradleWrapperMain.main(GradleWrapperMain.java:48)
FAILURE:构建失败,出现异常
Where:
构建文件’ F:\Qt\Qt5.5.1\Examples\Qt-5.5\widgets\widgets\ Build – analogc锁android_for_armeabi_v7a_gcc_4_8_qt_5_5_1 – debug \android-build\ Build。什么地方出了问题:
在评估根项目’ android-build ‘时出现了一个问题。
无效的修订:24.0.0-preview
运行-stacktrace选项以获取堆栈跟踪。
运行-stacktrace选项以获取堆栈跟踪。使用-info或-debug选项运行以获得更多日志输出。
构建失败
总时间:6.283秒
构建android包失败!
-有关更多信息,请使用- verbose运行此命令。
22:46:03:进程“F: \ Qt \ Qt5.5.1 \ 5.5 \ android_armv7 \ bin \ androiddeployqt。exe”退出,退出代14码。
错误构建/部署项目analogclock (kit: Android for armeabi-v7a (GCC 4.8, Qt 5.5.1))
执行步骤” Build Android APK ”
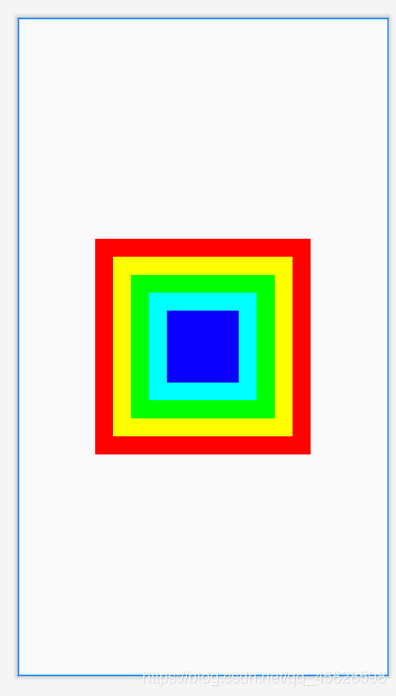
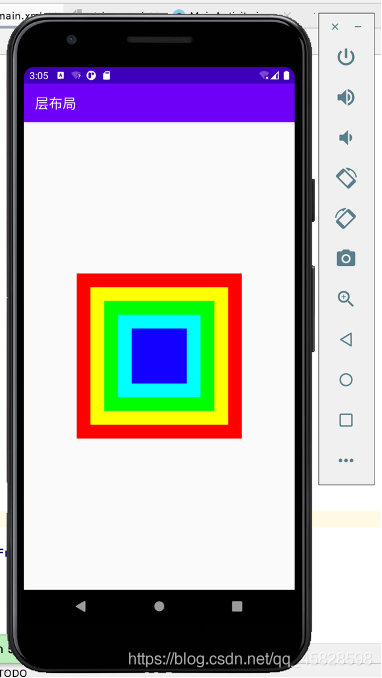
Android layout: layer layout
add the layer layout code to see how it works.
experiment code:
<?xml version="1.0" encoding="utf-8"?>
<FrameLayout xmlns:android="http://schemas.android.com/apk/res/android"
    xmlns:app="http://schemas.android.com/apk/res-auto"
    xmlns:tools="http://schemas.android.com/tools"
    android:layout_width="match_parent"
    android:layout_height="match_parent"
    tools:context=".MainActivity">
    <TextView
        android:layout_width="240dp"
        android:layout_height="240dp"
        android:background="#ff0000"
        android:layout_gravity="center"
/>
    <TextView
        android:layout_width="200dp"
        android:layout_height="200dp"
        android:background="#ffff00"
        android:layout_gravity="center"
/>
    <TextView
        android:layout_width="160dp"
        android:layout_height="160dp"
        android:background="#00ff00"
        android:layout_gravity="center"
/>
    <TextView
        android:layout_width="120dp"
        android:layout_height="120dp"
        android:background="#00ffff"
        android:layout_gravity="center"
/>
    <TextView
        android:layout_width="80dp"
        android:layout_height="80dp"
        android:background="#0000ff"
        android:layout_gravity="center"
/>
</FrameLayout>
experimental results :
