Recommend two apps, termux and better terminal, and search directly in the app store.
The purpose of using this app is to let beginners experience learning Linux system, or let you have a portable server, intranet penetration and so on.
Below is how to turn on SSH
———————
With termux, you can easily convert your mobile phone into Linux to practice or learn
If you feel inconvenient, you can use Google input method or hacker input method
Feel not used to external keyboard, OTG adapter can be used, about five dollars look, very convenient, you can also read and write U disk
If you think the screen is small, you can use SSH to connect your mobile phone. You can use any SSH tool on your computer to connect your mobile phone
Common shortcut keys for mobile phone to operate termux——————–
The Ctrl key is a key commonly used by end users – but most touch keyboards don’t have it. To do this, termux uses the volume down button to simulate the Ctrl key.
for example, on the touch keyboard, press to decrease the volume button+ L sends the same input as pressing Ctrl + L on the hardware keyboard.
Ctrl+A -& gt; Move the cursor to the beginning of the line Ctrl + C -& gt; Abort the current process Ctrl + d -& gt; Log off terminal session Ctrl + e -& gt; Move the cursor to the end of the line Ctrl + k -& gt; Delete from cursor to end of line Ctrl + L -& gt; Clear terminal Ctrl + Z -& gt; Suspend (send sigtstp to) the current process
The volume up key can also be used as a special key to generate a specific input
volume + e -& gt; ESC key volume + T -& gt; Tab volume + 1 -& gt; F1 (and volume increase + 2 → F2, etc.) volume increase + 0 -& gt; F10 volume + B -& gt; Alt + B, use readLine to return a word volume plus + F -& gt; Alt + F, forward a word when using readLine volume + x -& gt; Alt + x volume + W -& gt; Up arrow key volume + a -& gt; Left arrow key volume + s -& gt; Down arrow key volume + d -& gt; Right arrow key volume + L -& gt; | ( Pipe character) volume plus + H -& gt; 〜( Wave character) volume plus + U -& gt; _ ( Underline character) volume plus + P -& gt; Previous volume plus + n -& gt; Next page volume up +. -& gt; CTRL + \ \ (sigquit) volume + V -& gt; Display volume control volume plus + Q -& gt; Show additional key view
Suggestions———————————————————————–
It is recommended that beginners do not always run as root. If you want to use root, you can
suAfter the command is switched to root
exitReturn to the original identity
Openssh needs to be installed in termux. As we all know, Linux has two major distributions.
General Command
uname -aYou can view the kernel information of this machine. For more details, execute the following command
cat /proc/version For the convenience of operation, I use SSH to connect my Android phone,
Open SSH: I’m afraid this is the most detailed one for termux to open SSH
https://blog.csdn.net/qq_ 35425070/article/details/84789078
Solutions to the failure of installing jupyters in termux
When installing jupyter in termux, the network was cut off in the middle of the installation, which led to a day’s struggle. Finally, the installation was completed, and the problem was a. C . H file is not available
Main reason: the dependency is not fully installed
Later, after some problems were solved, the installation of pyzmq (zeromq) got stuck, and the card owner did not move. Neither PIP install pyzmq nor PIP install jupyter alone could work
Follow these steps:
———————Check basic operations and commands:
pkg update
PKG install VIM curl WGet git unzip Unrar
———————Install dependency packages (5)
apt install python-dev clang fftw
apt-get install libzmq
apt-get install libzmq-dev
———————Install jupyter again
pip install –force-reinstall –no-cache-dir jupyter // Force download and install again
========================================================
Using termux for Linux unfamiliar students can come to git this, a script written by high school students, fool type installation termux common tools
termux-tools-install
—————————————————————————————————————–
Other solutions reference:
Baidu reference here http://www.drehere.com/?s=termux%20jupyter%20zmq
To re install termux: http://tieba.baidu.com/p/5537783650
Manual installation of zeromq (download source code analysis): there are a lot of online tutorials, just choose one: https://blog.csdn.net/n_ sev7/article/details/77320250
Other related issues: installing sketch, lxml, etc
https://www.jianshu.com/p/4deba3fad266
When installing pyaudio, an error is reported: failed error: portaudio. H: there is no such file or directory
When installing pyaudio, an error is reported: failed error: portaudio. H: there is no such file or directory
The operation of pyaudio depends on the portaudio library. You should first install a portaudio library
Portaudio installation steps:
A) Download PortAudio Library http://portaudio.com/download.html , select the latest tgz, upload it to Linux or termux and place it where you want to install it. Termux: I put it in/data/data/com.termux/files/usr/share, and CD it to this directory
B) tar – zxvf file name Unzip the downloaded files without tar, such as apt get install tar
C) enter the decompressed portaudio file and execute the following commands in turn:
./configure
(configure command)
This step is generally used to generate makefile to prepare for the next step of compilation. You can control the installation by adding parameters after configure. For example, the code:./configure – prefix =/usr means to install the software under/usr, and the executable file will be installed in/usr/bin (instead of the default/usr/local/bin), The resource file will be installed in/usr/share (instead of the default/usr/local/share). At the same time, some software configuration files can be set by specifying the – sys config = parameter. Some software can also add – with, – enable, – without, – disable and other parameters to control the compilation. You can view the detailed instructions and help by allowing./configure – help.
In termux, this step is set to
./configure –prefix=/data/data/com.termux/files/usr
)
make compile
make install Installation
4. Install pyaudio library, PIP3 install pyaudio
Why interview requires reading the source code
Some people always think that when interviewing to build an aircraft carrier, you need to screw up your work. In the junior interview, you often ask, what is the life cycle of spring and what has been done since it was started, but it doesn’t matter at work. It’s useless and meaningless. Is that really the case?
Here is a small problem that can only be solved by understanding the initial sequence of spring.
Problem description
In the old version, obtaining a certain data XXX depends on a table tb in the database_ XXX, the new version requires to obtain these data by calling service_ B service interface. It’s reasonable to change bservice’s implementation class to interface mode, but after the change, we find that the application can’t be started! Error: DH handshake failed! I didn’t modify other logic, but I couldn’t start it, and the interface I called doesn’t need any encryption verification. As a fresh undergraduate who has been employed for less than two months, how can I solve this situation?
Background
Application introduction
our Java Web application service_ A is dynamic, the page is dynamic, the fields of the entity class are dynamic, the functions of an entity class and the services to be accessed are dynamic. You need to read the XML configuration file at startup to determine what the application looks like and what capabilities it has. The technology stack is SSM. In order to facilitate the natural loading of XML in @ postcut, That is, these XML configuration files are loaded after bean creation.
Requirements and changes
in the new version of the technology stack, we need to switch to spring boot, with some functional changes. Parsing these model configuration files actually depends on a table tb in the database_ XXX, the new version requires to obtain these data by calling service_ B service interface.
Introduction to service invocation
before calling other services remotely, you need to call addressing service first_ X address to obtain the protocol, IP, port and domain information of the target service, and then get the same address as the domain of its own service, and then get a callable instance of the target service according to the specified load balancing algorithm to call. The sensitive interface needs DH handshake and data encryption and decryption.
Problem orientation
I just changed a service method from database to interface, and the error was DH handshake failure. There was no change, which means that there must be something wrong with the interface call. Debugging found that the DH error occurred in the service addressing report, that is, the error occurred before entering the code I wrote, and the service addressing code was provided by the internal framework, Other people are also using the frame. Why didn’t other people respond?
Make a breakpoint in the addressing part of the framework code of idea decompilation, and debug step by step to find that the addressing service is being called_ The IP port of the target host can’t be found in X, but the framework code takes it directly from the cache. If it doesn’t, NPE will be thrown, and it will be thrown as a DH error by the upper layer. It is reasonable to say that there should be IP port information of addressing service in cache. Debug check shows that the cache is empty, size = 0, indicating that it has not been put in. Ctrl Alt F7 looks for a wave to see where the key pair will be put into the cache. It is found that the framework injects a bean: serviceinfolistener, which is executed after listening to the applicationcontextinitializedevent.
At this point, students who have read the spring source code or know what spring did when it started will immediately know what the problem is, because XML parsing is too early, and the dependent service addressing is not initialized at this time, so it cannot be called.
solve
Temporary scheme:
the parsing of XML will be delayed until the listener of the framework is finished.
The following scheme:
discuss with the framework group, the framework will rely on the addressing service_ The configuration time of X’s secret key pair is advanced to the after properties set of initializing bean, that is, the application developed with the framework is allowed to be called remotely at startup.
Solving Chinese garbled code in Java compressed file
Solving Chinese garbled code in Java compressed file
Introducing Maven dependency
<dependency>
    <groupId>ant</groupId>
    <artifactId>ant</artifactId>
    <version>1.6.5</version>
</dependency>
Click here to view all versions of ant on Maven’s official website
Using ant.jar class in ant
import org.apache.tools.zip.ZipEntry;
import org.apache.tools.zip.ZipOutputStream;
Replace the class in JDK API
import java.util.zip.ZipEntry;
import java.util.zip.ZipOutputStream;
Solve xshell garbled code
As shown in the figure:
Click the earth logo above and select UTF-8. The results are as follows
Summary and statistics of large amount of data
1. Try to implement group grouping in SQL. Although the database needs grouping operation, there is index in the database, so the operation speed is fast, and the number of records fetched to the report server side is greatly reduced, and the fetching speed is greatly accelerated. Therefore, when grouping operation is carried out on the report side, only a small number of records are needed, and the operation speed of the report is greatly accelerated.
2. To modify the expression of background color, use row () as little as possible. For example, calculate the line number in a grid of each line, and then judge the background color expression. The odd and even line judgment of background color, such as: if (row ()% 2 = = 0, – 3342337), is mainly row (), because this function can not optimize the calculation, and the number of expressions must be calculated as many times, and the calculation must be delayed after the expansion. In this way, if you expand more, it will have a greater impact on performance.
3. For cross grouping, the number of data sets should be reduced as much as possible, and single data set should be used as much as possible.
Solution to the failure of springboot integrated PageHelper
     <dependency>
            <groupId>com.github.pagehelper</groupId>
            <artifactId>pagehelper</artifactId>
            <version>5.1.2</version>
        </dependency>
        <dependency>
            <groupId>com.github.pagehelper</groupId>
            <artifactId>pagehelper-spring-boot-autoconfigure</artifactId>
            <version>1.2.3</version>
        </dependency>
        <dependency>
            <groupId>com.github.pagehelper</groupId>
            <artifactId>pagehelper-spring-boot-starter</artifactId>
            <version>1.2.3</version>
            <exclusions>
                <exclusion>
                    <groupId>org.mybatis</groupId>
                    <artifactId>mybatis</artifactId>
                </exclusion>
                <exclusion>
                    <groupId>org.mybatis</groupId>
                    <artifactId>mybatis-spring</artifactId>
                </exclusion>
            </exclusions>
        </dependency>
The resolution of Ubuntu 16.04 screen can’t be modified and the solution of circulating login
Today, there are many problems with the graphics card driver. One of them is that after the computer restarts, the resolution of the display screen becomes 800600, and the normal resolution is 19201080. There is no other resolution option in the system settings, so it cannot be modified. Try to create the xorg. Conf file, which is described on the Internet, to set the custom desktop resolution. After the modification, the resolution has changed, but it is 1600 * 1200, which is still very abnormal. Using the combination of CVT and xrandr to modify the resolution indicates another error, xrandr: failed to get size of gamma for output default. One problem after another, what a tangle!
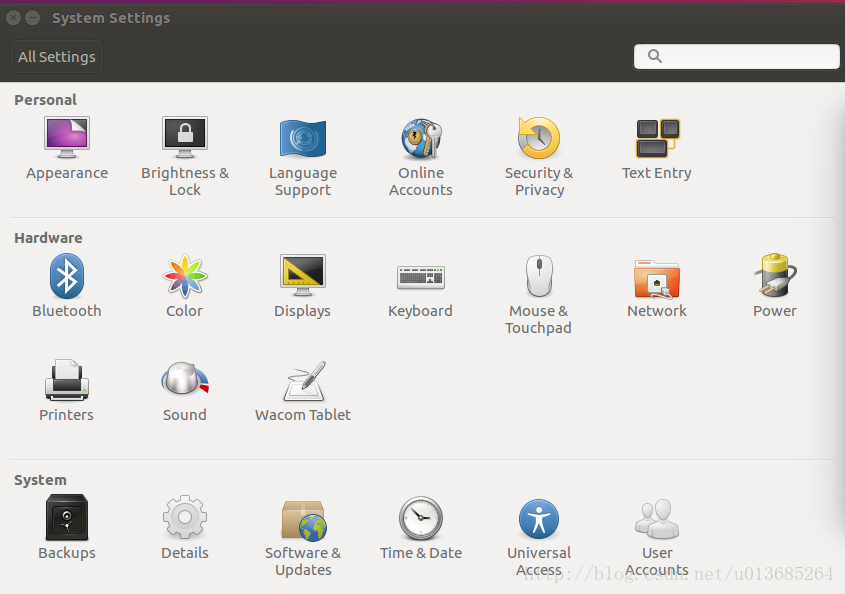
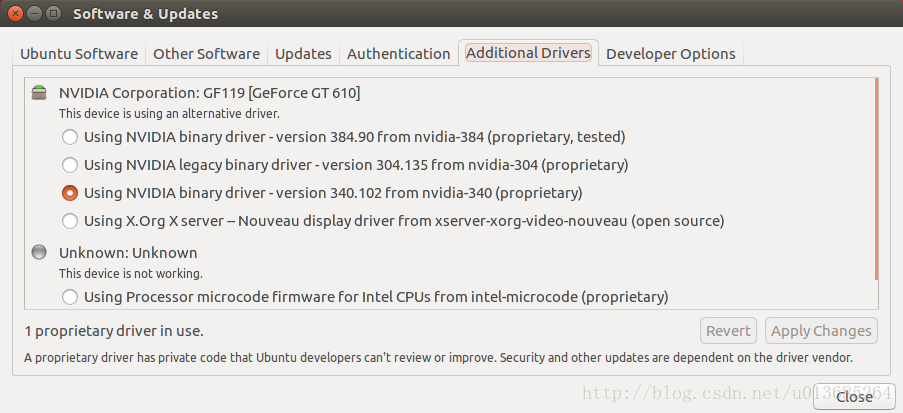
It has to be said that it’s really unpleasant to search these professional problems with Baidu in China. What often appears are some irrelevant or unsolvable web pages. Fortunately, it’s all solved now, and the problem is still in the driver side of the graphics card [1]. Software & amp; update in system settings; In updates, click additional drivers and change it to NVIDIA driver (I choose the third one here, as shown in the figure below). The application modification needs to wait for a little time, restart the computer after completion, and the resolution is normal again.
After the driver is re installed, the problem of circular login appears again. You may encounter it later. Record the solution here.
ctrl +alt +f2
sudo service lightdm stop
sudo apt-get --purge remove nvidia-*
After many months, I stepped on the big pit of circular login again, but the previous solution was invalid. Another possible problem is that the owner and all groups of the. Xauthority file become root. There is a. Xauthority file in the user’s home directory. View the owner and all groups of the file
ls -la .Xauthority
If it is root, you need to change it to your login user:
sudo chown username:username .Xauthority
(there will always be all kinds of accidents in the actual solution, one by one, don’t worry.)
The range of Chinese Unicode encoding and the calculation of the number of Chinese and English words in text
Unicode encoding range of Chinese characters
Unicode encoding range
u4e00 ~ u9fff
U + 4e00 ~ U + 9fa5 is the most commonly used range, that is, the block named CJK unified ideographs. The characters between U + 9fa6 ~ U + 9fff are still empty codes, which have not been defined yet, but there is no guarantee that they will not be defined in the future
def is_zh(char):
    """

    :param char:  Single character
    :return:
    """

    if u'\u4e00' <= char <= u'\u9fff':
        return True
    return False
Statistics of Chinese and English words
In word document, Review – > count the number of words can calculate the number of words, Chinese words, non Chinese words and so on, now use Python to achieve
example: Hello, world 4
# -*- coding: utf-8 -*-
import re

def strQ2B(ustring):
	# Full to half angle string
    rstring = ""
    for uchar in ustring:
        inside_code = ord(uchar)
        if inside_code == 12288: # convert full-corner spaces directly
            inside_code = 32
        elif (inside_code >= 65281 and inside_code <= 65374): # Full-angle characters (except spaces) are converted according to the relationship
            inside_code -= 65248
        rstring += chr(inside_code)
    return rstring


def querySimpleProcess(ss):
	# query preprocessing, excluding characters other than Chinese and English numbers, all converted to lowercase
    s1=strQ2B(ss)
    s2=re.sub(r"(?![\u4e00-\u9fff]|[0-9a-zA-Z])."," ",s1)
    s3=re.sub(r"\s+"," ",s2)
    return s3.strip().lower()


# Determine if it contains Chinese
def check_contain_chinese(check_str):
    for ch in check_str:
        if u'\u4e00' <= ch <= u'\u9fff':
            return True
    return False


# Determine if it contains English
def check_contain_english(check_str):
    for ch in check_str:
        if u'a' <= ch <= u'z' or u'A' <= ch <= u'Z':
            return True
    return False


# Delete letters from a string for character counting purposes
def delete_letters(ss):
    rs = re.sub(r"[a-zA-Z]+","",ss)
    return rs


# First space split, get the list, and then line processing each element in the list
###Example: Smart School Uniform Commercial=6, Disrespectful Breakup=2
### Exception: C Mile C Mile=3 ### Can't handle
# If the element does not contain Chinese, then the length of the element is recorded as: 1 + the number of digits
# If the element does not contain English, the length of the element is recorded as: the number of Chinese characters + the number of digits, you can directly use the len () method
# If the element contains both English and Chinese, the length of the element is recorded as: number of Chinese characters + number of digits + 1
def countCharacters(inputStr):
    tmpStr = querySimpleProcess(inputStr)
    str2list = tmpStr.strip().split(" ")
    if len(str2list) > 0:
        charsNum = 0  # Initialize character count
        for elem in str2list:
            chineseFlag = check_contain_chinese(elem)
            englishFlag = check_contain_english(elem)
            if englishFlag == False:  # no English
                charsNum = charsNum + len(elem)
                continue
            else:  # contain English
                elem = delete_letters(elem)
                charsNum = charsNum + 1 + len(elem)
        return charsNum
    return 0
[CHM] Python: How to Extract CHM Data
Demand scenario
Chm format document, extract and save as HTML
Method 1: use online conversion tools or software
Method 2: Script Compilation
Step 1: decompile. Bat script
Using this script, you can decompile the CHM file, decompress it and get the file. Some documents can be directly converted to TXT, and some will be converted to HTML. This has something to do with generating CHM files
1 create a new TXT document and write the command according to the example. After saving, save the file as . Bat format
hh -decompile Output path of conversion result File to be converted (relative/absolute path)
# Example
hh -decompile   D:\Desktop\  123.chm
2 right click the administrator to run the file, and output the result to the directory specified by the command
Step 2: HTML to TXT
[HTML] Python extracts HTML text to TXT
Pyyaml tutorial introduction to pyyaml library and YML writing and reading
PyYAML
Source code: https://github.com/yaml/pyyaml
install
# pip command line installation
pip install PyYAML

# Download the source code for installation
python setup.py install
Import
import yaml
Read yaml file
def read_yaml(yml_file, mode='r', encoding='utf-8'):
    """ Read and convert the contents of yaml to Python objects

    :param yml_file:
    :param mode:
    :param encoding:
    :return:
    """
    # safe_load_all() Open multiple documents
    with open(yml_file, mode=mode, encoding=encoding) as y_file:
        # .load is a non-recommended and unsafe encoding method
        # content = yaml.load(y_file.read(), yaml.FullLoader)
        # .safe_load safe encoding method
        # If you don't trust the input stream, you should use:
        return yaml.safe_load(y_file)
Write yaml file
def write_yaml(yaml_file, data, mode='w', encoding='utf-8', is_flush=True):
    """ Converting Python objects to yaml

    :param yaml_file:
    :param data:
    :param mode:
    :param encoding:
    :param is_flush:
    :return:
    """
    with open(yaml_file, mode=mode, encoding=encoding) as y_file:
        # yaml.dump(data, stream=y_file)
        # allow_unicode Solve the problem of writing messy code
        yaml.safe_dump(data, stream=y_file, allow_unicode=True)
        if is_flush:
            y_file.flush()