Modification Bashrc file
vim ~/.bashrc
Then add the following two lines of code at the end
export LANG=en_US:UTF-8
export LANGUAGE=en_US:en
After closing the file, finally execute the following code
source ~/.bashrc
Modification Bashrc file
vim ~/.bashrc
Then add the following two lines of code at the end
export LANG=en_US:UTF-8
export LANGUAGE=en_US:en
After closing the file, finally execute the following code
source ~/.bashrc
Problem description
Platform: Windows 10 professional edition, anaconda3
When starting the Jupiter notebook, there is an error message, as follows:
ModuleNotFoundError: No module named jupyter_nbextensions_configurator
Although the jupyter lab can still be used when it is opened, the error message is always a hidden danger. Therefore, after searching the data, the following solutions are found
Solution:
python -m pip install --user jupyter_contrib_nbextensions

#jupyter contrib nbextension install --user --skip-running-check

python -m pip install --user jupyter_nbextensions_configurator

#jupyter nbextensions_configurator enable --user
Only running the above two commands solves the problem of error reporting.
Background of the problem
Getting started with Python
try to use pyldavis for simple topic extraction;
Problems and related codes
Pyldavis has been installed, as shown in the figure (Annotated):
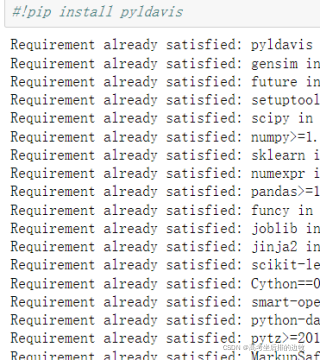
but an error occurs when entering the following statement:
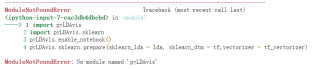
error code segment:
import pyLDAvis
import pyLDAvis.sklearn
pyLDAvis.enable_notebook()
pyLDAvis.sklearn.prepare(lda,tf,tf_vectorizer)
Screenshot of specific error reporting:
Solution:
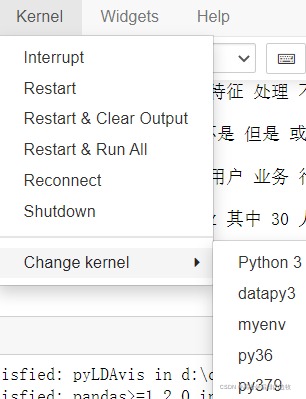
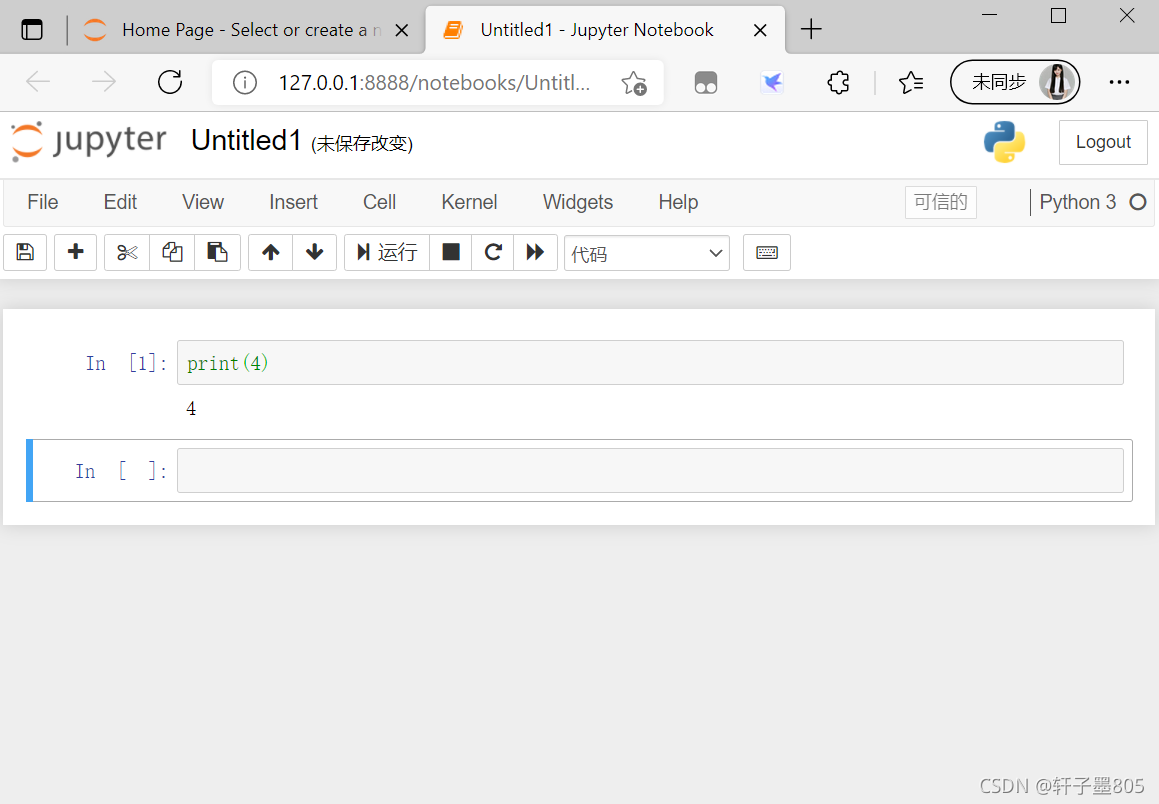
Some bloggers suggested that the installation was not successful. I installed it as an administrator. I operated it, but it was useless
in fact, the final solution is very simple. I found that the kernel used by my Jupiter notebook is wrong. I used a virtual environment I set up before. Just change it to the default environment (my one is named python3).
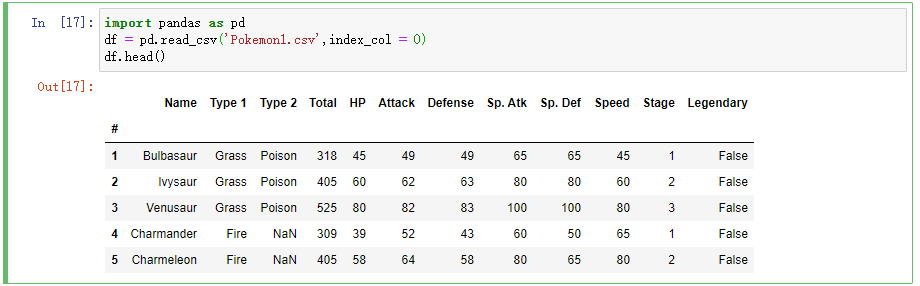
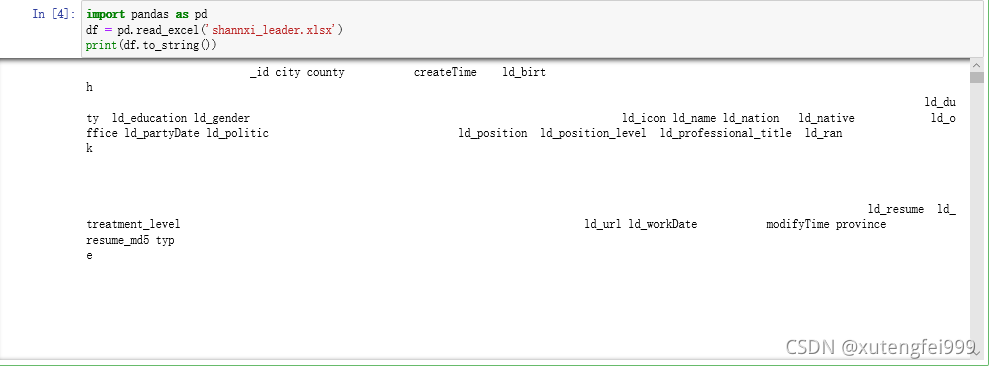
import pandas as pd
df = pd.read_csv('Pokemon1.csv',index_col = 0)
An error is reported after executing the code: Unicode decodeerror: ‘UTF-8’ codec can’t decode byte 0x89 in position 1538: invalid start byte
an error is still reported when trying to manually specify the encoding format [encoding = “UTF-8″/encoding = “GBK”):
df = pd.read_csv('Pokemon1.csv',index_col = 0,encoding="gbk")
Solution:
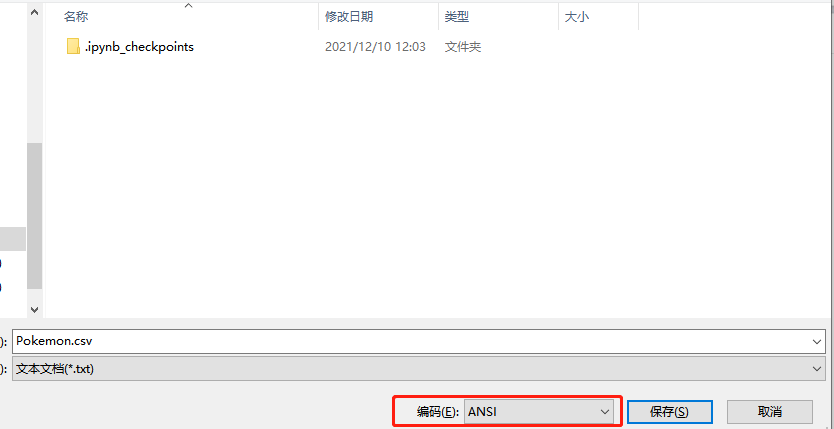
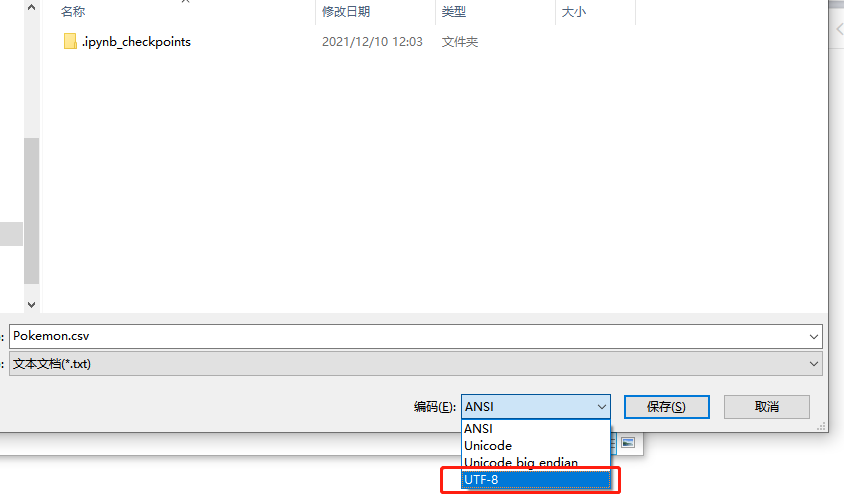
1 Find the CSV file used -> Right mouse button -> Opening method -> Select Notepad
2 Open the file and select File -> “Save as”, you can see that the default code is ANSI. Select UTF-8 to save a copy again, and then open it with PD.Read_csv(). There will be no error:
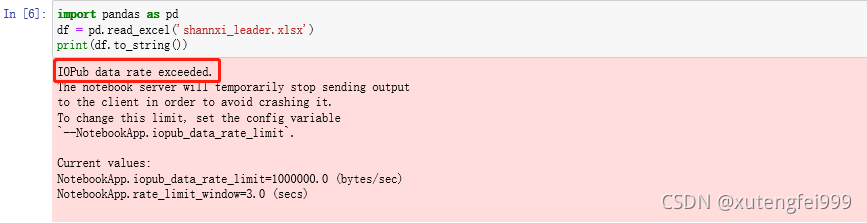
1. Errors are reported as follows:
2. Solution:
jupyter notebook –generate-config
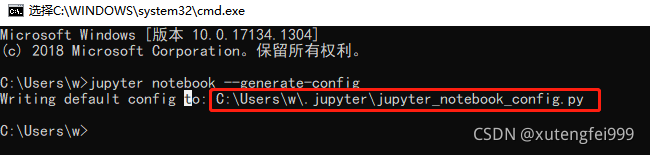
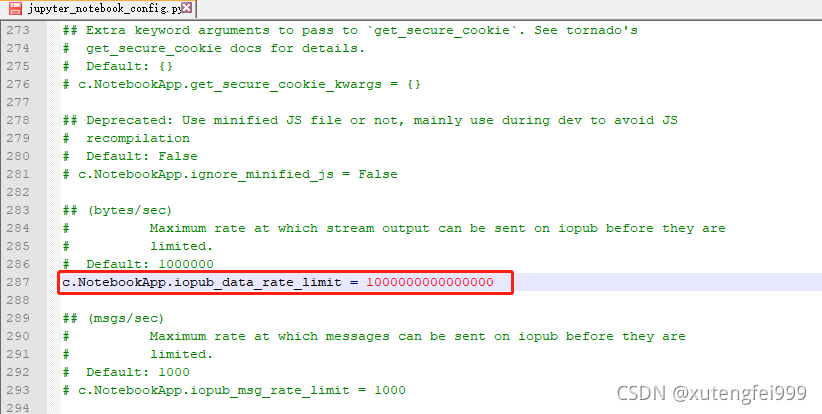
Reopen jupyter in CMD and run the code
Anaconda and jupyter notebook were installed on my new computer recently. When I opened the code with jupyter notebook, I found that it could not run. I turned back to CMD and found that the following errors interrupted jupyter Notebook:
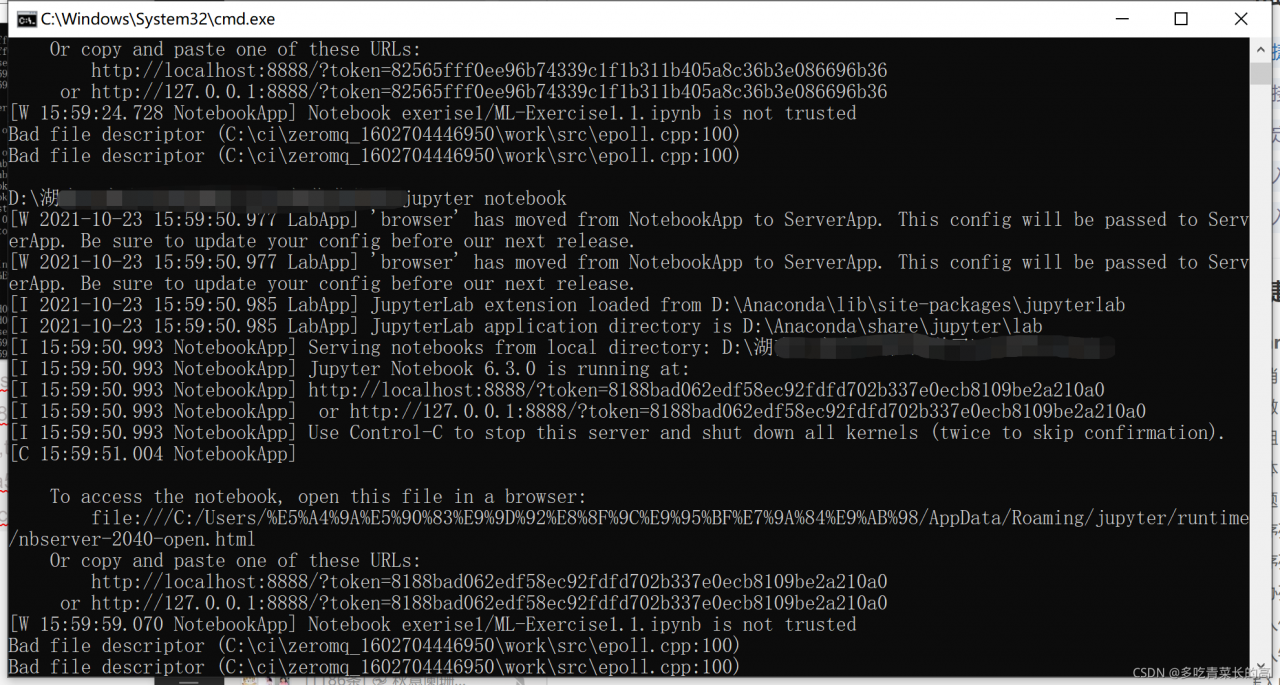
I checked many answers. It is said that it was caused by using Chinese when registering a Windows account. Coincidentally, I happen to use Chinese, but I think it’s very troublesome to re create an account. I don’t believe in evil. I’ll see if there are other methods. I’ve tried and found it
according to others, it seems that when you install jupyterab or jupyter notebook, you will automatically install ipykernel, and then automatically install a higher version of pyzmq.
this problem is the problem of pyzmq version. Uninstall pyzmq 22.0.2, execute PIP install pyzmq = = 19.0.2, and install pyzmq 19.0.2.
as shown in the figure below, 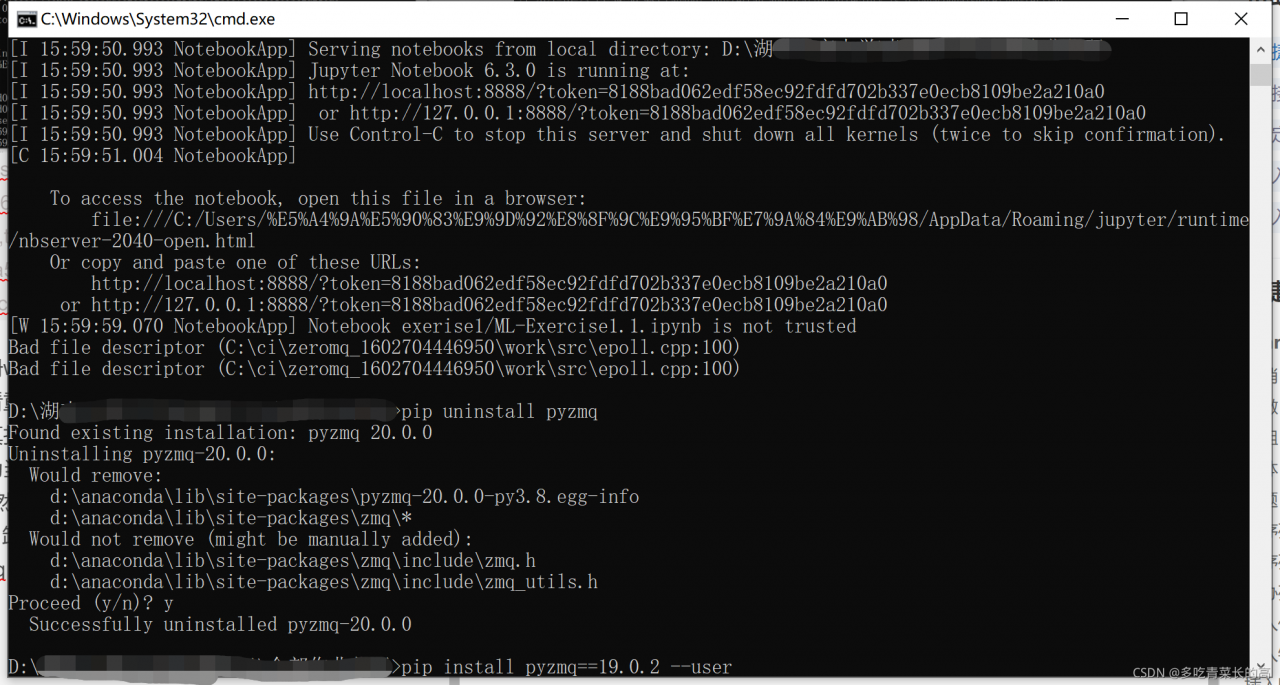
paste a command to facilitate everyone to copy
pip uninstall pyzmq
pip install pyzmq==19.0.2 --user
After installing pyzmq version 19.0.2, I have the following error messages
ERROR: pip's dependency resolver does not currently take into account all the packages that are installed. This behaviour is the source of the following dependency conflicts.
spyder 4.2.5 requires pyqt5<5.13, which is not installed.
spyder 4.2.5 requires pyqtwebengine<5.13, which is not installed.
But fortunately, it does not affect the use. You can open the code again by using jupyter notebook.
Problem Description:
After installing Anaconda 3, open the Jupiter notebook to create a new one. When you click Python 3, the kernel error is always displayed. It has been tried several times. I believe many people have such a problem. No matter uninstalling and reloading Anaconda or rebuilding an environment, it has not been solved. Until later, it was found that the nuclear was not cleaned up. Here I share a solution to this problem. Successfully solved my problem.
solve:
1. Open the anaconda prompt window and enter Jupiter kernelspec list to see the location of the current kernel. Note that this is the wrong kernel, 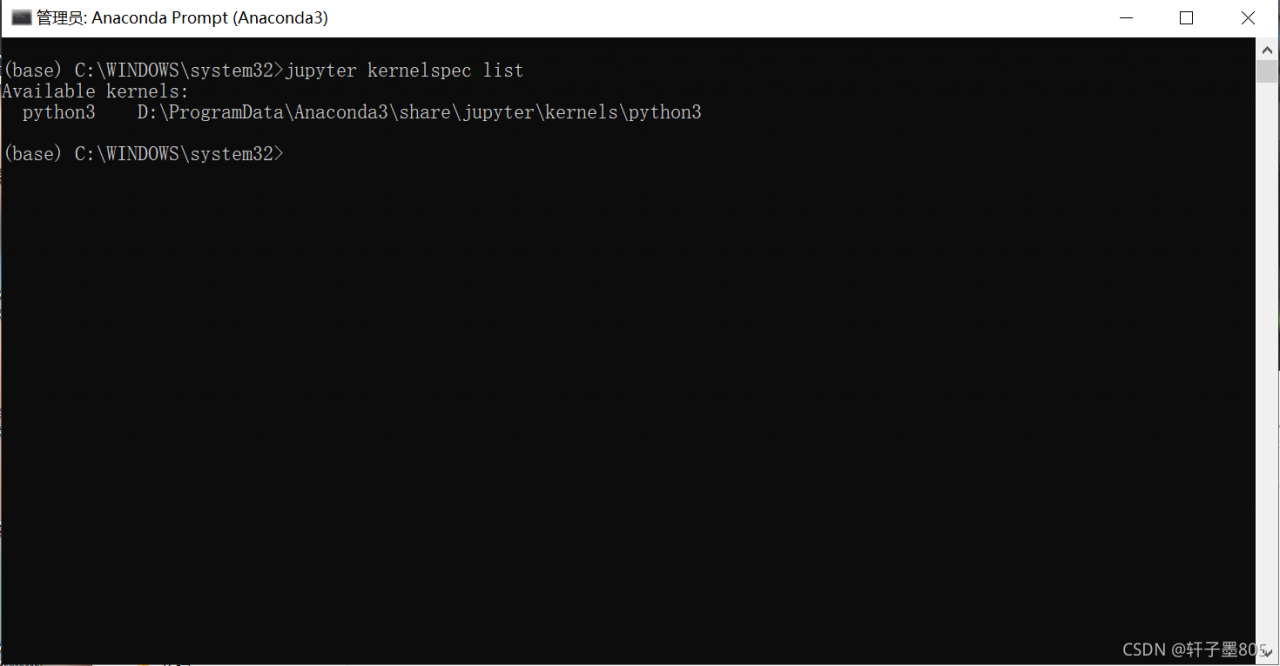
2. Copy this address and uninstall the current anaconda
3. Find the address just now and delete the jupyter folder
4. Reinstall Anaconda
It can be solved!!
Jupyter notebook service error
Problem background
I created a CONDA virtual environment of Python 3.8 and prepared to install Jupiter notebook in this virtual environment. Start Jupiter notebook in CMD to pop up the browser and working interface smoothly. However, when creating a new IPython file, the kernel always shows that it is busy and cannot run the script in the cell.
reason
Through searching for information, I found that most of the reasons on the Internet were attributed to the mismatch between ipykernal and pyzmq versions. For this purpose, I refer to another virtual environment I created earlier. The jupyter notebook in this environment can run normally, and its corresponding versions are ipykernal 6.2.0 and pyzmq 19.0.2 respectively
Solution:
pip install ipykernal=6.2.0
pip install pyzmq=19.0.2
Problem description
Previously, rename a CONDA virtual environment with the following command:
conda create -n torch --clone rl
conda remove -n rl --all
Then start jupyter from Torch virtual environment, and the following error is reported:
Fatal error in launcher: Unable to create process using
"g:\miniconda3\envs\rl\python.exe"
 "G:\miniconda3\envs\torch\Scripts\jupyter-notebook.EXE"
Reference solutions
I checked the online information and found that it was better after a mess… So I’m not sure which operation fixed the problem. What’s more certain is the last few executed commands:
pip uninstall ipython
pip uninstall jupyter
pip uninstall notebook
Or (after the above command is executed, try installing jupyter first. If the problem cannot be solved, execute the following command)
pip install pip-autoremove
pip-autoremove jupyter -y
Then install jupyter
pip install jupter
The problem is solved later!!!!
Installation
vscade and Anaconda are installed on their own in Baidu. Python plug-ins are installed in vscade. The file operation of creating . Ipynb suffix is similar to the web version of Jupiter notebook
Error content:
Kernel died with exit code 1. D:\IDE\Anaconda3\envs\pytorch\lib\site-packages\traitlets\traitlets.py:2196: FutureWarning: Supporting extra quotes around Unicode is deprecated in traitlets 5.0. Use 'hmac-sha256' instead of '"hmac-sha256"' – or use CUnicode. warn( D:\IDE\Anaconda3\envs\pytorch\lib\site-packages\traitlets\traitlets.py:2151: FutureWarning: Supporting extra quotes around Bytes is deprecated in traitlets 5.0. Use '70f91ecb-d1b9-4e6f-bab4-f4eb00d14e8c' instead of 'b"70f91ecb-d1b9-4e6f-bab4-f4eb00d14e8c"'. warn( Traceback (most recent call last): File "D:\IDE\Anaconda3\envs\pytorch\lib\runpy.py", line 194, in _run_module_as_main return _run_code(code, main_globals, None, File "D:\IDE\Anaconda3\envs\pytorch\lib\runpy.py", line 87, in _run_code exec(code, run_globals) File "D:\IDE\Anaconda3\envs\pytorch\lib\site-packages\ipykernel_launcher.py", line 16, in <module> app.launch_new_instance() File "D:\IDE\Anaconda3\envs\pytorch\lib\site-packages\traitlets\config\application.py", line 844, in launch_instance app.initialize(argv) File "D:\IDE\Anaconda3\envs\pytorch\lib\site-packages\traitlets\config\application.py", line 87, in inner return method(app, *args, **kwargs) File "D:\IDE\Anaconda3\envs\pytorch\lib\site-packages\ipykernel\kernelapp.py", line 570, in initialize self.write_connection_file() File "D:\IDE\Anaconda3\envs\pytorch\lib\site-packages\ipykernel\kernelapp.py", line 230, in write_connection_file write_connection_file(cf, ip=self.ip, key=self.session.key, transport=self.transport, File "D:\IDE\Anaconda3\envs\pytorch\lib\site-packages\jupyter_client\connect.py", line 212, in write_connection_file with secure_write(fname) as f: File "D:\IDE\Anaconda3\envs\pytorch\lib\contextlib.py", line 113, in __enter__ return next(self.gen) File "D:\IDE\Anaconda3\envs\pytorch\lib\site-packages\jupyter_client\connect.py", line 100, in secure_write win32_restrict_file_to_user(fname) File "D:\IDE\Anaconda3\envs\pytorch\lib\site-packages\jupyter_client\connect.py", line 53, in win32_restrict_file_to_user import win32api ImportError: DLL load failed while importing win32api: 找不到指定的程序。
The solution is:
pip install pywin32==228
v1.0.0
Environment introduction
1、 The virtual machine on this machine. There is jupyter in the virtual machine
2、 Jupyter notebook web server is an online editor
3、 A proxy server on this machine, such as nginx
Configuration steps
1、 Virtual machine
Start the virtual machine
2、 Jupyter
Set the root directory of the file
sudo GEDIT (VIM) ~ /. Jupyter/jupyter_ notebook_ config.py
c.NotebookApp.notebook_dir = '/path/to/jupyter'
sudo gedit(vim)~/.jupyter/jupyter notebook config.py
c.NotebookApp.allow_origin = '*' # allow cors
3、 Nginx
Start nginx configuration nginx.conf excerpt
# Actual tcp/websocket server address
    upstream jupyter_url {
        server virtual machine ip:8888;
    }

    server {
        listen       8000;
        server_name  localhost;

        charset utf-8;

      location/{
          proxy_pass http://jupyter_url;
          proxy_http_version 1.1;
          proxy_set_header Upgrade $http_upgrade;
          proxy_set_header Connection "upgrade";
      }
	}
Test effect
Visit: nginxip: 8000
Sometimes, when the program has a large amount of computation or falls into a dead loop, and there is no response when you click the interrupt button, there are three solutions:
1. Enter Ctrl + C to exit jupyter
2. Select notebook and shutdown
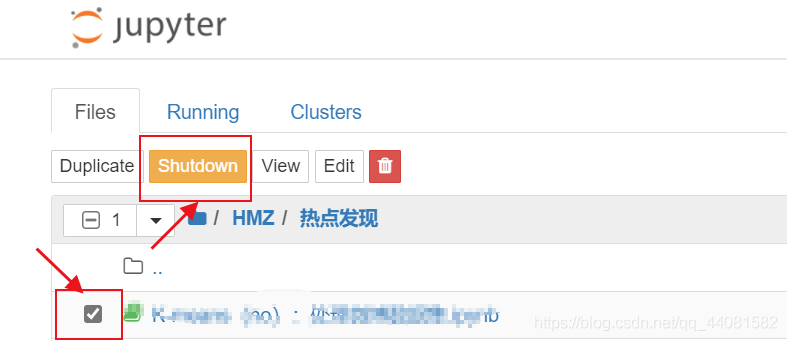
3. Click restart the Kernel (recommended)
