VTK8.2.0 + VS2015 + Win10 compilation and configuration
Special thanks to the “cook a delicious fish” blogger for technical support please refer to: VTK8.2.0+ITK4.13.2+VS2015 configuration
Only the VTK library is compiled here, not the examples and data contained in the VTK.
because the project needs to use only the VS2015 version, and the compilation process is also applicable to VS2017 and VS2019;
1 Download the source code
1.1 VTK source code can be downloaded from VTK official website
Download address: https://vtk.org/download/
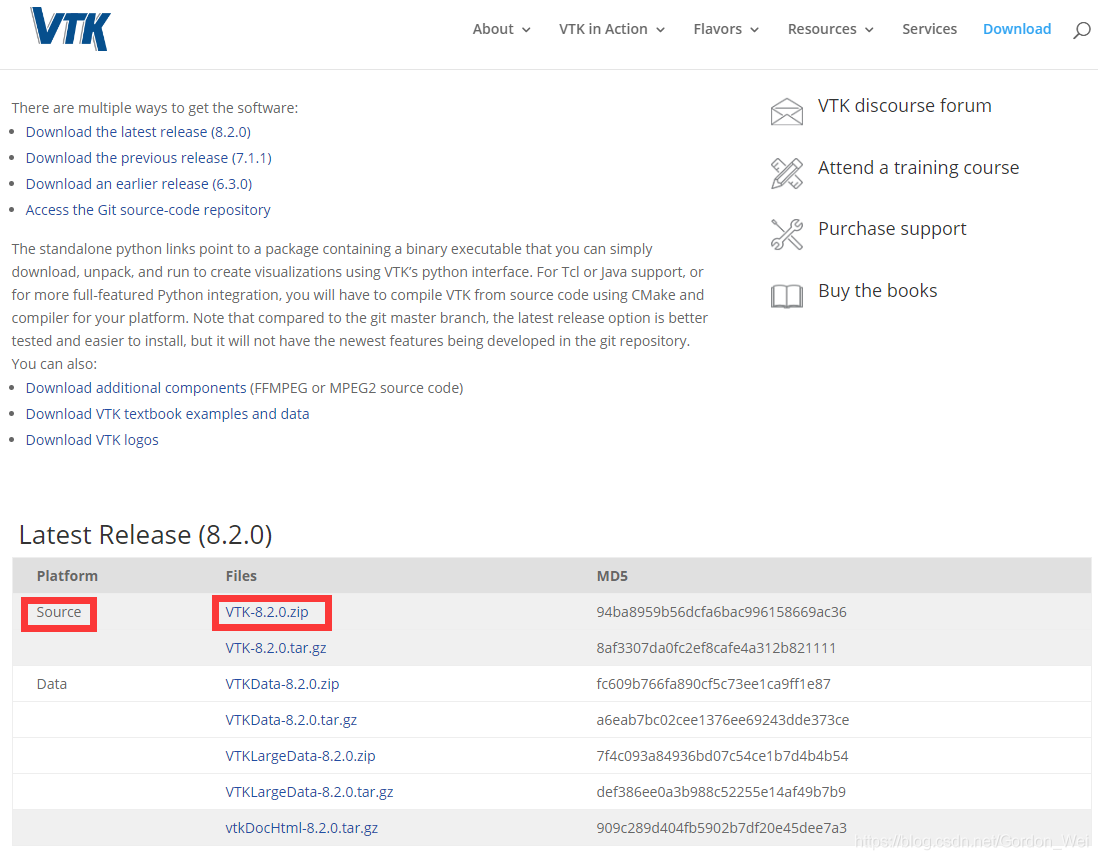
in 8.2.0 release version of the Source select a package to download.
1.2 CMake official website download
Download address: https://cmake.org/download/
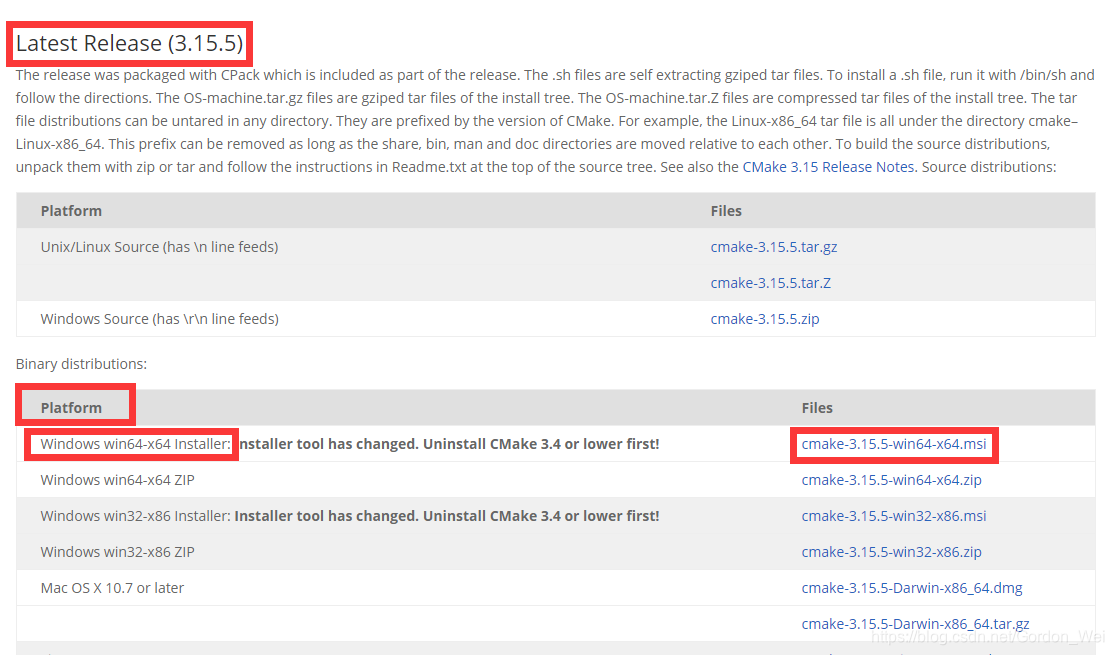
select the latest Release version, choose according to your Windows Platform, I am a 64 – bit system, so choose Windows win64 – X64 Installer installation package, download can be installed directly after, best as an administrator to install.
2. Generate VS2015 project file of VTK using CMAKE
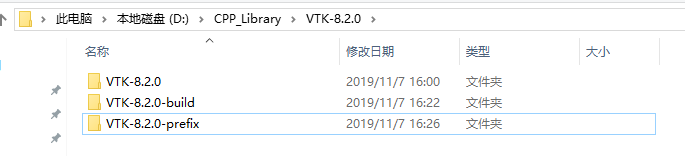
Unzip the VTK source code to get the vtk-8.2.0 folder, open it and see if there is a layer of VTK8.2.0 available when creating a new folder vtk-8.2.0-build and vtk-8.2.0-prefix.
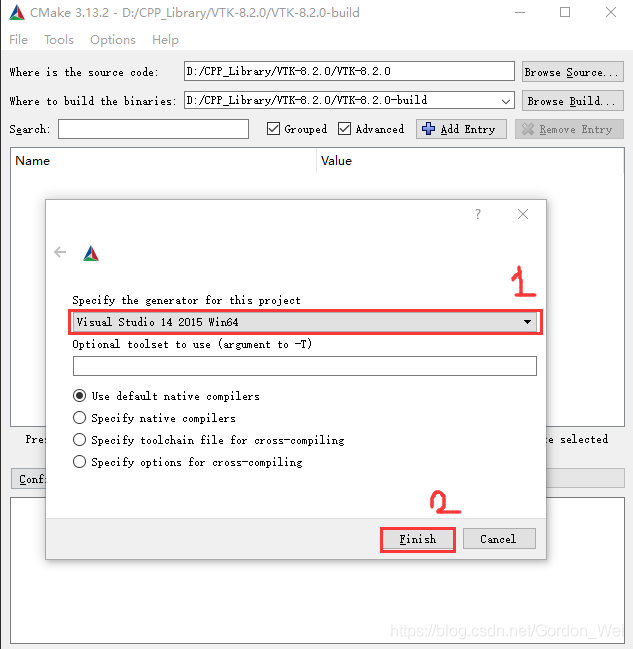
2.1 Open the installed Cmake (cmak-gui) (please ignore that my version is not the latest version) and select the VTK source path and the VTK generation path as the previous step, click Configure.
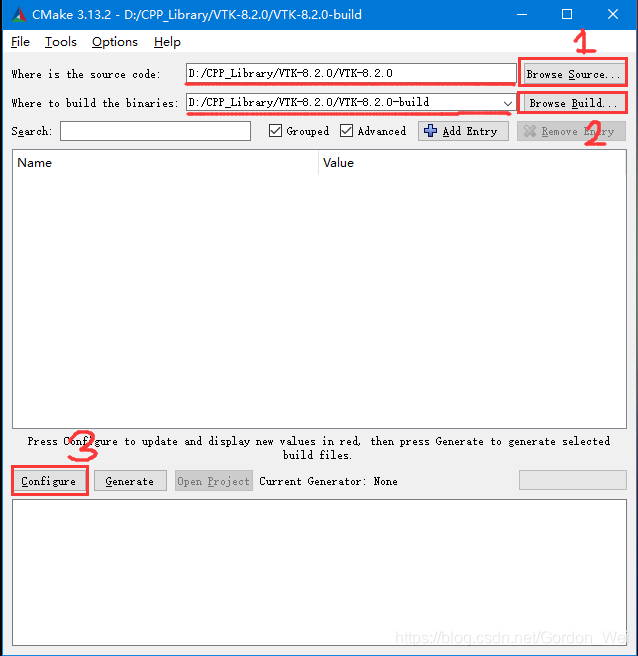
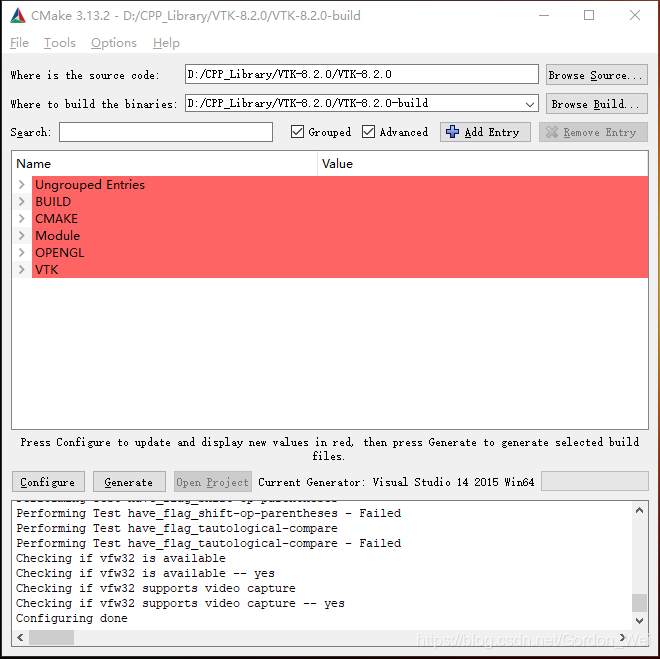
I am VS2015 64-bit version, click Finish to start loading the configuration and wait until the red area appears and the Configuring done appears.
2.3 Modify configuration parameters
2.3.1 Tickle BUILD_SHARED_LIBS under Build (I didn’t check it for example tests if I want to check it)
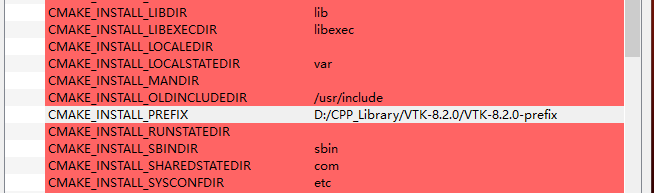
2.3.2 Modify the CMAKE_INSTALL_PREFIX option path to the vtk-8.2.0-prefix path created earlier
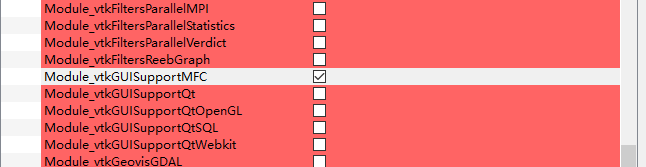
2.3.3 If you want to support MFC, check the MODULE_VTKGUISUPPORTMFC option under Module
2.3.4 Click the Configure button until the red part disappears, and click the Generate button to Generate the project file
2.3.5 Here refer to “VTK8.2.0 Compile, Installation and Test Case Run (Win10 + VS2017 + QT5, Release+Debug)” to set the value of CMAKE_DEBUG_POSTFIX. This variable represents the character added after the output filename in Debug mode, set to “_D”, then the filename generated in Debug mode will have the suffix “_D”. In order to distinguish between the files used in Release and Debug mode (I did not set it, you can set it, so that when you create a Release after the Debug version, you will not overwrite the files you created before)

3 Enter the generated VS2015 project file and compile the VTK library
3.1 Open before the new VTK-8.2.0-Build folder, use VS2015 to open VTK. SLN (it is best to open Win10 as an administrator to modify C disk data is very sensitive, may lead to compilation failure, close 360 and other defense software, close no necessary programs) 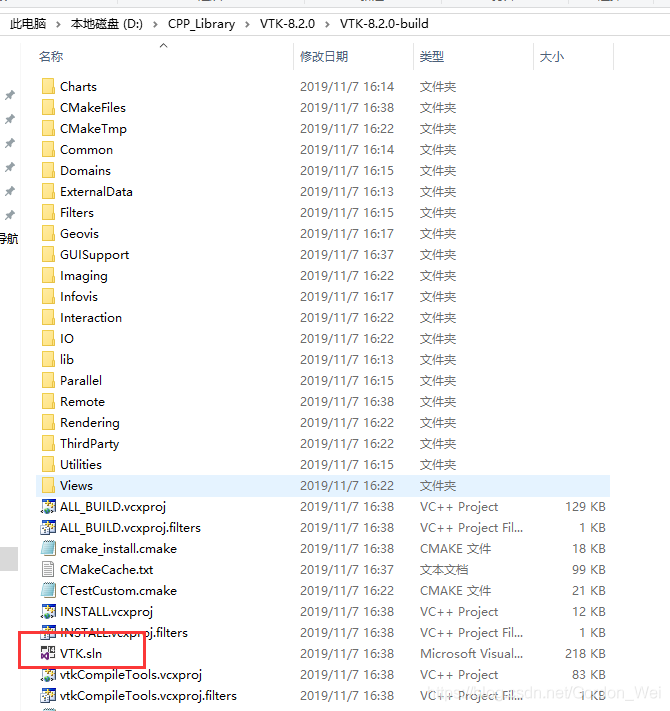
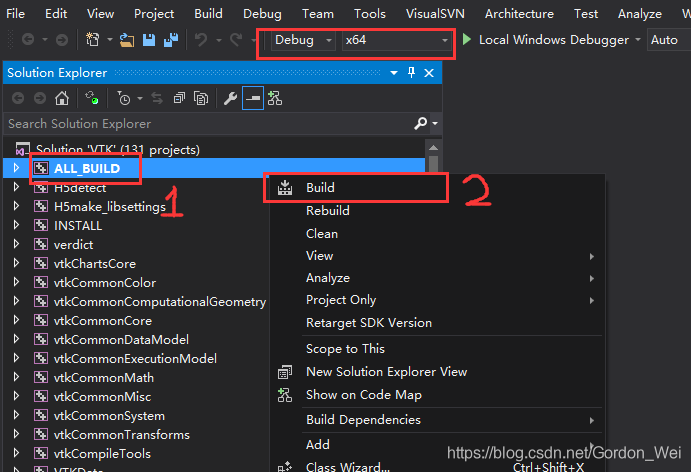
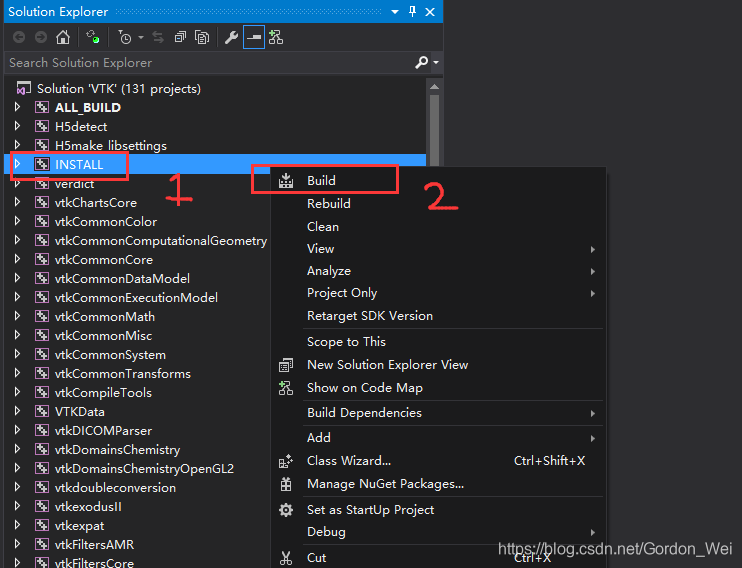
3.2 The default attribute is debug x64, right-click ALL_BUILD and select Build for compilation. It is better not to operate the computer during the Build period. After completion, check whether the output is all successful.
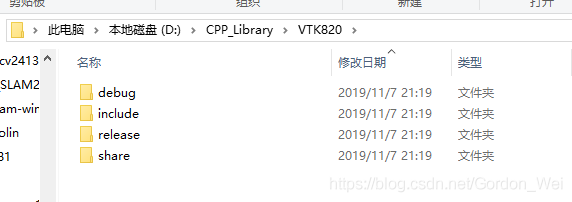
3.3 Copy the include, bin, lib, and share files from the vtk-8.2.0-prefix files to your own VTK library folder. For example: Create a new VTK820 folder with Debug and Release, because include and share files are shared by debug and release versions, put include and share folders in VTK820, and copy the generated bin and lib files to the corresponding folders. For example, the bin and lib files generated by vtk-8.2.0-prefix under debug environment are placed in the Debug folder of VTK820.
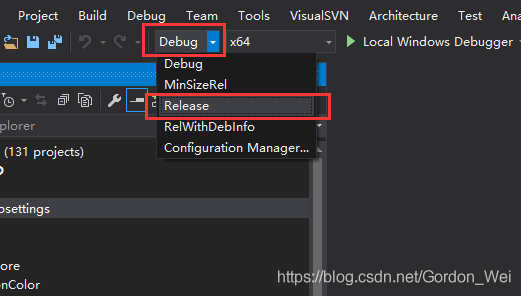
3.4 After changing Debug to Release in VS2015, repeat the operation of 3.2 to generate the Release version of VTK library (note: the bin and lib generated under vtk-8.2.0-prefix will be overwritten and copied ahead of time). Save the library files to the Release as described in 3.3
4. Use of VTK
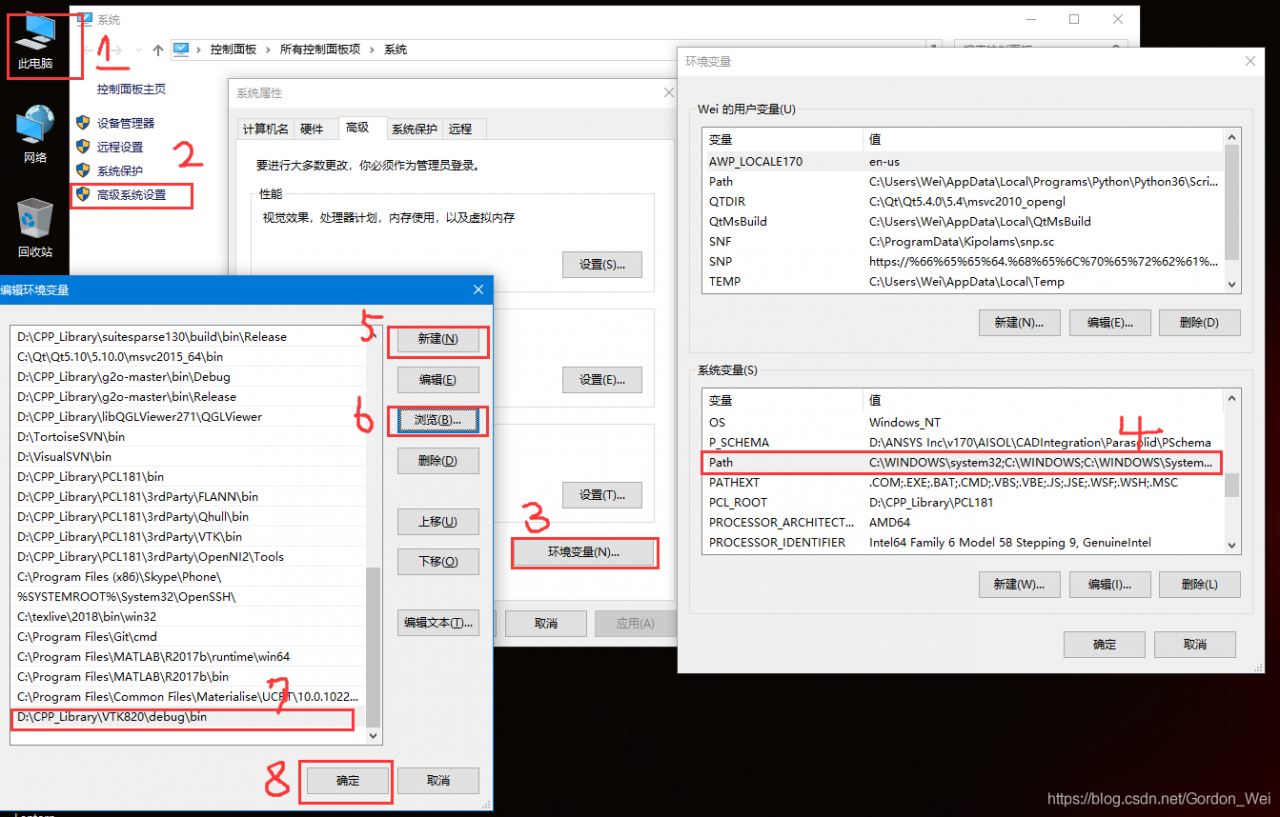
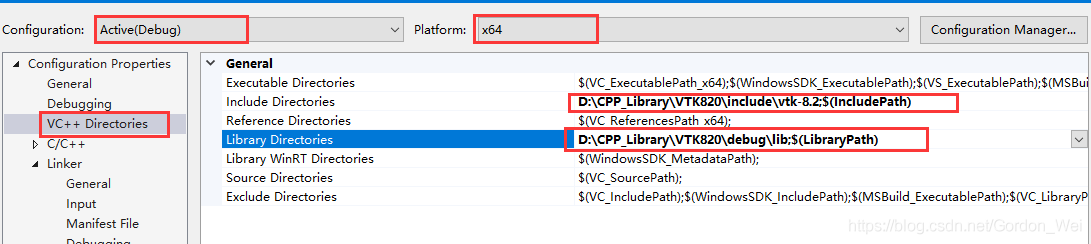
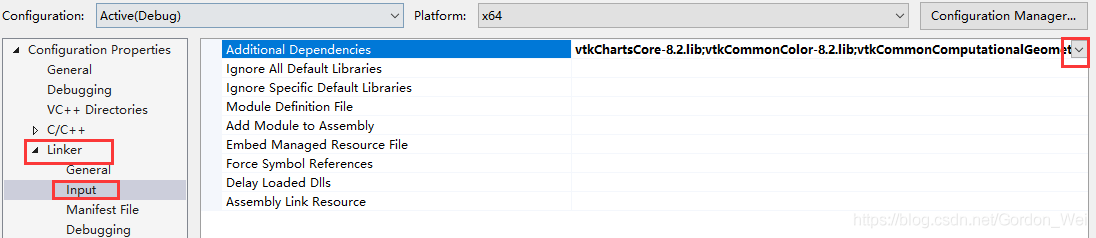
Configure the VTK library, including (1) add the environment variable VTK820 bin folder directory (debug and release used to fill which is OK) (after configuration need to restart VS or restart the computer), create a new console application (2) modify the project properties contain directory and lib library directory, (3) and use the lib file name to Link->; Iput-> Additional Dependencies (there is a method to get all the lib names, create a new.txt file under the lib file, and type dir /b *.lib>;
ah
a>
Read More:
- VTK + QT + vs compilation and installation configuration
- Vtk8.2.0 (32bit + 64bit) compilation and installation test (win10 + vs2017 + Qt5)
- Solutions to several VTK compilation errors (vtk5.8 + VS2010)
- Vtk8.0 compilation process record under vs2017 and qt5.12.1
- Configuration, compilation and installation of vtk8.1 in qt5.9
- OpenGL class library and environment configuration under win10 and vs2015
- Vtk7. X is compiled and installed under vs2013 and vs2015
- Vs2015 + PCL. 1.8.1 (win10) environment configuration
- Configuration of OpenGL development environment under Windows environment, win10 + vs2019 + glfw + glad
- Opencv perfect configuration strategy 2015 (win7 + opencv 2.4.9 + vs 2013)
- PCL environment configuration (pcl1.8.1, vs2017, win10)
- OpenGL environment configuration under VS2010 / vs2012 / vs2015
- Vs2017 compiles pcl1.8.1 with vtk8.0 and uses qt5.9.5
- Vs2012 compiling PCL dependency library vtk7.0
- Summary of problems encountered in compiling and installing vtk7 + vs2013 / 2015 + cmake
- Some errors in VTK compilation
- Configuring OpenGL development environment in win10 + vs2015 (including the method of installing 32-bit and 64 bit libraries)
- Construction of vs2015 OpenGL configuration environment
- Vs configuration of OpenGL development environment: configuration of glfw library and glad Library
- OpenGL Programming Guide 8th Edition 9th Edition vs2015 vs2017 configuration method