To do a good job, a worker must first sharpen his tools
First of all, we need to prepare the required documents, which are as follows:
(1) cmake, download link cmake download. As for what CMAKE is, I will not introduce it, so a book, want to say it is hard to say. If you look at the suffix,.msi and.zip, you may wonder “what’s the difference?” In my opinion, zip is more convenient than msi.
(2) VTK file, divided into Source file and Data file. Download link VTK download link. Click the download link and you will see the picture.
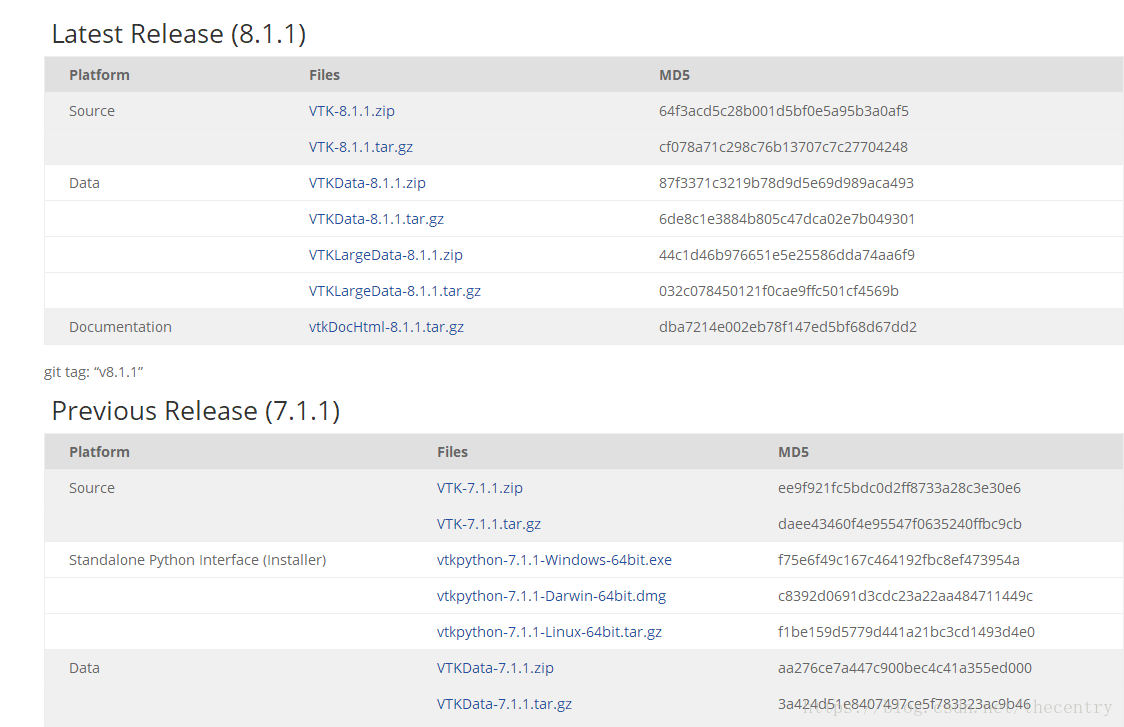
Download zip files for source and zip files for data. Since I’m using VS here, I don’t need to download Python.
After downloading, it is decompressed. I used to decompress the files extracted from Data into the files extracted from Source. I stressed that I decompressed them separately, that is, decompressed them into two folders.
Two, start compiling
(1) Create a new folder in the folder after source unzipped, habitually named build, this folder is used to put the project related files after cmake.
(2) Open cmake
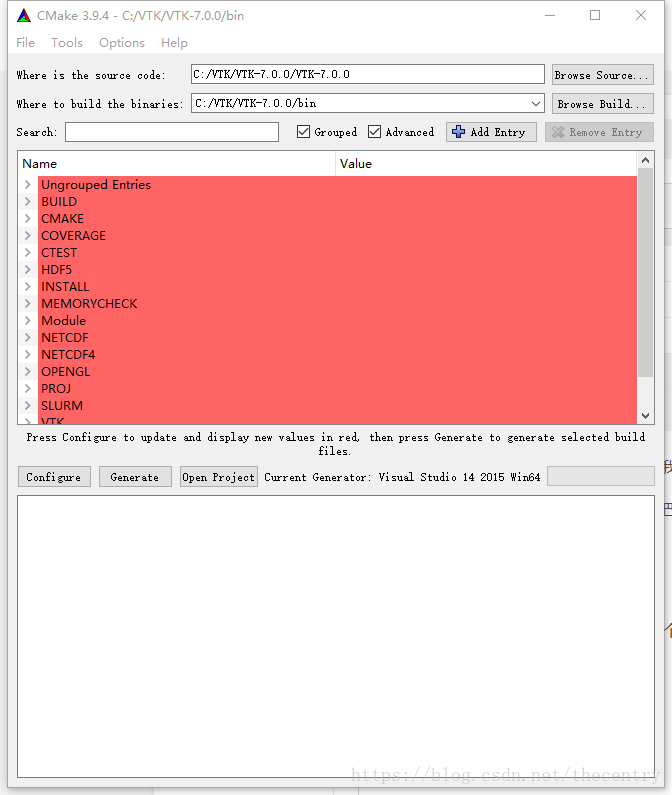
The source code bar is the path after unzips the source, and the build bar is the path of the project generated by CMAKE. The bin folder in the picture is not what I said above, so you can change the destination path to the build folder you created.
If you want to create a 64-bit VTK, you need to select the 64-bit VSXuan option. If you want to create a 64-bit VTK, you need to select the 64-bit VSXuan option
(3) Make the file options, the specific meaning of the options I will not say
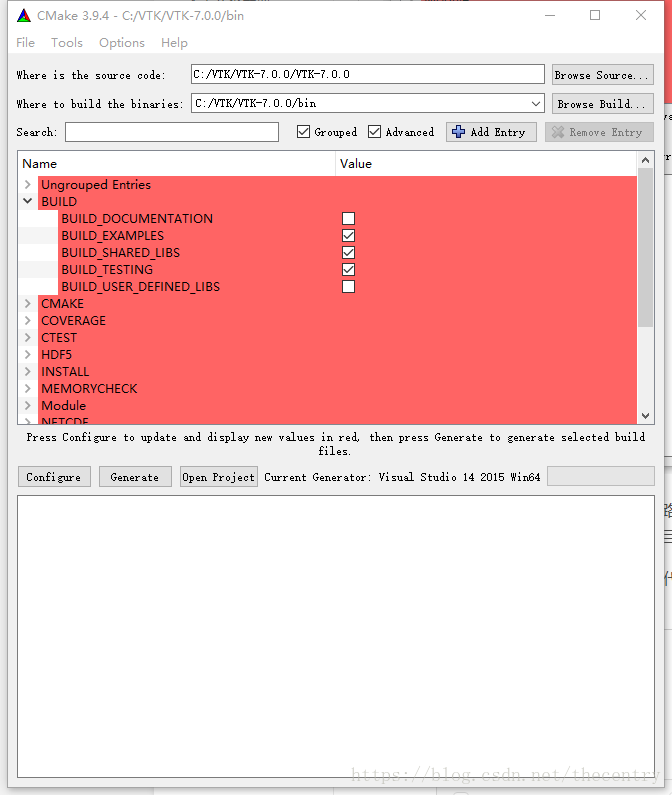
This is the item that should be checked in Build.
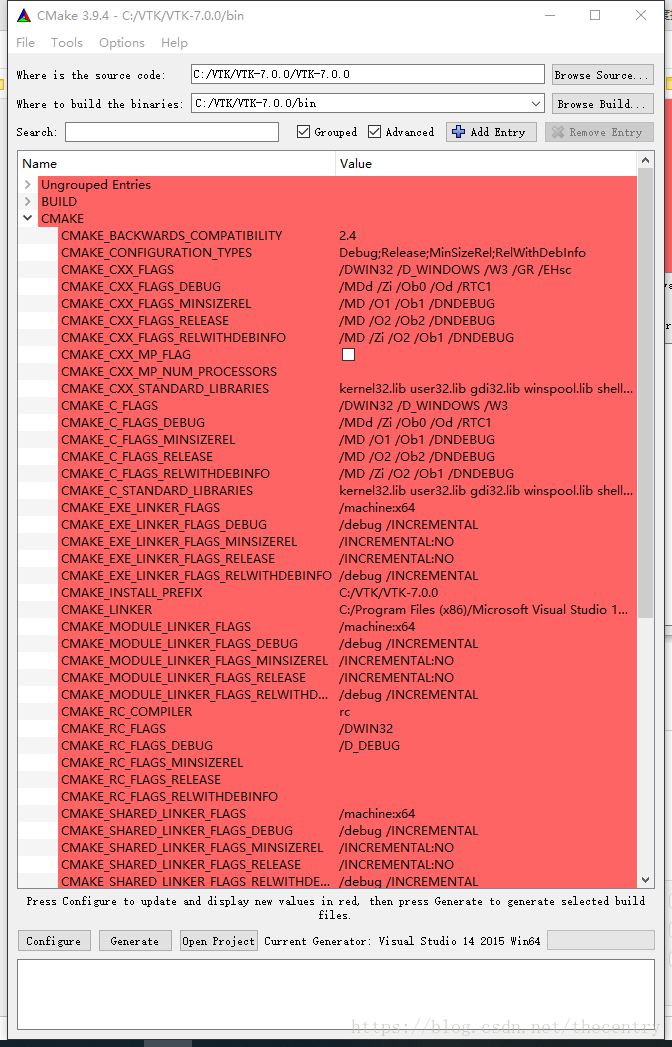
This is the cmake group, but watch out for CMAKE_INSTALL_PREFIX. This is a very important one. You’ll notice that most of the blogs don’t talk about it at the moment, but it will make it much easier to use VTK.
Then is the intall road strength configuration, as shown below:
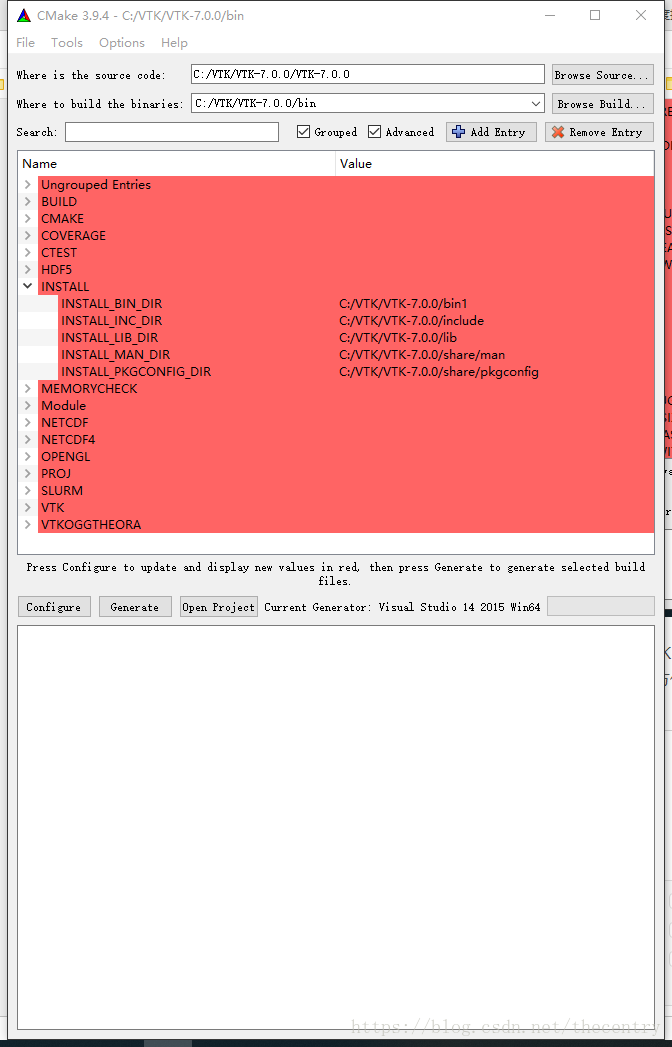
Represent the DLL path, the LIB path, and the VTK header path compiled with VS respectively. You need to set it up by yourself. In the future, you can use VTK just like OpenCV.
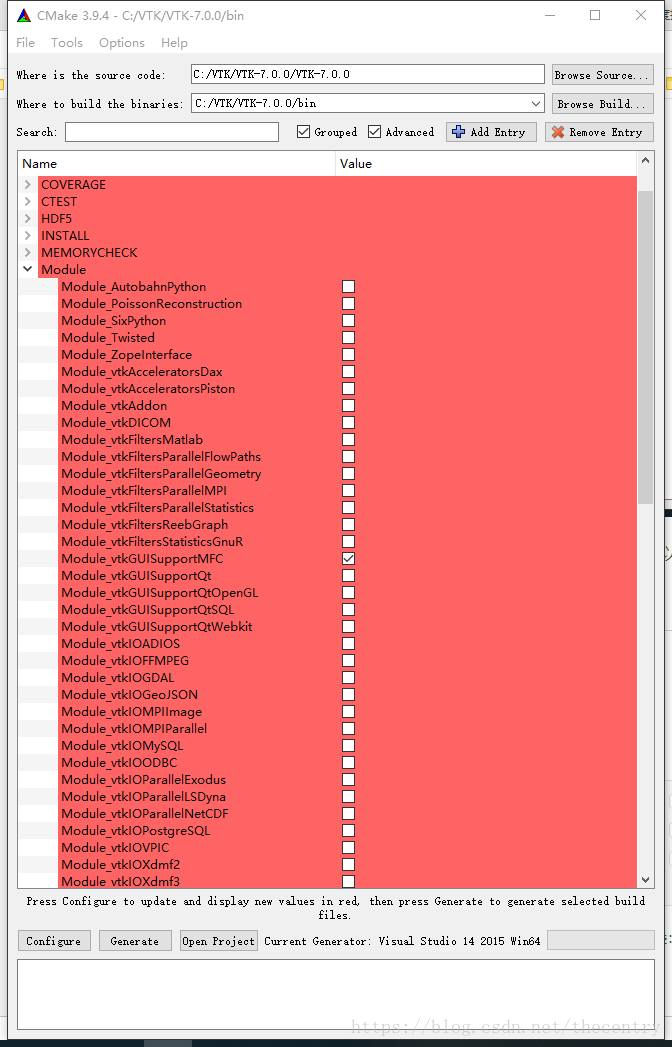
Because I’m using MFC, check the module_vtkguisupportMFC in the Module. Other options seem to be the default.
(4) Click the Configure button, and when the red color turns to white, click the Generate button to Generate the project.
Note: If there is an error when cmake is checked, it may be because the VS installation path has Chinese. Therefore, it is specially reminded that the installation path in Chinese should not appear.
(5) Finally, click Open ProJeroject to open the generated project in VS. As shown in figure:
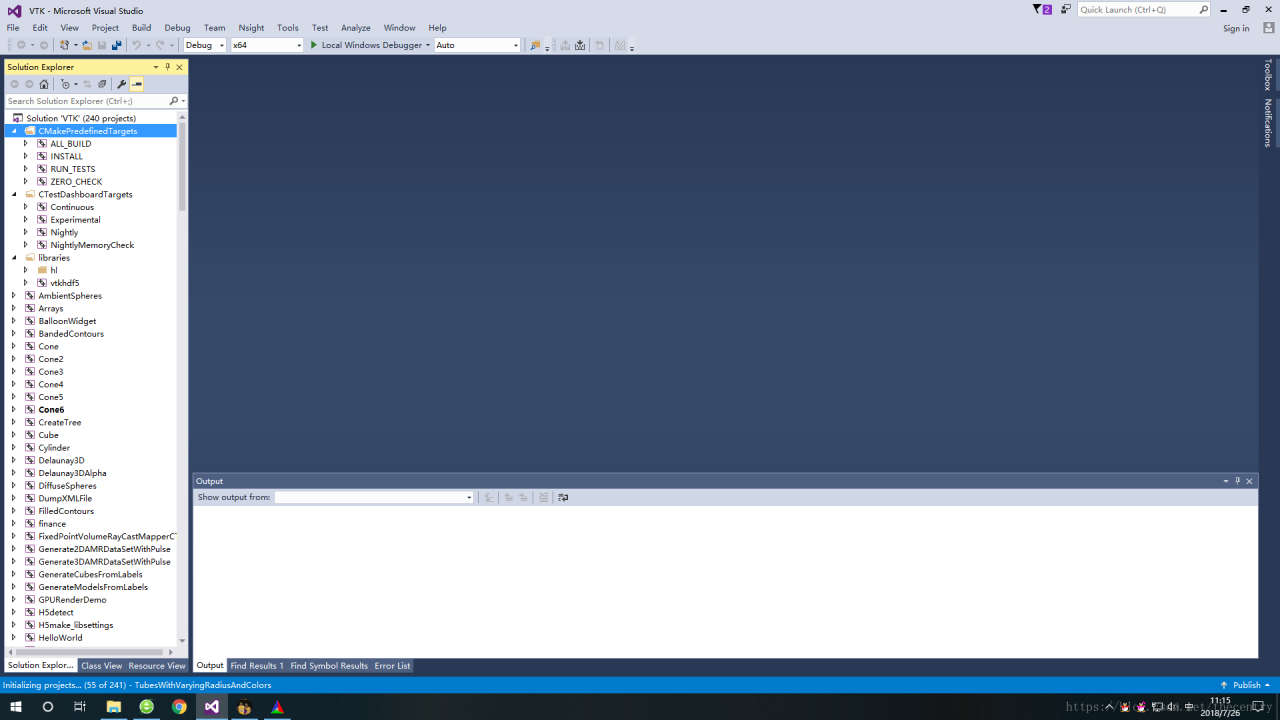
Compile all_build, only install if successful.
While I’m using VS2015, other VSs do the same, I need to remind you that there is one more step you need to take before VS2013 is compiled, and that is to install multiple character sets.

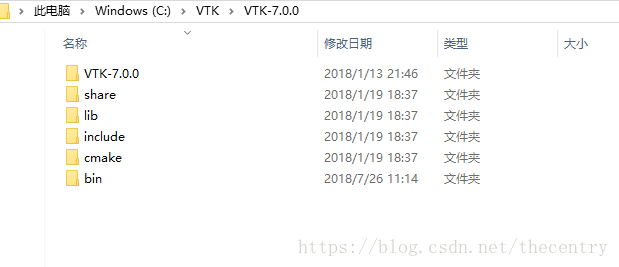
The result after successful compilation is shown in the figure below:
As for the use, and you are familiar with the use of OpenCV is the same.
Because everyone’s level is different, I don’t know if it’s clear or not. If there is a lack of documents, or what questions can be left in the blog question, we discuss together.
And finally, the aforementioned book:
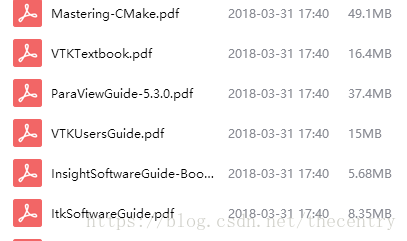
These are books about learning VTK, ITK, and CMAKE. Please leave a comment below if you need any.
First of all, we need to prepare the required documents, which are as follows:
(1) cmake, download link cmake download. As for what CMAKE is, I will not introduce it, so a book, want to say it is hard to say. If you look at the suffix,.msi and.zip, you may wonder “what’s the difference?” In my opinion, zip is more convenient than msi.
(2) VTK file, divided into Source file and Data file. Download link VTK download link. Click the download link and you will see the picture.
Download zip files for source and zip files for data. Since I’m using VS here, I don’t need to download Python.
After downloading, it is decompressed. I used to decompress the files extracted from Data into the files extracted from Source. I stressed that I decompressed them separately, that is, decompressed them into two folders.
Two, start compiling
(1) Create a new folder in the folder after source unzipped, habitually named build, this folder is used to put the project related files after cmake.
(2) Open cmake
The source code bar is the path after unzips the source, and the build bar is the path of the project generated by CMAKE. The bin folder in the picture is not what I said above, so you can change the destination path to the build folder you created.
If you want to create a 64-bit VTK, you need to select the 64-bit VSXuan option. If you want to create a 64-bit VTK, you need to select the 64-bit VSXuan option
(3) Make the file options, the specific meaning of the options I will not say
This is the item that should be checked in Build.
This is the cmake group, but watch out for CMAKE_INSTALL_PREFIX. This is a very important one. You’ll notice that most of the blogs don’t talk about it at the moment, but it will make it much easier to use VTK.
Then is the intall road strength configuration, as shown below:
Represent the DLL path, the LIB path, and the VTK header path compiled with VS respectively. You need to set it up by yourself. In the future, you can use VTK just like OpenCV.
Because I’m using MFC, check the module_vtkguisupportMFC in the Module. Other options seem to be the default.
(4) Click the Configure button, and when the red color turns to white, click the Generate button to Generate the project.
Note: If there is an error when cmake is checked, it may be because the VS installation path has Chinese. Therefore, it is specially reminded that the installation path in Chinese should not appear.
(5) Finally, click Open ProJeroject to open the generated project in VS. As shown in figure:
Compile all_build, only install if successful.
While I’m using VS2015, other VSs do the same, I need to remind you that there is one more step you need to take before VS2013 is compiled, and that is to install multiple character sets.
The result after successful compilation is shown in the figure below:
As for the use, and you are familiar with the use of OpenCV is the same.
Because everyone’s level is different, I don’t know if it’s clear or not. If there is a lack of documents, or what questions can be left in the blog question, we discuss together.
And finally, the aforementioned book:
These are books about learning VTK, ITK, and CMAKE. Please leave a comment below if you need any.
Read More:
- After vs2019 is installed, the original vs2017 project cannot compile various error reports
- [VTK] vtk8.2.0 + vs2015 + win10 compilation and configuration
- Vs2017 compiles pcl1.8.1 with vtk8.0 and uses qt5.9.5
- Vs2012 compiling PCL dependency library vtk7.0
- Vtk8.0 compilation process record under vs2017 and qt5.12.1
- Solutions to several VTK compilation errors (vtk5.8 + VS2010)
- OpenGL environment configuration under VS2010 / vs2012 / vs2015
- VTK + QT + vs compilation and installation configuration
- Summary of problems encountered in compiling and installing vtk7 + vs2013 / 2015 + cmake
- Common compatibility problems of VS2010 to vs2017 projects
- Vtk8.2.0 (32bit + 64bit) compilation and installation test (win10 + vs2017 + Qt5)
- Vs2015 64 bit vtk7.1 error handling
- Vs compile VTK, only generate install error, stop, ask God how to solve?
- [pit filling] problem summary of upgrading VS2010 project to vs2017
- Vs + QT reports an error “vs cannot open the source file qchartview”
- OpenGL Programming Guide 8th Edition 9th Edition vs2015 vs2017 configuration method
- When opencv is used, vs is stuck and other software works normally
- For opencv3.0 and vs2015, msvcr120d.dll is missing
- Solve the problem that the newly installed CodeBlocks cannot be compiled and run
- After the vs2013 + OpenGL environment is set up, there is an error in running the first program