Category Archives: How to Fix

The method of using Allegro to export package and pad from BRD file

1. Open a BRD File and click File — & GT; The Export – & gt; Libraries, as shown below.

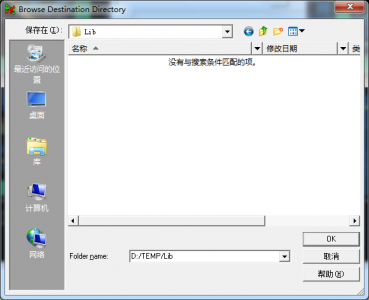
3. In the popup dialog, click “…” Select the directory you want to save, save here under D:TempLib.

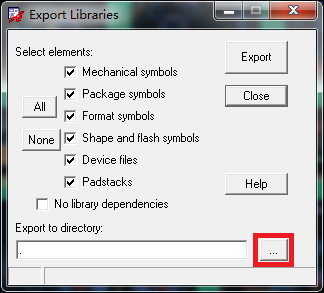
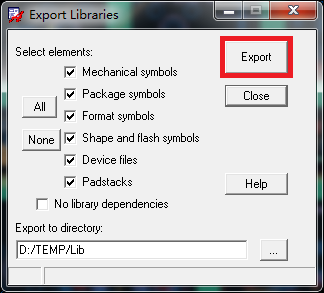
4. Click OK to return to the previous interface and click Export to Export the information selected by default to the directory D:TempLib.

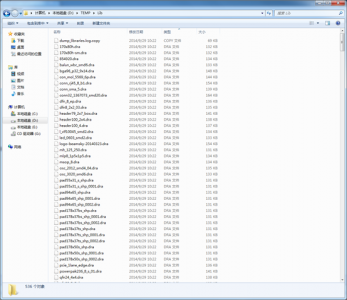
5. Check D:TempLib directory, found that many files have been exported, as shown in the figure below.

6. However, it is important to note that the devices here are not working properly at this time, and I am sure many readers will encounter problems here.
Because by default, Allegro checks to see if the pad file used for encapsulation exists in the directory specified by the environment variable. For example, on my computer, the PAD path is set to D:LibraryAllegro.
If the weld inventory used in the encapsulation is in D:LibraryAllegro, the export operation in Step 4 does not export the solder disk. For example, a wrapper file uses both Pad10x20 and Pad20x10. Pad10x20 exists in D:LibraryAllegro and is not exported. Pad20x10 does not exist in D:LibraryAllegro will be exported.
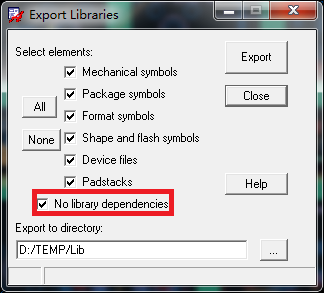
7. Then the key question comes, how to export all the pads?Go back to Step 4, and check “No Libraries Dependencies”, which means “not dependent on library files”. Click Export again, and you will see many more files in the directory D:TempLib. Pad.

At this point, Allegro’s PSM and PAD directories are pointed to D:TempLib, and the packaging here can be used normally.

Multi environment configuration of springboot under docker

1. Dockerfile build file defines parameters

FROM java:8
VOLUME ["/home/pdsstm/uploads/pdsfile"]
COPY pds-stm-management.jar /home/pds-stm/jar/pds-stm-management.jar
ENV CE=$CE
EXPOSE 31080
ENTRYPOINT [ "sh", "-c", "java  -Djava.security.egd=file:/dev/./urandom -jar /home/pds-stm/jar/pds-stm-management.jar --spring.profiles.active=$CE" ]

Define variable CE
2. Go to the folder to build the image

docker build -t pds-stm .

3. Run the image with parameters

docker run -d -p 38082:31080 --name pds-stm -e CE="test" -v /home/pds-stm/jar:/home/pds-stm/jar -v /home/pds-stm/logs:/logs  --restart=always pds-stm


gerrit error: missing Change-Id in commit message footer

Recently, the company warehouse changed from Gitlib to Gerrit, and you need to get the boss to review the submitted code before you can push it. This error occurred the first time it was used.
record, also convenient to check in the future:
Step1: copy this sentence to the terminal (on your own terminal)
gitdir=$(git rev-parse –git-dir); SCP – p – p 29418 102001111 @192.168.132.200: hooks/commit – MSG ${gitdir}/hooks/
step2: paste directly to the terminal (without modifications exit row)
the git commit – amend
step3: paste to the terminal (dev branch can be amended as required)
git push origin HEAD: refs/for/dev
Reference:
https://blog.csdn.net/weixin_33910385/article/details/92457771

Error! Failed to start nginx

The following error occurred when the blogger started the Nginx service

[root@localhost ~]# /usr/local/nginx/sbin/nginx 
nginx: [emerg] getpwnam("nginx") failed

The function of getPwnam in the error message is to get information about the user’s login
So you can see that getting “nginx” users failed
Query the user with id, and sure enough, it does not exist

[root@localhost ~]# id nginx
id: nginx: no such user

Once the user is added, it works

[root@localhost ~]# useradd -M -s /sbin/nologin nginx
[root@localhost ~]# /usr/local/nginx/sbin/nginx
[root@localhost ~]# netstat -anpt | grep nginx
tcp        0      0 10.0.0.100:80           0.0.0.0:*               LISTEN      3843/nginx: master  

Recall that the configuration for source code compilation and installation was as follows

./configure --prefix=/usr/local/nginx --user=nginx --group=nginx && make && make install 

At that time, the user group and user group of Nginx were set. In the absence of nginx users in the system, it could not be started naturally.

Solution to the problem of Chinese garbled in gradle console in idea

1. Background:

Mowday, Xiaoming received the task from his superior and needed to develop a Gradle project in IDEA. When writing the test case, the following error occurred


2. The environment is as follows:
The IDEA 2019.3 Gradle 5.2.1 Java 1.8.0 comes with
3. Try the following
In the IDEA menu File==> Settings==> Edit==> Various UTF-8 are set in File Encoding. No effect. 
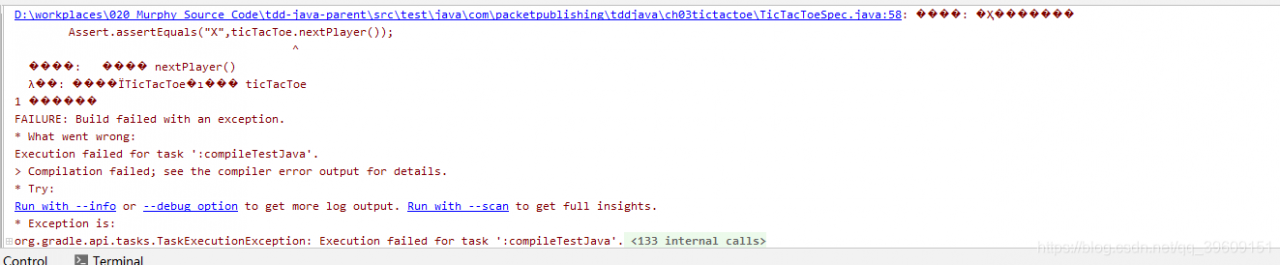
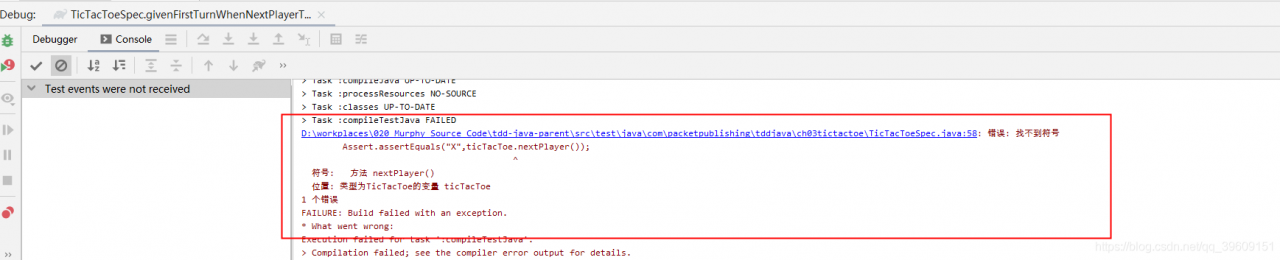
is also configured with UTF-8 in Gradle RunConfigurations. Still no effect of
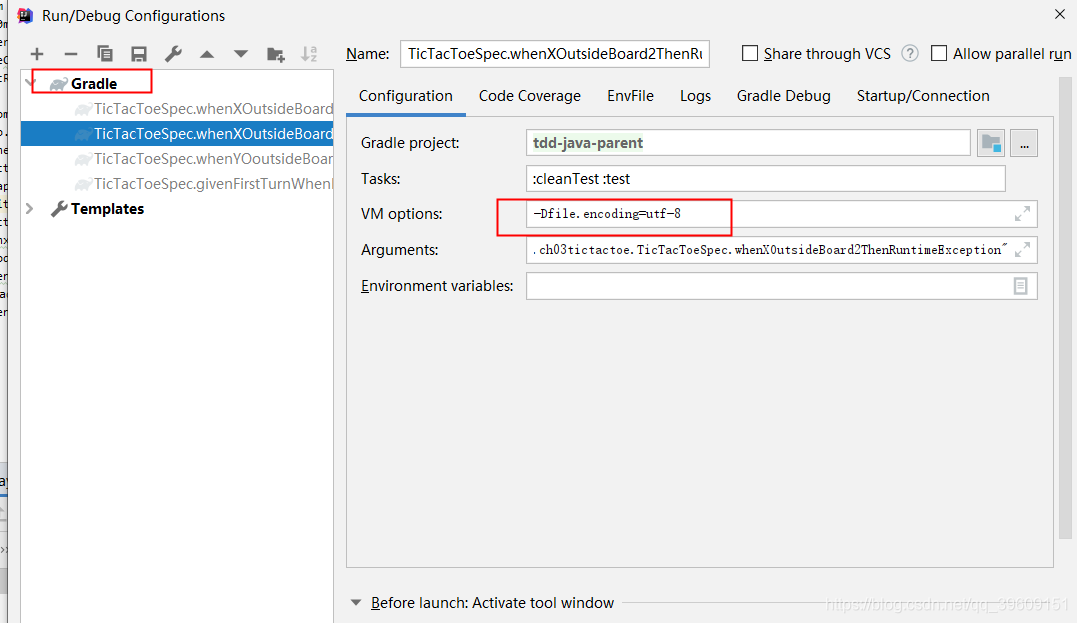
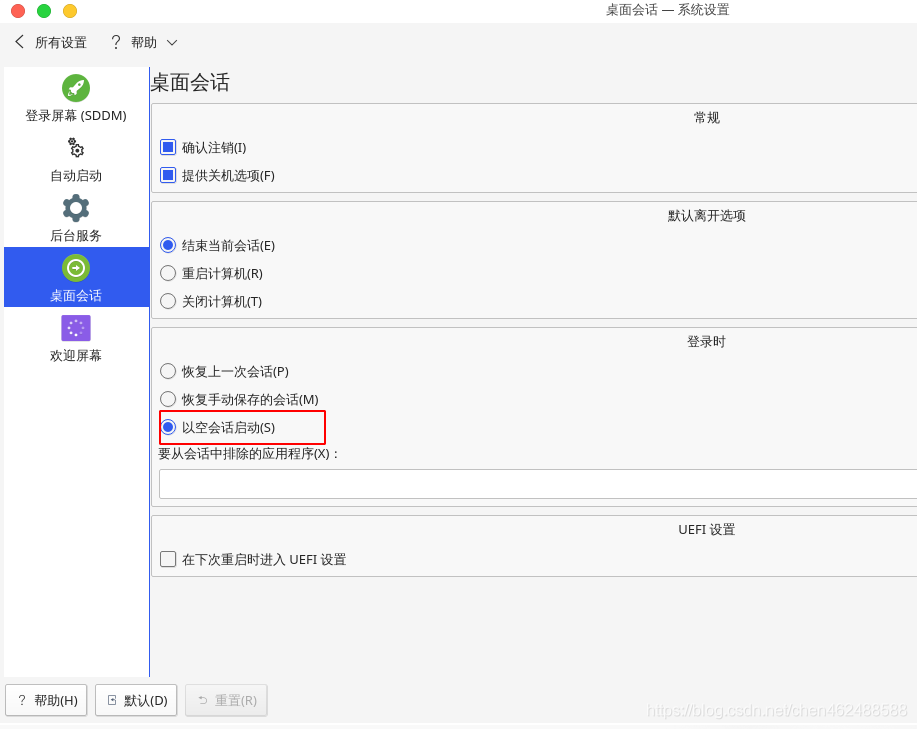
Gradle and Gradle. Bat both join set DEFAULT_JVM_OPTS=” -dfile.Encoding =UTF-8″. Still not encoding!!
4. Final solution
Edit Help | Edit Custom VM Options in IDEA, adding the following parameters

-Dfile.encoding=UTF-8


The effect is as follows, problem solved

 
conclusion
In the emergence of Chinese disorderly code problem. The first time I thought of the coding format.
A compilation error occurred during gradle execution. Chinese encoding and IDEA encoding are inconsistent. Therefore, ensuring consistent encoding of the encoding file and IDEA is the key to solving the problem.
In CUSTOMER VM option in IDEA, the file encoding can be customized as UTF-8.

Solve the problem of red wavy line in pychar when importing module written by oneself

Solve the problem of red wavy line in the module imported from Pycharm
A red wavy line appears in the module imported by myself in Pycharm, as shown in the figure below. However, it can operate normally. The main problem is the file directory, and the module simply imported by import cannot find the path.

if you don’t feel comfortable with the red wavy line, you can also choose to solve this problem. The next two steps will be completed.
step 1:
enter Settings, go to the Python Console under the Console, check the option “Add source roots to PYTHONPAT”, and then click OK
. Step 2:
right click on the Directory and select Mark Directory as in the popup menu bar, then continue to select Sources Root, and you will immediately see the red wavy line in the code has been automatically removed.

Gitpod cannot push to GitHub solution

Gitpod cannot push to Github’s solution
Gitpod introduction
Gitpod is an online IDE editor that allows you to quickly set up a programming environment without having to build your own. Gitpod can directly import the project on Github and start editing.
Github’s interface, extension and usage are the same as VSCode, which is a blessing for VSCode users.
official website: Gitpod
The solution

Manjaro shut down the auto recovery software

The problem
Using Manjaro+KDE desktop, there will be a default function to automatically restore the desktop, each boot will restore a lot of, browser, terminal, editor…… Users with OCD are not used to it.
The solution
Setup – boot and shutdown – desktop session, select start
with empty session

Conversion between list and string array

List is converted to a String array

 public static void main(String[] args) {
List<String> list=new ArrayList<String>();
list.add("1");
list.add("2");
System.out.println(list);
String[] strings =list.toArray(new String[list.size()]);
for (String s:strings
     ) {
    System.out.println(s);
}
}

String array converted to List

  public static void main(String[] args) {
    String[] a=new String[]{"1","2"};

        List list= Arrays.asList(a);
        System.out.println(list);
    }

ActiveMQ installation, deployment and running

The Windows version
Download The Windows version of ActiveMQ, unzip and run Activemq.bat. It’s similar in Linux.
http://activemq.apache.org/activemq-580-release.html
After running in the browser to http://127.0.0.1:8161/admin, can appear the following picture, user name and password: admin/admin
In ActiveMQ, the default 61616 is the service port 8161 as the administrative console port
After unzipping run

enter username and password admin/admin

Traversing the background data to generate tree structure

var getTree=function(treeData,parentId){
var treeArr=[];
for(var i=0; i< treeData.length; i++){
var node=treeData[i];
if(node.sjchannelcode==parentId ){
var newNode={order:node.order,code:node.channelcode,url:node.url,name:node.name,sjchannelcode:node.sjchannelcode,channelcode:getTree(treeData,node.channelcode)};
treeArr.push(newNode);
}
}
return treeArr;
}
// call tree method
var treeArr=getTree(data,sj);
data is the data returned from the background, sj root directory returned by the node parent id