Conda creates a virtual environment
1, what is a virtual environment
it is a virtualization, independent from computer hacked out of the environment. Commonly speaking, virtual environment is to use virtual machine Docker to independent part of the content, we call this part of independent things “container”, in this container, we can only install the dependent packages we need, each container is isolated from each other, do not affect each other.
2, why want to use a virtual environment
in the actual project development, we usually according to their own requirements to download all sorts of corresponding framework library, such as Scrapy, Beautiful Soup, etc., but may each project USES the framework of library is not the same, or using a framework version is different, so we need to according to the demand constantly update, or uninstall the corresponding libraries. Working directly with our Python environment can cause a lot of unnecessary hassle for our development environment and project, and can be quite confusing to manage. Like the following scene:
Scenario 1: Project A requires version 1.0 of A framework, and project B requires version 2.0 of the library. If the virtual environment is not installed, then when you use the two projects, you will have to uninstall back and forth, which can easily cause errors in your project.
Scenario 2: Your company’s previous projects need to run in Python 2.7, and your project needs to run in Python 3. If you do not use the virtual environment, you may not be able to use both projects at the same time. If you use Python 3, your company’s previous projects may not be able to run, and your new projects may have trouble running. If the virtual environment can configure different runtimes for the two projects, then both projects can run at the same time.
Second, conda common commands
in the Anaconda conda can be understood as a tool, is also an executable commands, its core function is package management and environmental management. Therefore, the virtual environment to create, delete and other operations need to use the conda command.
1. Create a virtual environment
conda create-n env_name numpy matplotlib python=2.7 # Conda create -n env_name numpy matplotlib python=2.7 #
2. Activate the virtual environment
Linux: source activate your_env_name
Windows: activate your_env_name
tivate root
p>n –version Check if the current Python version is the one you want.
3. Exit the virtual environment
Linux: Conda deactivate your_env_name
Windows: deactivate env_name
4. Remove the virtual environment
Conda remove-n your_env_name(virtual environment name) — ALL
Delete packages from virtual environment:
Conda remove –name $your_env_name $package_name
6. Share the environment
conda env export > environment.yml
7. Create the environment from the YML file
conda env create -f environment.yml
Conda install package_name
(4). Conda install package_name
(4). Conda install package_name
(4). Conda install package_name
(4).
(5). Conda update conda: Check to update the current conda.
(5)
Tag Archives: anaconda
Removeerror: ‘requests’ is a dependency of CONDA and cannot be removed from CONDA’s o
Preparing transaction: done
Verifying transaction: failed

RemoveError: 'requests' is a dependency of conda and cannot be removed from
conda's operating environment.
RemoveError: 'setuptools' is a dependency of conda and cannot be removed from
conda's operating environment.
The solution
run
conda update conda
portal
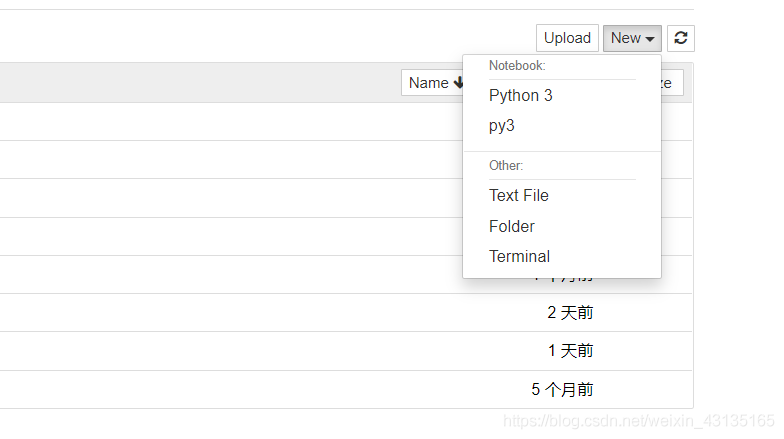
Setting up a virtual environment for jupyter notebook
After create the virtual environment, start jupyter can’t find the environment, the solution is as follows:
1. First activate the virtual environment
activate py3
2. Install ipykernel
conda install ipykernel
3. Create the kernel file
conda install -n py3 ipykernel
4. Write the environment into the Notebook kernel
python -m ipykernel install --user --name py3 --display-name "py3"
The first Py3 is the name of the virtual environment, and the second Py3 is the name displayed in the Jupyter.
The process of creating the virtual environment is really bumpy. I just encountered another problem. After creating a new Notebook, it keeps showing that it is connecting to the service. pip uninstall tornado
pip install tornado==5.0.0
Reference links
add conda jupyter environment jupyter notebook open file times wrong: the connection to backend service failed to build a…
CONDA 3090 install tenslow GPU report error importerror: libcublas.so .9.0: cannot open shared object file
ImporError: libcublas.so.9.0: Cannot open shared object file: No such file or directory
The complete installation of TensofLow2.x creates the environment to go into the environment and install the TensorFlow test environment
background
Graphics card 3090 GeForce RTX driver version 455.23.04 CUDA version 11.1
why
cudatoolkit/ code>> is not installed in the Conda environment, use the install command
conda install cudatoolkit
A complete installation of tensoflow2.x
Create an environment
conda create -n tensorflow-gpu python=3.8 cudatoolkit
Into the environment
conda activate tensorflow-gpu
Install tensorflow
pip install tensorflow -i https://pypi.tuna.tsinghua.edu.cn/simple
The test environment
import tensorflow as tf
tf.test.is_gpu_available()
Anaconda update error
No module named conda_package_handling. API: No module named conda_package_handling
After a while, Google decided to install Anaconda3 again
Just change the environment variables according to the following tutorial
https://blog.csdn.net/ychgyyn/article/details/82258136
After a while, Google decided to install Anaconda3 again
Just change the environment variables according to the following tutorial
https://blog.csdn.net/ychgyyn/article/details/82258136
CONDA install torch error
If you can’t find the corresponding version, you need to add another PyTorch source
conda config --add channels https://mirrors.tuna.tsinghua.edu.cn/anaconda/cloud/pytorch/
Conda toggle Tsinghua source complete command:
conda config --add channels https://mirrors.tuna.tsinghua.edu.cn/anaconda/pkgs/free/
conda config --add channels https://mirrors.tuna.tsinghua.edu.cn/anaconda/cloud/conda-forge
conda config --add channels https://mirrors.tuna.tsinghua.edu.cn/anaconda/cloud/msys2/
conda config --add channels https://mirrors.tuna.tsinghua.edu.cn/anaconda/cloud/pytorch/
conda config --set show_channel_urls yes
Package summary of installing python with CONDA
Install Python with Conda package summary ## title
If you want to find which package, go to the official website and download it directly to this directory (my directory location) 
CD C:\ProgramData\Anaconda3\Lib
\ ProgramData\Anaconda3\Lib
\
PIP install torchvision-0.1.8-py2.py3-none-any.whl
p install torchvision-0.1.8-py2.py3-none-any.whl
PIP install torchvision-0.1.8-py2.py3-none-any.whl
PIP install torchvision-0.1.8-py2.py3-none-any.whl . (here torchvision 0.1.8 – py2 py3 – none – any. WHL, is my at https://pypi.org/project/torchvision/0.1.8/#files to download python library)
this time in the CMD import torchvision went wrong, but in the anaconda in the prompt is correct. 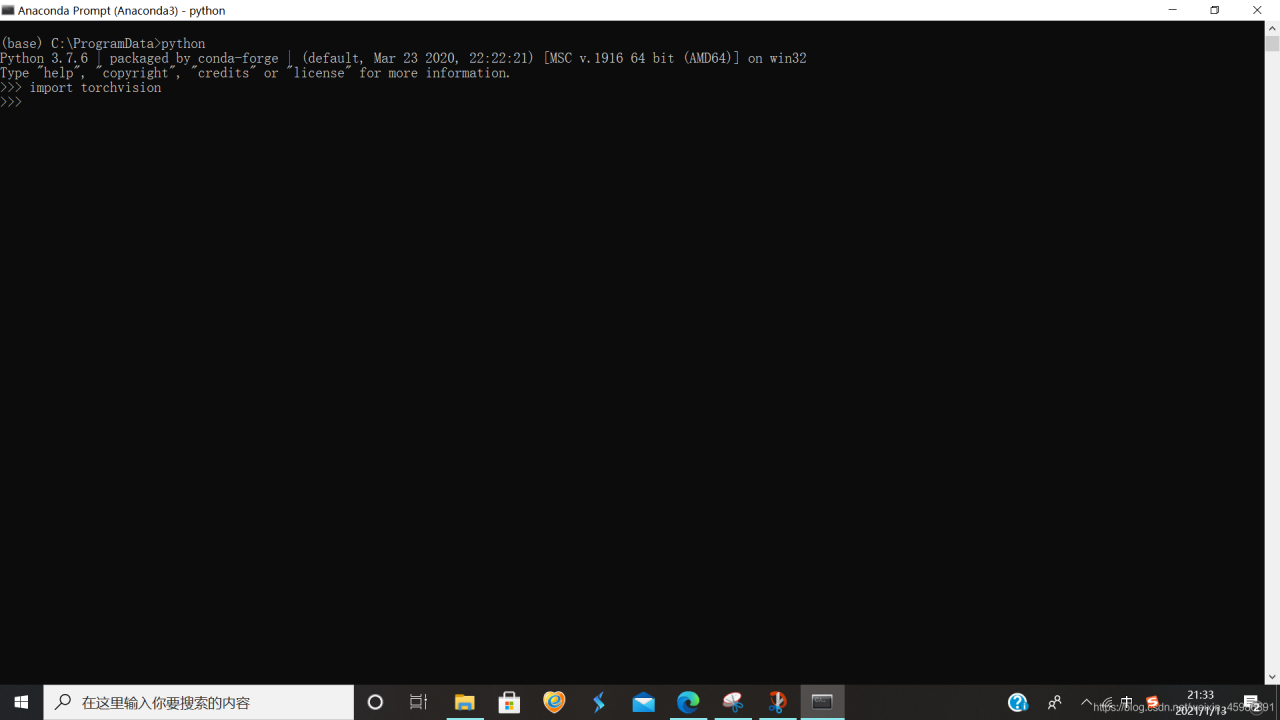
Everything will be all right!
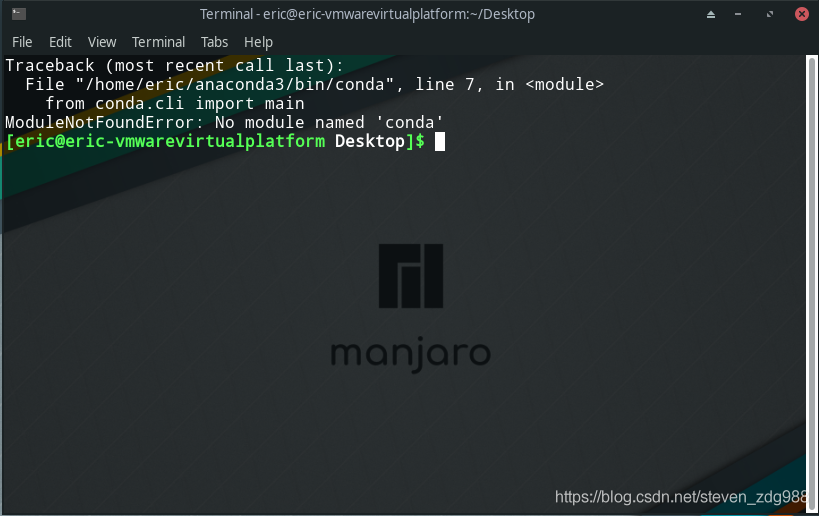
For the installation of anaconda3 in manjaro system, after the update (CONDA update — all), the terminal prompts an error and cannot execute CONDA related commands
Anaconda upgrade sklearn version
Project github address: bitcarmanlee easy-algorithm-interview-and practice
welcome to star, message, study and progress together
When you call model_selection for Sklearn, you find a module with no Model_selection in Sklearn. Upon inspection, the SkLearn version in Anaconda was found to be too low, at version 0.17. So sklearn started to upgrade.
1. View the original version
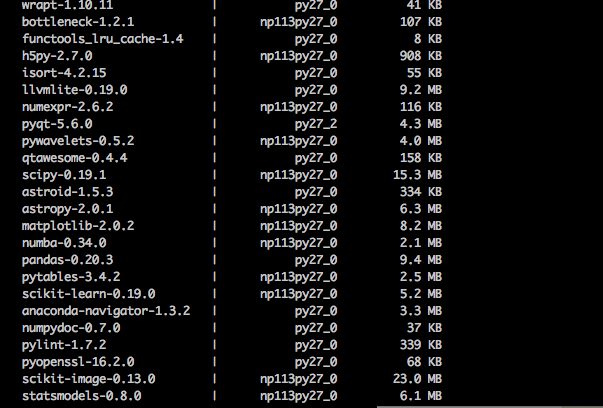
First use the conda list command to check the existing version:
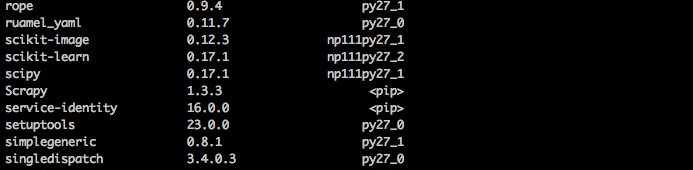
Sure enough, version 0.17.1 was too low, so it was time to upgrade.
2. Upgrade to the latest version
Use the conda update scikit-learn command to update the version of sklearn. Before you update, you will be prompted for what version to update to.
As you can see, the latest version is 0.19.0
Then confirm and start updating.
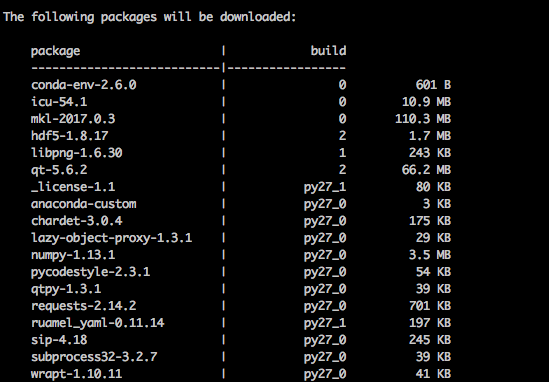
Due to the large number of packages that need to be updated this time, it will take quite a long time…
Once the update is complete, then use the Model_Selection package, and it’s OK to use 1
Incomplete and “the Jupiter” distribution was not found
After using PIP Uninstall or Conda Uninstall jupyter, it is common to find that a jupyter notebook has not been fully uninstalled because PIP uninstalls only some of its packages when it is uninstalled.
Complete unloading of jupyter can be used:
Complete unloading of jupyter can be used:
pip install pip-autoremove
pip-auto remove jupyter -y
Can delete complete jupyter
It actually deletes the following related libraries, and if there are libraries that other libraries depend on, you can manually uninstall those that are not needed.
pip uninstall jupyter
pip uninstall jupyter_core
pip uninstall jupyter-client
pip uninstall jupyter-console
pip uninstall notebook
pip uninstall qtconsole
pip uninstall nbconvert
pip uninstall nbformat
Pay attention to the PIP/PIP3 switch.
“The jupyter” distribution was not found, but on The command line type jupyter still exists, because there are several jupyter computers in The system. This problem seems to be relatively rare, and there are few discussions on CSDN /stack Overflow. I happened to encounter this error today and solved it, so I would like to share the solution here.
The crux of the matter is that it is possible to have multiple versions of jupyters installed in multiple Python/PIP environments, and when PIP Uninstall, only jupyters for this version are uninstalled. The version using piPs can be viewed with which PIP, and you can use which -a PIP to view all piPs installed on your machine.
Therefore, we can see all versions of jupyter with which -a jupyter and then corresponding to one by one uninstall. For the most part, the file paths for jupyter and PIP are the same, so it is enough to remove them with the PIP of that directory.
such as, suppose we see a jupyter path is /usr/local/bin/jupyter, we can use the following command to remove it:
/usr/local/bin/pip uninstall jupyterOf course you can ls the directory to see all jupyter related libraries, and then use the top of the manual unload way to remove one by one.
Of course it is possible that you have something like jupyter under Snap, if you see a jupyter that is something like /usr/bin/Snap under the directory.
for jupyter, snap remove jupyter can be uninstalled using snap remove jupyter.
Remove all versions of jupyter and a jupyter notebook and then use PIP Install to reinstall, with PIP Install-U PIP of course recommended to update the PIP before installation
Finally, the possible cause of this error is personal analysis under anaconda environment when installing jupyter, using Sudo APT install jupyter-core or Sudo Snap install jupyter. Use conda Install or PIP Install jupyter as far as possible for a jupyter installation.
Installing xgboost in anaconda is based on win10 32 / 64 bit system
Because the computer system is 32-bit, software that you want to press on 64 bits can be tricky. This article made a search on the net, think of Stack Overflow use https://stackoverflow.com/questions/35139108/how-to-install-xgboost-in-anaconda-python-windows-platform;
There are only three steps:
1. Anaconda is installed; That’s not a big deal
2. Enter anaconda Prompt; Anaconda Search-t Conda XgBoost enter; A big push of XgBoost is returned
3, select the appropriate XGBoost for your system; Anaconda/py-xgBoost; So enter Conda Install-c Anaconda XgBoost enter
4, ok!
Unable to call numpy in pychar, module notfounderror: no module named ‘numpy’
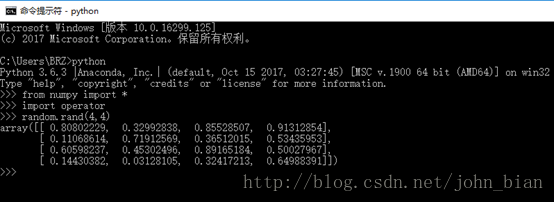
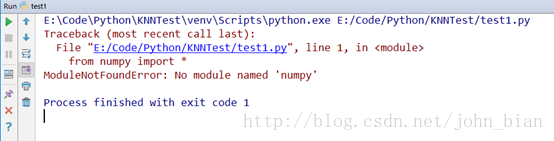
Python was installed before, and then Anaconda was installed because I was practicing using Python to write scientific calculations. However, after installing Anaconda, another problem occurred. When I wrote Python commands to call numpy on the command line, it could be used normally, but the call in PyCharm would report No module named ‘numpy’, that is, numpy could not be found, as shown below.
Numpy can be used normally on the command line:
However, numpy cannot be used properly in PyCharm:
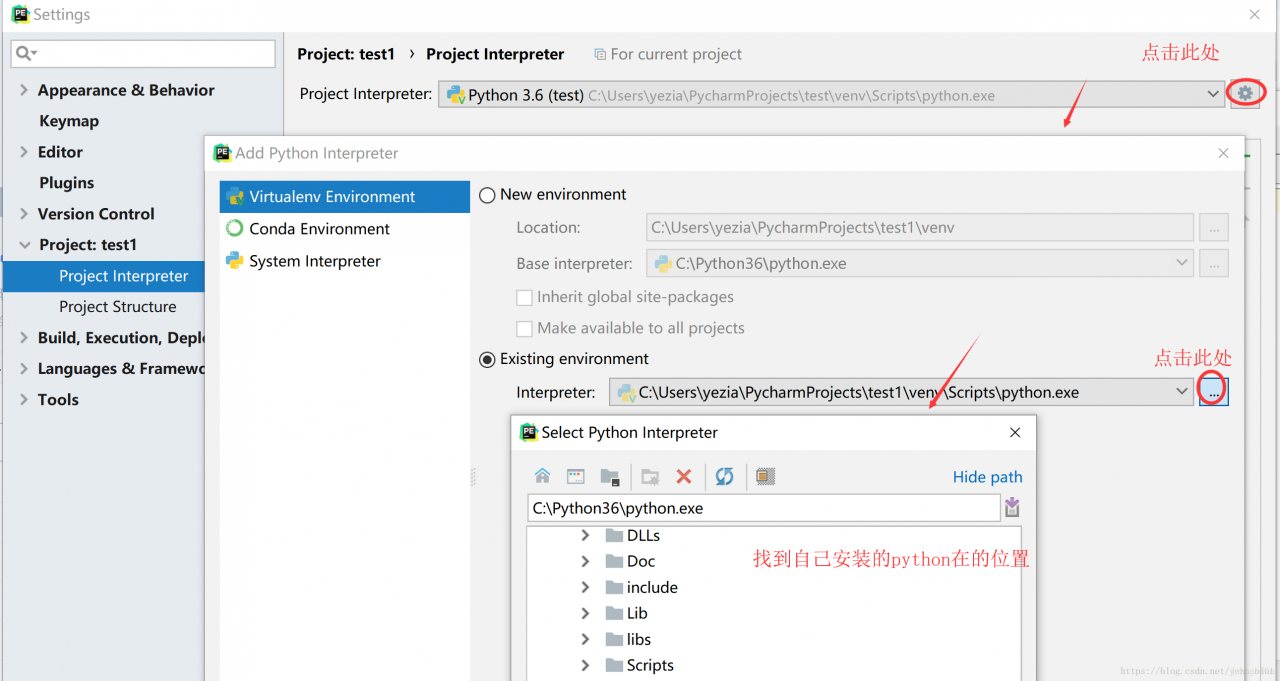
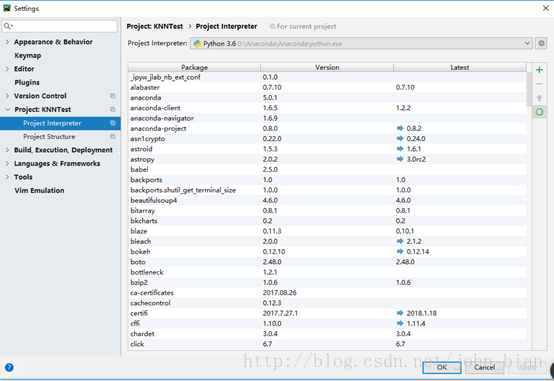
This problem occurs because the interpreter that Pycharm USES is not the installed Python 3.6, but comes with the Python.exe interpreter, and there are only two modules PIP and SetupTools, so that many third-party libraries cannot be used in Pycharm. Only the Settings on PyCharm (File-> settings-> Project: Current project name -& GT; Set Interpreter in the Project Interpreter. Set it to Anaconda, as shown in the figure below.
Then the program will run normally
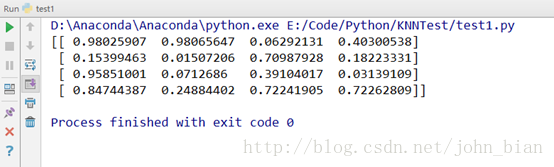
The experimental procedure for this example is as follows
Numpy can be used normally on the command line:
However, numpy cannot be used properly in PyCharm:
This problem occurs because the interpreter that Pycharm USES is not the installed Python 3.6, but comes with the Python.exe interpreter, and there are only two modules PIP and SetupTools, so that many third-party libraries cannot be used in Pycharm. Only the Settings on PyCharm (File-> settings-> Project: Current project name -& GT; Set Interpreter in the Project Interpreter. Set it to Anaconda, as shown in the figure below.
Then the program will run normally
The experimental procedure for this example is as follows
from numpy import *
import operator

a = random.rand(4,4)
print(a)