1. Similar to: use _CRT_SECURE_NO_WARNINGS
http://www.cnblogs.com/douzi2/p/3974959.html
http://www.cnblogs.com/douzi2/p/3974959.html
On March 7, 2017, Microsoft released the 20th official version of Visual Studio — VS2017. I also can’t wait, the first time to download and install the community version, after all, this is the first IDE in the universe ah, on the VS2017 relative to the VS2015 improvement overview, please move to open source China, here to say that I as C++ installation and use experience.
Install the feeling
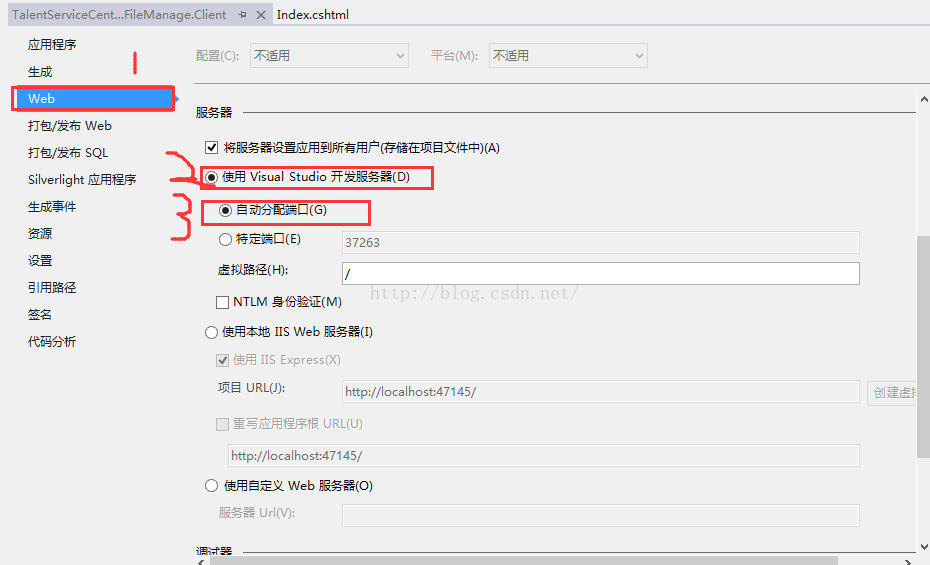
Installation interface for personal depth customization
About the installer
VS2017 has a new installation logic and steps, I use the way of network installation. VS2017 uses a separate installer to download and install VS components. The first installer downloaded from the official website is very small, with a space footprint of only 0.99M. (This is a real thing, the MS VS team must know that I have poor C disk space!) .
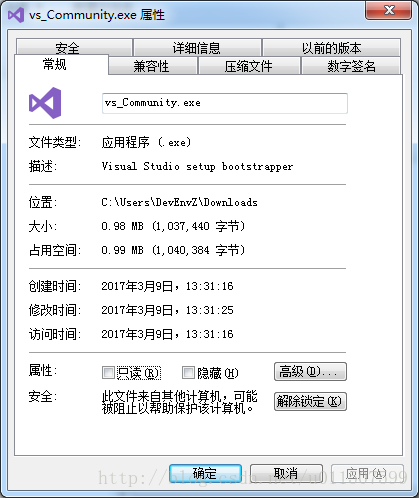
but this is not the real installer, real installer is needed by this small program to download and install, and then you can use. Installer volume……
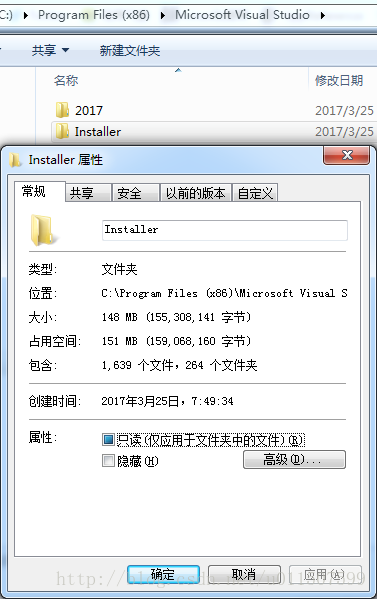
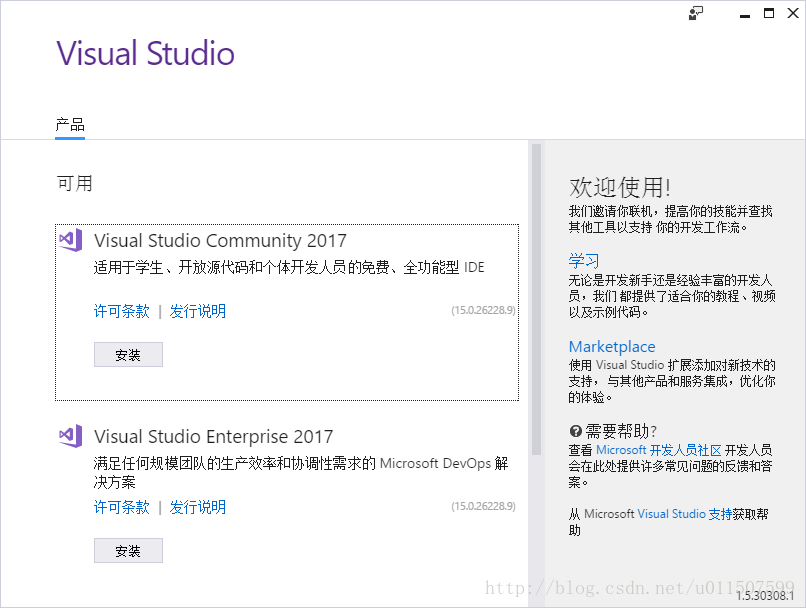
wnload quickly, after the completion of the installation will automatically install the system under the C disk, and open the VS2017 installation version selection interface, I installed the VS2017 community version, enough to use, the focus is personal use does not spend money on the legal version.
Modular customization
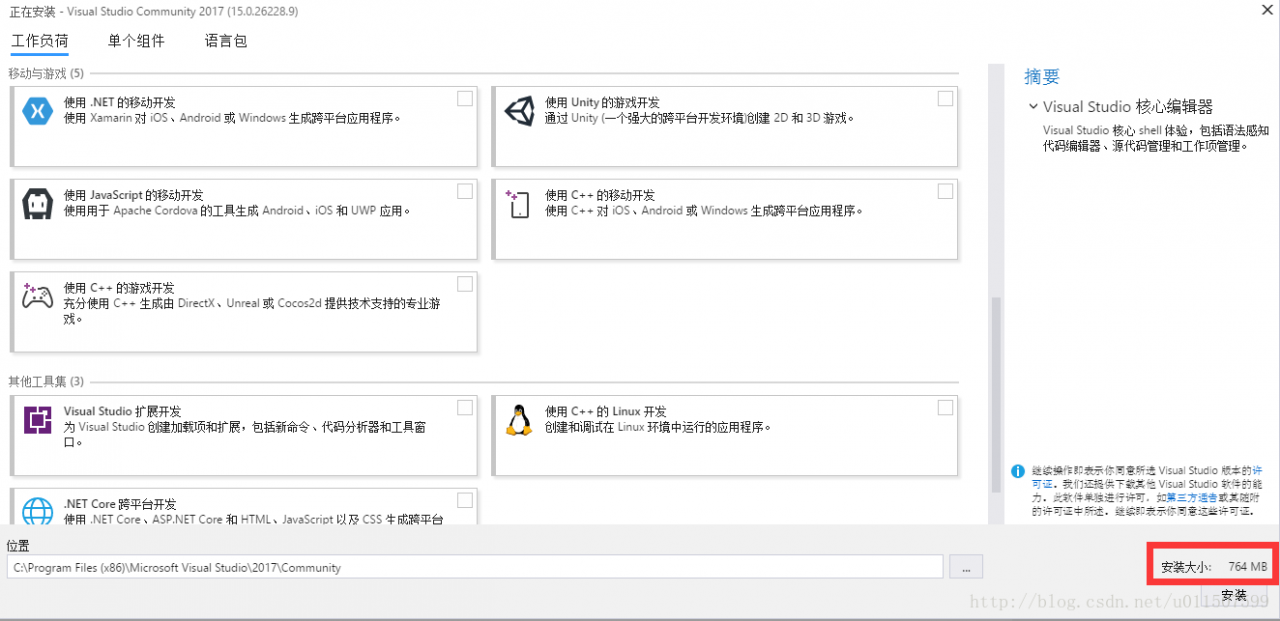
Choose a good version, load for a while will enter the VS2017 module selection interface, the overall feeling is very refreshing, customization is very simple, you can choose a large module, such as.NET desktop development, or C++ development, or Windows development and so on, see the picture by yourself… . (I haven’t chosen any here, only the core editor, which takes up only 764MB of space! Heaven and earth conscience! ╮ (╯ del ╰) ╭)
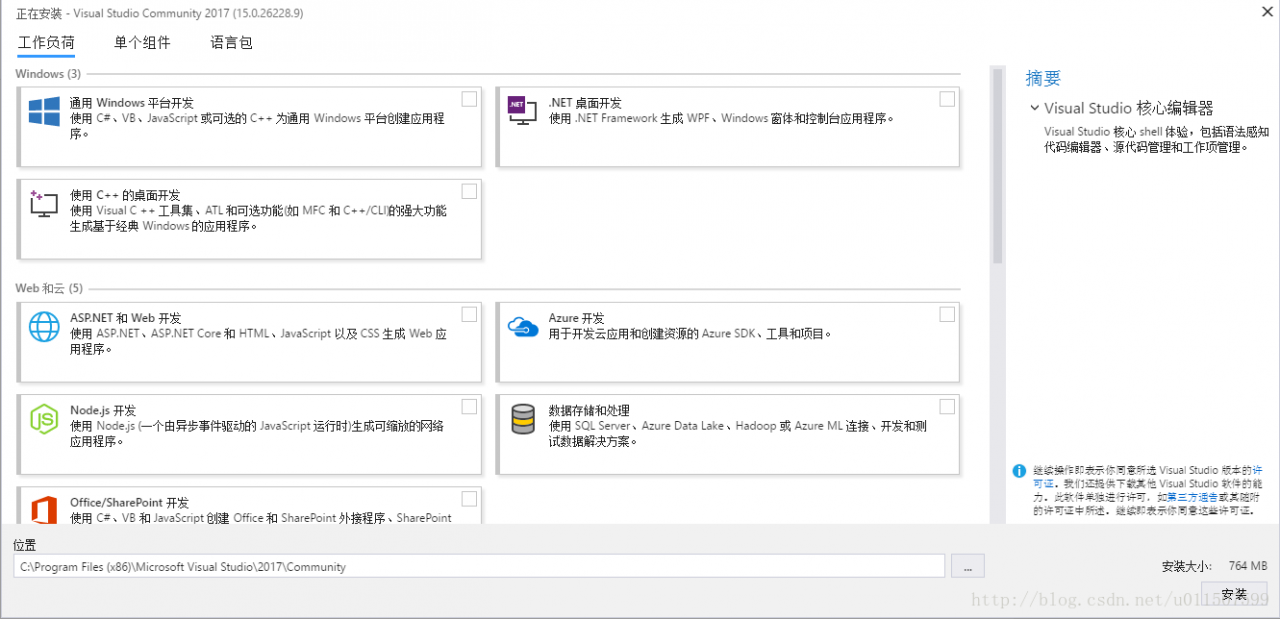
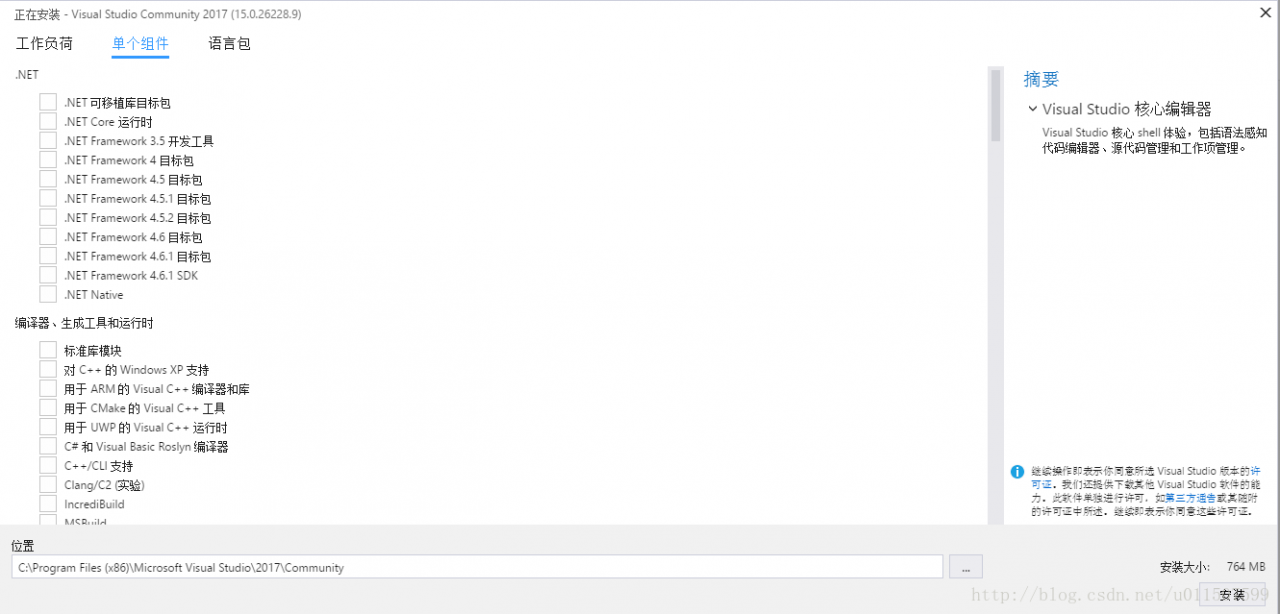
in choosing a good big modules, also can undertake the choice of a single component, it is important to note that between components are interdependent, and some of the dependence between components is mandatory, some of it is not mandatory, for C disk will be lost comrades, Suggestions can seriously customization, unnecessary, or can be configured after installation, don’t need to use the installer installed, like a Win10 SDK is likely to be the hard disk C; For cross-platform development using VS, such as Android development, develop the required suite (JDK, NDK, SDK, Ant…) Basic can be installed after VS to configure, after all, it takes time to download, and the general VS installation path will be placed in the default C disk, so the VS components you choose will be installed C disk by default!
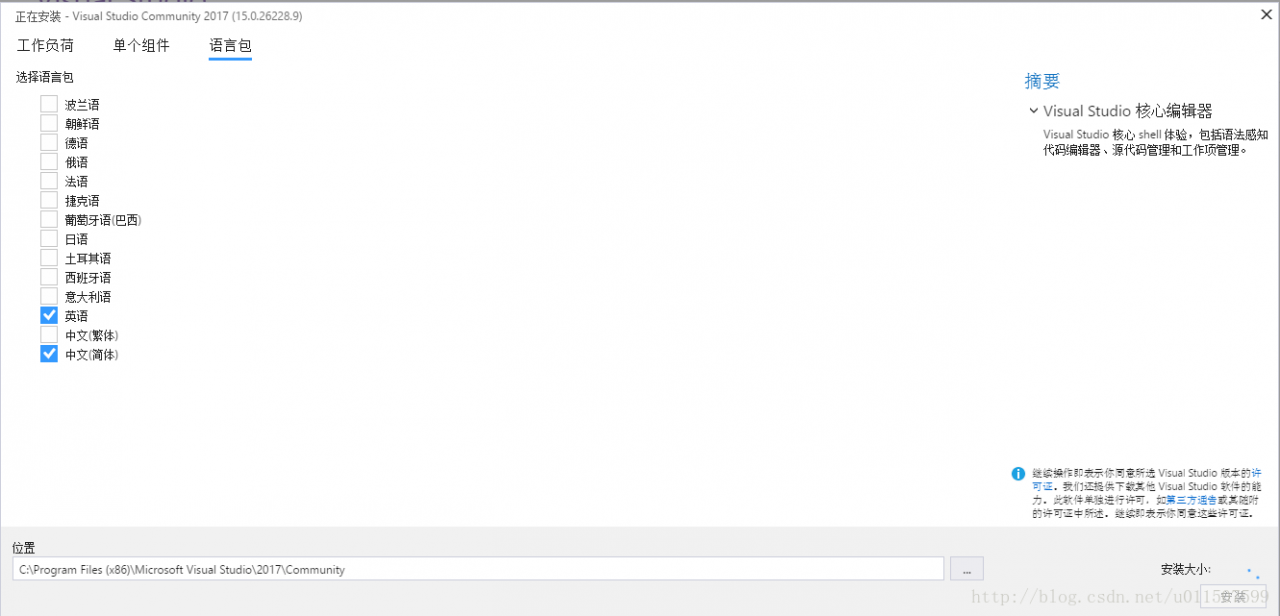
the installer can be directly the optional language pack, it’s a fine details of the changes, I personally before I hope I can a installation on English language and Chinese language pack, every time is to the other from the website to download the language pack, feel quite troublesome.
ah
1. Under VS2017, the header file you need to include is <<; gl/glut.h>
GL/glut.h>
=
=
=
=
=
=
=
pch.h> Header files, to run a successful
and it will be included in the front, in & lt; gl/glut.h> PCH is a file that is automatically generated by the compiler when you create the project, called a precompiled file. Open PCH.H, and PCH.CPP, and find that there is nothing substantial in it.
for some references below:
(copyright statement: this article original articles for bloggers, follow BY CC 4.0 – SA the copyright agreement, please attach the original source links and reprinted in this statement.
the article links: https://blog.csdn.net/qq_37866732/article/details/83894909 is the beginning of your code without # include “PCH. H” the precompiled header.
H This header file can be put into your.h header file, and having #ifndef, #define, and #endif is to prevent you from linking to a certain header file again.
#ifndef PCH_H
#define PCH_H
// TODO: Add the header to precompile here
#endif //PCH_H
#endif //PCH_H
#endif //PCH_H
Attributes – & gt; Configure properties –>; C/C + + – & gt; Precompiled header –>; To the right of the precompiled header, select not to use the precompiled header and press OK. You can add pch.h without any errors.
)
VS as the first editor of the universe, especially after the release of 2017 should attract countless programmers to use, but the VS2017 start speed is slow, so specially studied the VS2017 to accelerate the start of the method. The following methods are Microsoft official advice, you can try.
Uninstall program
You can uninstall little-used individual projects from Solution Explorer by using the right-click context menu.
Refactoring the solution
You can split the solution into smaller solution files and include common projects in these files. This refactoring can significantly reduce the memory usage of the workflow. In addition, the smaller the solution, the faster it loads.
Configure debug options
If you often run out of memory during a debugging session, you can optimize performance by changing one or more configurations.
Enable “Only My Code”
The simplest optimization is to enable the “Only My Code” feature, which only loads your project’s symbols. With this feature enabled, you can save a lot of memory when debugging managed applications (.NET). This option is enabled by default for some project types.
To enable “Only My Code”, select “Tools”>; “Options” & gt; “Debugging” & gt; “General”, then select “Enable My Code Only”.
Specifies the symbol to load
For native debugging, loading the symbol file (.pdb) takes up a lot of memory resources. You can save memory by configuring the debugger symbol Settings. Typically, configure the solution to load only modules in your project.
To specify symbol loading, select Tools>; “Options” & gt; “Debugging” & gt; “Symbol.”
sets the option to “Specify modules only” instead of “All modules” and then specifies the payload to load. When debugging, you can also right-click on a particular module in the Modules window to include its display in the system load. (To open the window while debugging, select Debug>; “Window” & gt; “Modules.”)
Disable diagnostic tools
It is recommended to disable it after using CPU profiling. This feature can be resource-intensive. After CPU analysis is enabled, it remains enabled for subsequent debugging sessions, so it can be displayed off when it is complete. If you do not need the functionality provided, you can save some resources by disabling the diagnostic tool during debugging.
To disable Diagnostics Tools, start a debug session and select Tools>; “Options” & gt; Enable Diagnostic Tools, then deselect the option.
Disable full solution analysis
Visual Studio performs analysis on the entire solution to provide a rich experience of the errors before the call is generated. This feature can be used to identify errors as quickly as possible. However, for very large solutions, this feature can be a significant memory resource hog. If you run out of memory or similar problems, you can disable this experience and release these resources. By default, Visual Basic enables this option, while C# disables it.
To disable Complete Solution Analysis, select Tools>; “Options” & gt;> “Text Editor” ”
Disable CodeLens
Visual Studio performs the Find All References task for each method displayed. Codelens provides functions such as inline display of reference numbers. Working in a separate process (for example, ServiceHub. RoslynCodeAnalysisService32). In very large solutions or resource-constrained systems, this feature can have a significant impact on performance, even if it is run at a lower priority. If you encounter high CPU or memory problems during this process (for example, when loading a large solution on a 4 GB machine), try disabling this feature to free up resources.
To disable CodeLens, select Tools>; “Options” & gt;> “Text Editor” ‘All Languages’> “Codelens”, then deselect the feature.
This feature is available in Visual Studio Professional and Visual Studio Enterprise.
Other tools and extensions
disable
Extensions are additional software components that are added to Visual Studio to provide new functionality or extend existing functionality. Expansion can often cause memory resource problems. If you encounter memory resource issues, try disabling the extension one at a time and see how this affects the schema or workflow.
to disable extension, please go to “tools” | “extension and update”, and then disable specific extensions.
Disable the XAML designer
By default, the XAML designer is enabled, but it only consumes resources when the.xaml file is opened. If you are using XAML files but do not want to use the designer feature, disable this feature to free up memory.
To disable the XAML designer, go to Tools>; “Options” & gt; “XAML Designer”> “Enable XAML Designer,” then deselect the option.
Delete the workload
You can use the Visual Studio installer to remove workloads that are no longer used. This action can skip packages and assemblies that are no longer used, thus optimizing startup and run time resource utilization.
Forced Garbage Collection
CLR uses a garbage collection memory management system. On this system, memory is sometimes consumed by objects that are no longer needed. This state is temporary and the garbage collector frees the memory based on its performance and resource usage heuristics. You can force the CLR to reclaim any unused memory by using hotkeys in Visual Studio. If there is a large amount of garbage waiting to be collected and garbage collection has been forced, you can see the memory utilization decrease for the devenv.exe process in the task manager. You rarely need to use this method. However, after a high-resource operation has been completed, such as a full build, debug session, or solution open event, this approach can help determine how much memory the process is actually using. Because Visual Studio is a hybrid (managed and native), native allocators and garbage collectors may sometimes compete for limited memory resources. This may help to force the garbage collector to run when memory usage is high.
To force garbage collection, use the hotkeys: Ctrl+Alt+Shift+F12, Ctrl+Alt+Shift+F12 (press twice).
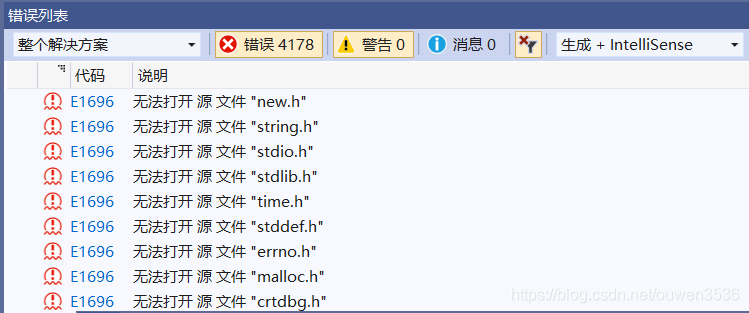
Unable to open source file xxx.h
Symptoms cause medicine friendship hint
symptoms
When learning the teacher’s example code, I found an error.

udaoplaceholder0
clock function and clock_t type are undefined identifiers?

see the library reference can not find the header file, tip “unable to open the source file time. The h”
The cause of
The code given by the teacher is not wrong in theory, it should be the problem of my development environment.
So my first reaction was: VS is broken?Can’t find time.h?Do I need to change the IDE configuration?Find the location of the header file to add?
Reference
VS cannot open source file “XXX. H”
10:57:14 on June 8, 2016 May the peace of the world Mr. W read number: 16405https://blog.csdn.net/u014800094/article/details/51611636 project properties – & gt; Configure properties ->; C/C + + & gt; Conventional – & gt; Additional include directory ->; $(ProjectDir)
I tried it, but it was no use.
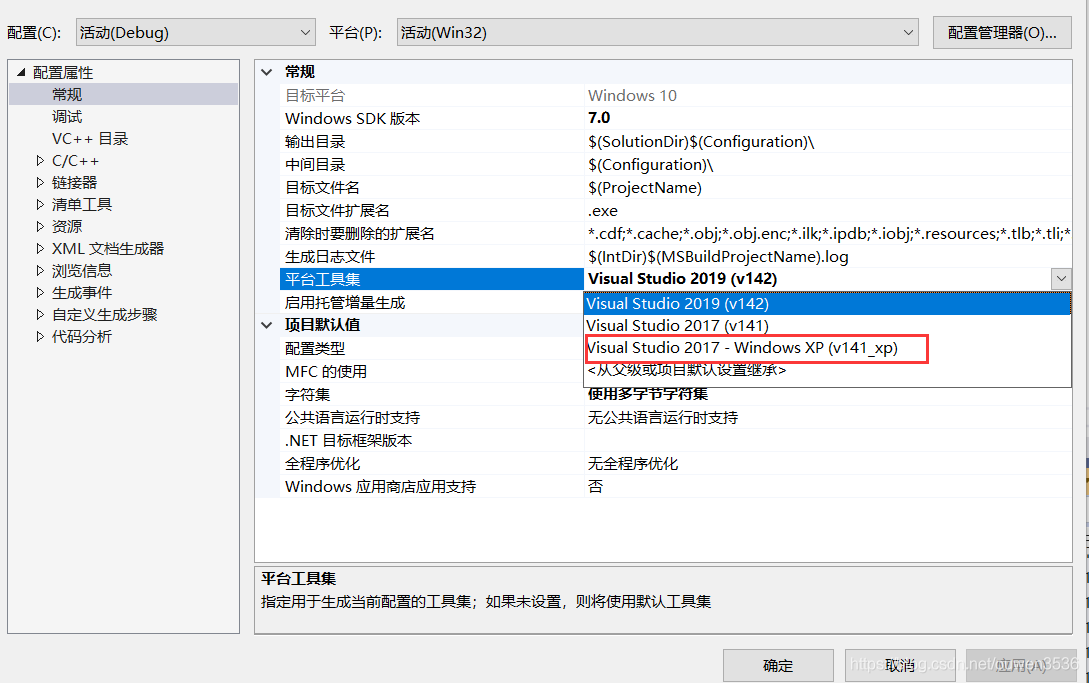
I think again, this project is written by the teacher VS2005, I am now 9012 years old, using VS2017 to open, is it possible that the version difference caused the problem! ?
Baidu, sure enough, I found someone with the same problem as me.

ah


2. Causes of the problem:
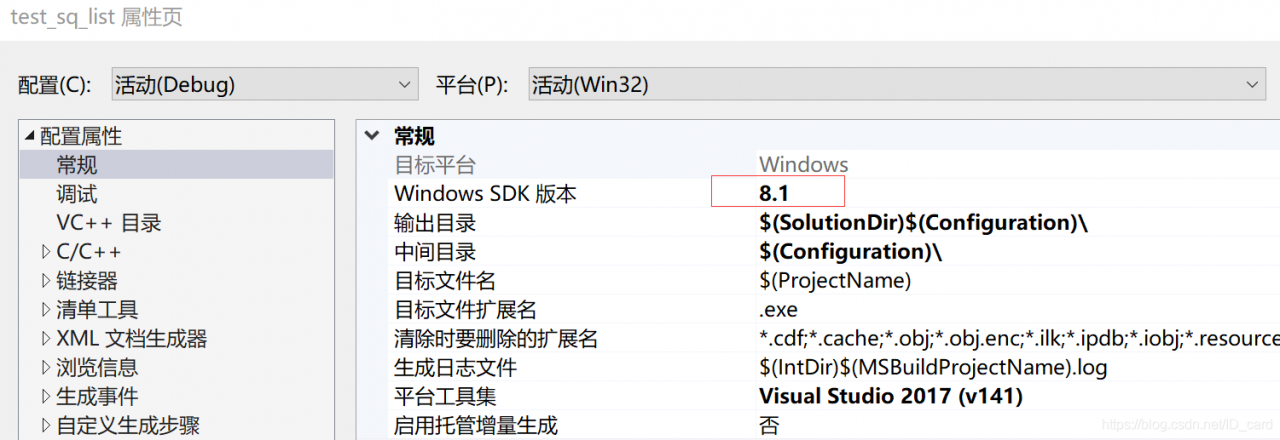
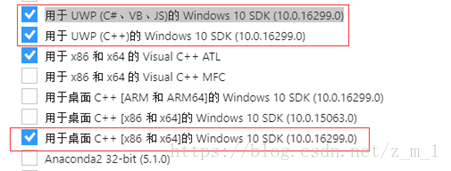
The Windows 10 SDK for Desktop C++ [x86 and x64] (10.0.16299.0) module was omitted during the installation of VS2017.
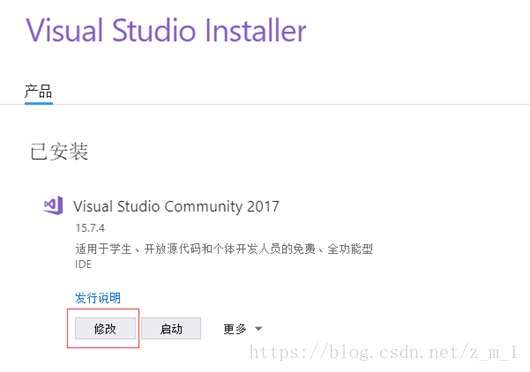
3. Problem solving:
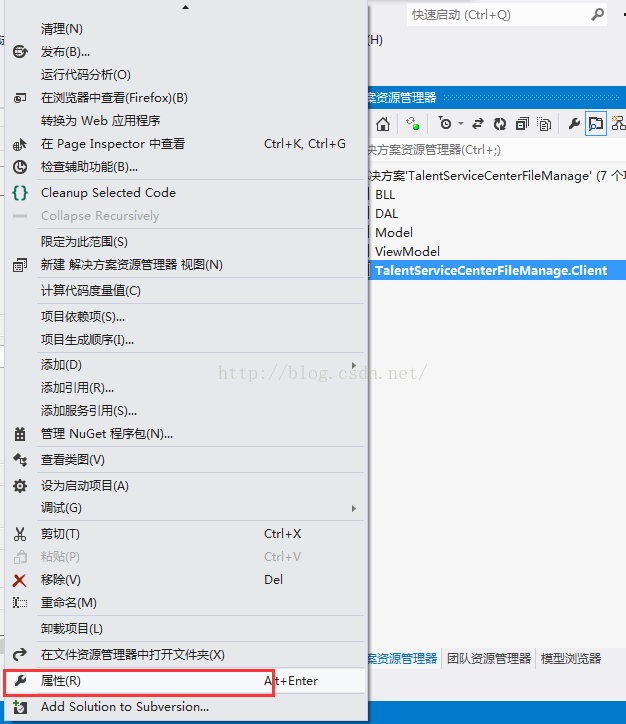
(1) Open VisualStudio Installer and click Modify in VisualStudio Installer.
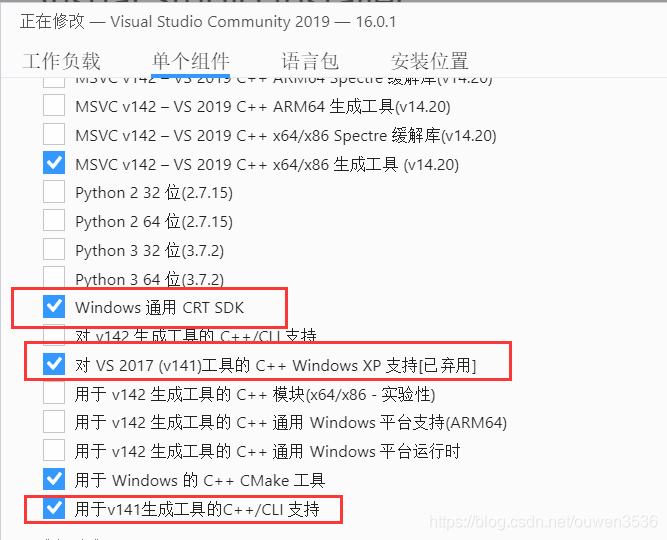
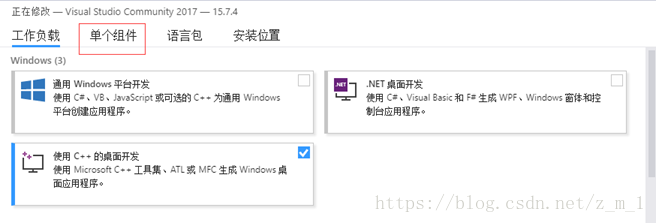
(2) Select a single component;
(3) Check “Windows 10SDK (10.0.16299.0) for Desktop C++ [x86 and x64]” module, check this module will automatically add “Windows 10SDK (10.0.16299.0) for UWP(C ++)” and “Windows 10SDK (10.0.16299.0) for UWP(C#, VB, JS)” module;
(4) Finally click the Modify button to add these modules. Problem solved.
4. The operation process is as follows:

Fixed VS2017 not being able to install
(Jin Qing’s column, November, 2018)
Downloaded from the website vs_community__1600125377. 1541561546. Exe, but when running the installation can’t appear the interface for product selection.
Looking at the logs in the Temp directory, no errors were found.
A search reveals a large number of similar errors:
VS : How to fix stuck Visual Studio Community installation problem
https://www.howtosolutions.net/2015/08/solving-installation-is-stuck-problem-in-visual-studio-community-edition/Resolving Installation Issues with Visual Studio 2017
http://rion.io/2017/02/17/resolving-installation-issues-with-visual-studio-2017/Unable to start vs_installer.exe to install VS2017 Community
https://social.msdn.microsoft.com/Forums/vstudio/en-US/fc8f5a04-8687-48dd-987e-1cfac67566a1/unable-to-start-vsinstallerexe-to-install-vs2017-community?Forum = vssetupVS 2017 Installer quits before starting the
https://developercommunity.visualstudio.com/content/problem/8993/vs-2017-installer-quits-before-starting.htmlVS2017 is not installed into the solution – the whole interface problems, Perseverance – CSDN blog
https://blog.csdn.net/qq951127336/article/details/71036868VS2017 automatically quit when installation _yanggy_ sina blog
http://blog.sina.com.cn/s/blog_702b606a0102y6n3.html
But it didn’t work.
C: Program Files (x86)\Microsoft Visual Studio\Installer: Program Files (x86)\Microsoft Visual Studio\Installer
but download again after cleaning, is still the same.
Vs_installer. exe. The pop-up screen says there is a compatibility error and you can choose to fix it.
fixed, vs_installer.exe will appear in the product selection screen.
Then run vs_community__1600125377. 1541561546. Exe, can appear the interface for product selection.
The problem may be that the Installer is not installed correctly, you may have selected the wrong version, and it will still be the same if you delete it and download it again. Fortunately, you can fix it manually.
VS2017 is now being installed.
2, explore https://blog.csdn.net/myruo/article/details/79277817 Visual Studio generated. Vs folders internal structure and function of the
https://shiyousan.com/post/636441130259624698
3, in the Visual Studio. Suo (Solution The User Options) file
https://shiyousan.com/post/636445373691512313
2. The error LNK2019: cannot resolve the external symbol of __iob_func
the solution: CPP
/*
when libjpeg-turbo is compiled for vs2010: __iob_func cannot be found,
*> __iob_func to __acrt_iob_func to solve this problem,
* when>peg-turbo is compiled for vs2015,
* when libjpeg-turbo is compiled for vs2015:
*/
if _MSC_VER>; =1900
#include “stdio.h”
# ifdef __cplusplus
extern “C”
# endif
the FILE * __cdecl __iob_func (unsigned I) {
return __acrt_iob_func (I);
}
endif /* _MSC_VER>; =1900 */
. ERROR LNK2026 module is not safe for the SAFEEH image.
solution:
. Open the Property Pages dialog box for the project.
b. Click the Linker folder.
c. Click the Command Line property page.
d. Type /SAFESEH:NO into the Additional Options box and click Apply.