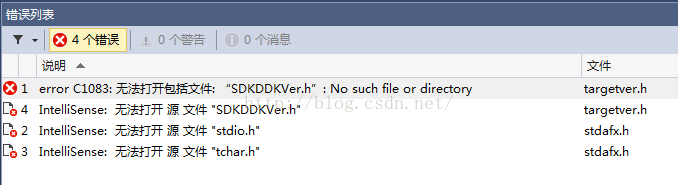
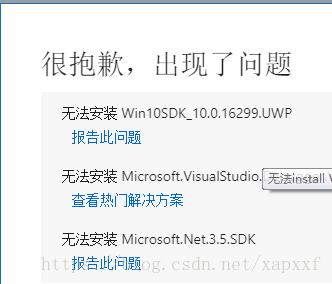
The first time it was installed, the error in the picture appeared. Searched for this for a long time, thought is the installation problem, uninstall reinstall several times…… Thirty grams of stuff, it’s no joke.
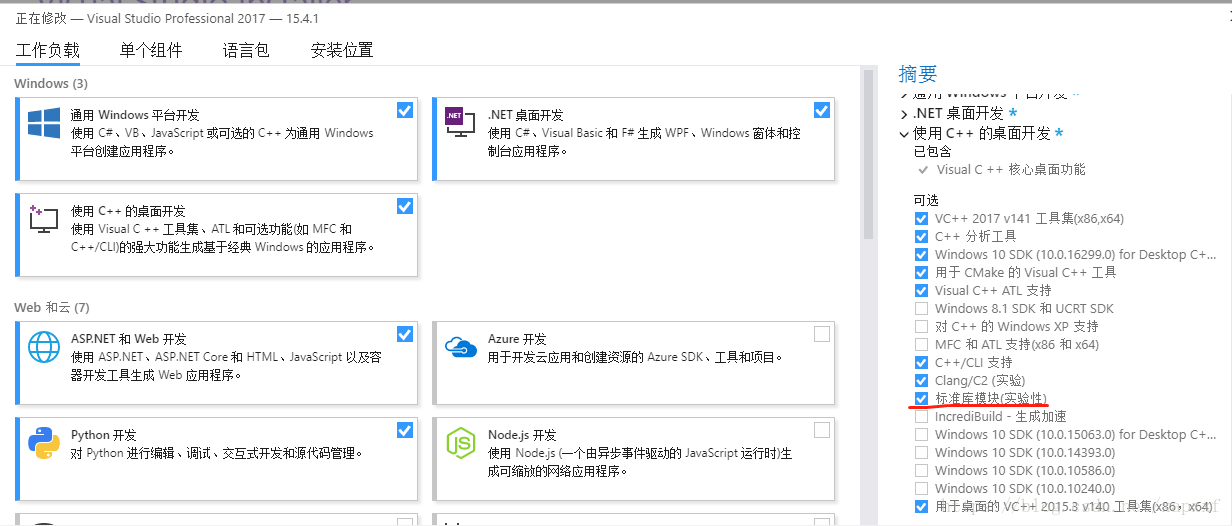
But finally found that the reason for this problem is!! In the case of Visual Studio default installation, there are files that are not checked by default, that is, they are not installed by default. (Also should be because Win10SDK installation failed, but how to install also can not install, even if…
, causing problems)
But!!!!! H and stdio.h exist in these files.
It is not installed by default, as shown in the figure below:
Because oneself is this pit for a long time, think the net search is all sorts of separate download, the latter search, and then reconfigure and so on incomparable trouble operation. Here are some of the easiest ways to do it once and for all
Solution:
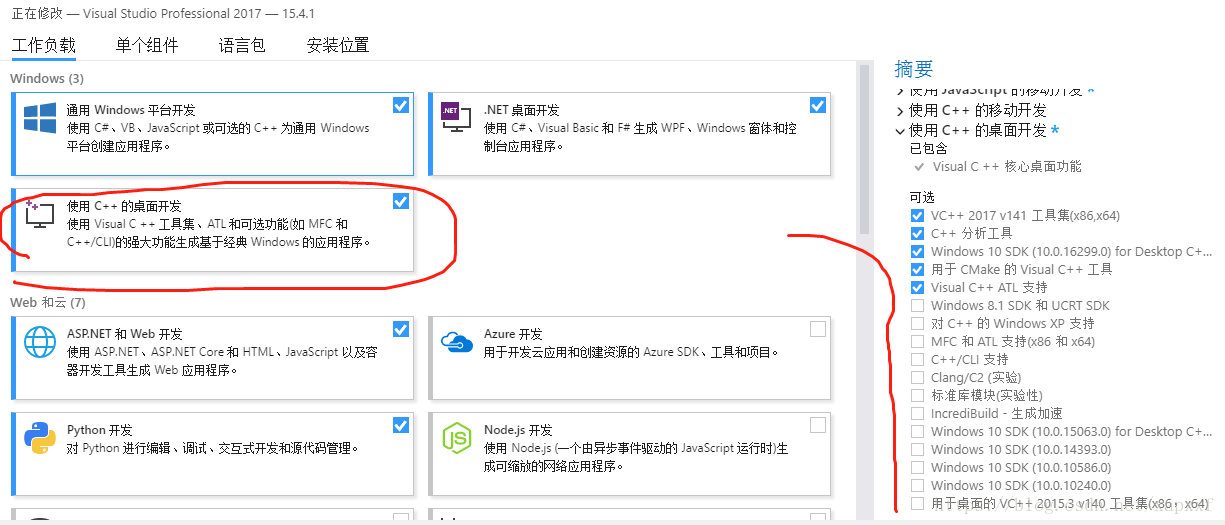
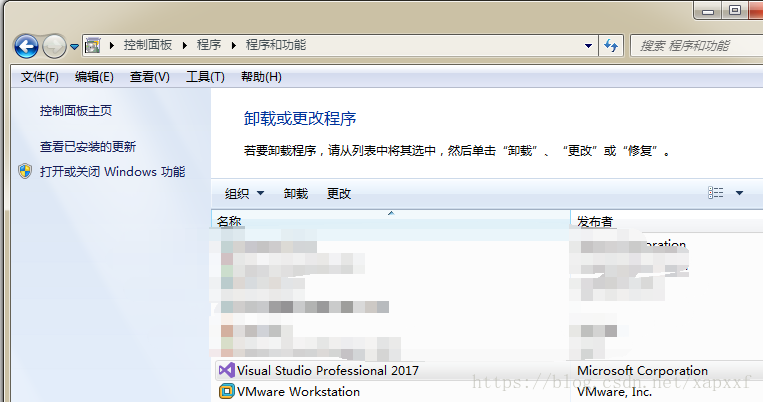
Just go to Programs and Functions, go to VS, right-click, modify, and check those, and you’re done.
Right-click and go to Change
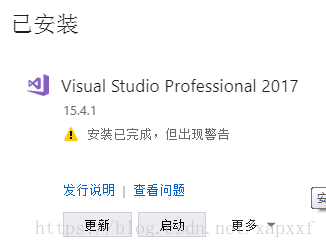
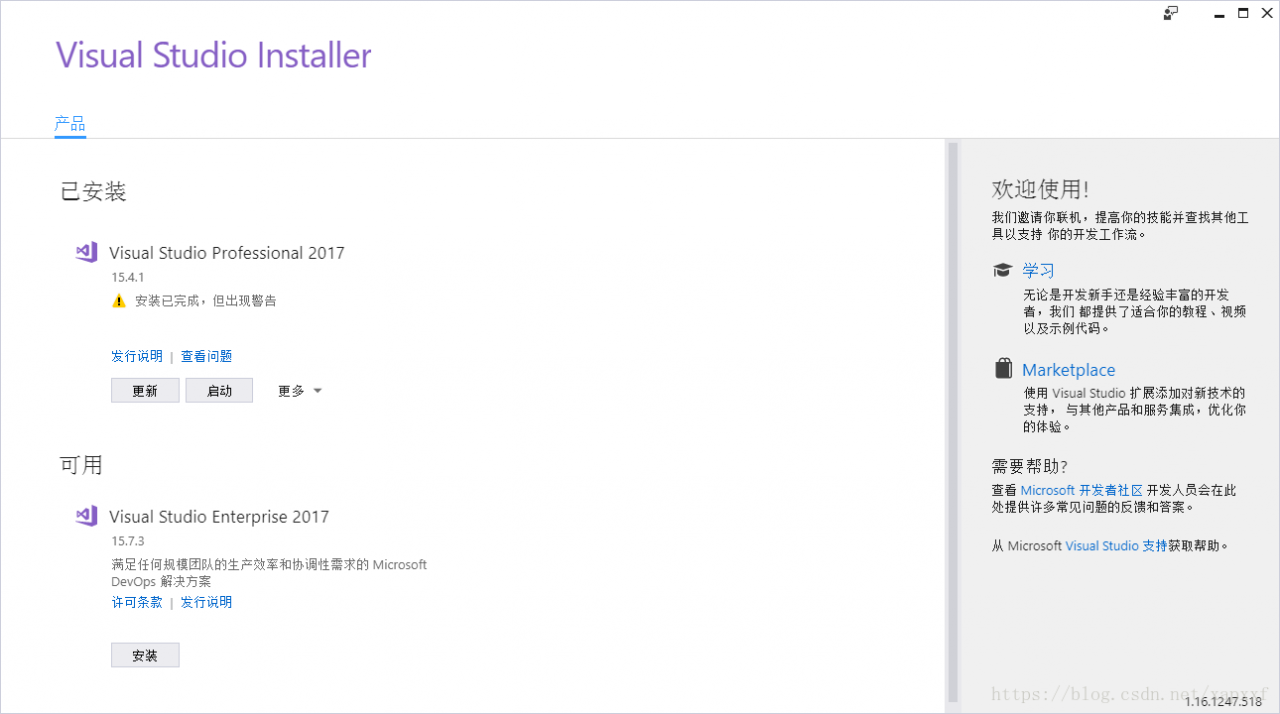
Then you can see:
Then, click More and Select – Modify (check the box). After the completion of the picture, found that I forgot that several are unsolved problems ticked) C++, check, and then confirm the modification OK, wait for the installation, problem solved. You don’t have to go to download WindowsSDK yourself.
Solve! (after this can be used, my development needs can basically meet, but this is the installation of Win10SDK failure, the helpless move)
Separate installation, you can reference this article: http://blog.csdn.net/hhh1108/article/details/50352027
There is also a point of benefit, so you can install to other disks. Configure it yourself. VS will be installed on the C drive.
Of course, if you can install the Win10SDK on your computer, you should not have this problem.
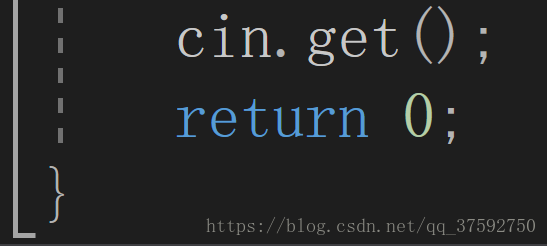
Add an input statement to the end of the editor: cin.get(); In this way, the user will be required to input characters before the end of the program (or the Enter key can close the window), and the console will remain in existence before the input. The specific code is shown in the figure below
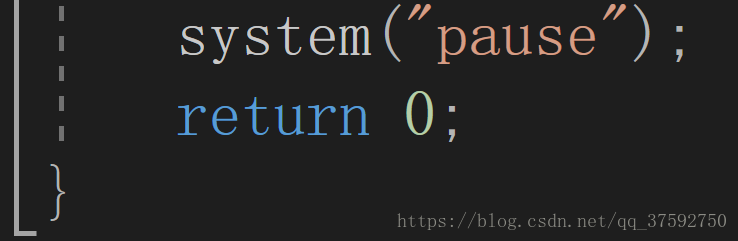
Add system(“pause”) at the end of the editor; After adding this sentence, the console will display “Please press any key to continue” after displaying the result of running. The specific code is shown in the figure below
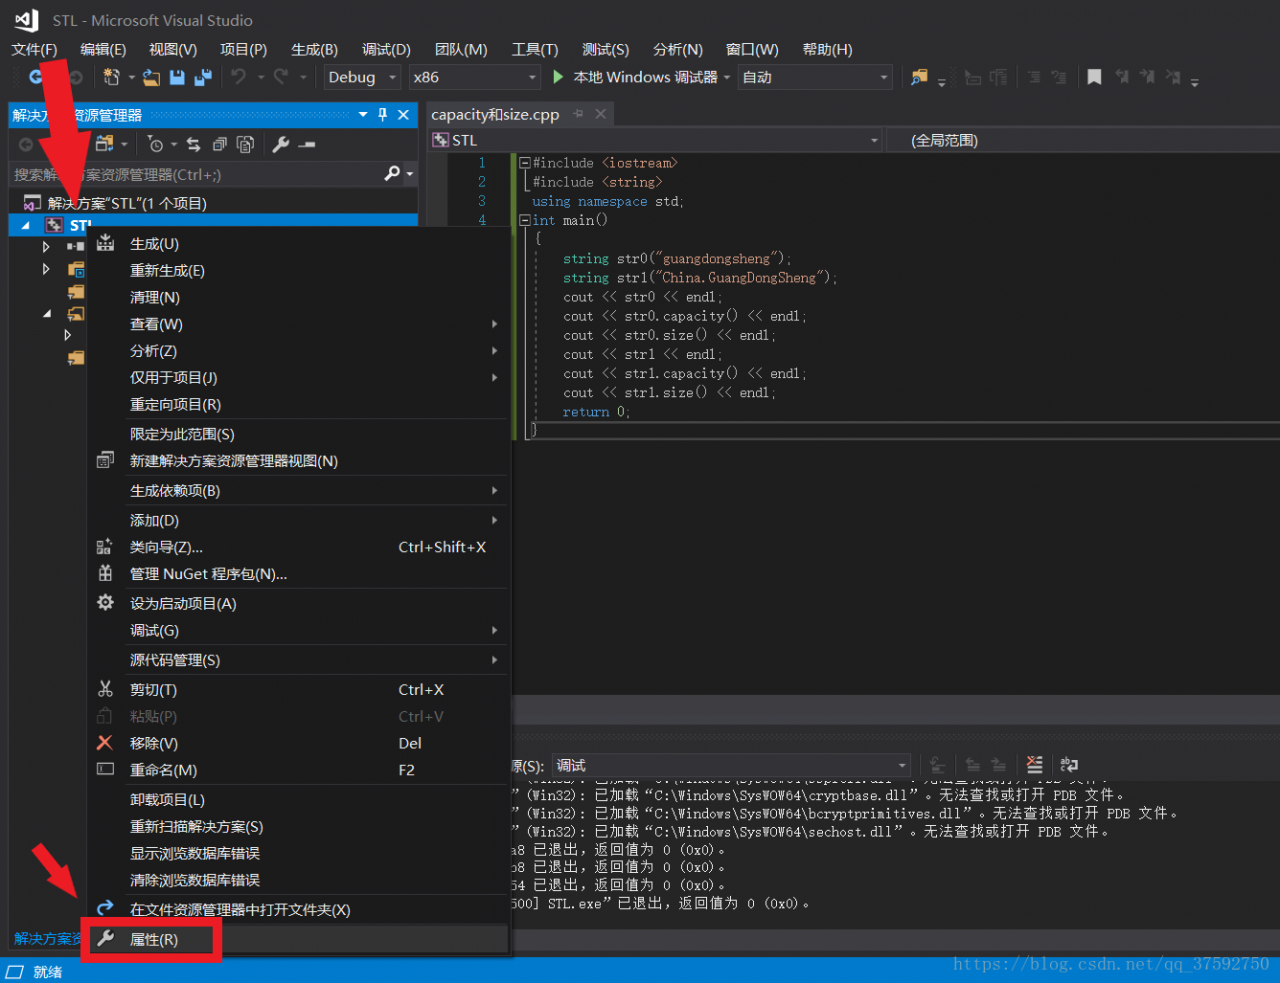
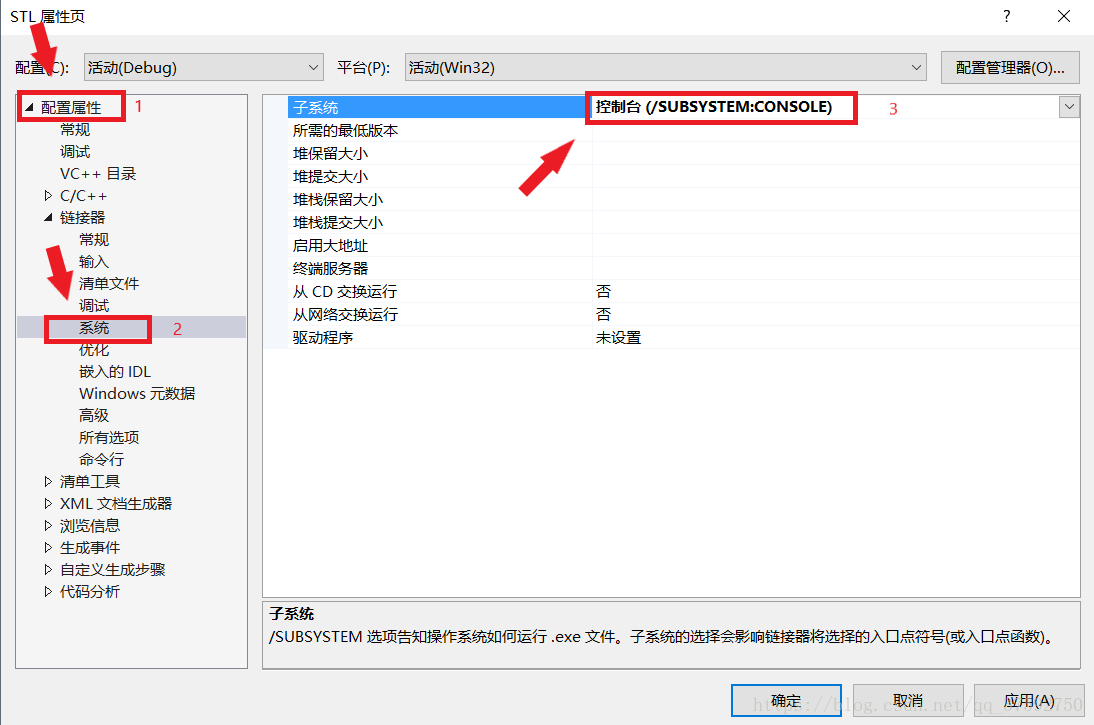
Method 3: To modify the project configuration, right-click on the project, select Properties from the right-click menu, and then select “Configuration Properties” from the list on the left of the pop-up dialog box –>; ‘Linker’ –>; “System”, and then in the list on the right, in the first “subsystem” value, select “Console (/SUBSUSTEM:CONSOLE)” as shown in the figure below
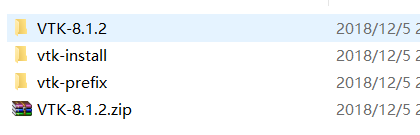
VTK installation in this paper, under the win10 operating system, installed VTK8.1.2.
, Visual Studio2017 Community, this version can be used for free. 2, cmake-3.13.1-win64-x64.msi 2, cmake-3.13.1-win64-x64.msi 2, CMake 3, VTK8.1.2, download vtk-8.1.2.zip, binary file, free to use.
First of all, install VS2017 and CMAKE two software, because the installation of these two software is very simple, this article is skipped, if you have problems can be Baidu or Bing, pay attention to install VS2017 MFC also installed.
https://cmake.org/download/
Local Directory Description:
pcl1.8.1 installation directory
E: \ pcl1.8.1
Qt5.9.5 MSVC – 64 – bit directory
E: \ Qt \ Qt5.9.5\5.9.5 \ msvc2017_64
vtk8.0.0 Extract the directory
E: \ VTK – v8.0.0
vtk8.0.0 build directory
E: \ VTK – v8.0.0 \ build
vtk8.0.0 The install directory
E: \ PCL1.8.1\3 rdparty \ VTK
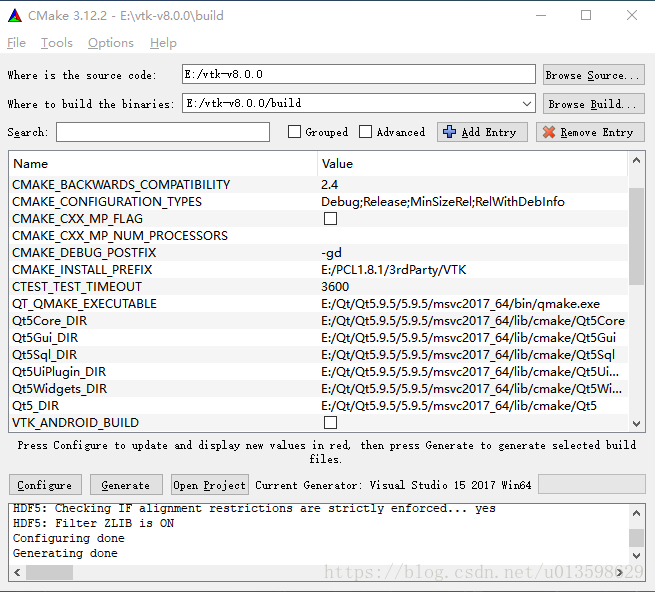
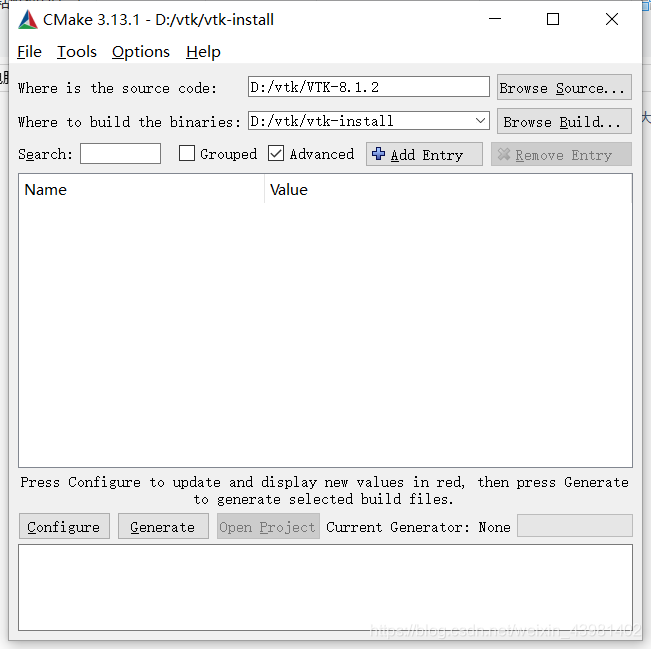
Cmake Settings:
[1. Set the source directory is the vtk8.0.0 decompression directory ] and generated directory [is the build directory].
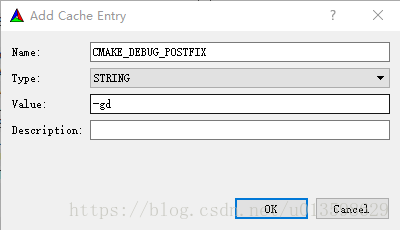
2. Click Add Entry,Name is CMAKE_DEBUG_POSTFIX, Type is String, Value is -GD, and click OK. This is to separate the final generated debug from the release version of the lib.
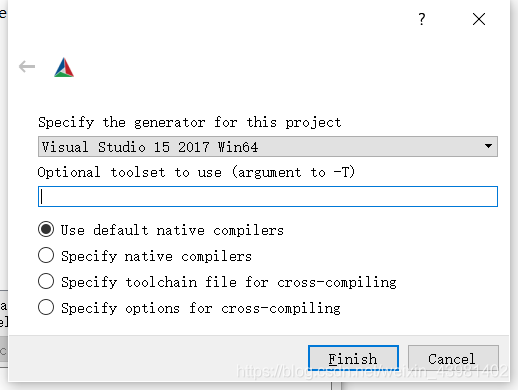
3. Click Configure, select VisualStudio 15 2017 Win64, and click Finish to wait for the configuration to complete.
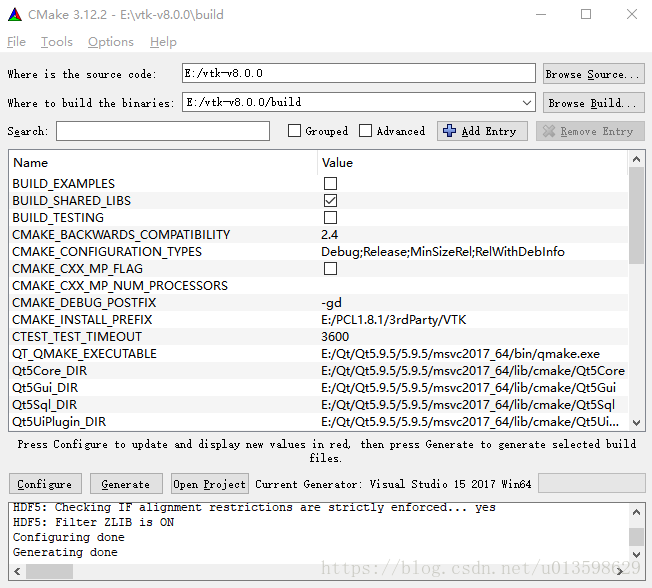
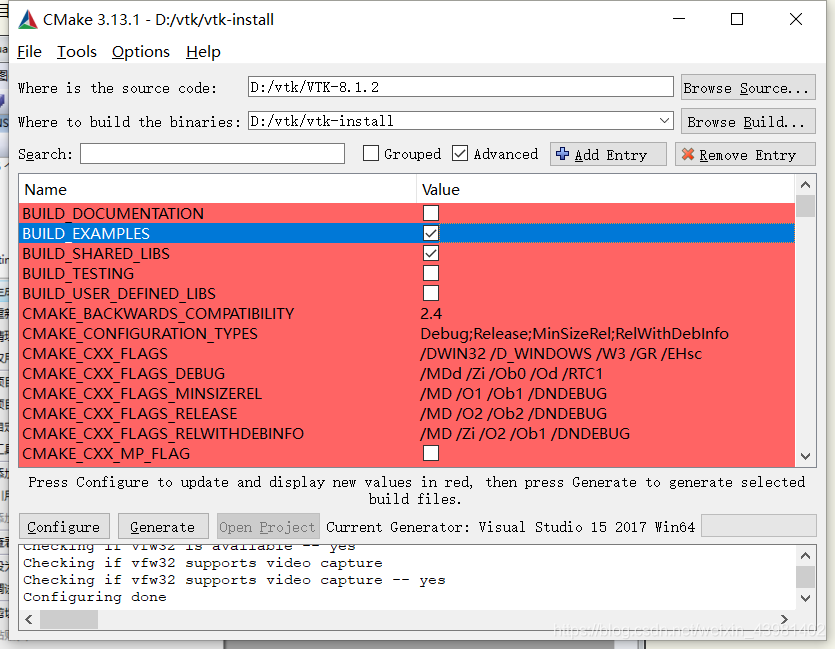
After some time, the configuration is finished, and a configuration list will appear. Follow these steps to configure it
BUILD options
BUILD_EXAMPLES, build_shared_libs, BUILD_TESTING
Just tick build_shared_libs, and the other two are up to the individual to select, so it’s a lot faster at compile time, so I just tick build_shared_libs.
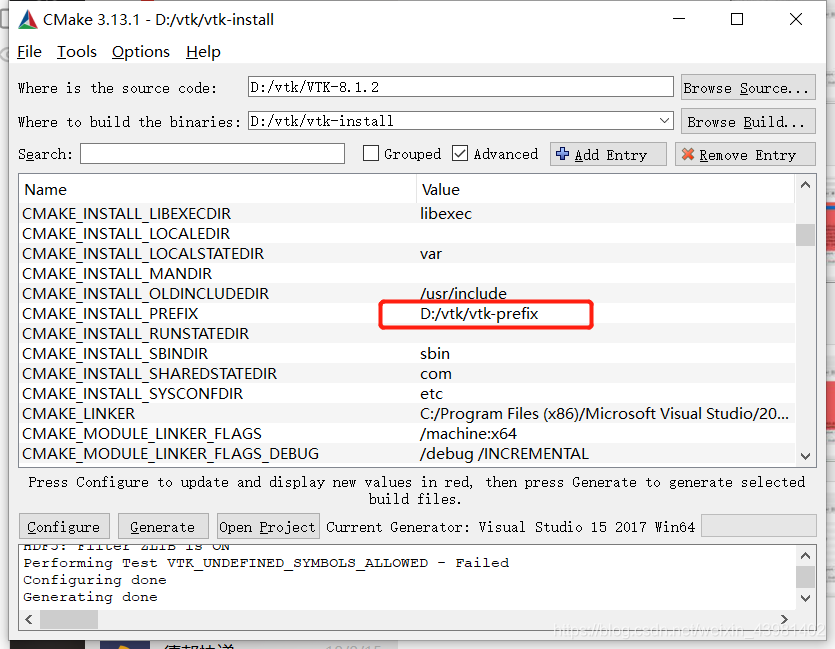
VTK installation directory
CMAKE_INSTALL_POSTFIX- Set to the vtk8.0.0 install directory described in the local directory above
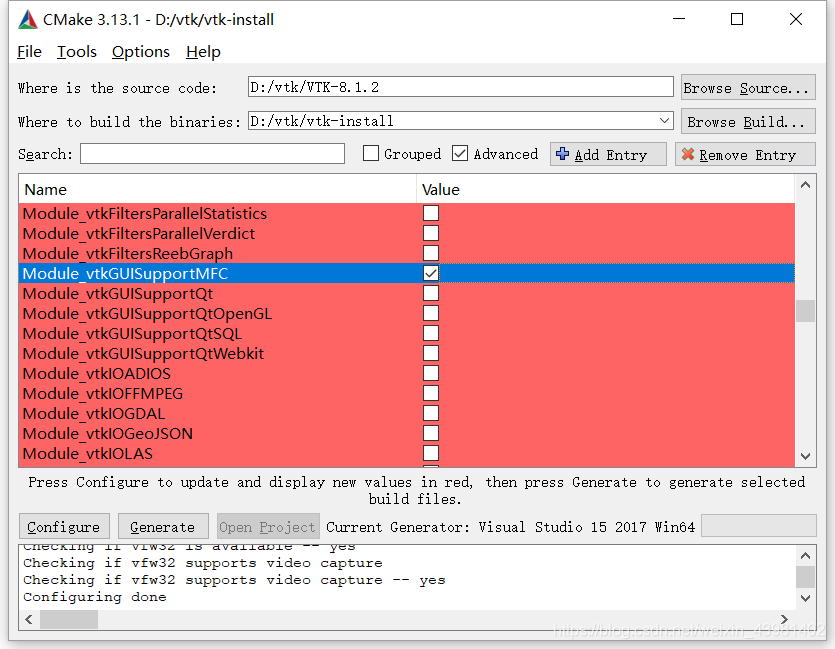
VTK_Group_Qt
Click Configure and wait for the configuration to finish.
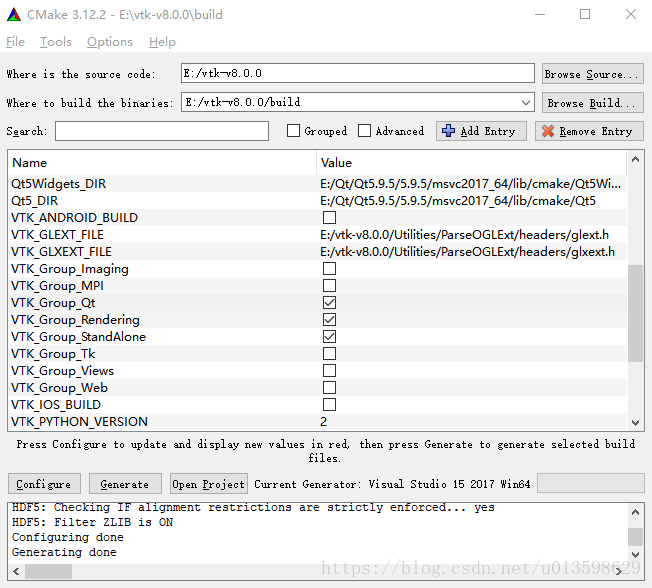
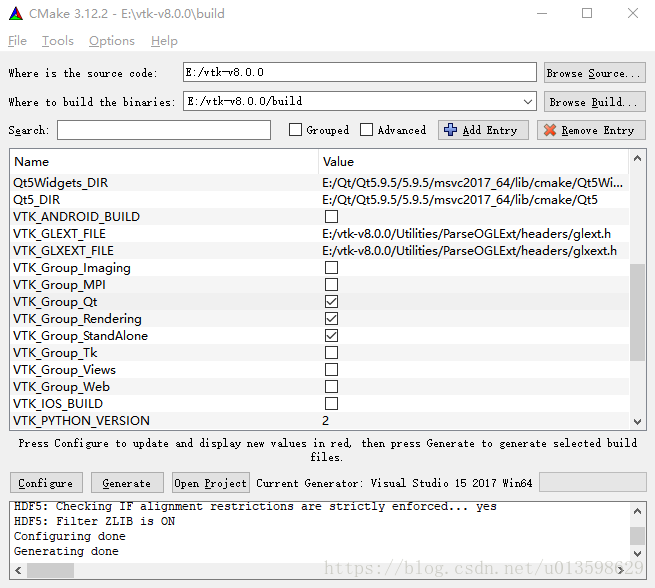
After some time, more configuration options will appear, and then follow the following steps to configure them.
1. Modify Qt5_DIR to E:\Qt\Qt5.9.5\5.9.5\msvc2017_64\lib\cmake\Qt5.
2. Set VKT_QT_VERSION to 5. Click Configure again to continue.
Generate engineering
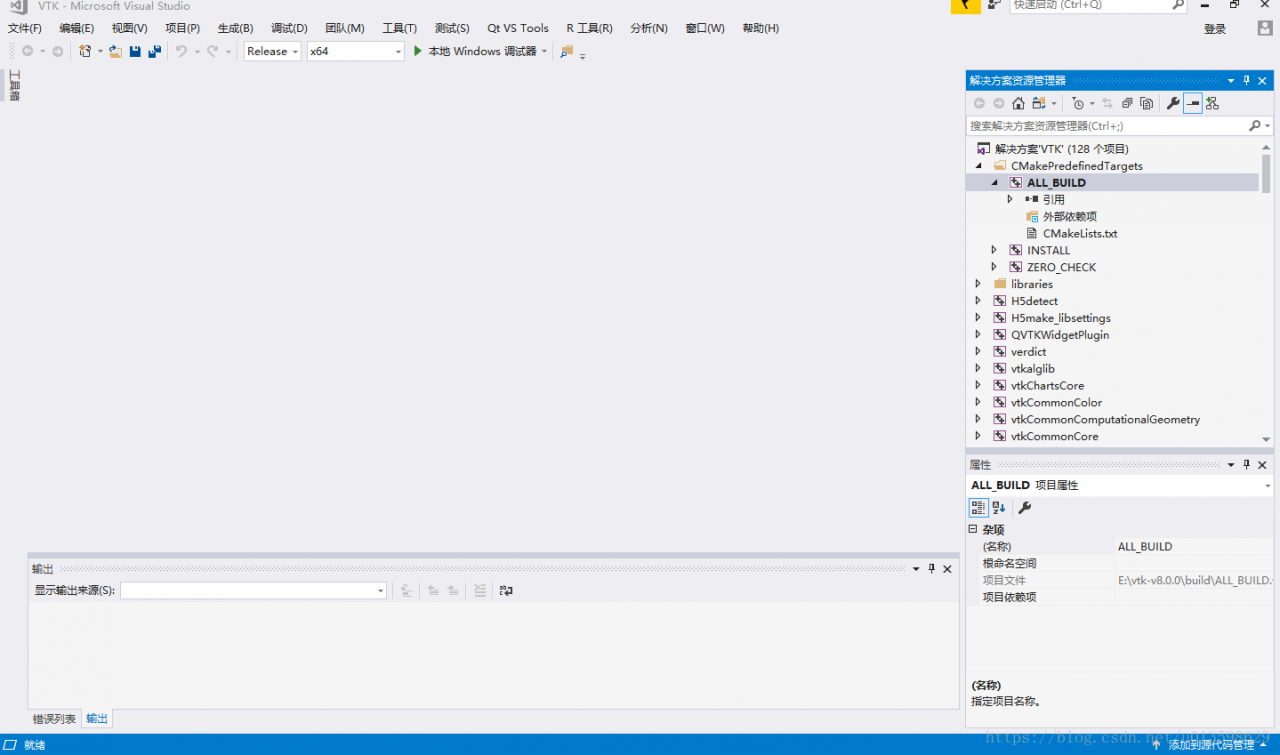
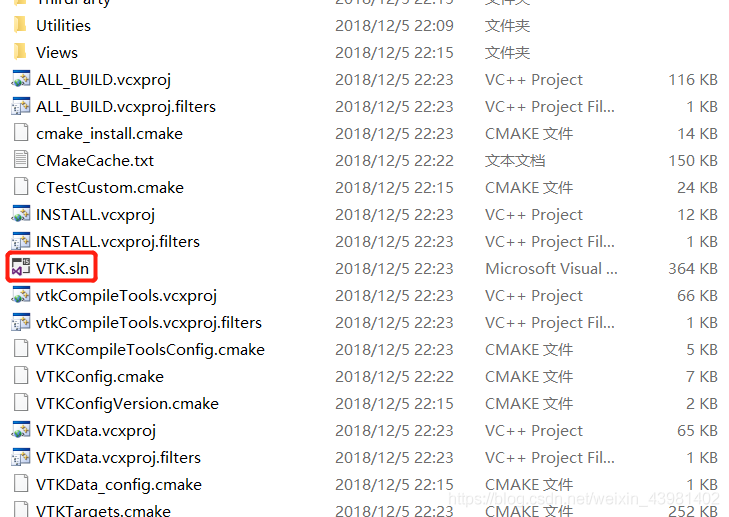
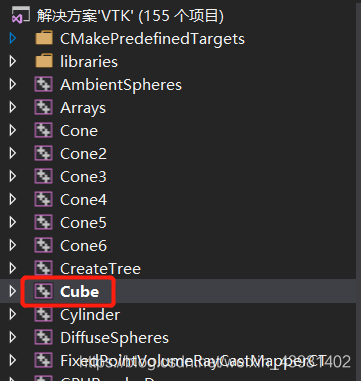
After the configuration is successful, a Configuring Done prompt appears. Click Generate to build the project. If Generating Done appears, you can click Open Project. VTK. SLN will be opened in VS2017.
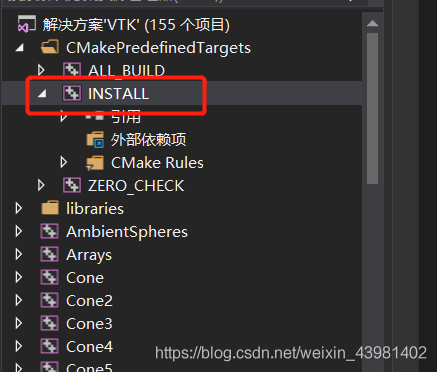
First, configure the solution to Debug in VS2017. In Solution Manager, go to ALL_BUILD, right-click, and click Build. Wait for VS to compile. When finished, find Install, click the right mouse button, and click Create
Switch the solution configuration to Release. In Solution Manager, go to ALL_BUILD, right-click, and click Build. Wait for VS to compile. When finished, find Install, click the right mouse button, and click Create.
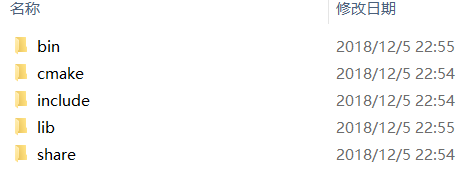
After the above steps are completed, the compiled file will be placed under the path set by CMAKE_INSTALL_PREFIX.
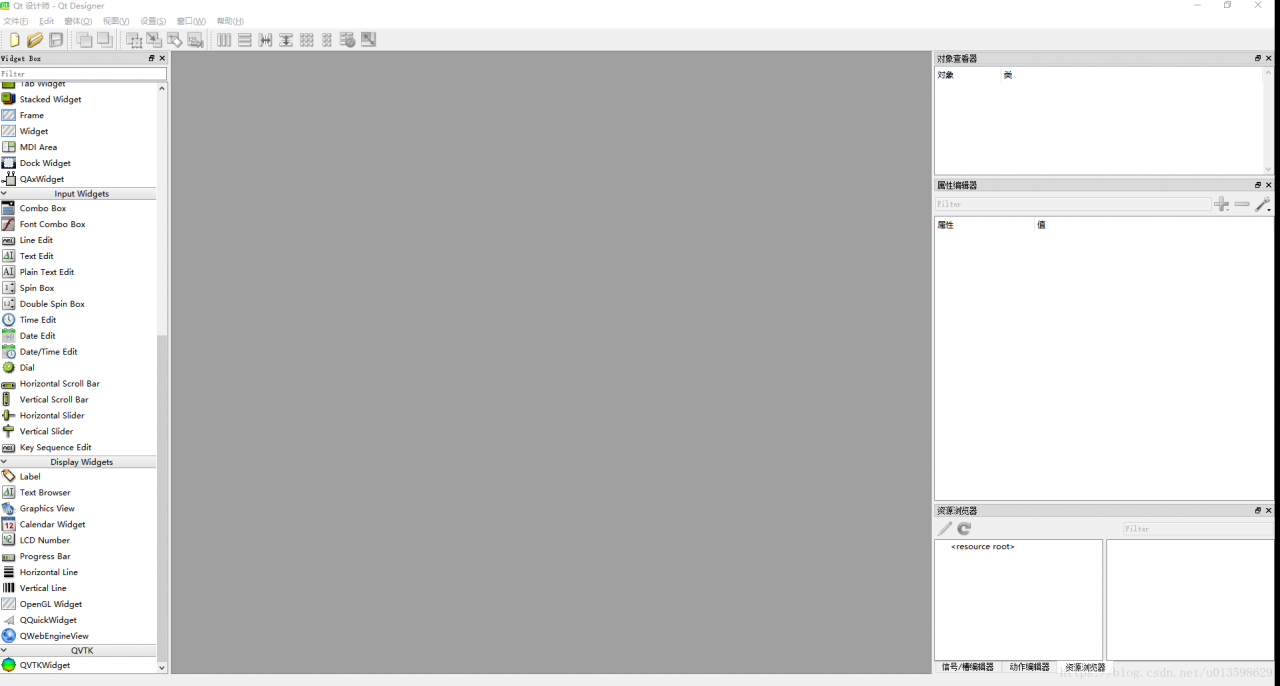
Then put the QVTKWidgetPlugin.dll in the E:\vtk-v8.0.0\ Build \bin\Release directory
Copy to E:\Qt\Qt5.9.5\5.9.5\msvc2017_64\plugins\designer.
At this point, open the Designer again and you will see the QVTKWidget.
I want to display point cloud in Qt interface, but the VTK of PCL 1.8.1 lacks qvtkwidgetPlugin.dll, so I need to recompile it.
1. VTK source source
Link: https://pan.baidu.com/s/10kMCNJ-5UiYqRTOvrlrR9A extraction code: ug7p 2. The build folder is created by yourself in the D:/vtk-v8.0.0 directory
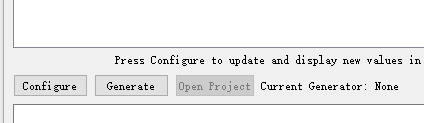
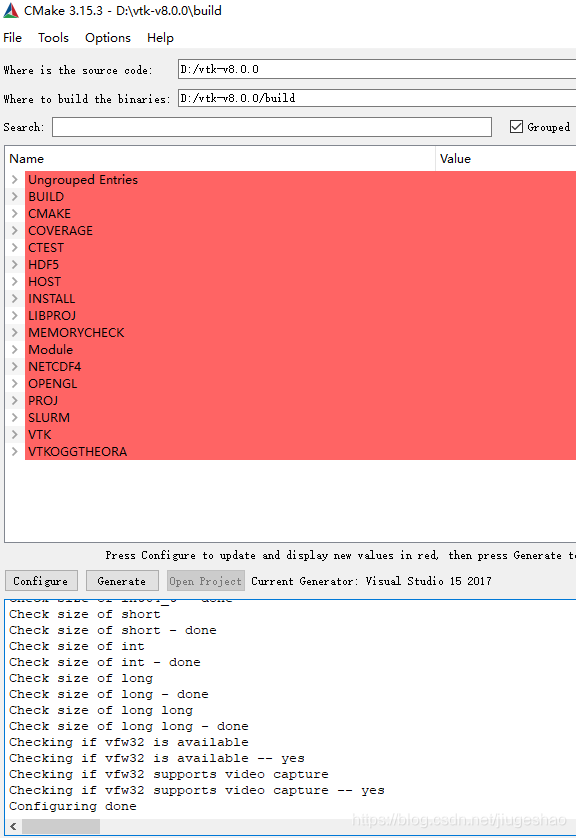
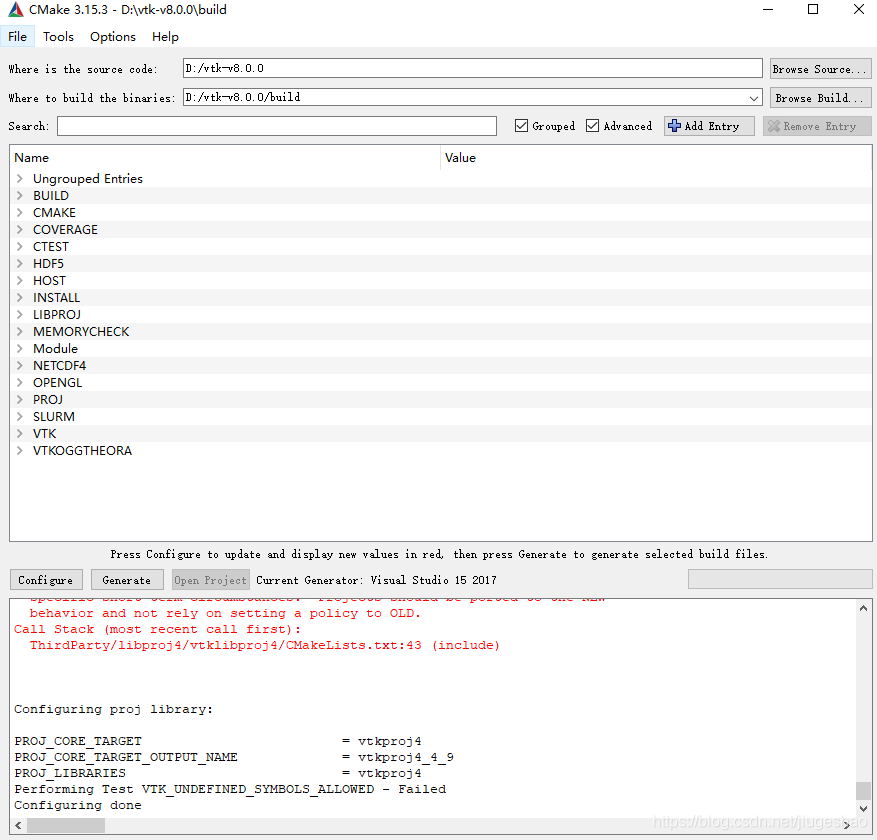
3. Click the Configure button in the lower left corner
After waiting for some time, the following screen appears
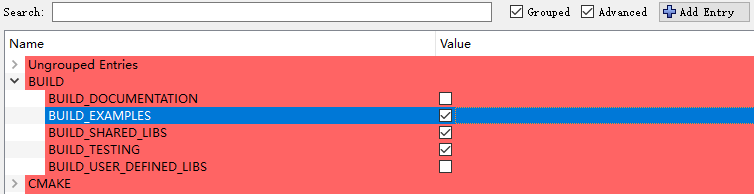
The Build option checks the following three
The CMake option CMAKE_INSTALL_PREFIX is set to the following path, which is where a directory structure similar to the VTK that comes with PCL will be generated when you run the install project in the compiled solution
The following is checked in the VTK options
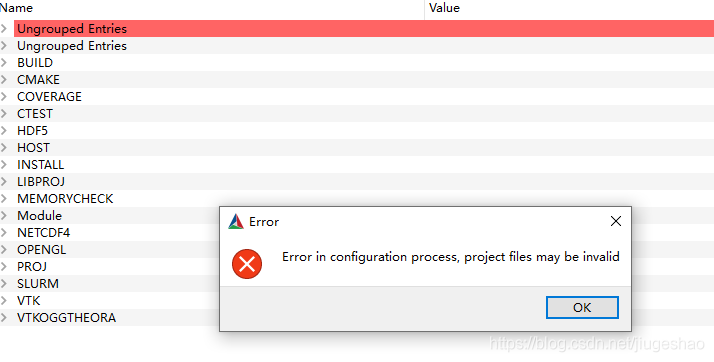
Click Configure again and report the following error when the configuration is complete
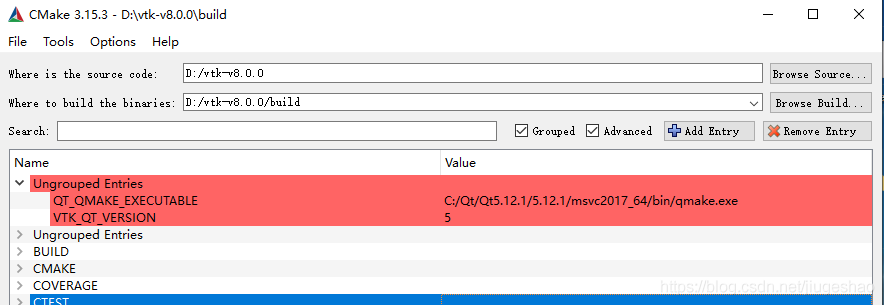
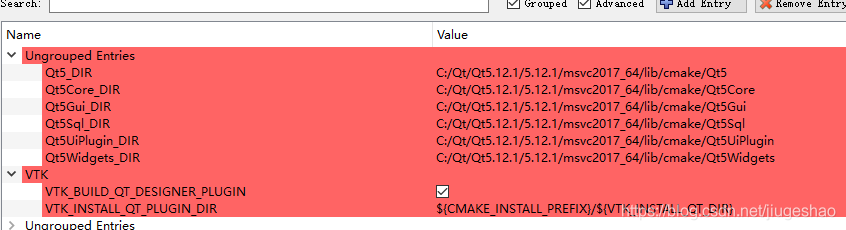
The two lines at the red position below are modified as follows:
Then click the Configure button again. Then click the configuration Ungrouped Entries again
Click Configure again, no more errors
Click Generate to Generate the project
Then click the Open Project button to Open the solution with VS2017
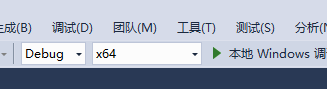
Check the environment, currently I have Debug, x64
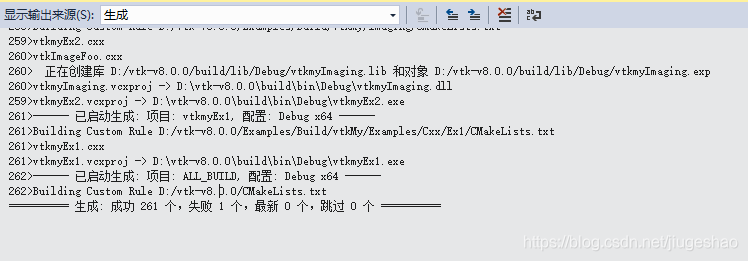
Then click on the generate ALL_BUILD project, which will last for a long time.
1 error message was found at the end
Some files did not download in time
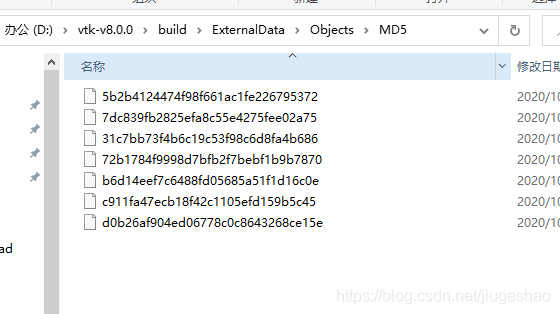
1> — [download 83% complete] 1> — [download 84% complete] 1> CMake Error at D:/VTK – v8.0.0/CMake/ExternalData CMake: 1005 (the message) : 1 & gt; The Object MD5 = 9 e68ff1b1cc914ed88cd84f6a8235021 not found at: 1 & gt; 1> http://midas3.kitware.com/midas/api/rest?method=midas.bitstream.download& checksum=9e68ff1b1cc914ed88cd84f6a8235021& algorithm=MD5 (“HTTP response code said error”) 1> http://www.vtk.org/files/ExternalData/MD5/9e68ff1b1cc914ed88cd84f6a8235021 (” the Timeout was reached “) 1 & gt; Call Stack (most recent call first): 1> D:/VTK – v8.0.0/CMake/ExternalData CMake: 1027 (_ExternalData_download_object) 1 & gt; 1>
D:\vtk-v8.0.0\build\ExternalData\Objects\MD5 :\vtk-v8.0.0\build\ExternalData\Objects\MD5
Here I will upload a copy, and replace the folder MD5 after unzipping
Link: https://pan.baidu.com/s/1GItTKoBPeiil20RXgMwyYg extraction code: k4tz
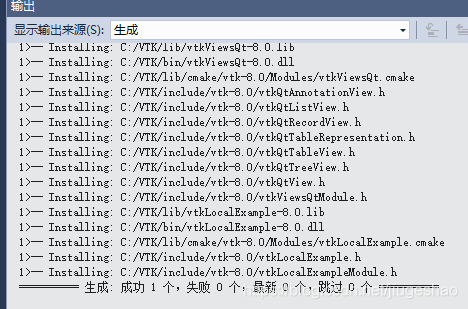
It then regenerates into the next ALL_BUILD project
After success, generate only the INSTALL project
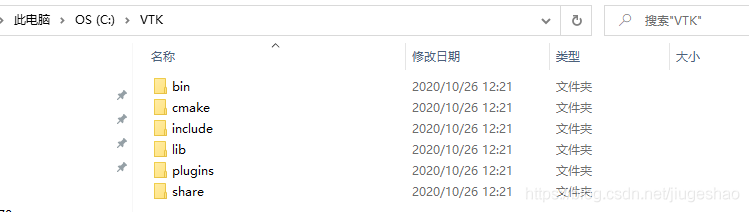
Then go to the C disk directory C:\VTK and look at this folder
Similar to the VTK structure that comes with PCL1.8.1. There is a plugins folder, and then replace this folder with the following folder in PCL1.8.1
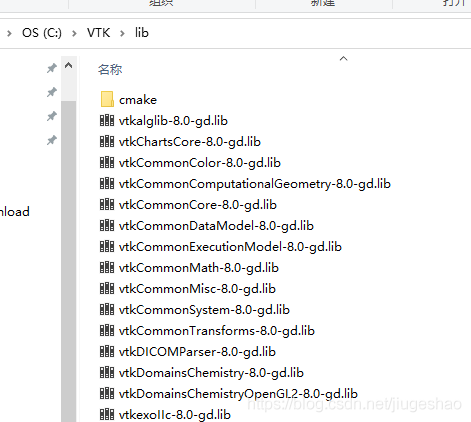
Since the debug version of VTK shipped with PCL1.8.1 contains the -gd keyword, you can use the following Python script to modify the file name
#!/usr/bin/env python
# -*- coding: utf-8 -*-
# author:jiugeshao
import os
import sys

filepath= r'C:/VTK/lib'
fileList = os.listdir(filepath)
currentpath = os.getcwd()
os.chdir(filepath)

for fileName in fileList:
    result = "lib" in fileName
    if(result):
      os.rename(fileName,fileName.replace(".lib","-gd.lib"))

os.chdir(currentpath)
The format of the lib name in the modified folder is as follows:
Switch to Release x64 and compile ALL_BUILD. After compiling, remember to compile INSTALL
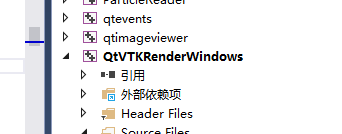
You can run the example QtVTKRenderWindows project
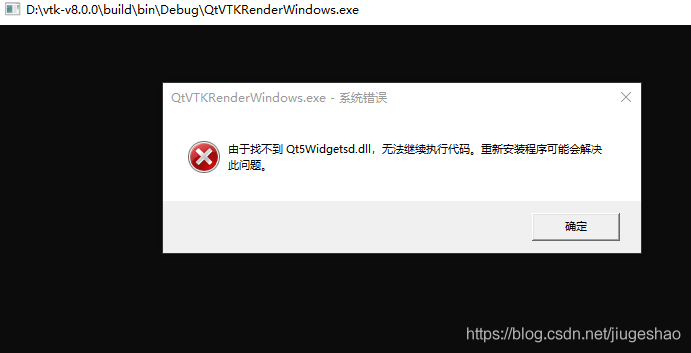
When running under DEBUG, report an error
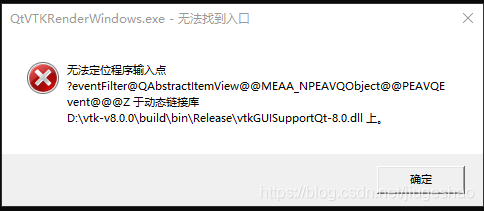
Unable to locate program input vtkguisupportqt-8.0. DLL by running error under release
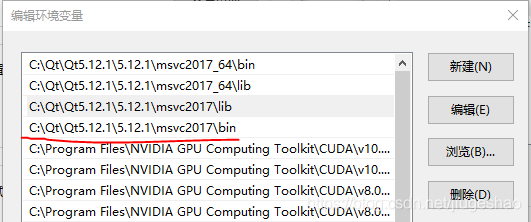
Note the environment variables at this point, since I installed both 32bit and 64bit versions of QT, I added bin and lib to the environment variables.
Also note that these four paths are placed at the top (environment variables can be sorted).
When running QTVTKrenderWindows project in debug mode, the interface can be displayed, but there is an error message in VTKOutputWindow
Either a filename was not specified or the specified directory does not contain any DICOM images.
I upload a DICOM diagram here
I put it under the folder D:\ ct
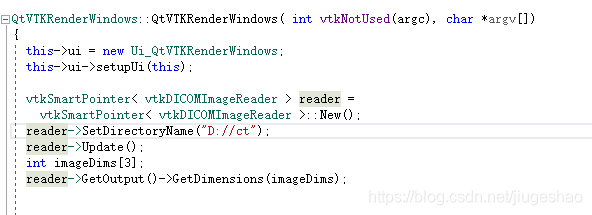
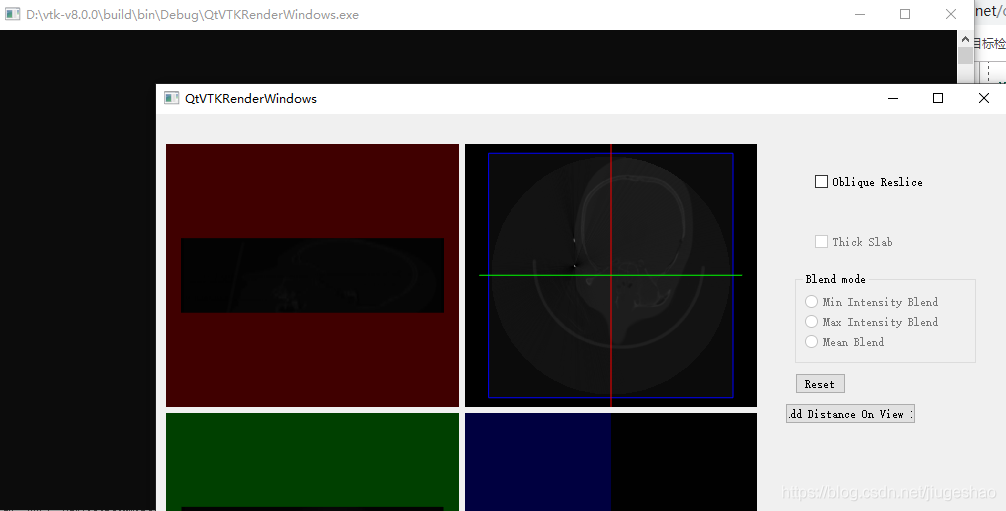
Link: https://pan.baidu.com/s/1adDaWCQaTwgnLVARf2nQkg extraction code: h793. and then open the QtVTKRenderingWindows CXX file, modify the following way
This will show the following interface in both debug and release mode:
After I compiled the debug version and release version of VTK, see Baidu net disk
Link: https://pan.baidu.com/s/199YssGsprlm99zkuI5eM3g extraction code: 3 ip5
I usually use youdao cloud notes to record my learning experience. When sharing in CSDN, I don’t want to typeset any more, so I can directly link it. http://note.youdao.com/noteshare?id=01c70b5a3d371f659bfcd1826520ab82
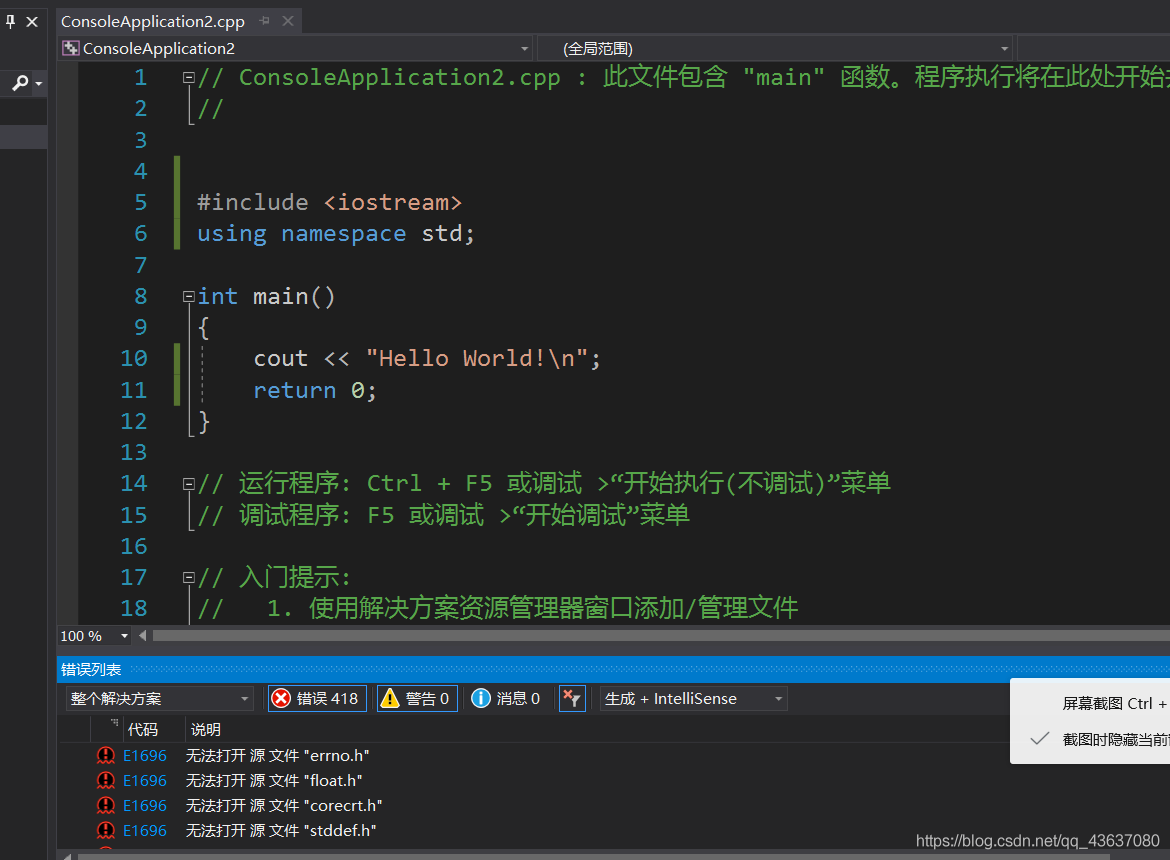
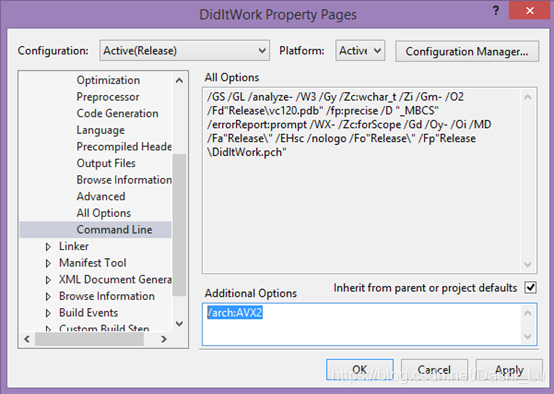
As shown in the figure, VS2017 encountered a big problem when using it. One stack could not open XXX, and another stack could not open XXXXXX in global scope. How to set it
1. Under VS2017, the header file you need to include is <<; gl/glut.h>
GL/glut.h> = = = = = = = pch.h> Header files, to run a successful and it will be included in the front, in & lt; gl/glut.h> PCH is a file that is automatically generated by the compiler when you create the project, called a precompiled file. Open PCH.H, and PCH.CPP, and find that there is nothing substantial in it. for some references below: (copyright statement: this article original articles for bloggers, follow BY CC 4.0 – SA the copyright agreement, please attach the original source links and reprinted in this statement.
the article links: https://blog.csdn.net/qq_37866732/article/details/83894909 is the beginning of your code without # include “PCH. H” the precompiled header.
H This header file can be put into your.h header file, and having #ifndef, #define, and #endif is to prevent you from linking to a certain header file again.
#ifndef PCH_H #define PCH_H
// TODO: Add the header to precompile here
#endif //PCH_H #endif //PCH_H #endif //PCH_H Attributes – & gt; Configure properties –>; C/C + + – & gt; Precompiled header –>; To the right of the precompiled header, select not to use the precompiled header and press OK. You can add pch.h without any errors. )
VS as the first editor of the universe, especially after the release of 2017 should attract countless programmers to use, but the VS2017 start speed is slow, so specially studied the VS2017 to accelerate the start of the method. The following methods are Microsoft official advice, you can try.
Uninstall program
You can uninstall little-used individual projects from Solution Explorer by using the right-click context menu.
Refactoring the solution
You can split the solution into smaller solution files and include common projects in these files. This refactoring can significantly reduce the memory usage of the workflow. In addition, the smaller the solution, the faster it loads.
Configure debug options
If you often run out of memory during a debugging session, you can optimize performance by changing one or more configurations.
Enable “Only My Code”
The simplest optimization is to enable the “Only My Code” feature, which only loads your project’s symbols. With this feature enabled, you can save a lot of memory when debugging managed applications (.NET). This option is enabled by default for some project types. To enable “Only My Code”, select “Tools”>; “Options” & gt; “Debugging” & gt; “General”, then select “Enable My Code Only”.
Specifies the symbol to load
For native debugging, loading the symbol file (.pdb) takes up a lot of memory resources. You can save memory by configuring the debugger symbol Settings. Typically, configure the solution to load only modules in your project. To specify symbol loading, select Tools>; “Options” & gt; “Debugging” & gt; “Symbol.” sets the option to “Specify modules only” instead of “All modules” and then specifies the payload to load. When debugging, you can also right-click on a particular module in the Modules window to include its display in the system load. (To open the window while debugging, select Debug>; “Window” & gt; “Modules.”)
Disable diagnostic tools
It is recommended to disable it after using CPU profiling. This feature can be resource-intensive. After CPU analysis is enabled, it remains enabled for subsequent debugging sessions, so it can be displayed off when it is complete. If you do not need the functionality provided, you can save some resources by disabling the diagnostic tool during debugging. To disable Diagnostics Tools, start a debug session and select Tools>; “Options” & gt; Enable Diagnostic Tools, then deselect the option.
Disable full solution analysis
Visual Studio performs analysis on the entire solution to provide a rich experience of the errors before the call is generated. This feature can be used to identify errors as quickly as possible. However, for very large solutions, this feature can be a significant memory resource hog. If you run out of memory or similar problems, you can disable this experience and release these resources. By default, Visual Basic enables this option, while C# disables it. To disable Complete Solution Analysis, select Tools>; “Options” & gt;> “Text Editor” ”
Disable CodeLens
Visual Studio performs the Find All References task for each method displayed. Codelens provides functions such as inline display of reference numbers. Working in a separate process (for example, ServiceHub. RoslynCodeAnalysisService32). In very large solutions or resource-constrained systems, this feature can have a significant impact on performance, even if it is run at a lower priority. If you encounter high CPU or memory problems during this process (for example, when loading a large solution on a 4 GB machine), try disabling this feature to free up resources. To disable CodeLens, select Tools>; “Options” & gt;> “Text Editor” ‘All Languages’> “Codelens”, then deselect the feature. This feature is available in Visual Studio Professional and Visual Studio Enterprise. Other tools and extensions
disable
Extensions are additional software components that are added to Visual Studio to provide new functionality or extend existing functionality. Expansion can often cause memory resource problems. If you encounter memory resource issues, try disabling the extension one at a time and see how this affects the schema or workflow. to disable extension, please go to “tools” | “extension and update”, and then disable specific extensions.
Disable the XAML designer
By default, the XAML designer is enabled, but it only consumes resources when the.xaml file is opened. If you are using XAML files but do not want to use the designer feature, disable this feature to free up memory. To disable the XAML designer, go to Tools>; “Options” & gt; “XAML Designer”> “Enable XAML Designer,” then deselect the option.
Delete the workload
You can use the Visual Studio installer to remove workloads that are no longer used. This action can skip packages and assemblies that are no longer used, thus optimizing startup and run time resource utilization.
Forced Garbage Collection
CLR uses a garbage collection memory management system. On this system, memory is sometimes consumed by objects that are no longer needed. This state is temporary and the garbage collector frees the memory based on its performance and resource usage heuristics. You can force the CLR to reclaim any unused memory by using hotkeys in Visual Studio. If there is a large amount of garbage waiting to be collected and garbage collection has been forced, you can see the memory utilization decrease for the devenv.exe process in the task manager. You rarely need to use this method. However, after a high-resource operation has been completed, such as a full build, debug session, or solution open event, this approach can help determine how much memory the process is actually using. Because Visual Studio is a hybrid (managed and native), native allocators and garbage collectors may sometimes compete for limited memory resources. This may help to force the garbage collector to run when memory usage is high. To force garbage collection, use the hotkeys: Ctrl+Alt+Shift+F12, Ctrl+Alt+Shift+F12 (press twice).
 :
:  :
:  :
:  :
:  :
:  :
:  :
:  :
:  :
:  :
:  :
:  :
: