Tag Archives: VMware

Error 1406: could not write value installpath to key

 
http://hi.baidu.com/tianxingacer/blog/item/7b2ec88893e59da30e2444cd.html
Before, a VMware was installed on the computer. Later, the system was reinstalled and VMware could not be used. Fortunately, the file of LINUX was imported
It works. Today, install VMware into the same directory of the old files, and report when it is almost finished:
Error 1406: could not write value installpath to key/soft ware/vmware, inc/vmwareconverter hosted verify that you have sufficient access to that key or contalt your support personnel “this Error.
I received it online, and the netizen said it was reasonable that the old VMware registry value was not deleted last time. I did not delete it at all, but directly overwrote it.
The reason may be that the old VMware registry key was not deleted clean before installation, so the current installation cannot write the registry file of registry Software/VMware. The solution is simple: find HKEY_LOCAL_MACHINE–> Software-> VMware, Inc., delete the whole thing, close the registry, and re-run the VMware installation file. Then the problem can be solved.
If the same problem cannot be installed after the above operation, the stupid (and most effective) method is to find the registry, delete all the key values related to VMware, repeat Ctrl+F to find “VMware” and then delete. In order to avoid misoperation, it is recommended to backup the registry in advance.
 
PS. After deleting this key, retry can be installed normally.

Fatal IO error 11

Installation of cenos-6.6 using VMware Workstation8.0 prompts the following error:
fatal io error 11 on x server:1
Method one:
In VMware Workstation8.0, set as follows:
1. Create the virtual machine as shown in the figure below

2. Modify the virtual machine hardware compatibility 6.5-7.x,

3. At least 1G of virtual machine memory

4. The resolution of the virtual machine is at least 800*600, and I set it to 1024*768

After the above four steps, fatal IO Error 11 on X Server :1 of Cenos-6.6 installed on the virtual machine can be resolved

Method 2:
Set the memory on the virtual machine to be less than 1024M, and I generally set the memory to be 512M, so as to skip the installation of X Server related services and solve the fault.

VMware reported an error: “internal error” internal error

Online method:
1, services.msc check the service, check that all the services have been opened, this method is invalid; 2. Administrator rights to run vmware, same error, invalid;
3. Delete the most recent *.vmem file under the error declaring virtual machine (record the state of each snapshot and the state of each snapshot). Restart the virtual machine and you will be reminded to choose below the snapshot (I cannot find it). Click OK and the virtual system will restart normally. – The method succeeded.

win7 VMware Error:1325 Documents Is not a valid short name solution

Recently, when installing VMware8.0 in Win7, I encountered Error:1325 Documents is not an valid short name. I still cannot install it. There are many answers on the Internet, but I failed to solve them one by one. Finally, combined with the solutions on the Internet, I summed up an effective method, at least on my machine is a success.
Found in the registry HKEY_CURRENT_USER/Software/Microsoft/Windows/CurrentVersion/Explorer/Shell Folders directory, double-click the Favorites options. The diagram below:

Check whether the computer has D partition (D disk). If it does not (where the problem is), set it as follows:


Change the partition identifier specified by the Favorites string. Mine is D:\Favorites.
Note: at the beginning, there were no D disks on my machine, there were C, E, F and G disks, but I changed G disks to D disks.

VMware Workstation unrecoverable error: (vcpu-0) c.382

Today, I copied the virtual machine from the old machine to the new machine. I made an error starting the virtual machine:
VMware Workstation is not recoverable error: (vcpu-0)
vcpu-0:VERIFY vmcore/vmm/main/cpuid.c.382
bugNr=1036521
.
See online that there is a way to add the following content to the.vmx file of the virtual machine:
smc.version = 0
Then save and restart.
But I just couldn’t live without it, and then I found another way online, turning on CPU virtualization in my computer’s BIOS Settings.
Find the Intel Virtual Technology in the BIOS, set it to ENABLE, save the restart, and the virtual machine will open normally.

linux VMware Unable to change virtual machine power state: Internal error

Linux installation of VMWare under a problem, recently due to project needs, we have to Fedora8 system to install a virtual machine, the above run a Windows Server 2003, after a hard time to find a Linux version of VMWare, after installation, every time you start the virtual machine will report.

Unable to change the power state of the virtual machine: internal error.
This is an error.
At first I thought there was a problem with the vmware settings, but I finally found the answer on the Internet:
I encountered this problem when running a Vmware workstation under Ubuntu Jaunty. I get an error when shutting down the machine via an NX session.
It’s the result of a zombie ‘vmware-vmx’ process running. All you need to do is kill the process. This command sends ‘signal 9’ to the process. When sent to the process, SIGKILL causes the process to terminate immediately. Contrary to SIGTERM and SIGINT, this signal cannot be captured or ignored. More info:More sigkill info.
After that, I was able to start the virtual machine without any problems.

Error installing windows8 in virtual machine-HAL_INITIALIZATION_FAILED and

HAL_INITIALIZATION_FAILED error
Cause of the problem: this problem mainly occurs when installing windows8 in the virtual machine, mainly because windows8 has just been developed and there are still many bugs, especially when using third-party software to install the system.
Solutions:
1, restart the computer, most of the time can solve the problem;
2. Update the latest version of virtual machine VMWare software;
3. Make sure you are using the latest version of VMWare after the update is complete. Download the link
https://www.virtualbox.org/wiki/Downloads, or you can use the QQ software management upgrade
4. After installation, it is best to restart the computer and enter VMWare. You can see the latest interface of VM:

2. Windows cannot read from unattended reply file during installation & LT; ProductKey> Set up the
Reason: VMware automatically turns on the floppy disk and automatically loads the ‘autoinst.FLp’ file.   
Solution: Close the Floppy Disk in Settings, and try again successfully!   
Attached is the download address of windows8:
English version:
Download 64-bit systems here
Click here to download 32-bit systems
The Product Key: DNJXJ – 7 xbw8-2378 – t – X22TX – BKG7J
Simplified Chinese version:
Download 64-bit systems here
Click here to download 32-bit systems
The Product Key: DNJXJ – 7 xbw8-2378 – t – X22TX – BKG7J

VMware uninstall installation problem (The MSI Failed)

VMware uninstall installation problem (The MSI Failed)
Reference: https://coderwall.com/p/zbbtga/fixed-vmware-installation-problem-the-msi-failed
The problem
VMware is not clean when uninstalling. The MSI Failed and The new VMware cannot be installed.
To solve
Step 1
Disable vmware-related processes. Then go to %TEMP% directory (” win+R “enter %TEMP%, usually C:\Users\(username)\AppData\Local\ TEMP ) and delete all VMware files.
Restart the computer.
Step 2
Go to CMD, type runas /user: username CMD go to the administrator, and then CD to the directory of the old VMware installation file.
Run vmware-workstation -***. Exe /x /v EULAS_AGREED=1 to reinstall/uninstall the old version. /v EULAS_AGREED=1 enabled license)
All right.


Prompt “The MSI failed” solution when uninstalling VMware

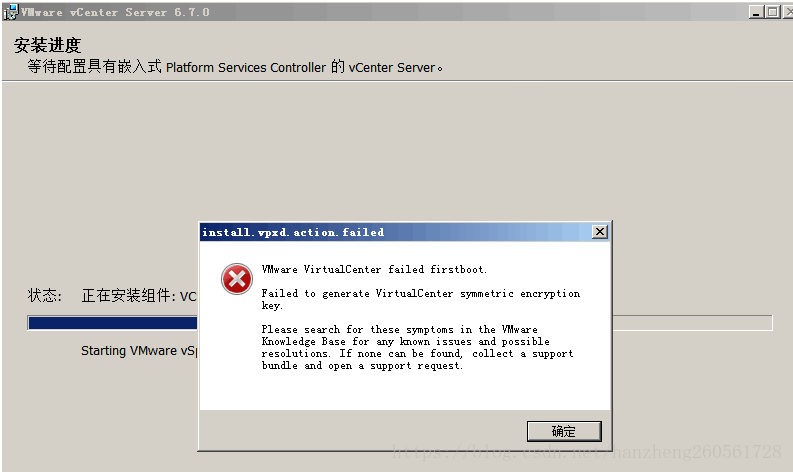
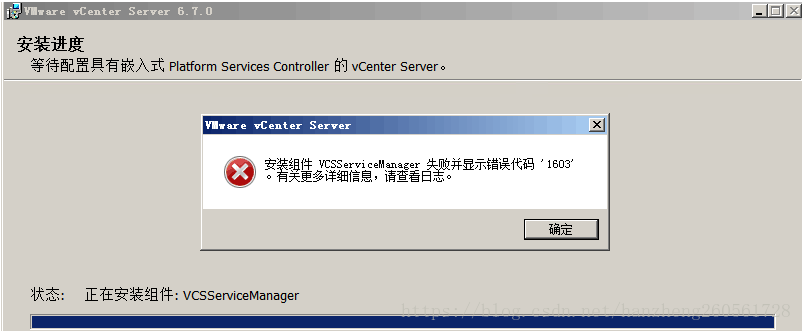
After installing The compact version of VM and then installing other versions of VM, or when you want to upgrade and install a higher version, it cannot be uninstalled normally (such as prompt The MSI failed), you can refer to The following method to solve The problem. (Registry values, files, devices, etc. mentioned in this article are ignored if they do not exist in the system.)

Manual unloading:

clear the registry manually

start → run →regedit

click hkey-local-machine→software→ find the VMware file and right click to delete it.

(go to [HKEY_LOCAL_MACHINE\Software\VMware,inc] and delete the whole VMware,inc.)

operating on the registry may cause the system to fail to start properly. Please backup the registry before modifying it

1. Log in to the local computer as an administrator

2. Stop the following services

VMware Authentication Service

VMware Registration Service

VMware DHCP Service

VMware NAT Service

3. Uninstall VMware network bridge

to start & gt; Set up & gt; Network connection & GT; Right click on any network adapter & GT; attribute

select VMware Bridge Protocol and uninstall it

4. Uninstall VMware installed devices

computer management > Device Manager & GT; Check & gt; Shows hidden devices

double-click the non-plug and play driver and delete as follows

hcmon

VMware Network Application Interface

VMparport

vmx86

VMware Bridge Protocol

double-click the network adapter

uninstall a network device that contains the word VMware

5. Run VMware_Install_Cleaner. Exe (you can download it here
http://download.csdn.net/detail/xxdddail/6265655)

The default installation location is C:\Program Files\VMware. The specific location depends on the location you set when installing the software. Note: if your virtual system is also in this directory, please save the virtual system Files before deleting

7. Delete Application information folder in C:\Documents and Settings\All Users\Application Data\VMware\.

8. Delete VMware program group folder, default location is C:\Documents and Settings\All Users\Start Menu\Programs\VMware\.

9. Delete the shortcut icon for the desktop

10. Delete the following files in the system folder (note :XP system to replace “WINNT” in the path with “Windows”)

% SystemDrive % \ WINNT \ system32 \ vmnat exe

% SystemDrive % \ WINNT \ system32 \ vmnetbridge exe

% SystemDrive % \ WINNT \ system32 \ vmnetdhcp. Conf

% SystemDrive % \ WINNT \ system32 \ VMNetDHCP exe

% SystemDrive % \ WINNT \ system32 \ vmnetdhcp leases

% SystemDrive % \ WINNT \ system32 \ vmnetnat. Conf

% SystemDrive % \ WINNT \ system32 \ vmxw2ksetup DLL

% SystemDrive % \ WINNT \ system32 \ vnetprobe exe

% SystemDrive % \ WINNT \ system32 \ vnetprobelib DLL

% SystemDrive % \ WINNT \ system32 \ vnetinst DLL

% SystemDrive % \ WINNT \ system32 \ vnetlib DLL

% SystemDrive % \ WINNT \ system32 \ vnetlib exe

% SystemDrive % \ WINNT \ system32 \ drivers \ vmnet sys

% SystemDrive % \ WINNT \ system32 \ drivers \ vmnetx sys

% SystemDrive % \ WINNT \ system32 \ drivers \ VMparport sys

% SystemDrive % \ WINNT \ system32 \ drivers \ vmx86 sys

% SystemDrive % \ WINNT \ system32 \ drivers \ vmnetadapter sys

% SystemDrive % \ WINNT \ system32 \ drivers \ vmnetbridge sys

% SystemDrive % \ WINNT \ system32 \ drivers \ vmnetuserif sys

% SystemDrive % \ WINNT \ system32 \ drivers \ hcmon sys

% SystemDrive % \ WINNT \ system32 \ drivers \ vmusb sys

Delete the user groups of vmware_user__ and vmware__ __ user groups in the local user group management

12. Restart the computer

After the above operation, if the new version of VM(such as VM10) cannot be uninstalled normally, please install the original version of VM(such as VM9.0.2), and then install and uninstall. This is how I successfully installed VM10.0.
It is also possible to have uninstallable problems when installing more advanced versions of a VM with a compact version, and you can refer to this method to resolve the problem.

VMware Virtualcenter failed firstboot. Failed to generate Virtu when installing vCenter6.7 on Windows Server 2008R2

VMware Virtualcenter failed firstboot. Failed to Generate Virtu appeared when Win2008R2 installed vCenter6.7

Unable to continue installation, you can only rollback to exit the installation

Start installing the MS17-012 patch
http://download.windowsupdate.com/d/msdownload/update/software/secu/2017/02/windows6.1-kb4012212-x64_2decefaa02e2058dcd965702509a992d8c4e92b3.msu
MS17-010
http://download.windowsupdate.com/c/msdownload/update/software/secu/2017/03/windows6.1-kb4012215-x64_a777b8c251dcd8378ecdafa81aefbe7f9009c72b.msu


The installation is complete