Tag Archives: solution

Opensuse12.3 enable / disable touchpad

Use the command:

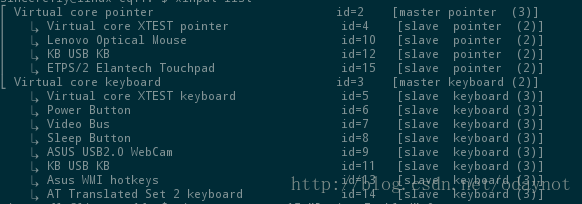
xinputlist 

View devices

Find the ID of the touchpad. For example, my id = 15

Then use the command:

xinput set-prop 15 “Device Enabled”0

The last “0” is to close the touchpad, and “1” is to open the touchpad

OpenSUSE test is available. I always use the external keyboard, but I can’t use the touch pad. Anyway, I don’t need it. It’s better to turn it off. Maybe I can save some power?Ha ha
ha

Solve the problem of USB mouse failure in the laptop mode of Ubuntu

A while ago, in order to solve the problem of not saving the brightness of the boot, the laptop mode management system was installed

But recently, I happened to find that the mouse can’t be used after the power is off. Because I have no time and seldom use the notebook in battery mode, I never care about it.

If you are free today, try the online method. Solve this problem. The method is as follows

First, input lsusb in the terminal, and the display is as follows:

$lsusb
Bus 001 Device 001: ID 1d6b:0002 Linux Foundation 2.0 root hub
Bus 002 Device 001: ID 1d6b:0002 Linux Foundation 2.0 root hub
Bus 001 Device 002: ID 8087:0024 Intel Corp. Integrated Rate Matching Hub
Bus 002 Device 002: ID 8087:0024 Intel Corp. Integrated Rate Matching Hub
Bus 001 Device 003: ID 058f:a014 Alcor Micro Corp. 
Bus 001 Device 004: ID 0bda:0139 Realtek Semiconductor Corp. 
Bus 002 Device 003: ID 093a:2521 Pixart Imaging, Inc. 
Bus 002 Device 004: ID 1a2c:0002 

If you find multiple devices. But I don’t know which is the USB mouse. Don’t worry. I don’t know. Then look down.

Enter the following command:
0

lsusb -xv

It shows a lot of detailed information. What can we do.

Can’t you read it?

Of course not. We export the result with the following command.

lsusb -xv > ~/mouse.txt

And then do it

gedit ~/mouse.txt

We went to the “mouse” editor, and we went up there. Just look for the ID of the mouse.

Bus 002 device 003: ID 093A: 2521 pixart imaging, Inc.
this is what I found. Remember 093A: 2521

Then open the configuration with the following command.

sudo gedit /etc/laptop-mode/conf.d/usb-autosuspend.conf

Search again for “autosuspend”_ USBID_ BLACKLIST=”

I found it. Under my picture

In the double quotation marks at the end of the second line of yellow, fill in the ID of the mouse. That’s 093a:2521

. Is the mouse still working normally after saving and unplugging?

PS: my current computer is ubuntu12.04

reference resources: http://forum.ubuntu.org.cn/viewtopic.php?t=391117
Using cbmakegen to export makefile of code:: blocks

First, Download cbmakegen from the official website

Official website address: http://developer.berlios.de/projects/cbmakegen/

Can also be downloaded through my baidu disk

[Windows version] address: http://pan.baidu.com/share/link?shareid=123030&uk=1227046485

[Linux version] address: http://pan.baidu.com/share/link?shareid=123067&uk=1227046485

【Windows】

Decompress cbmakefilegen-bin-0.3.12.5-win32

obtain cbMakefileGen.cbplugin

Open plugins – & gt; manage plugins in the code:: blocks interface

add to cbMakefileGen.cbplugin

Then the generate makefile option will appear in the Project menu to export the makefile

It appears in the project directory Makefile.gen

Change the path in the user directory in Chinese Ubuntu to English

In order to make it easy for users to use, it is installed in the “home”, “music”, “pictures” and “natural” It’s all in Chinese.

Most of the time, I like to put some files to be operated on the desktop. There are many command-line operations in Linux, so it’s hard to avoid using the command line to operate things on the desktop. Then I need to “CD desktop”. When I hit “desktop”, I need to switch the input method. It’s troublesome So I tried to find a way to change the path under the user directory to English, while the other Chinese remained unchanged. The method is as follows:

Open the terminal and enter the command in the terminal

        export LANG=en_US

        xdg-user-dirs-gtk-update

Jump out of the dialog box and ask if you want to convert the directory to an English path, agree and close it.
enter the command in the terminal:

        export LANG=zh_CN

Close the terminal and restart. Next time you enter the system, the system will prompt you whether to change the converted directory back to Chinese. Select no more prompt and cancel the modification. The Chinese to English conversion of the main directory is completed~

Reprinted from: http://my.oschina.net/myriads/blog/2867

_ASSERTE((unsigned)(c + 1) <= 256);

_ Asserte ((unsigned) (c + 1) & lt; = 256);

when using VS2010 to write a program, it is a very simple program, but when inputting Chinese characters, the following error prompt appears.

at the beginning, I was obsessed with the “cannot find or open the pdb file” of the error prompt, but later found that it was not the problem there. I started to notice the following problems.

click Retry, and a breakpoint message will appear.

next, click interrupt, and the breakpoint information will appear.

it can be seen from the figure that this is one of the problems in isctype. C file.

the solution is to right-click on the project – properties – configuration properties – C/C + + – command line

and then enter “/ J”

in the input box on the lower right side to re-enter Chinese characters. It is found that the error has been solved.

reference: msdn.microsoft.com

note: for other editors, such as VS2005, 2008 and 2012, you can choose from the top of the above website. As shown in the figure below

Solution — windows 2012 installation Framework 3.5 in VMWare

Solution – Windows 2012 installation Framework 3.5 in VMWare

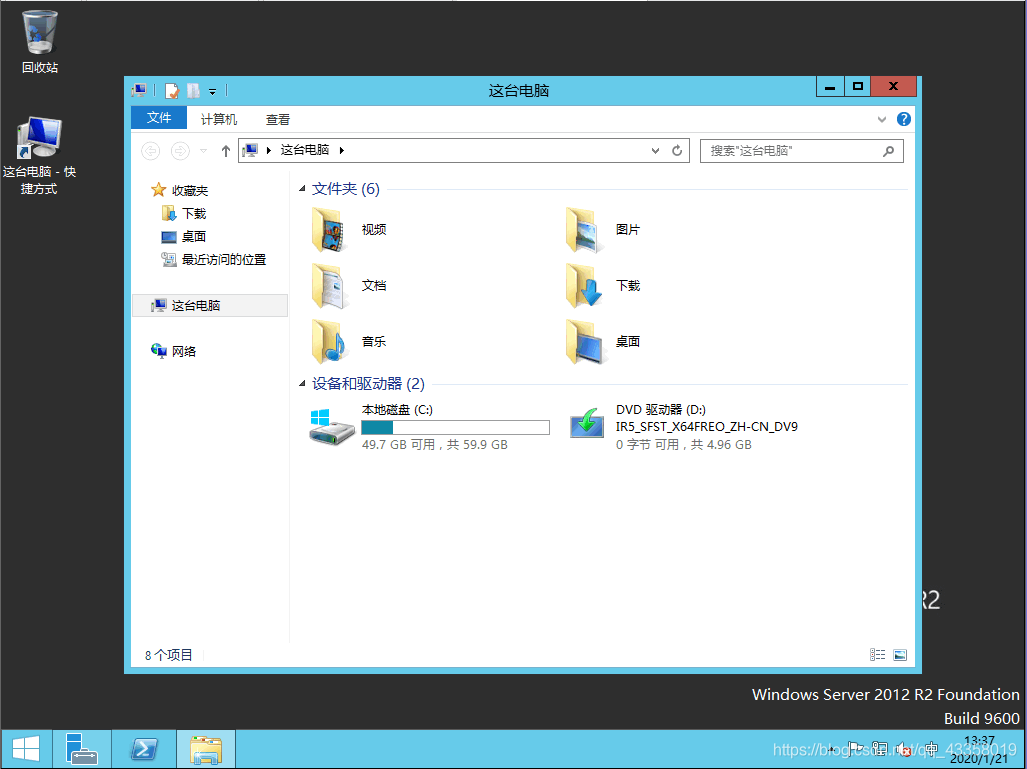
Mount the system image
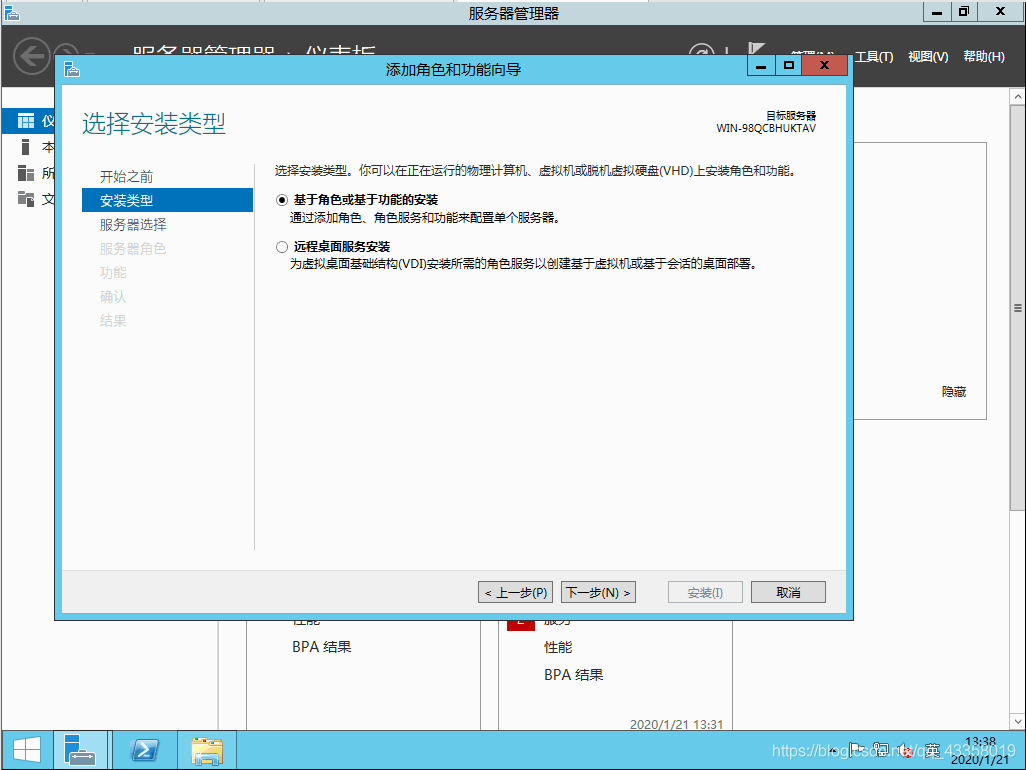
, open the server manager, click “add roles or functions”
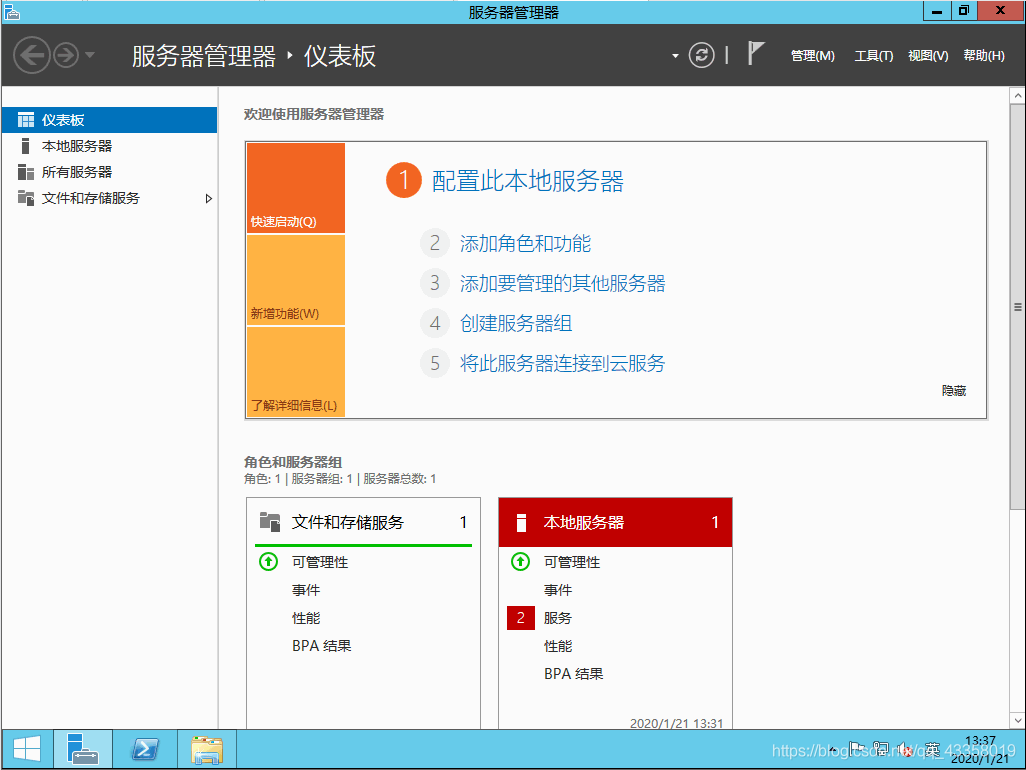
next
next
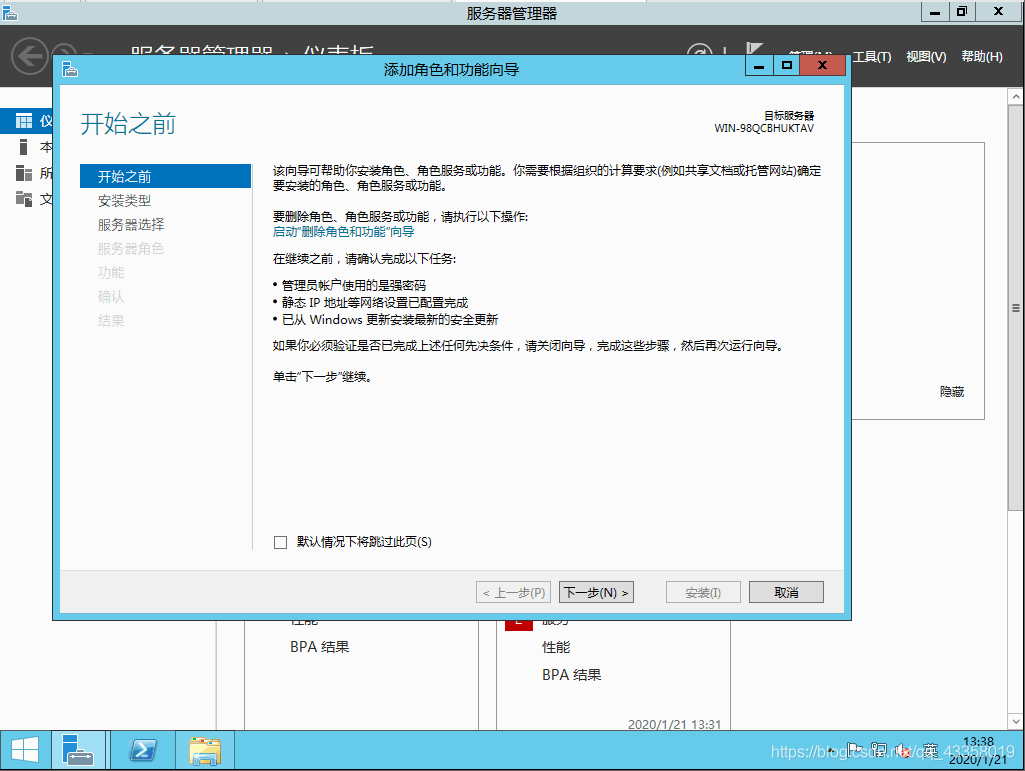
next
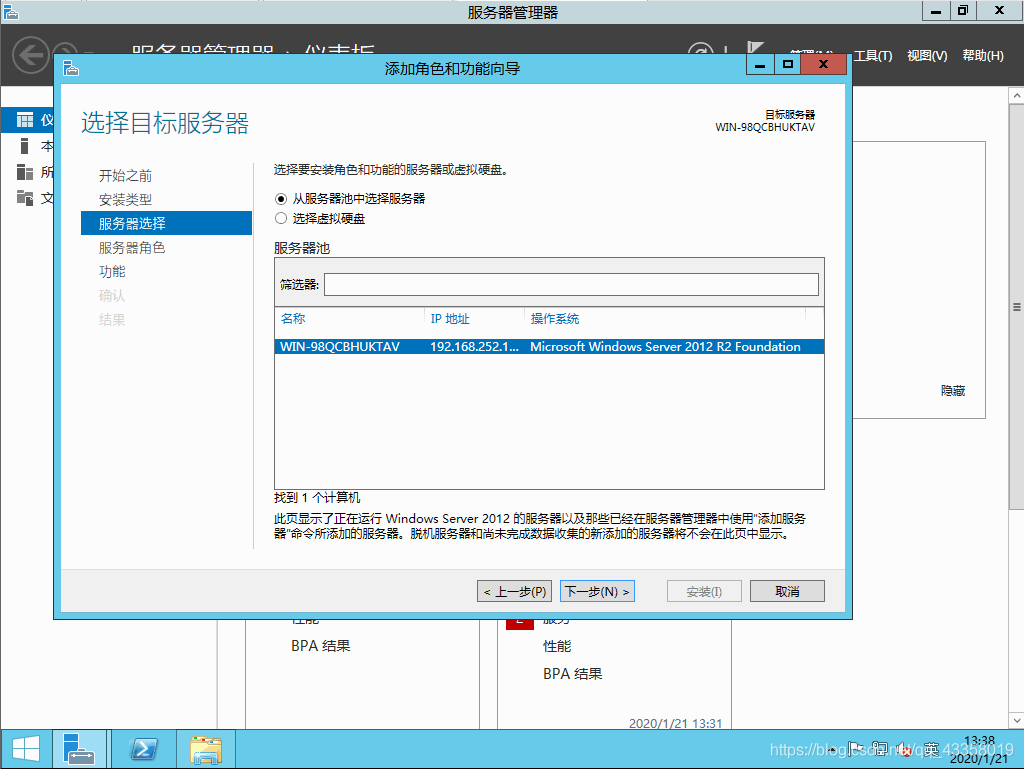
do not need to operate here, directly next
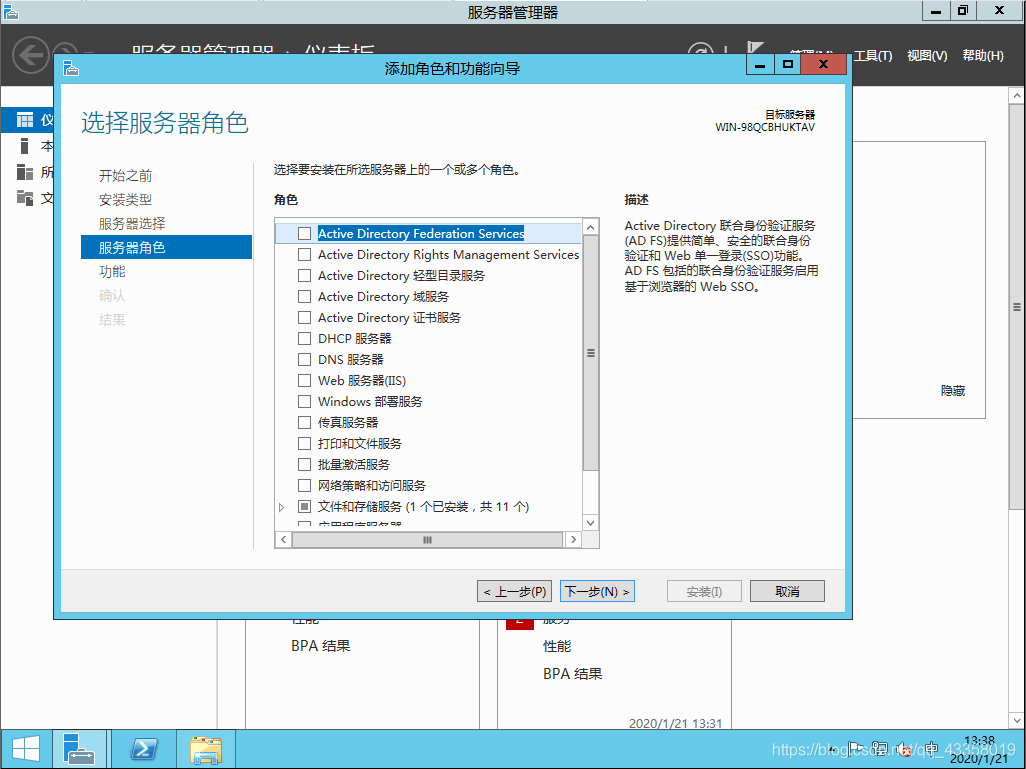
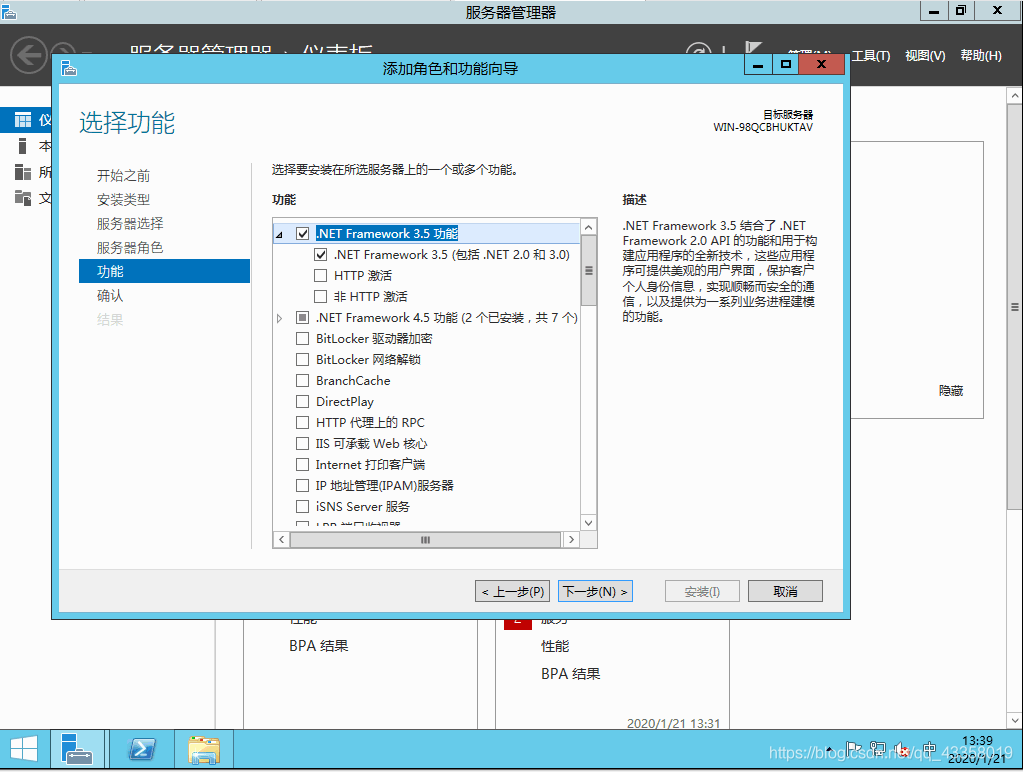
check Framework 3.5 here, and then next
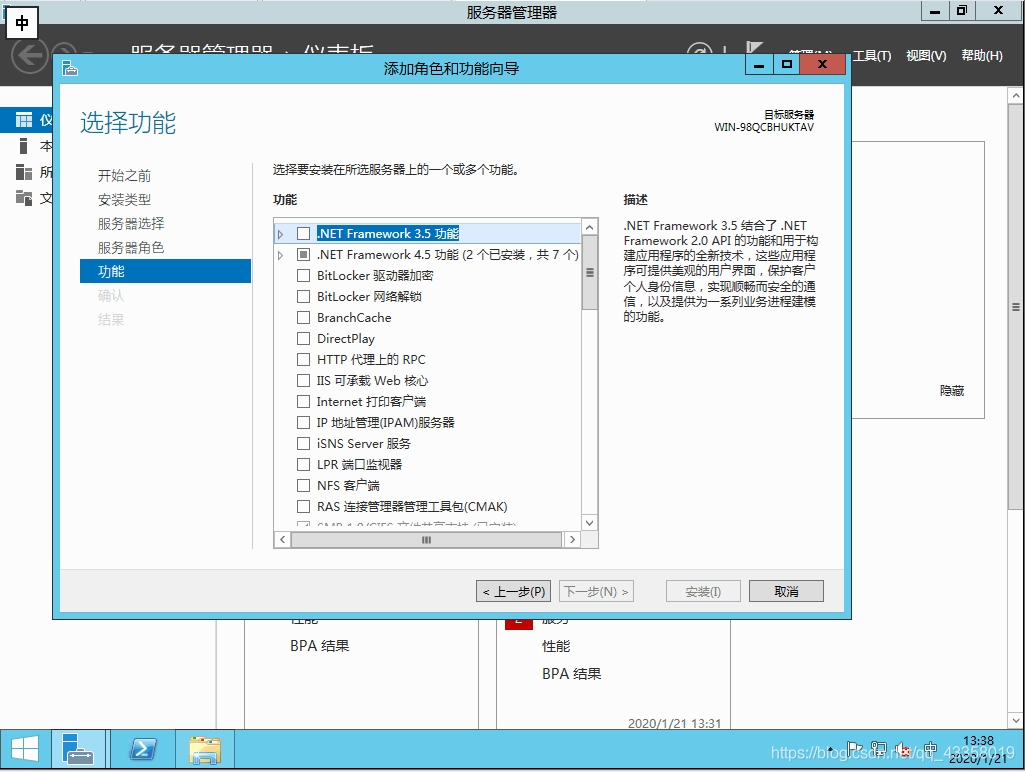
click specify alternate source path option
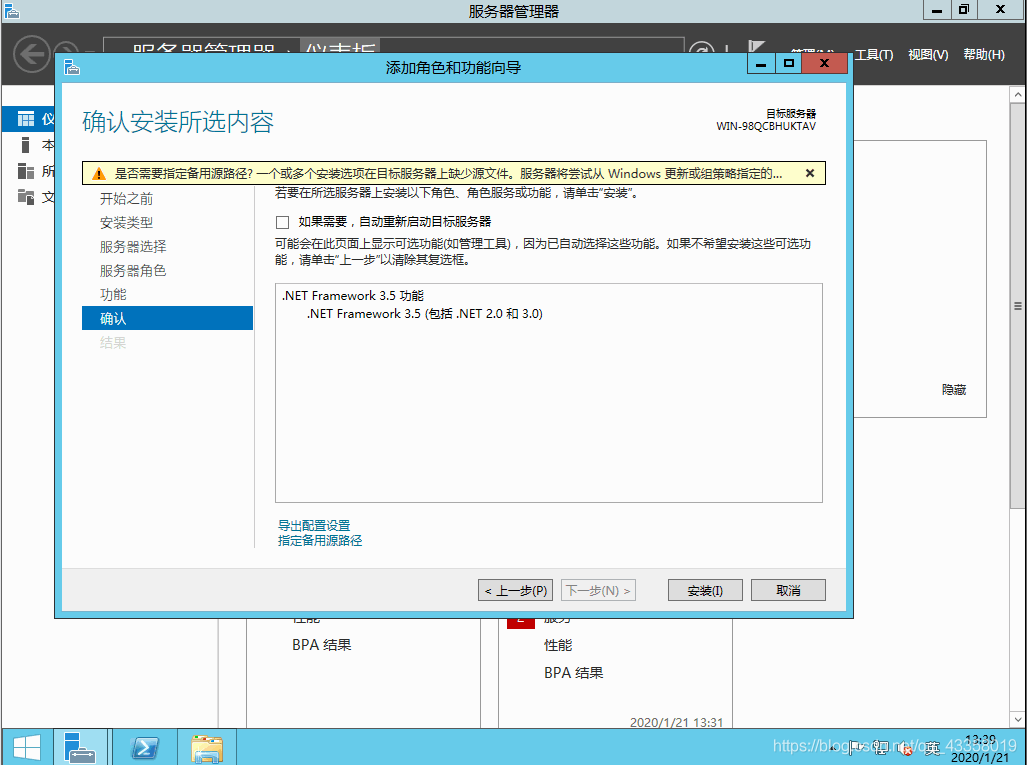
A289885427 here you need to fill in the alternate source path
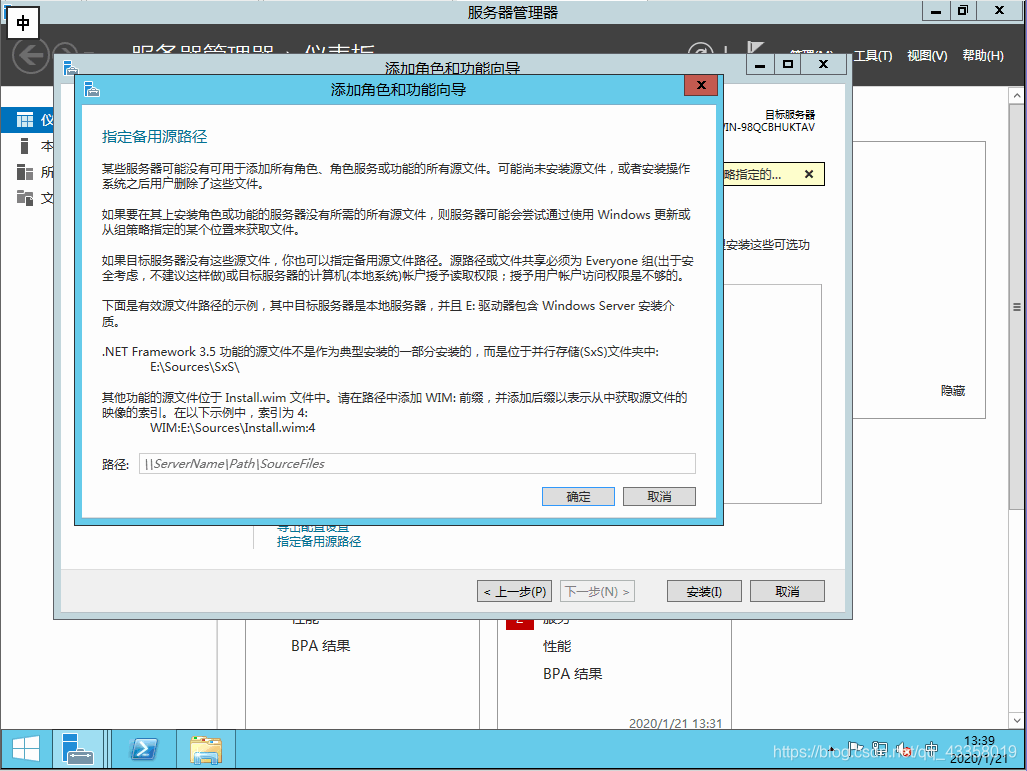
open the mounted system image, enter the specified location, copy the path
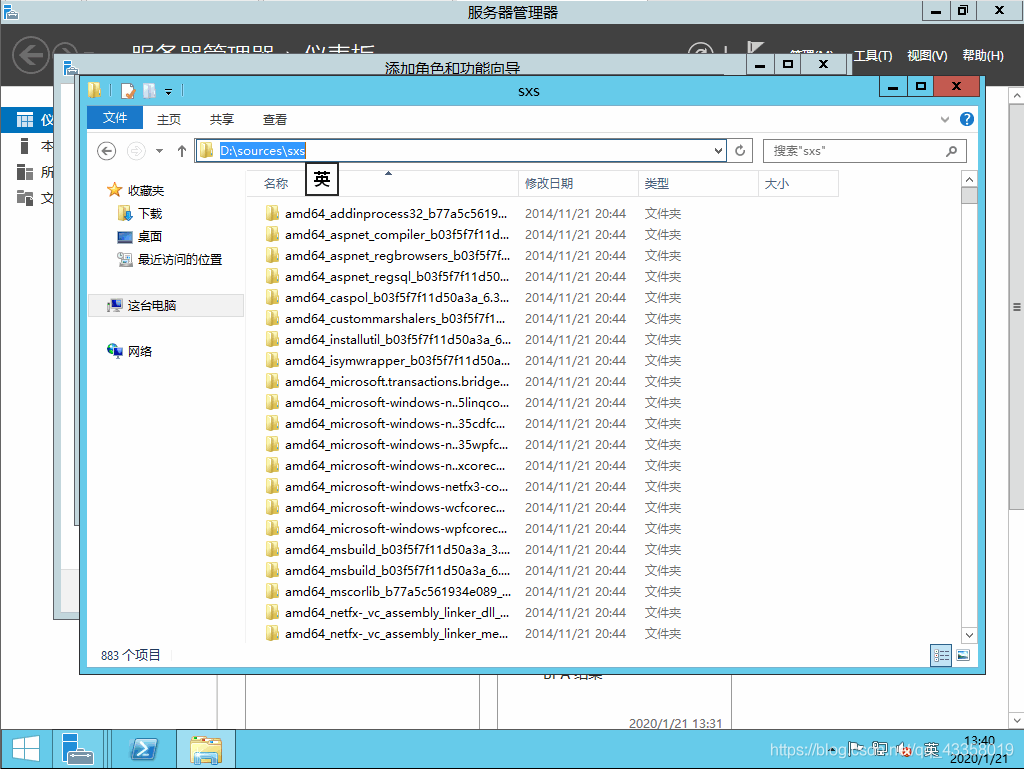
fill in the alternate source path, confirm, and then click Install
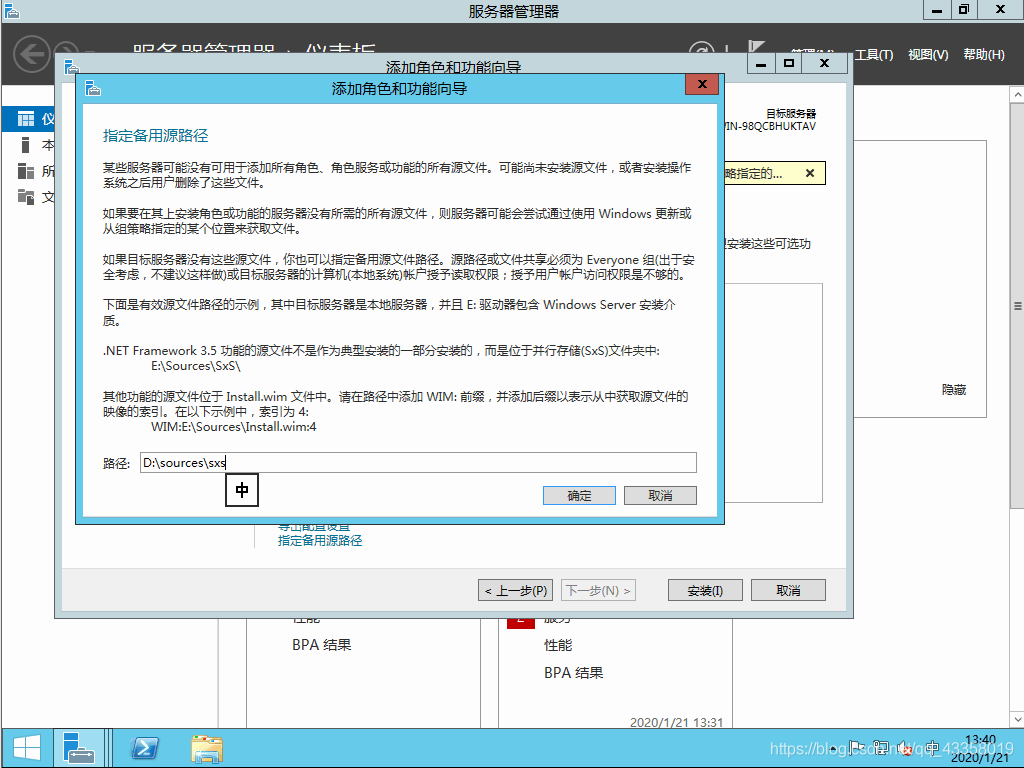
to start the installation, wait for the installation to complete
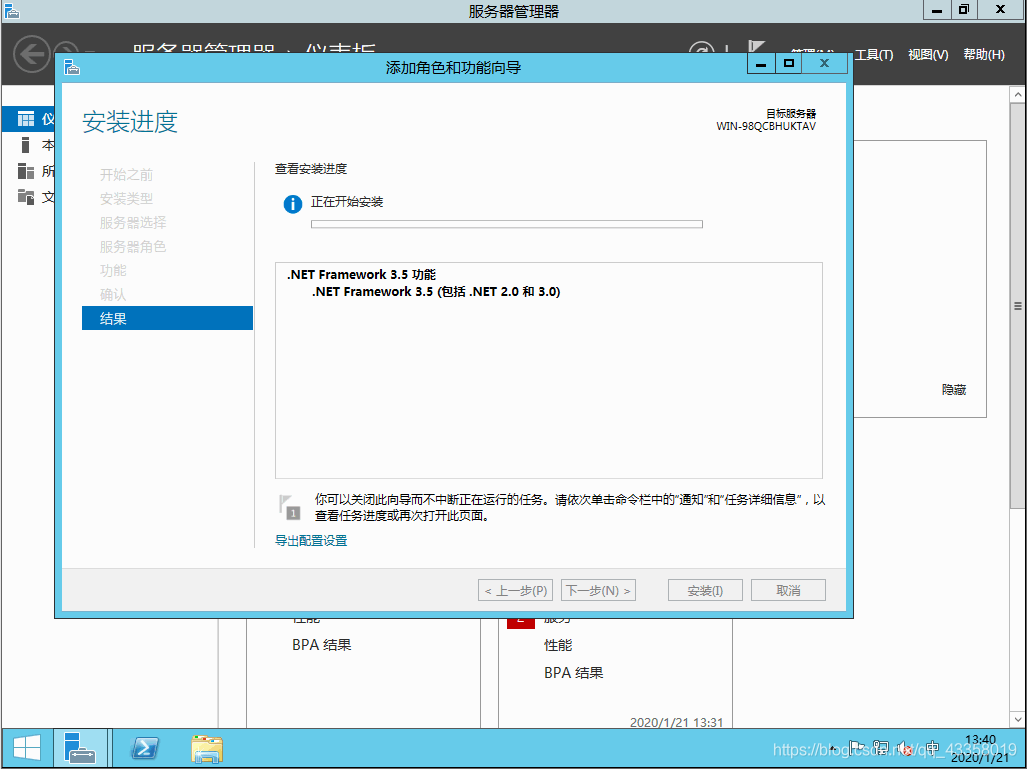
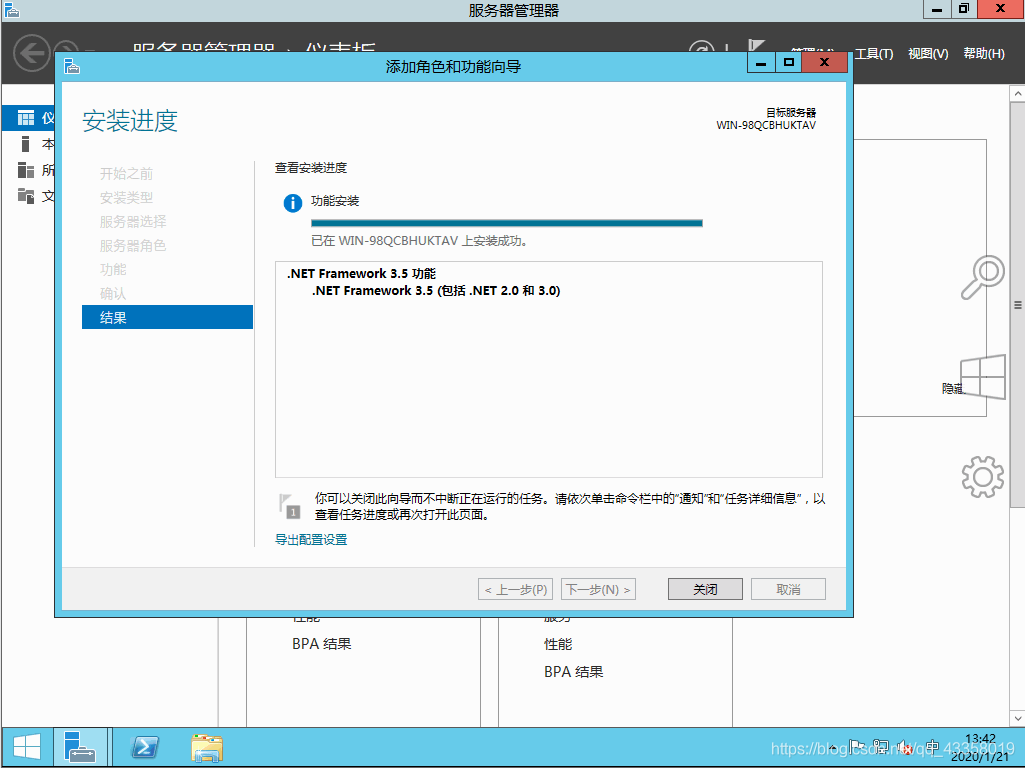
to finish the installation, and then close VMware.
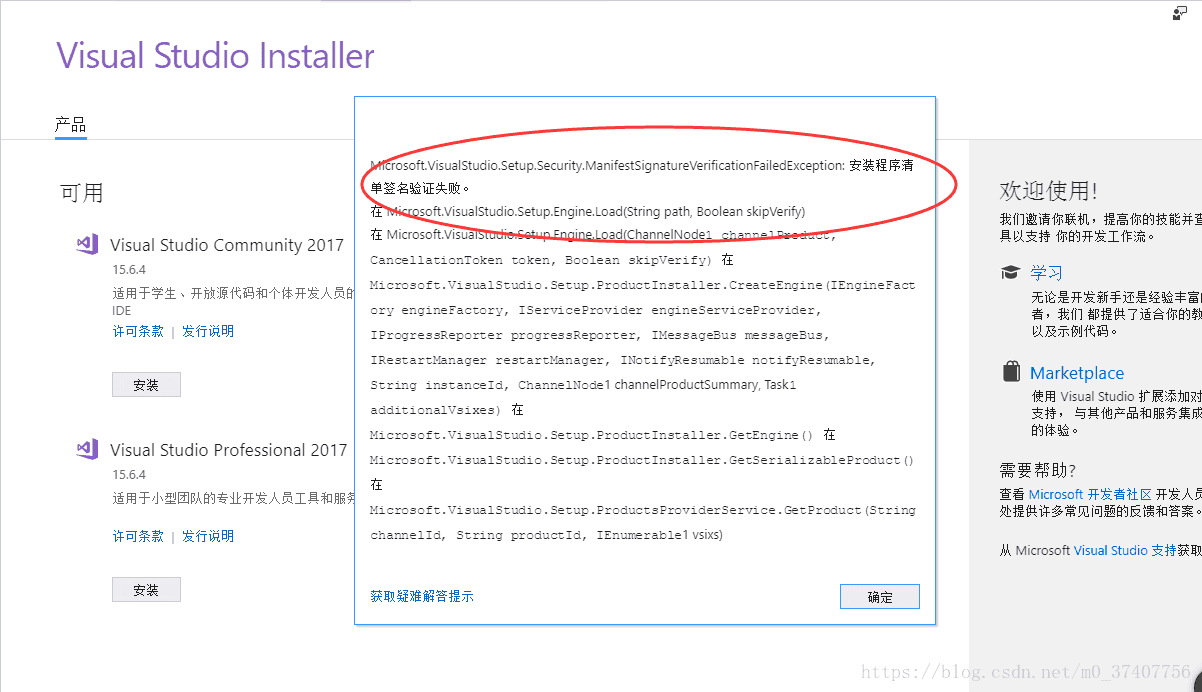
An error occurred when installing vs2017: failed to verify the signature of the installation program list

Problem Description: installation error: the signature verification of the installation program list failed!


Online mainstream solution 1:

Win + R – & gt; input“ gpedit.msc ”-≫ confirm

Computer configuration – & gt; Windows settings – & gt; security settings – & gt; local policies – & gt; security options – & gt; system Cryptography: use FIPS computer algorithms, modified to disabled.

Do you think that will solve the problem?It’s not that simple. Most people’s option is disabled, so this method is invalid.

2. Mainstream online solutions:

Win + R – & gt; enter “regedit” – & gt; OK

Modify the registry HKEY_ LOCAL_ Machine/system/currentcontrolset/control/Lisa/fipsalgorithmpolicy change 1 to 0.

Because the system is set in this way by default, the above scheme is useless.


My solution:

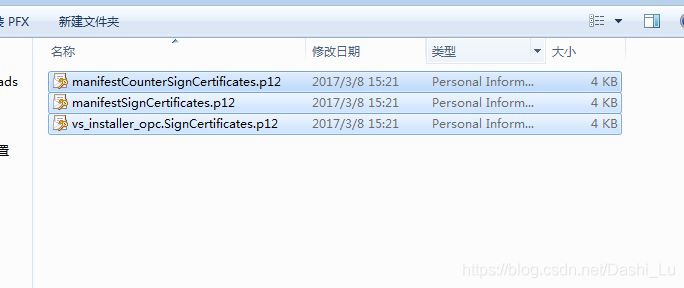
Install the certificates file offline. I have uploaded the file. Click to download the certificates file.


There are three files after decompression, double-click in turn, the default installation line, problem solving, pro test effective!

Wechat scan code, welcome to pay attention!


Git clone appears fatal: unable to access’ https://github.com/… The solution to the problem

As shown in the figure below, this error occurs when I try to clone someone else’s repo. When I clone from git: /, instead of HTTPS://, it works well.

This happens because the agent is configured in GIT. Since it’s an HTTPS proxy (not HTTP) git config http.proxy And git config — Global http.proxy It doesn’t help.

Solution 1

1. Look at your git configuration

git config –global -l

If you don’t have any content related to the HTTPS proxy, such as HTTPS_ Proxy =… That’s not the problem.

If you have any content related to the HTTPS proxy, please remove it from the ~ /. Gitconfig file and try again.

2. If it still doesn’t work, unset the environment variable

env|grep -i proxy  

You should have one or more lines_ proxy = …

Use the following to cancel settings one by one: cancel settings_ Proxy (or HTTPS)_ Proxy, depending on the name of the variable)

3. Check the environment variables again

env|grep -i proxy  

If it doesn’t show anything, you should be good.

Note: this solution can be applied to HTTP and HTTPS proxy problems. Only the variable name is changed from HTTPS to http.

Solution 2

On the premise of opening shadowlocks, manually configure git agent. Git client can input the following two commands.

git config –global http.proxy http://127.0.0.1 :1080

git config –global https.proxy http://127.0.0.1 :1080

Http:// can also be changed to sockets5://, but the difference is that Socks5 does not support password free login to GitHub through pubkey, and only user name and password can be entered for each code submission. HTTP can support password free login.

Cancel agent:

git config –global –unset http.proxy  

git config –global –unset https.proxy  

In fact, plan 1 and plan 2 are the same method, but plan 2 is more specific. Most problems can be solved by plan 2. When plan 2 is invalid, plan 1 should be considered.


reference: https://stackoverflow.com/questions/24543372/git-cannot-clone-or-push-failed-to-connect-connection-refused  

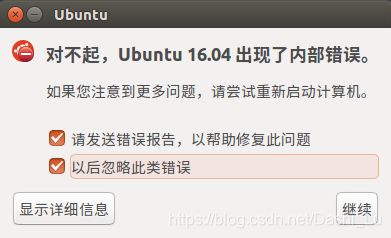
Solution: ubantu has an internal error

This often happens when Ubuntu is turned on.


Why

Ubuntu desktop version is pre installed with app, which is an error collection system. It collects software crashes, unhandled exceptions and other information, including program bugs, and generates crash reports for debugging purposes. When an application crashes or a bug occurs, the app will alert the user through a pop-up window and ask the user whether to submit a crash report

“Sorry, the application XXX has closed unexpectedly.”
“sorry, the application XXX has closed unexpectedly.”  
“Sorry, Ubuntu XX.XX Has experienced an internal error.
“sorry, Ubuntu XX.XX An internal error has occurred. ”
“system program problem detected.”

The actual situation is not that Ubuntu is prone to internal errors, but that once the program crashes once, a. Crash file will be generated to record the crash information, which is stored in the directory:

/var/crash/ 

As long as you don’t deal with it, every time you turn on it, you will be prompted with an error. That is to say: the error report is not necessarily something wrong, but there have been errors, and you did not deal with them. Usually, go to the/var/crash/directory to view the crash file. If it’s not a big problem (usually no big problem), delete the crash file in the directory, and then no more errors will be reported.

Solution:

Error report for permanently closing the app
to permanently close the app, edit/etc/default/APP and modify the following parameters

enabled=0 

Restart your Ubuntu system, and the app will shut down automatically
if you never use it again, there is a simple way to remove it completely

$ sudo apt-get purge apport

Even if I removed the app directly, there was no problem.

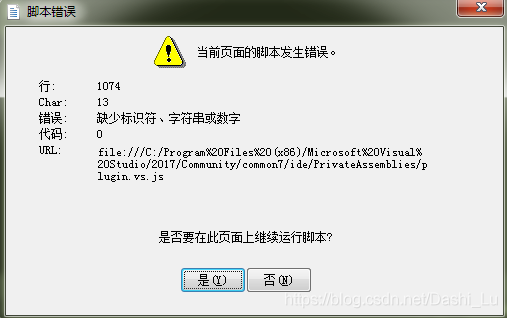
Vs error: there is an error in the script of the current page


This happens after vs update:

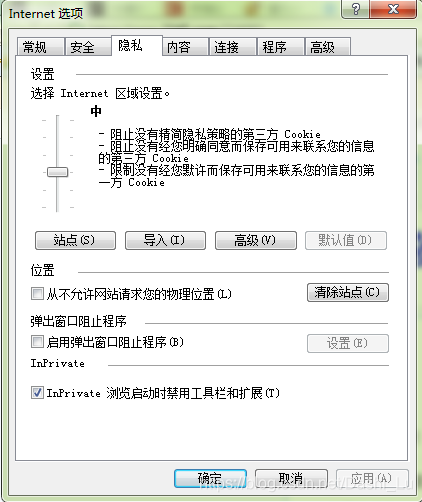
Solution:

Check the “stop Internet” option in the pop-up control panel to open the Internet privacy menu.

Note: when the above method fails, you can try to close “start diagnostic tool during debugging”;

Tools – & gt; options – & gt; debug – & gt; start the diagnostic tool while debugging; just remove the previous tick.

When opencv is used, vs is stuck and other software works normally

Problem: when using OpenCV, when the mouse is on mat, vs2017 often gets stuck, the computer doesn’t get stuck, and other software works normally.

Solution:

1. Tools – & gt; options – & gt; text editor – & gt; C/C + + – & gt; advanced – & gt; intelisense – & gt; automatically change quick information to false

2. Right click in any of the definitions in Mat & gt

3. Class CV_ Delete or cut the lengthy passage above exports mat to another place

4. Tools – & gt; options – & gt; text editor – & gt; C/C + + – & gt; advanced – & gt; intelisense – & gt; automatically change quick information back to true