Tag Archives: Android

[Solved] Fragment not attached to an activity

Error Description:

Make a network request in the fragment, jump to other pages before the request ends, and then jump back from other pages. The compiler reports the following error:

E/AndroidRuntime: FATAL EXCEPTION: main
    Process: com.mio.hygrothermograph, PID: 32449
    java.lang.IllegalStateException: Fragment HomeFragment{86a99ac} (d6728a71-7df5-4f7b-ae10-e3e449d3b451) not attached to an activity.
        at androidx.fragment.app.Fragment.requireActivity(Fragment.java:928)
        at com.mio.hygrothermograph.ui.HomeFragment$getHomeInfoByRxJava$1.onNext(HomeFragment.kt:91)
        at com.mio.hygrothermograph.ui.HomeFragment$getHomeInfoByRxJava$1.onNext(HomeFragment.kt:70)
        at io.reactivex.internal.operators.observable.ObservableObserveOn$ObserveOnObserver.drainNormal(ObservableObserveOn.java:201)
        at io.reactivex.internal.operators.observable.ObservableObserveOn$ObserveOnObserver.run(ObservableObserveOn.java:255)
        at io.reactivex.android.schedulers.HandlerScheduler$ScheduledRunnable.run(HandlerScheduler.java:119)
        at android.os.Handler.handleCallback(Handler.java:900)
        at android.os.Handler.dispatchMessage(Handler.java:103)
        at android.os.Looper.loop(Looper.java:219)
        at android.app.ActivityThread.main(ActivityThread.java:8668)
        at java.lang.reflect.Method.invoke(Native Method)
        at com.android.internal.os.RuntimeInit$MethodAndArgsCaller.run(RuntimeInit.java:513)
        at com.android.internal.os.ZygoteInit.main(ZygoteInit.java:1109)

reason

Execute a time-consuming task in the Fragment, and rebuild the Activity before the task is completed. Getactivity() will be null, and null pointer exceptions will be caused in all places where parameters need to be obtained through the activity. For example, the getResource() method.

Solution:

The isAdded() judgment is performed where the parameters need to be obtained through the Activity to judge whether the current Fragment is added to the activity. Only when the Fragment is added to the activity can getResource be obtained.

[Solved] ARouter Error: There is no route matched

1. Problem description

There is no route matched when ARouter implements communication between components

My code design is as follows:

Defined in submodule:

interface InitApi : IProvider

Defined in the main module:

@Route(path = "/child/init/net")
class NetworkInitializer : InitApi {
    override fun init(context: Context?) {

    }
}

Then read in the submodule:

ARouter.getInstance().build(route).navigation() as InitApi

2. Solution

Uninstalling and reinstalling the app, it runs normally.


[Solved] Phone Debug Program Error: The application could not be installed: INSTALL_FAILED_TEST_ONLY

1. Error message

17:18	Gradle build finished in 2 s 904 ms

17:18	Failed to commit install session 1905086282 with command cmd package install-commit 1905086282. Error: INSTALL_FAILED_TEST_ONLY

17:18	Error
		Installation did not succeed.
		The application could not be installed: INSTALL_FAILED_TEST_ONLY
		Retry

17:18	Session 'app': Installation did not succeed.
		The application could not be installed: INSTALL_FAILED_TEST_ONLY
		Retry


2. Solution

1. Problem analysis


When you click 
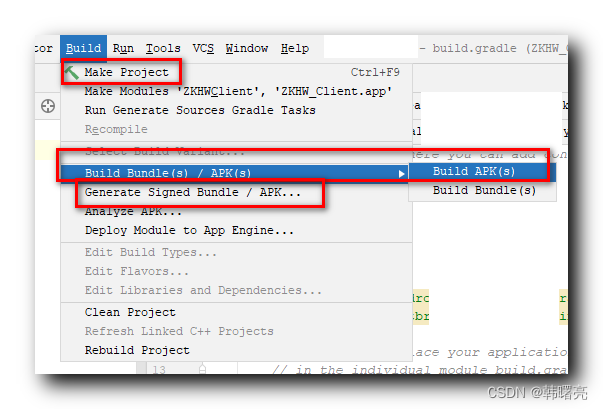
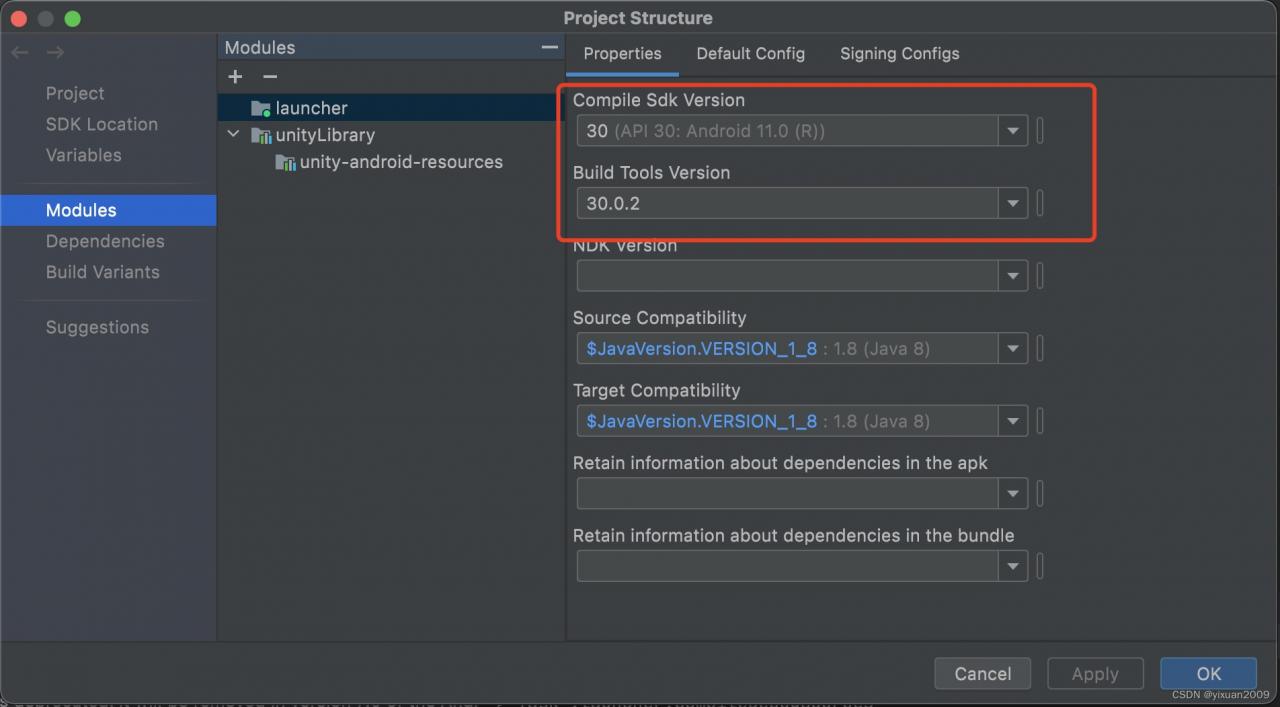
to run the debugging program, it will be automatically generated in the application tab of the manifest file

android:testOnly="true"

Some mobile phones do not support the installation of such applications;


2. Solution 1

Under menu bar/build:

  • Debug apps compiled with Build APK(s) can run;
  • The debug version of the application compiled with Make Project can be run;
  • Released apps packaged with Generate Signed APK signatures will also work;


3. Solution 2

Configure in gradle.properties

android.injected.testOnly=false

How to Solve Android Linux5.10 Kernel do_gettimeofday Function Error

Android Linux 5.10 kernel do_gettimeofday function prompt does not exist.

Solution: Replace with ktime_get_real_ts64 function.

Specific examples:

Code before modification:

    struct  timeval   time_now;
	struct rtc_time tm; 
    do_gettimeofday(&time_now);
	rtc_time_to_tm(time_now.tv_sec, &tm); 

Code after modification:

	struct timespec64 ts64;
	struct rtc_time tm; 
    ktime_get_real_ts64(&ts64);
	tm = rtc_ktime_to_tm(ts64.tv_sec); 

JZVideo Error: Attempt to invoke virtual method ‘android.view.Window android.app.Activity.getWindow()’ on a null object reference

1. Error reporting

Attempt to invoke virtual method ‘android.view.Window android.app.Activity.getWindow()’ on a null object reference

2. Cause

VideoAdapter.java file code:

@Override
    public View getView(int position, View convertView, ViewGroup parent) {
        ViewHolder holder = null;
        if (convertView == null) {
            convertView = LayoutInflater.from(context).inflate(R.layout.item_mainlv,parent,false);
            holder = new ViewHolder(convertView);
            convertView.setTag(holder);
        }else {
            holder = (ViewHolder) convertView.getTag();
        }

        // Get the data source of the specified location
        String path = "xxxx";
        holder.jzvdStd.setUp(path,"test",JzvdStd.SCREEN_NORMAL);

        holder.jzvdStd.positionInList = position;

        return convertView;
    }

    class ViewHolder{
        JzvdStd jzvdStd;
        public ViewHolder(View view){
            jzvdStd = view.findViewById(R.id.item_main_jzvd);
        }
    }

Since jzvdStd has released the jzvdStd window when the full screen is cut to a small screen, and the subsequent if (convertView == null) judgment, directly to the else statement, so the window that has been released cannot be obtained by the statement in the else in the window, so the error is reported. (The above is a personal opinion)

3. Solution

Replace the above code with the following code

    @Override
    public View getView(int position, View convertView, ViewGroup parent) {

        ViewHolder viewHolder;
        if (null == convertView) {
            viewHolder = new ViewHolder();
            LayoutInflater mInflater = LayoutInflater.from(context);
            convertView = mInflater.inflate(R.layout.item_mainlv, null);
            convertView.setTag(viewHolder);
        } else {
            viewHolder = (ViewHolder) convertView.getTag();
        }
        viewHolder.jzvdStd = convertView.findViewById(R.id.item_main_jzvd);


        // Get the data source of the specified location
        String path = "xxx";
        viewHolder.jzvdStd.setUp(path,"test",JzvdStd.SCREEN_NORMAL);

        return convertView;
    }

    class ViewHolder{
        JzvdStd jzvdStd;
    }

[Solved] Error:Kotlin: Module was compiled with an incompatible version of Kotlin. The binary version of

Problem Description: my project was fine the day before yesterday. Suddenly, the following error was reported after opening it the next day

Error:Kotlin: Module was compiled with an incompatible version of Kotlin. The binary version of its metadata is 1.5.1, expected version is 1.1.16.

I didn’t use kotlin either. Finally, I recompiled the project when compiling

Done!

Kotlin: How to Solve kapt import error

The first problem encountered was that the BR file could not be found

Log: unresolved reference: BR

Reason: the plug-in developed by kotlin does not support cross module, so the reference of databinding when using APT Technology br file does not determine the directory, so the error (unresolved reference: be) is caused, so it needs to be completed by kapt

Solution:

apply plugin: 'kotlin-kapt'
kapt {
    generateStubs = true
}

dependencies {
    implementation fileTree(dir: 'libs', include: ['*.jar'])
    implementation "org.jetbrains.kotlin:kotlin-stdlib-jdk7:$kotlin_version"
    //The version should be the same as the gradle version
    kapt  "com.android.databinding:compiler:3.5.0"
}

New problem: Class not found Custom generated class can not be generated.

Reason: If you already have kapt, you need to replace it with kapt

Solution: In Kotlin, you need to add the kotlin-kapt plugin to activate kapt and replace the annotationProcessor with kapt.

[Solved] adb shell error: error: device unauthorized

2022/7/29 oppo-r11s Android 8-test success

After connecting the Android device, the windows computer wants to enter the device through the terminal command line, and an error is reported

Error content

C:\Users> adb shell

error: device unauthorized.
This adb server's $ADB_VENDOR_KEYS is not set
Try 'adb kill-server' if that seems wrong.
Otherwise check for a confirmation dialog on your device.

Inspection items:

1. Whether the data cable is plugged firmly

2. Whether the developer option is turned on

3. Whether the USB debugging option is turned on

If the above inspections are normal, the following methods can be used to solve the problem:

On the command line, enter adb kill-server to close the ADB service, and then ADB devices. He will automatically start the service. After querying the device, enter ADB shell again to test successfully.

If you fail unfortunately, you can enter adb start-server to restart the service that has just been shut down.

adb kill-server

[Solved] docker Error response from daemon OCI runtime create failed container_linux.go380

docker: Error response from daemon: OCI runtime create failed: container_ linux. Go:380 error 

Docker fails to run after installing mysql5.7, and reports error: OCI runtime create failed

Pull mysql5.7 on docker is OK
execute the code and report an error

docker run -p 3306:3306 --name mysql 

-v /mydata/mysql/log:/var/log/mysql
-v /mydata/mysql/data:/var/lib/mysql
-v /mydata/mysql/conf:/etc/mysql
-e MYSQL_ ROOT_ PASSWORD=root
-d mysql:5.7

cd to /mydata/mysql/conf and finds that it is not mounted correctly, and there is no /etc/mysql file path

Reason for error: because of the compatibility between Linux and docker version, the docker version needs to be degraded or reinstalled

There are two solutions:

  1. Reinstall the specified version of docker
  2. Downgrade docker to the specified version

The first method: uninstall and reinstall:

//Step 1: Uninstall docker

//List the packages downloaded by docker
sudo yum list installed | grep docker

//remove all the above related installed packages sudo yum -y remove "above show related packages"
sudo yum -y remove docker-ce.x86_64
sudo yum -y remove docker-ce-cli.x86_64

// Remove related images and containers
sudo rm -rf /var/lib/docker

sudo yum remove docker 
              docker-client 
              docker-client-latest 
              docker-common 
              docker-latest 
              docker-latest-logrotate 
              docker-logrotate 
              docker-selinux 
              docker-engine-selinux 
              docker-engine
                 
//Test for deletion
docker -v


// Step 2: reinstall the specified version of docker

// Install some necessary system tools.
sudo yum install -y yum-utils device-mapper-persistent-data lvm2

// Add software source information: sudo yum-config -y
sudo yum-config-manager --add-repo http://mirrors.aliyun.com/docker-ce/linux/centos/docker-ce.repo

//Update the yum cache.
sudo yum makecache fast

//View the available versions of Docker-ce: sudo yum list docker-ce
yum list docker-ce --showduplicates | sort -r

// If you need to show only table versions, you can turn off the list for test versions: yum list
sudo yum-config-manager --enable docker-ce-edge
sudo yum-config-manager --enable docker-ce-test

//Update the yum package index
yum makecache fast

//Install the specified version of docker-ce: sudo yum install -y docker-ce
sudo yum install -y docker-ce-17.03.2.ce-1.el7.centos 

// Error: If the installation of the specified version of docker shows that the specified version of the docker-ce-selinux dependency package needs to be installed, please install.
yum install -y https://download.docker.com/linux/centos/7/x86_64/stable/Packages/docker-ce-selinux-17.03.2.ce-1.el7.centos.noarch.rpm 

Then pull MySQL again

docker pull mysql:5.7

The second method: downgrade docker to the specified version:

//stop docker
sudo systemctl stop docker
//Enter the downgrade command
yum downgrade --setopt=obsoletes=0 -y docker-ce-17.03.2.ce-1.el7 docker-ce-selinux-17.03.2.ce-1.el7 containerd.io
//Checking the docker version
docker -v

Recreate container and start

docker run -p 3306:3306 --name mysql 

-v /mydata/mysql/log:/var/log/mysql
-v /mydata/mysql/data:/var/lib/mysql
-v /mydata/mysql/conf:/etc/mysql
-e MYSQL_ ROOT_ PASSWORD=root
-d mysql:5.7

[Solved] Logging system failed to initialize using configuration from ‘classpathlogbacklogback-spring.xml‘

2021-12-31:

The project works fine on Windows, but when it is moved to a Mac system, an error appears!

According to the error message, the initialization of “logback-spring.xml” failed, and the configuration of “Logback” was detected as an error and an illegal exception was declared,

Failed to create a parent directory for “[/apps/logs/sns_error.log]”…

The main reason is that the initialization of the configuration file failed, and then the following error was reported.

First, let’s take a look at the input location of the log file defined in the configuration file, as shown below.

The specific error information is as follows:

Logging system failed to initialize using configuration from ‘classpath:logback/logback-spring.xml’
java.lang.IllegalStateException: Logback configuration error detected:
ERROR in ch.qos.logback.core.rolling.RollingFileAppender[ERROR] - Failed to create parent directories for [/apps/logs/sns_error.log]
ERROR in ch.qos.logback.core.rolling.RollingFileAppender[ERROR] - openFile(/apps/logs/sns_error.log,true) call failed. java.io.FileNotFoundException: /apps/logs/sns_error.log (No such file or directory)
ERROR in ch.qos.logback.core.rolling.RollingFileAppender[WARN] - Failed to create parent directories for [/apps/logs/sns_warn.log]
ERROR in ch.qos.logback.core.rolling.RollingFileAppender[WARN] - openFile(/apps/logs/sns_warn.log,true) call failed. java.io.FileNotFoundException: /apps/logs/sns_warn.log (No such file or directory)
ERROR in ch.qos.logback.core.rolling.RollingFileAppender[INFO] - Failed to create parent directories for [/apps/logs/sns_info.log]
ERROR in ch.qos.logback.core.rolling.RollingFileAppender[INFO] - openFile(/apps/logs/sns_info.log,true) call failed. java.io.FileNotFoundException: /apps/logs/sns_info.log (No such file or directory)
ERROR in ch.qos.logback.core.rolling.RollingFileAppender[DEBUG] - Failed to create parent directories for [/apps/logs/sns_debug.log]
ERROR in ch.qos.logback.core.rolling.RollingFileAppender[DEBUG] - openFile(/apps/logs/sns_debug.log,true) call failed. java.io.FileNotFoundException: /apps/logs/sns_debug.log (No such file or directory)
ERROR in ch.qos.logback.core.rolling.RollingFileAppender[TRACE] - Failed to create parent directories for [/apps/logs/sns_trace.log]
ERROR in ch.qos.logback.core.rolling.RollingFileAppender[TRACE] - openFile(/apps/logs/sns_trace.log,true) call failed. java.io.FileNotFoundException: /apps/logs/sns_trace.log (No such file or directory)

Let’s continue with the above

It should be that I don’t know its features very well when I just use Mac, and I don’t know whether it’s caused by different computer environments (I can’t create this directory on MAC)

Follow up: 2021-12-31 PM

Background Note: On Windows my project is in a folder on the D: drive, and today I found the “/apps/logs” directory on the D: drive, just like the path in the configuration below.

When I change the input location of the configuration file to “/apps/logs/sns”, the folder of “SNS” appears on disk D.

As shown in the following figure:

This shows that when the value in this configuration is “relative path”, it will be created in the root directory of the disk where the project is located (for example, if the project is on disk d: then the path is “d:+ relative path”).

Follow up: December 31, 2021

After opening the folder, I found that the following log was created, and then I looked at the error message. It can completely explain the reason for the error: the folder path cannot be created, and then the log file cannot be created, and the log file failed to be opened.

Then reported an error!!

The created log file is shown in the following figure:

The error information is shown in the following figure:

The solution must start with why the file path is not created on the Mac.

There is no concept of disk partition on Mac. Is it because of this reason that you can’t create a path.

Finally, I found the Solution:

On Mac when I remove the backslash at the top of “/apps/logs/sns” and change it to “apps/logs/sns”, it runs successfully

[Solved] Virtual Machine Error: FAILURE: Build failed with an exception.Flutter

FAILURE: Build failed with an exception.

* What went wrong:
Execution failed for task ':app:checkDebugAarMetadata'.
> Could not resolve all dependencies for configuration ':app:debugRuntimeClasspath'.
   > Using insecure protocols with repositories, without explicit opt-in, is unsupported. Switch Maven repository 'maven(http://storage.flutter-io.cn/download.flutter.io)' to redirect to a secure protocol (like HTTPS) or allow insecure protocols. See https://docs.gradle.org/7.4/dsl/org.gradle.api.artifacts.repositories.UrlArtifactRepository.html#org.gradle.api.artifacts.repositories.UrlArtifactRepository:allowInsecureProtocol for more details. 

* Try:
> Run with --stacktrace option to get the stack trace.
> Run with --info or --debug option to get more log output.
> Run with --scan to get full insights.

* Get more help at https://help.gradle.org

BUILD FAILED in 50s
Exception: Gradle task assembleDebug failed with exit code 1


Solution:

Although there are many tutorials online, but there is no solution to this solution, the early my attention are in the first sentence, only to know that the original focus is the latter sentence, the main error is in the http and https protocol, Just modify HTTP to HTTPS of the system variable FLUTTER_STORAGE_BASE_URL variable value.

[Solved] Manifest merger failed with multiple errors, see logs

After upgrading Android Sdk to 33 recently, packing Android generates the following problems:

AndroidManifest.xml Error:
 Apps targeting Android 12 and higher are required to specify an explicit value for `android:exported` when the corresponding component has an intent filter defined. See https://developer.android.com/guide/topics/manifest/activity-element#exported for details.

See http://g.co/androidstudio/manifest-merger for more information about the manifest merger.


Execution failed for task ':launcher:processDebugMainManifest'.
> Manifest merger failed with multiple errors, see logs

1. Tried to add android:exported as instructed, but the problem remains. So I used the 2nd solution, drop the sdk version.

2. Drop Android sdk version

1. Set the SDK version of Android project as shown in the following figure:

2. After setting, modify the relevant SDK in all build.gradle configuration files in the project to be consistent with the version number configured in the above figure.

compileSdkVersion 30
buildToolsVersion '30.0.2'
targetSdkVersion 30