How to use high version OpenGL under Windows

Windows only supports OpenGL1.1, but graphics cards may implement the related functions of higher versions of OpenGL directly from the hardware. How do you call a higher version of OpenGL in development?
 
Let’s start with a look at the OpenGL version and related function extensions supported by a graphics card:
To see what version of OpenGL the graphics card supports: glGetString(GL_VERSION);
To see the supported extensions: glGetString(GL_EXTENSIONS);
See more detailed information.
http://www.opengl.org/wiki/GlGetString
Note: call glGetString(GLemun); Be sure to initialize the drawing window before doing so, otherwise only null will be returned.
 
Calling extensions with glew:
After confirm the graphics support high version of the function can be used to glew libraries (http://sourceforge.net/projects/glew/) to invoke, configured information can be used after glew libraries. What I want to point out here is that before using the OpenGL function declared in the advanced version of Glew, you must make the following call:
GLenum err = glewInit ();
if (GLEW_OK! = err)
{
* Problem: glewInit failed, something is seriously wrong. */
f>tf (stderr, “Error: %s/n”, glewgeterrorString (err));
}
 
 
You can also use glee,glext, and mesa.
Glee is similar to Glew,glext is a bit cumbersome to use, and mesa is a platform-independent implementation of OpenGL.
[solved] why can’t open the lightning simulator using remote desktop, OpenGL version 1.1.0?

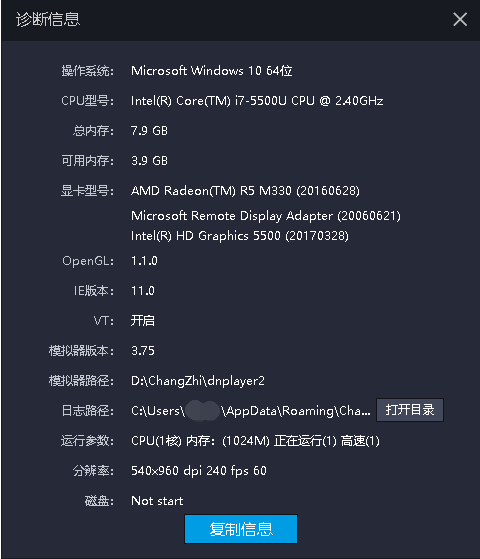
Today, I am also troubled by this problem, because Windows MSTSC connection mode does not take the video card output by default, you will find that OpenGL version is always 1.1.0 version.

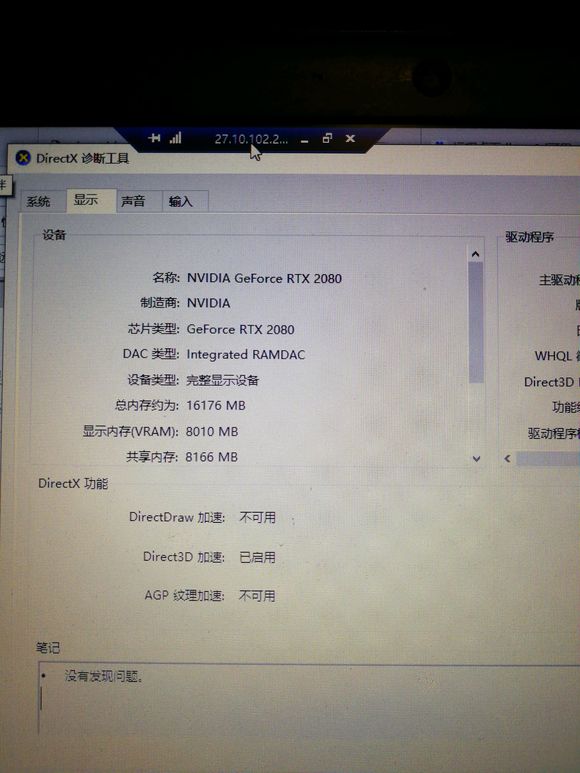
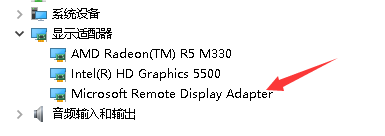
It’s not that the Remote Desktop can’t use the GPU, nor can it output game graphics, but many games use the current output Display to recognize the graphics card (as shown in the figure) at remote
The desktop will not recognize the unique display.

Just think about how hardware acceleration works…
Hardware acceleration is when programs write data directly to the graphics card’s memory to speed up the display, rather than through the system itself.
Because the remote desktop with Win10 may not be able to achieve, so we have to look for third party solutions, such as TeamViewer, AnyDesk, Sunflower and so on.
Attempted to use VNC software, not recommended, serious image problems, visual image rupture, and this is already in Ultra mode.

However, as mentioned on V2ex, GPU hosts like Tencent Cloud can do CUDA computing when using remote desktop. In theory, GPU can be used.
The forward solution is RemoteFX.
RemoteFX virtualizes the GPU to every virtual desktop, meaning that each virtual machine can have its own virtual GPU, which provides a variety of graphics acceleration capabilities to perform a variety of high-fidelity video, 2D, 3D graphics, and rich media processing capabilities.
 
It is said that Win10 is now support RemoteFX, virtual desktop in Win10 above run N card should be no problem:

Open the RemoteFX method reference
→ How to start Remote FX in Windows 7
RDP can only invoke Direct3D acceleration if the remote host is a Hyper-V virtual machine and RemoteFX graphics card is added.
 
 
If there is a need to play games,
The best solution is still Moonlight.
The source code is available on GitHub.


References:
[1] Technical Question: Will 3D games on remote tabletop be played alone?
[2] Remote Desktop issues start hardware acceleration issues
[3] The problem of remote tabletop games
[4] Windows Remote Desktop write and run OpenGL program
[5] Now Win10 1809 Remote Desktop supports N card 3D acceleration?Assassins creed
[6] Baidu Baike — RemoteFX

OpenGL result white screen solution

Recently, the graphics department is doing computer experiment, and it needs to use OpenGL experimental operation, but my computer is not good enough.
Cannot display the correct result, each time is a white screen, can not display the desired result.
1. Problem: OpenGL is white
2. Environment: Win7 system, 64-bit. The model is Acer E1-571G, and the graphics card is Intel + Nvidia 710M 2G, VC6.0 and VS2008.
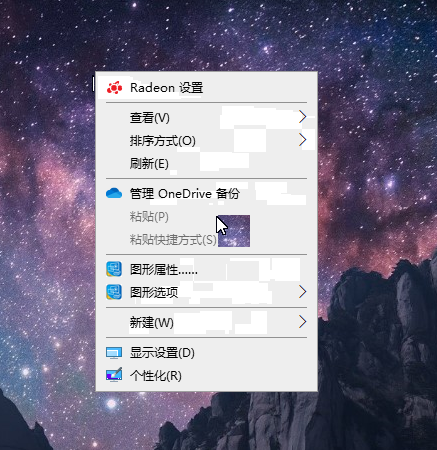
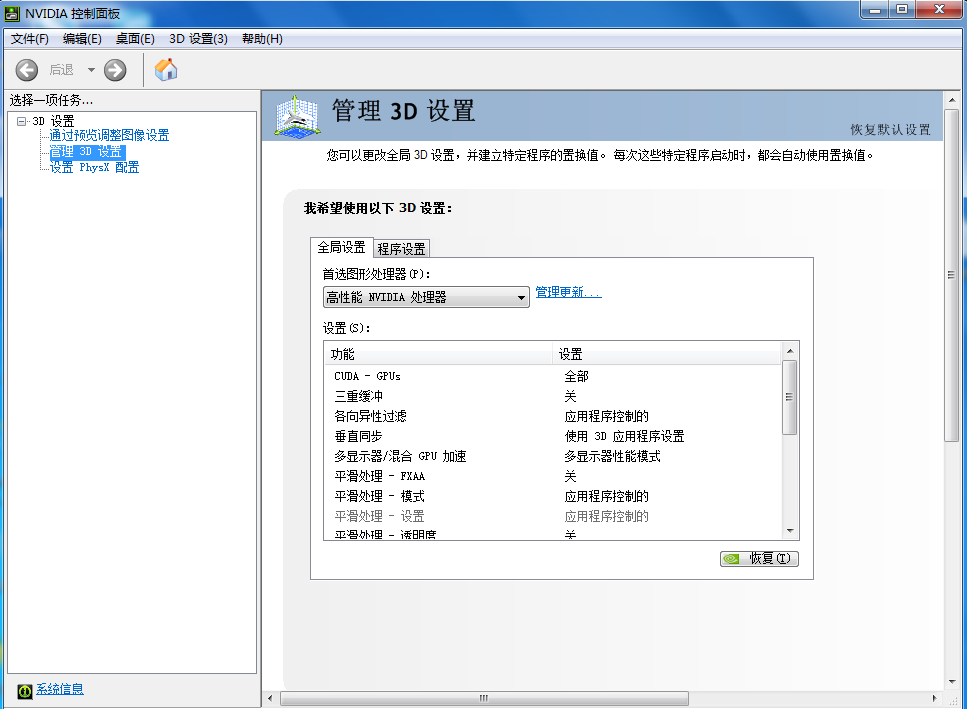
3, solution: enter the NVIDIA control panel (my computer directly desktop anti-key has), as shown in the picture global Settings to select high performance, application. Perfect solution, (*^__^*) Hee hee…

 
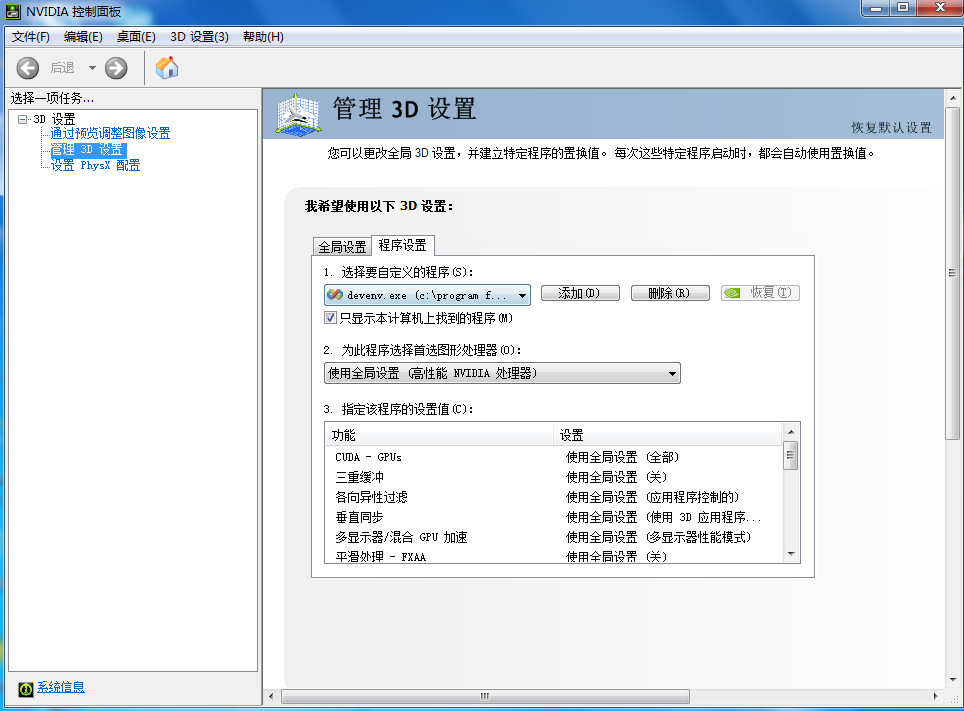
4, thinking: this setting should be the meaning of shielding set only open alone show, it should consume more power. So I tinkered with this control panel,
Here is a program setting, select Custom Settings, results… Useless, alas, forget it, solve good, first like this.
Have same problem to be able to refer to.

Reproduced in: https://www.cnblogs.com/hahanonym/p/3404884.html

The solution of using OpenGL’s Glu Library in qt5.2 under win7


I recently used QT5.2 to learn OpenGL in Windows 7. I recently used QT5.2 to learn OpenGL in Windows 7. I recently used QT5.2 to learn OpenGL.

‘GluPerspective’ was not declared in this scope. The version of Qt used in this article is
Qt 5.2.0 for Windows 32-bit (MinGW 4.8, OpenGL, 689 MB)
(Info), you can see the Qt version download information under various platforms from the Qt official website http://qt-project.org/downloads.

I searched the web for the following related solutions, which are for lower versions of Qt, such as this article: The GLU header file is not available for common Qt errors. I gave it a try and finally solved the problem with QT5.2 under Windows 7.
1. Add a header file to the source file of the glu library that references functions like gluPerspective: #include< gl/glu.h>
This step is necessary. For some reason, Glu32 libraries that start with glu and use OpenGL under QT5.2 also need to include GL /glu.h headers, while OpenGL32 libraries that start with GLL in OpenGL do not need to include headers.
Download Glut. lib and Glut32. lib and copy them to your Qt installation directory in Qt5.2.0\5.2.0\mingw48_32\lib, so that the Qt compiler will automatically search for the corresponding library files in the Qt installation directory.
This step may not be necessary.
Finally, I have tried the OpenGL under Qt (2) in my Qt5.2 environment (2) and the OpenGL example in C++ GUI Programming with Qt4(2nd Edition) Chapter 20. Make sure that after the above configuration, GluPerspective (45.0,(GLFloat)width/(GLFloat)height,0.1,100.0); And gluPickMatrix (GLdouble (pos) (x)), GLdouble (viewport [3] – pos. Y ()), 5.0, 5.0, viewport); These two lines of code work.

Reproduced in: https://www.cnblogs.com/lvdongjie/p/4775473.html

Vs2017 FAQs

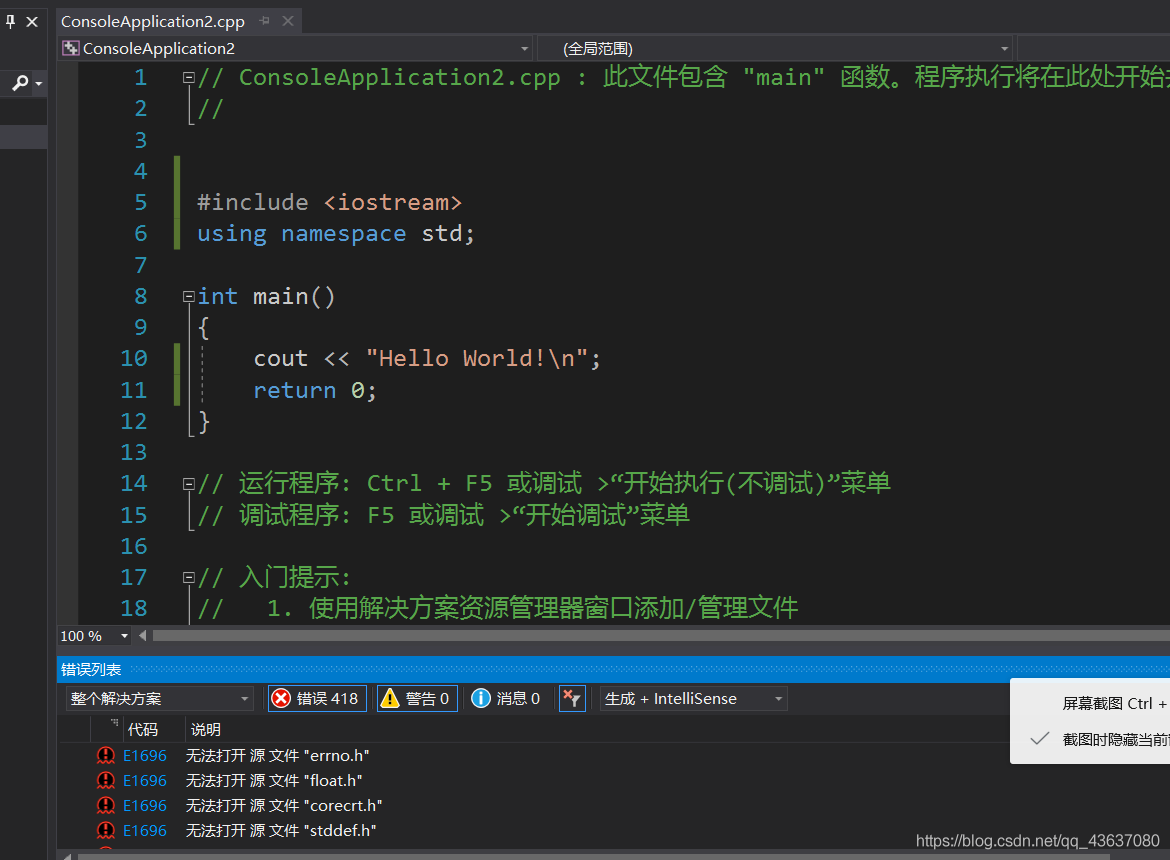
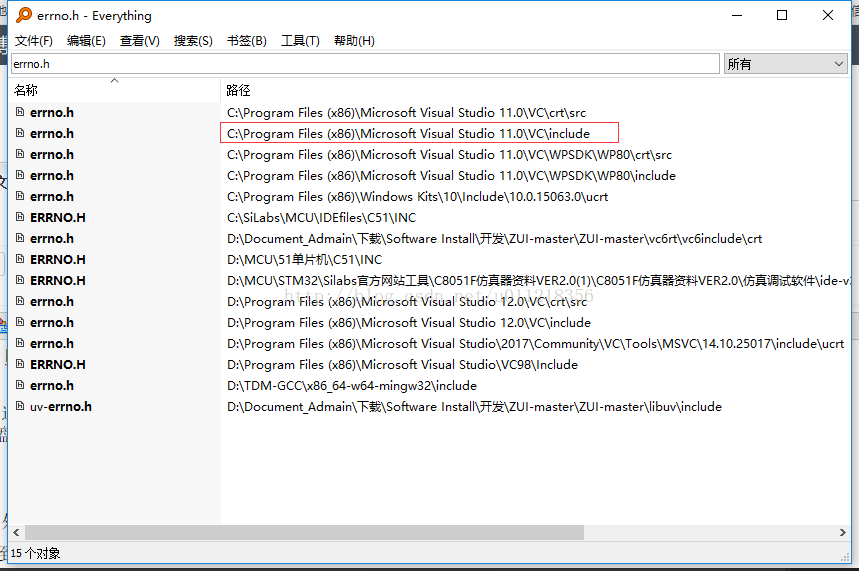
1. VS2017 could not open included file: “corecrt.h” : No such file or directory/ VS2017 could not open included file: “errno.h” : No such file or directory
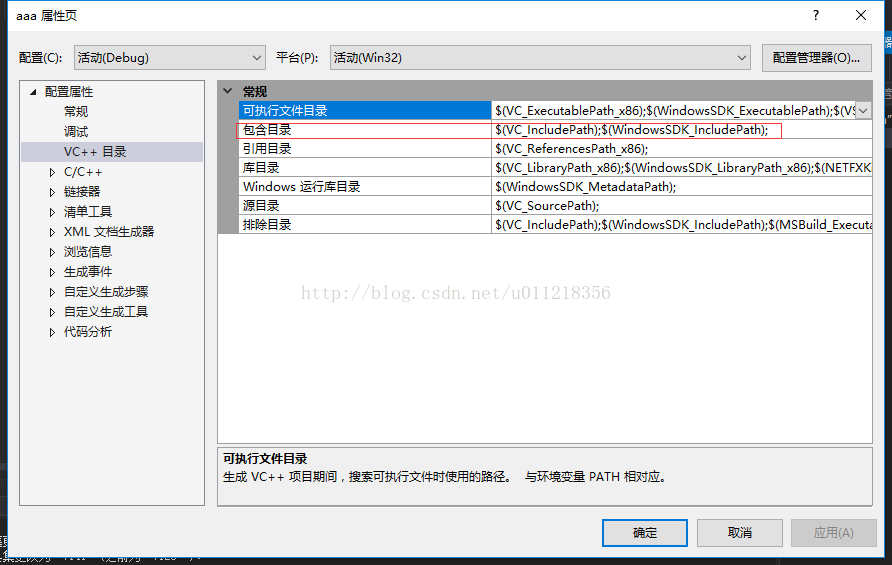
Solution: Everything searches for the corresponding “corecrt.h”/” errno.h “header file

Find the corresponding path, and then in VS2017

 
2. ERROR LNK2038: Mismatch of ‘_MSC_VER’ detected: value ‘1600’ Mismatch value ‘1800
 
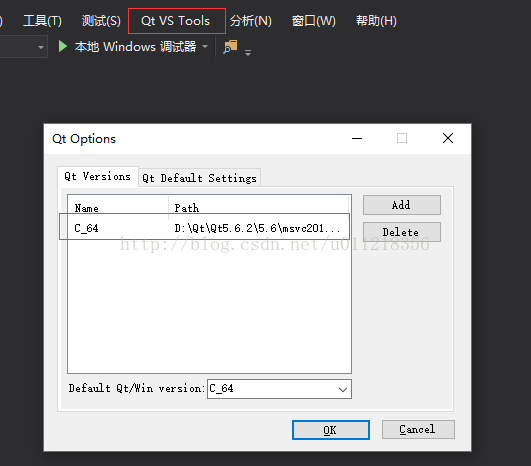
I encountered this problem because of the conflict of Qt versions, the problem left over from previous installation, the problem of 32-bit Qt and 64-bit Qt, and the installation path of Qt. Before, one was installed on both C and D disks.

 
Delete the other one and leave the same Qt as your computer version.
3. Unable to find entry program anchor point, cannot link dynamic library. The module computer type “X64” conflicts with the target computer type “X86”.
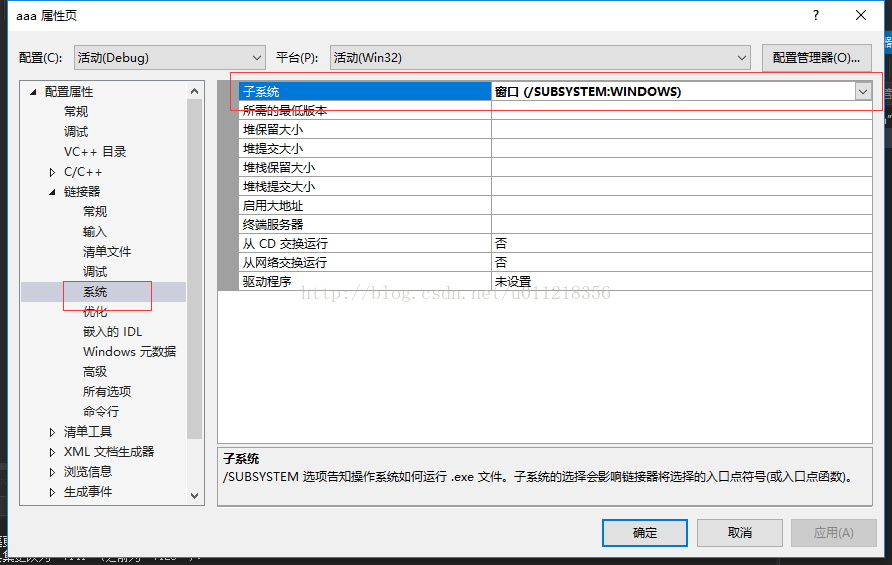
First modification:


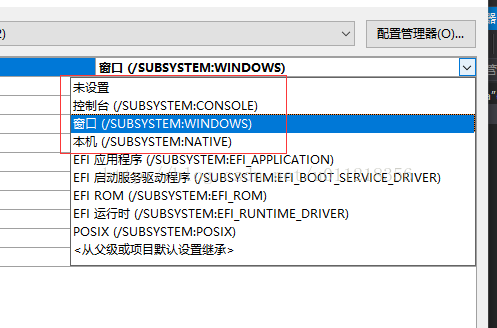
At the entry point
Set the entry point to the console, and the console will appear after running. It makes me feel bad.
Second modification:


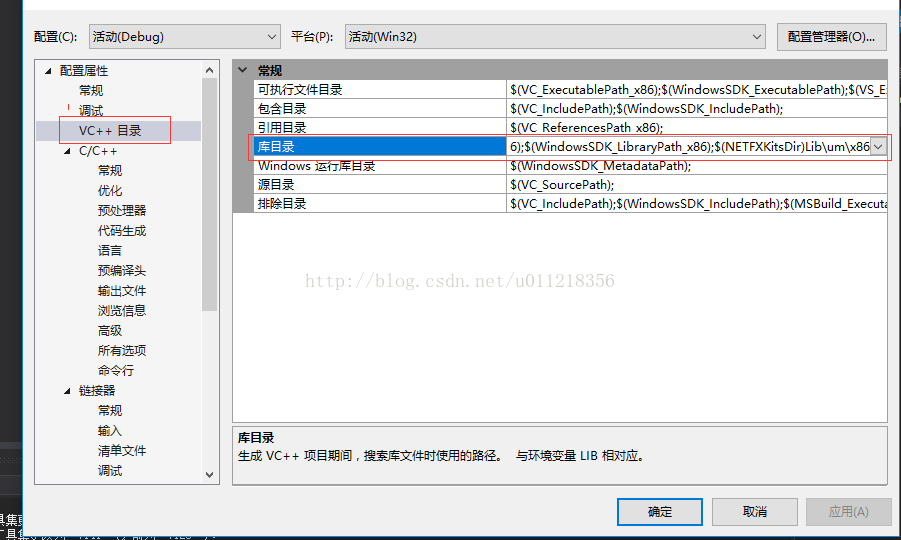
Later, I found that the library call path under UCRT, Tool was set incorrectly. I set it to X64, but I can change it to X86 folder.
 

2017 vs can’t reference problem solution

preface: the recent computer room cooperation to the coding stage, in this stage need to unify the version of VS, so I downloaded a 17 version of VS, but when the reference but reported an error, the following is the solution, to share with you.
>
>

>2
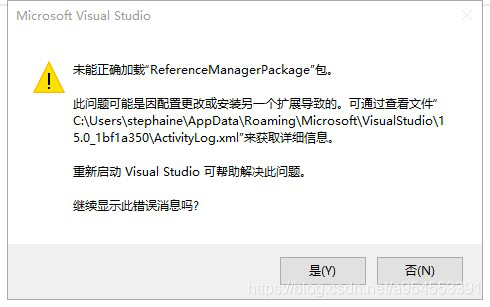
VS2017 add reference error: call to COM component returns error HRESULT E_FAIL
> (2) solution
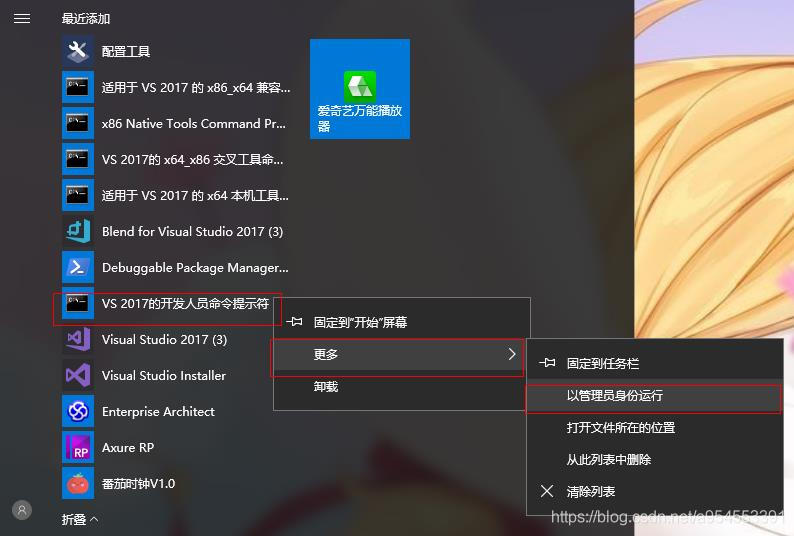
1. Open Developer Command Prompt for VS 2017 as an administrator
Developer Command Prompt for VS 2017 has been searched for a long time, but it has been found in the lower left corner of the desktop. The Developer Command Prompt for VS 2017 can be found by following the following steps: “Developer Command Prompt for VS 2017”, select “More”, and then “Run as an Administrator”.

2. Locate your VS2017 installation directory
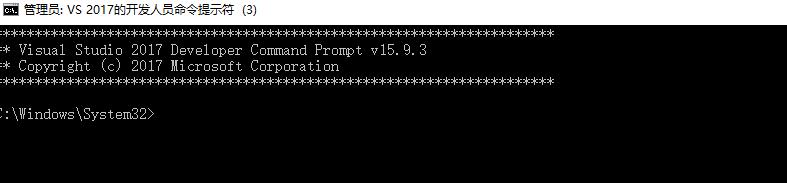
Once the first step is complete, the screen pops up.

Enter the following information:

C:\Program Files (x86)\Microsoft Visual Studio\2017\Enterprise\Common7\IDE\PublicAssemblies

CD C:\Program Files (x86)\Microsoft Visual Studio\2017\Enterprise\Common7\IDE\PublicAssemblies
Be sure to put [CD] before the position.
3. Execute the following code
Gacutil. -i Microsoft VisualStudio. Shell. Interop. 11.0 DLL
this is completed.
summary: for the same problem sometimes online solutions are very similar, but often can not find their own online solution location, so we must write in detail when writing a blog, after all, the blog is for others to see, convenient for others is to facilitate their own. Of course, if the solution situation is not the same as the problem you have to try.

Problems in using vs2017

Problems encountered in the use of VS2017. Only take notes, if there is infringement contact delete.
1. The default default.js or.vbs is missing when MFC adds classes to the interface. Microsoft Visual Studio2017\Community\Common7\IDE\VC\VCWizards\CodeWiz\MFC Move on to the great essay.
2. In the process of learning, the problem of “unable to start the program, denied access” suddenly appeared. After searching, it was found that it was because a game was started. After rebooting, it was fine.

3. Create new forms and pass values between forms.
1. Adding a class after adding a form is a good way to create a new form.
Open the new form code:

FileInformation dlg = new FileInformation();
dlg.DoModal();

2. Passing values between Windows should pay attention to:
1) use extern keyword to redefine the file in which the function is to be called;
2) Cannot assign initial values to variables.

Using GitHub in vs2017

These days, I have encountered some problems in the process of learning related knowledge of GitHub, especially the use of built-in GitHub in VS2017. It would be helpful to record them.
One, making the Extension for Visual Studio
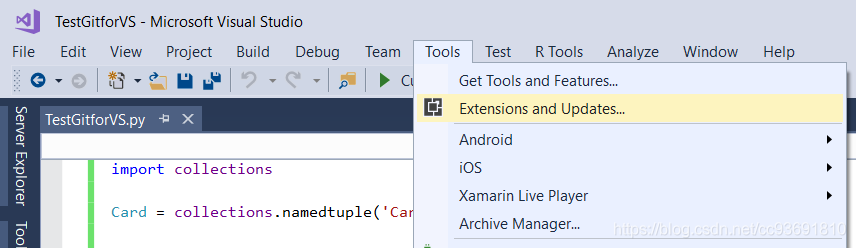
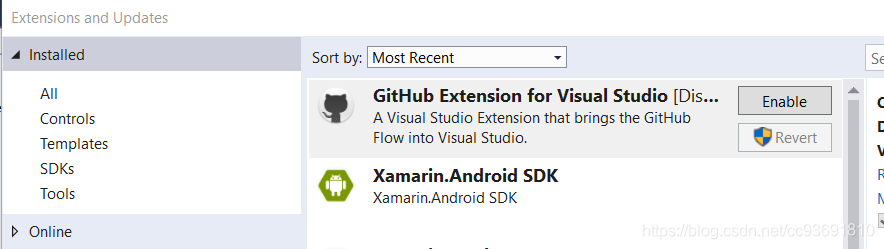
on many CSDN tutorial is directly speak in the heart of the VS2017 project manager, added to the code synchronization, push. You may think that Extension is unnecessary, so you should know it by default. In fact, to use GitHub in VS2017, you must start with the GitHub Extensionan installation. Open the Tools – & gt;

then search and install GitHub Extension for Visual Studio. The image below shows that I have already installed it. I actually need to select and install it from the Online option on the left. After downloading and installing, VS will prompt you to close all VS Windows and restart. After restarting, you can use it without accident.

Of VS2017, making use of the
if you are starting from scratch, in fact, there are a lot of information on the CSDN is can refer to, but I had used a fancy Git Bash, and making the Desktop, and established the multiple libraries in making account (Repository), want to in the existing library to complete the remote Repository (remote: origin) and the link between the local library.
1. First open the Team Explorer -> Manage Connections-> Connect to making

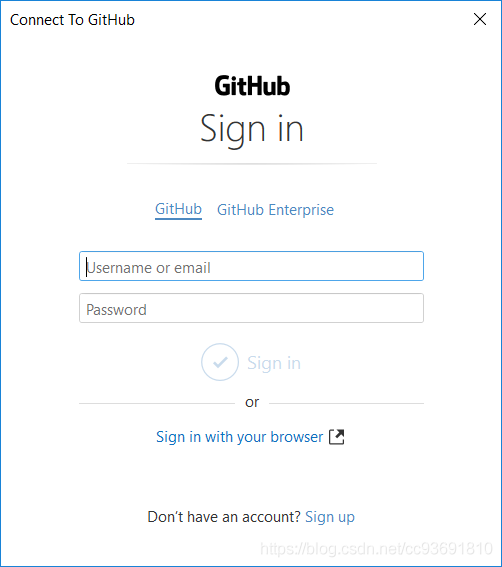
will pop up a interface requirements input lot account password, this is your own. When you successfully log in, your account will receive an email telling you that the third-party plugin is logged into GitHub. Just ignore it.


2>fter login, fill in your User Name, Email, and local library path in Global Settings, then you can go to Connection interface to continue using. Connection Local Git Repository (‘ New ‘, ‘Add’, ‘Clone’); Connection Local Git Repository (‘ Add ‘);


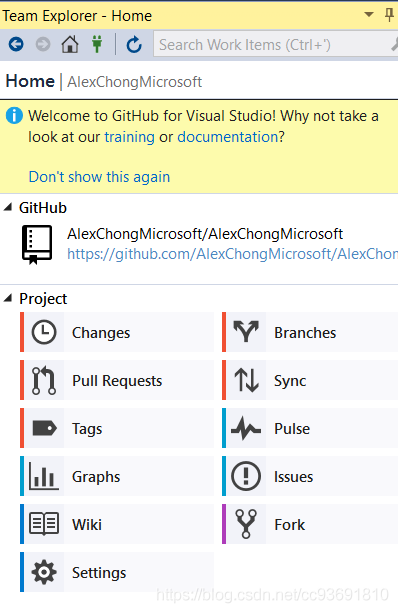
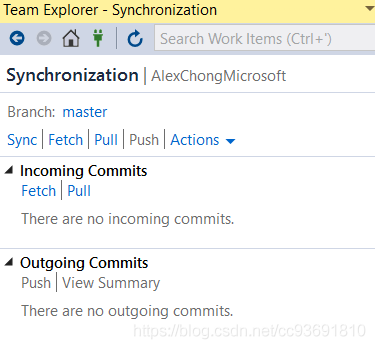
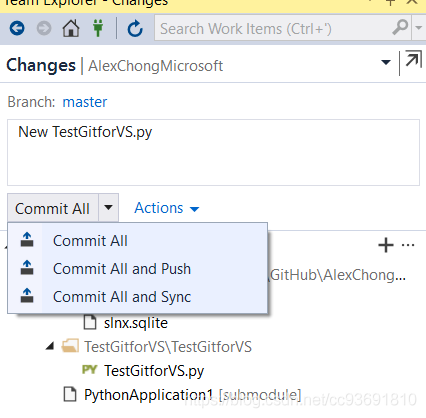
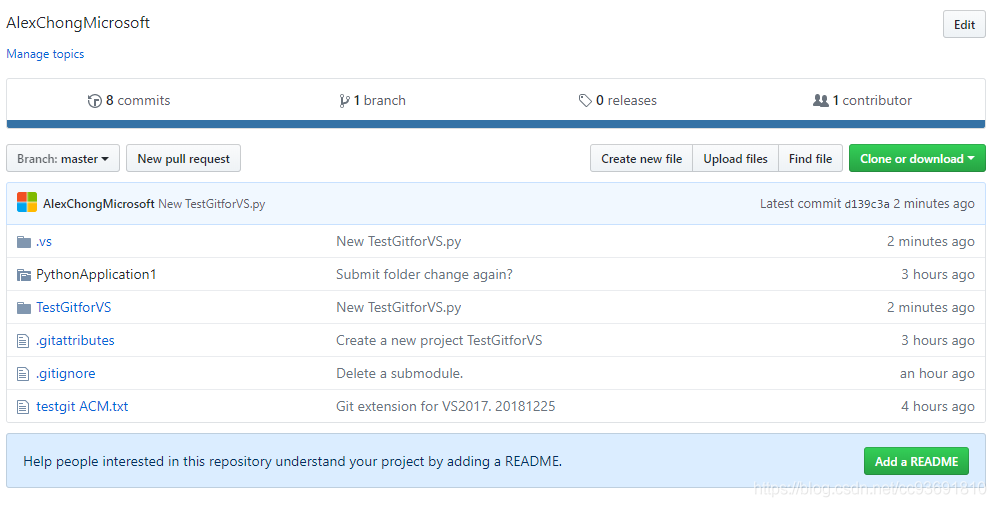
3>nce you have connected the local and remote libraries, you are ready to make changes. This is the same as with Git, except that the UI is integrated into VS. Doublicking on the local library that has changed, such as AlexchongMicrosoft here, will bring you to a more detailed action menu, which those of you who have used GitHub should have a rough idea of what it means.

. This command doesn’t seem to exist in Git. Personally, it means VS and GitHub sync. In practice, it feels like Commit and Push. In addition to ontology synchronization to the remote end, I wonder if there are other commands like pull synchronization from the remote end to the local end. I can try it if I have a chance in the future.

Visual studio 2017 experience

On March 7, 2017, Microsoft released the 20th official version of Visual Studio — VS2017. I also can’t wait, the first time to download and install the community version, after all, this is the first IDE in the universe ah, on the VS2017 relative to the VS2015 improvement overview, please move to open source China, here to say that I as C++ installation and use experience.
Install the feeling
Installation interface for personal depth customization
About the installer
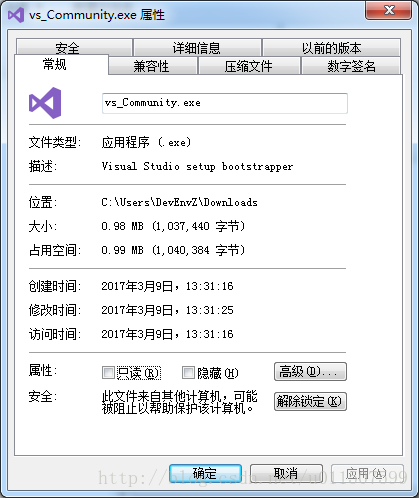
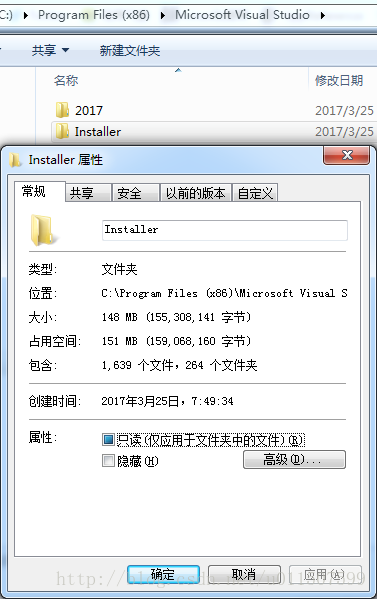
VS2017 has a new installation logic and steps, I use the way of network installation. VS2017 uses a separate installer to download and install VS components. The first installer downloaded from the official website is very small, with a space footprint of only 0.99M. (This is a real thing, the MS VS team must know that I have poor C disk space!) .

but this is not the real installer, real installer is needed by this small program to download and install, and then you can use. Installer volume……

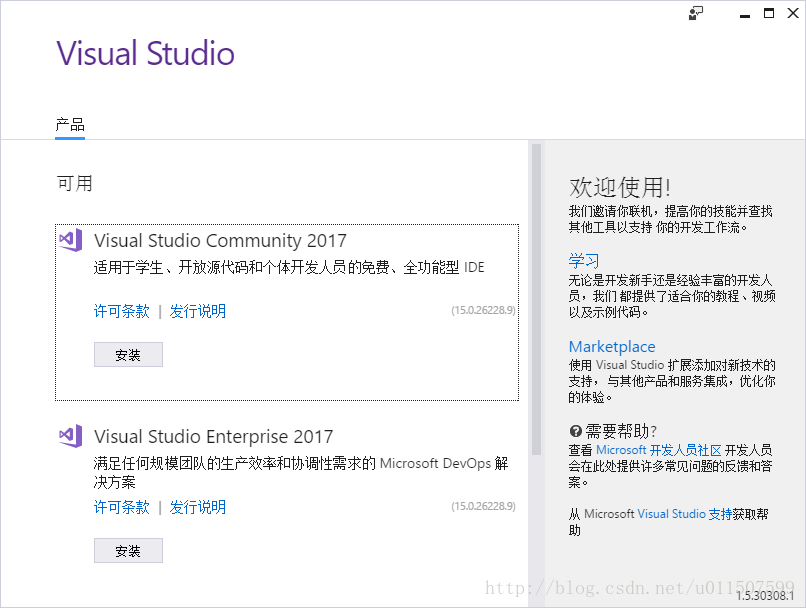
wnload quickly, after the completion of the installation will automatically install the system under the C disk, and open the VS2017 installation version selection interface, I installed the VS2017 community version, enough to use, the focus is personal use does not spend money on the legal version.

Modular customization
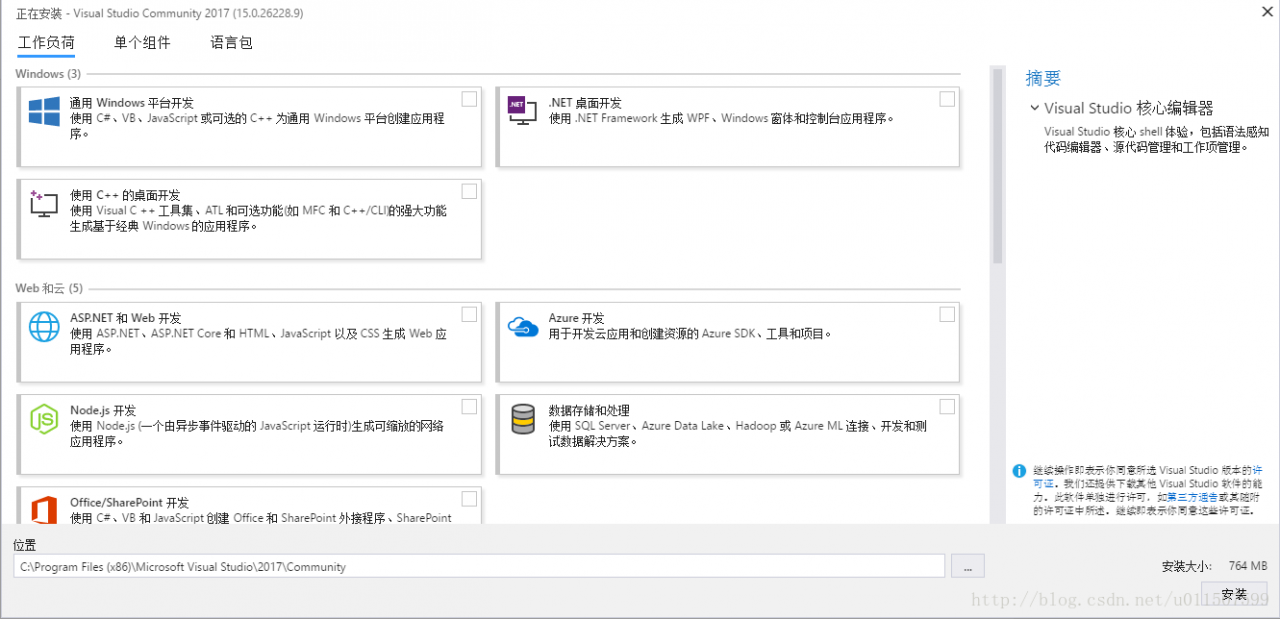
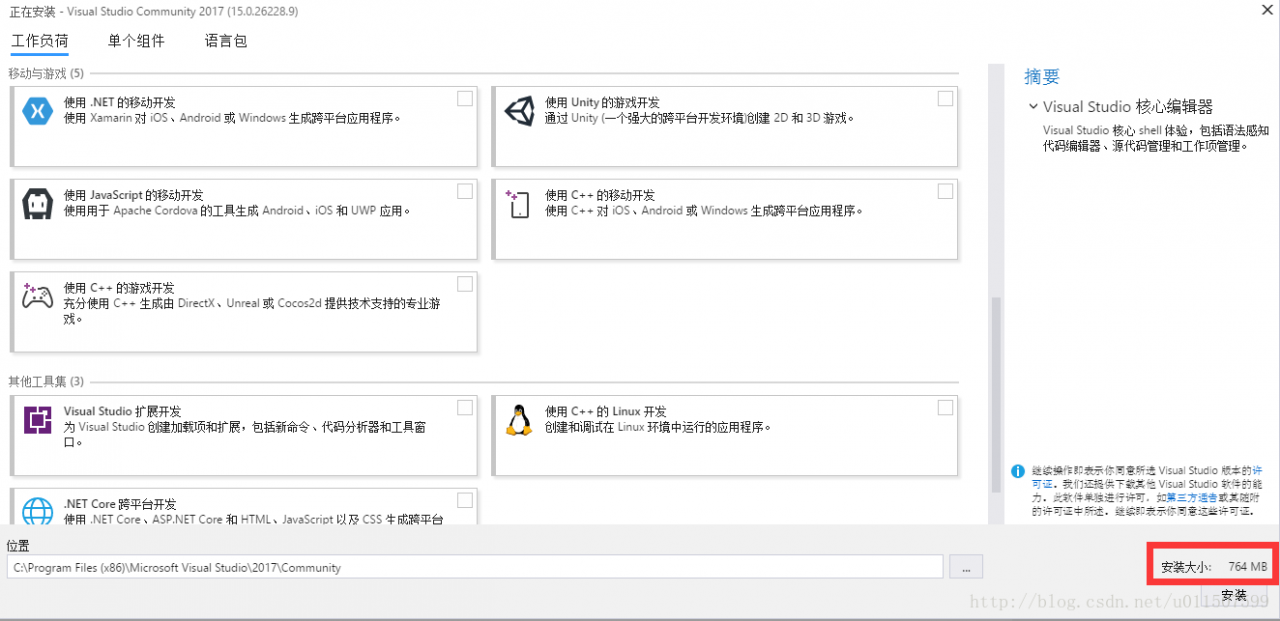
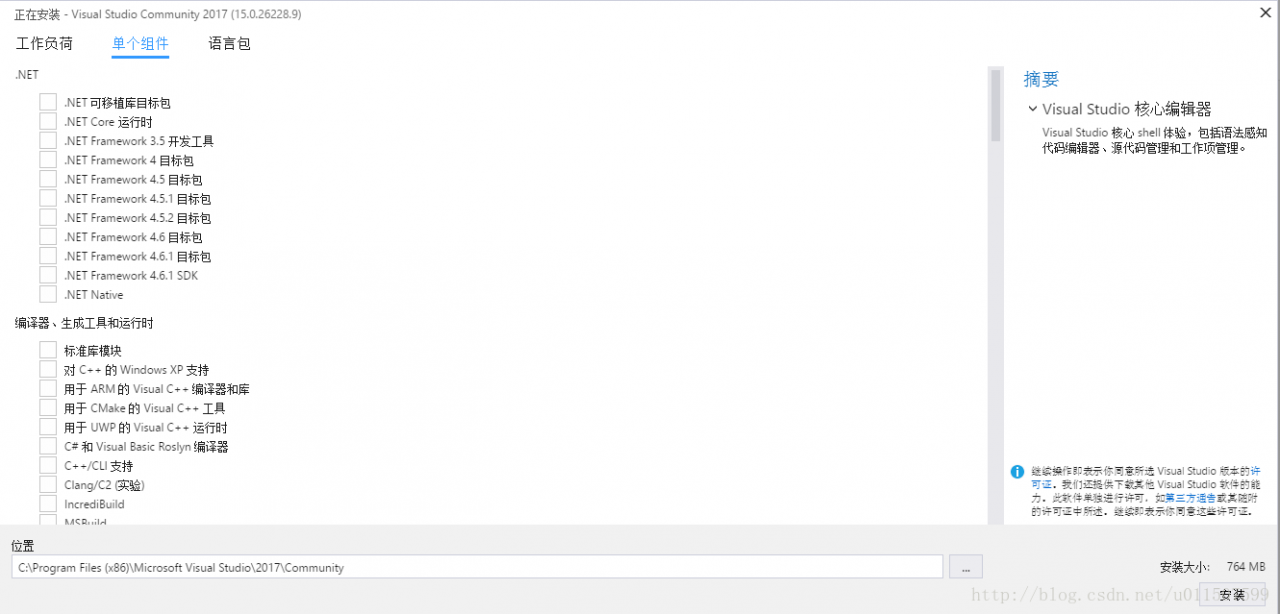
Choose a good version, load for a while will enter the VS2017 module selection interface, the overall feeling is very refreshing, customization is very simple, you can choose a large module, such as.NET desktop development, or C++ development, or Windows development and so on, see the picture by yourself… . (I haven’t chosen any here, only the core editor, which takes up only 764MB of space! Heaven and earth conscience! ╮ (╯ del ╰) ╭)

in choosing a good big modules, also can undertake the choice of a single component, it is important to note that between components are interdependent, and some of the dependence between components is mandatory, some of it is not mandatory, for C disk will be lost comrades, Suggestions can seriously customization, unnecessary, or can be configured after installation, don’t need to use the installer installed, like a Win10 SDK is likely to be the hard disk C; For cross-platform development using VS, such as Android development, develop the required suite (JDK, NDK, SDK, Ant…) Basic can be installed after VS to configure, after all, it takes time to download, and the general VS installation path will be placed in the default C disk, so the VS components you choose will be installed C disk by default!


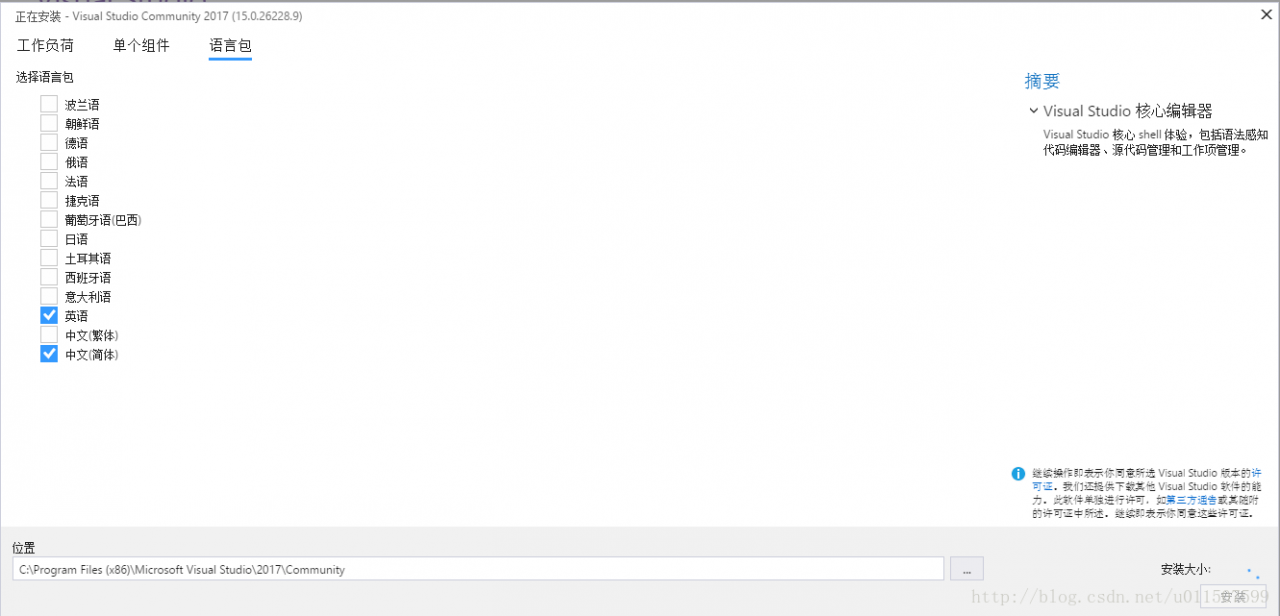
the installer can be directly the optional language pack, it’s a fine details of the changes, I personally before I hope I can a installation on English language and Chinese language pack, every time is to the other from the website to download the language pack, feel quite troublesome.

ah