Category Archives: How to Fix

How to Solve Arduino IDE Crash Issue

When I open Arduino, the start screen only shows “Initialize Package” and “Prepare Board”, then the start screen message and Arduino does not work.

Solution:

add the
C:\Users\your username\AppData\Local\Arduino15 folder
Delete it.

Note that some computers have two accounts, for example, my computer has two accounts, admin and Administrator, try both, mine only has the Arduino15 folder inside admin, delete it.

MPU6050 initialize failure [How to Solve]

1. 6050 initialization failed

If 6050 fails to initialize, first check whether the read address is wrong

res=MPU_Read_Byte(MPU_DEVICE_ID_REG);
	printf("mpu addr=%x\r\n",res);
	if(res==MPU_ADDR)//Device ID is correct
	{
		MPU_Write_Byte(MPU_PWR_MGMT1_REG,0X01); //set CLKSEL,PLL X-axis as reference
		MPU_Write_Byte(MPU_PWR_MGMT2_REG,0X00); //Acceleration and gyroscope both work
		MPU_Set_Rate(50); //Set the sampling rate to 50Hz
 	}
	else return 1;

I read out here is 0x68, different connection will also lead to different ID, if the address is correct, that is return 0, here for the initialization of the 6050 initialized through.

2, mpu initialization failure
Mpu initialization failure is common to return error code 8, you can step by step into the source code to analyze.

Solution I.
mpu_dmp_init() -> run_self_test() Here is the self-test, jump into the function can be seen, meaning that it needs to be placed horizontally in order to self-test successfully, so only the module can be placed horizontally, if not directly mask this part of the code can be.

Solution two.
Trace the source code: mpu_dmp_init() -> run_self_test() -> mpu_run_self_test(gyro, accel) -> accel_self_test(accel, accel_st)
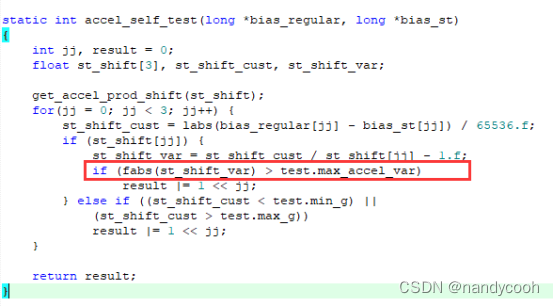
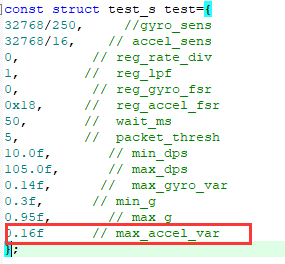
Both the initialization is successful only when the absolute value of st_shift_var < the value of test.max_accel_var. And the absolute value of st_shift_var is different for different positions of MPU6050 modules. Only when the module is placed horizontally, the absolute value of st_shift_var is closest to the value of test.max_accel_var, if this parameter is not modified, the module needs to be placed horizontally according to method 1 for testing

Here you can print out the absolute value of st_shift_var and the value of test.max_accel_var when debugging, my solution here is to change the initialization value of test.max_accel_var from 0.14 to 0.16. Then the module will be initialized successfully when the module is placed horizontally. This is shown in the figure below:
3. Initialization passed, but the data is 0

Another situation is that all initialization passes, but the Euler angle data is all 0. This situation is because there is a hard delay in the code or the processing of other modules affects 6050, so the data is all 0. The personal test is to mask the data processing screen of a module after the test.

Android studio NDK setting is gray and cannot be solved

Android studio NDK is set to gray

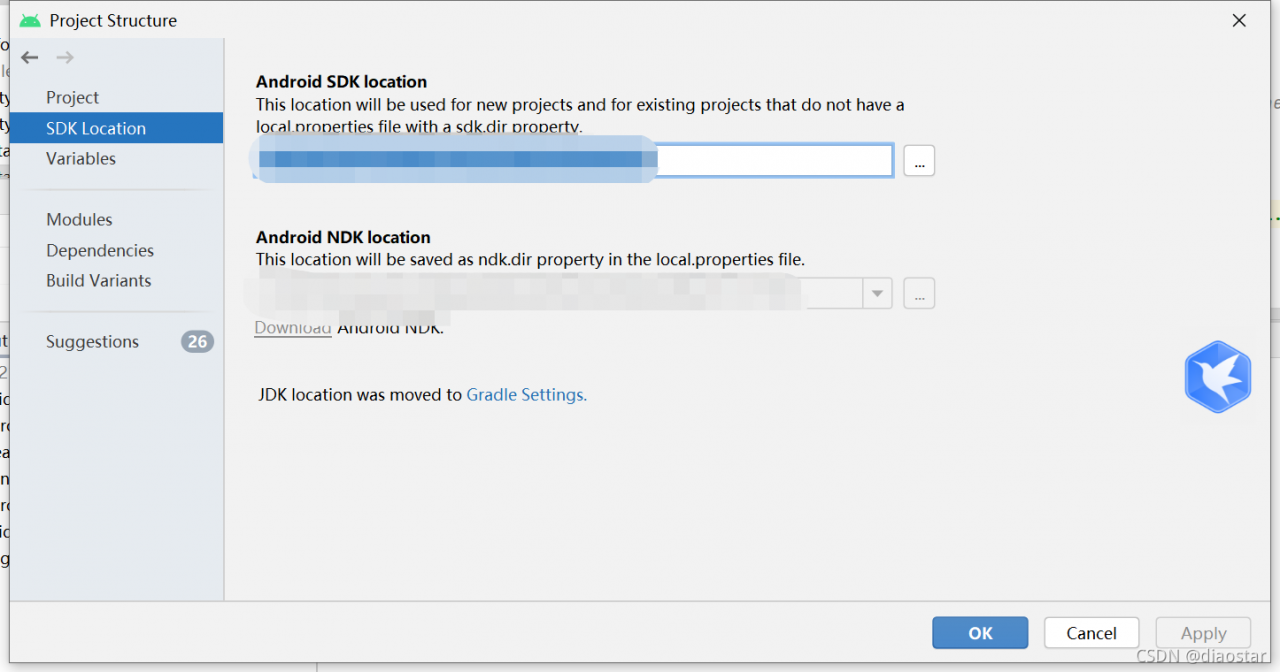
After clicking File->Project Structure, the screen that opens cannot be configured with NDK localtion

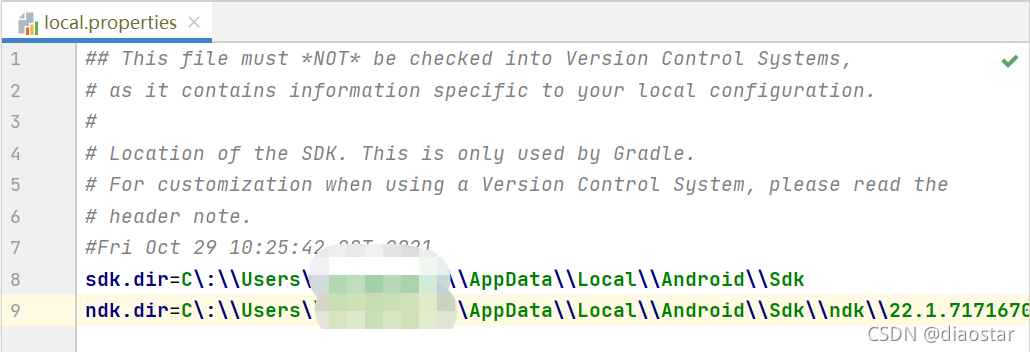
The solution is to configure the ndk path directly in local.properties

My settings path:

sdk.dir=E\:\\thirdparty\\Android\\Sdk
ndk.dir=E\:\\thirdparty\\Android\\android-ndk-r21e-windows-x86_64\\android-ndk-r21e

How to Solve Win 10 Kb5008212 can’t share printer Issue

Recently, because the update of kb5008212 is automatically installed in win10, the printer cannot be shared. At present, it is the way to modify the registry to solve the problem. Because you can’t uninstall successfully by uninstalling the update, unless you try with the command or the update uninstall tool. I’m not sure whether the update can be uninstalled successfully now because I can’t uninstall the update successfully. Now it is time to modify the registry to solve this problem.

1. First, right-click the blank space of the desktop and “create” a “text document”

2. Then enter the following code and save it:

Windows Registry Editor Version 5.00

[HKEY_LOCAL_MACHINE\SYSTEM\CurrentControlSet\Control\Print]

"RpcAuthnLevelPrivacyEnabled"=dword:00000000

[HKEY_LOCAL_MACHINE\Software\Policies\Microsoft\Windows NT\Printers\PointAndPrint]

"RestrictDriverInstallationToAdministrators"=dword:00000000

3. After saving, close the file and rename it to a file in “PrintShareRepair.reg” format.

4. Finally, double click to run the file to solve the problem that the printer cannot be shared.

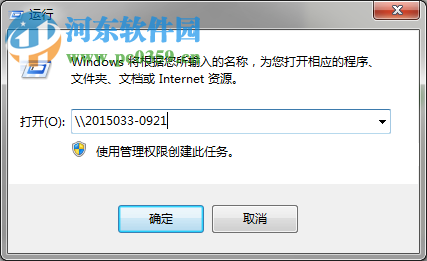
5. Open the Run screen using \\192.168.1.10\ to access the shared printer when the error 0X00000709 occurs, use the computer name for shared printer access for example: \\PC-HP001\ to see the shared printer connection can be.

[Fixed] Chrome Browser Cannot Edit Cookies Issue

I accidentally found that chrome can’t add cookies by itself. After adding cookies, it won’t be refreshed.

reason

The latest Chrome browser version has been automatically blocking this function.

Solution:

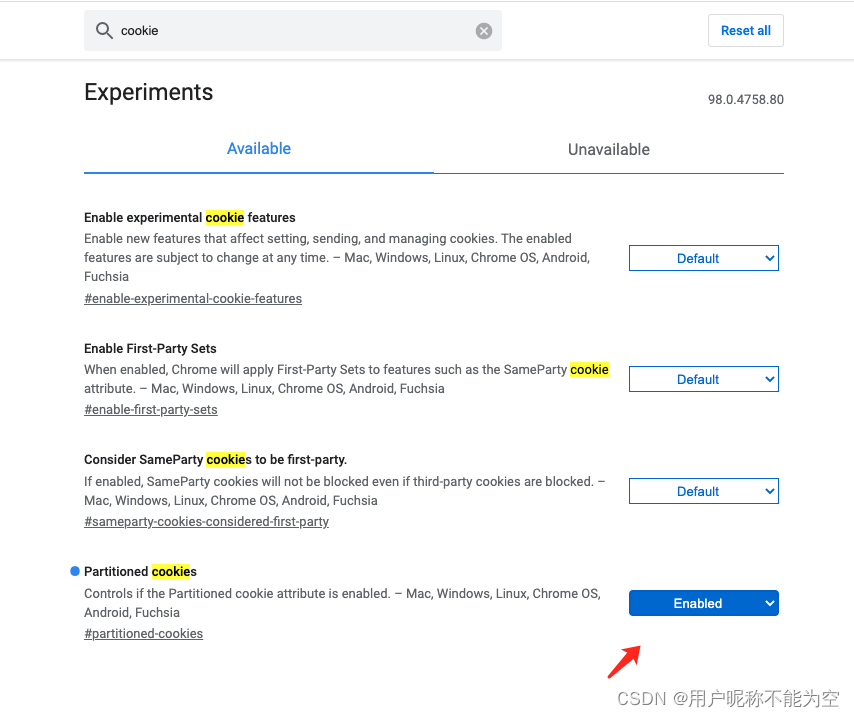
Open chrome://flags/ , search cookies , find partitioned cookies , select enabled
and then click relaunch in the lower right corner. The browser will restart automatically and take effect!

Uniapp Use vant Weapp icon Module Error [How to Fix]

1. Abnormal information

11:43:21.725 Module build failed (from ./node_modules/postcss-loader/src/index.js):
11:43:21.725 SyntaxError
11:43:21.735 (36:10521) Unclosed bracket
11:43:21.736   34 | 
11:43:21.741   35 | 
11:43:21.742 > 36 | @import '../common/index.css';.van-icon{text-rendering:auto;-webkit-font-smoothing:antialiased;font:normal normal normal 14px/1


Solution:

Modify /wxcomponents/vant/icon/index wxss

The following figure in the format (“woff2”) after the url in front of a space, you need to modify two places

How to Fix LDPlayer4 Proxy Setting Not Work Issue

Enter the installation directory D:\Program Files\leidian\LDPlayer4
powershell
.\adb
cmd
adb

if it appears

adb shell
error: more than one device and emulator

In this case, the first thing to check is whether there are really multiple devices or emulators.

adb devices
List of devices attached
emulator-5554 device
127.0.0.1:5555 device
It is found that there are multiple devices, then you need to specify the serial number of the device for the ADB command.
adb -s emulator-5554 shell

That is, as shown above, just add the -s parameter to the command!

If there is actually only one device or simulator, and the offline status is found;
it means that it is caused by a bug in ADB itself, and it needs to be dealt with as follows:
adb kill-server
taskkill /f /im adb The first command of .exe
is to kill the ADB service, and the second command is to kill the ADB process!
If the first one doesn’t work, consider using the second one to try again!

Finally execute this command to
set the proxy,
.\adb -s 127.0.0.1:5555 shell settings put global http_proxy 192.168.0.72:8888
remove the proxy
adb shell settings delete global http_proxy&adb shell settings delete global global_http_proxy_host&adb shell settings delete global global_http_proxy_port
or when there is no delete command
adb shell settings put global http_proxy :0

[Solved] ERROR: commit 60acc70: missing Change-Id in message footer

When merging multiple commits, I accidentally deleted the Change-Id, resulting in push failure

remote: Processing changes: refs: 1        
remote: Processing changes: refs: 1, done            
remote: ERROR: commit 60acc70: missing Change-Id in message footer        
remote: 
remote: Hint: to automatically insert a Change-Id, install the hook:        
remote:   gitdir=$(git rev-parse --git-dir); scp -p -P 29418 [email protected]:hooks/commit-msg ${gitdir}/hooks/        
remote: and then amend the commit:        
remote:   git commit --amend --no-edit        
remote: Finally, push your changes again        
remote: 
error: failed to push some refs to 'ssh://[email protected]/project'

Solution:

1. Use the amend option to generate a Change-Id:
If the missing Change-Id is the last (head) commit, use the following command to fix it:

$ git commit –amend
This command will open the default commit message editor, usually vi.

At this point, you don’t need to change anything, just save and exit (:wq).

If you check the git log again, you will see that the missing Change-Id has been filled in. Just git push again.

2. reset method
The reset command undoes your commit to the workspace, and you can recommit

If the missing Change-Id commit is the second commit in your git log, you can use the git reset command to roll back your local branch to that commit.

First, run git log, find the commit with the missing Change-Id, and copy its commit-id:

Find the second commit that is missing the Change-Id. Reset the code to that commit, and execute amend:

$ git reset 1a9096a34322885ac101175ddcac7dab4c52665d
$ git commit --amend

The next step is to recommit the code that was undone by git reset, and then push it:

$ git add ......
$ git commit -m "The log you Submitted"
$ git push review HEAD:refs /for/master
 

Reference link: https://blog.csdn.net/liuxu0703/article/details/54343096

[Solved] NVIDIA-SMI has failed because it couldn‘t communicate with the NVIDIA driver.

After restarting the server, the NVIDIA driver cannot be connected.

NVIDIA-SMI has failed because it couldn't communicate with the NVIDIA driver. Make sure that the latest NVIDIA driver is installed and running.

Solution:
check the version number of NVIDIA driver installed before

ls /usr/src | grep nvidia

Output

sudo apt install dkms
sudo dkms install -m nvidia -v 460.73.01

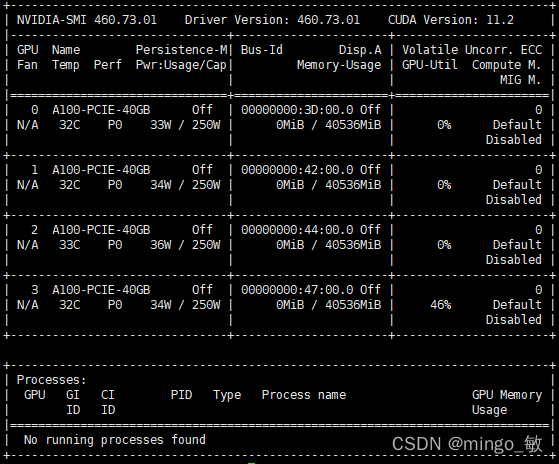
Finally, The familiar interface is back

MacOS rvictl -s Error: Starting device failed [How to Solve]

After mac os big sur, the security of Apple system is improved, which causes rvictl -s to fail to create a virtual network card.

Solution:

Restart the mac in recovery mode.
1. After booting, press and hold command + r until you enter the boot page
2. Select terminal in the upper left menu bar, type csrutil disable, and then select reboot in the upper left menu bar.
3. After rebooting, go to Security and Privacy, open the small lock in the lower left corner, there is an Apple. The computer will restart automatically.
3. Run rvictl -s device udid again and it will work.