- scenario: when the browser opens the HTML file,
- Solution: write the name of the app in urls.py where the app is located
- For example: app_name = ‘polls’
DLL load failed while importing when sklearn is called_Arpack error
There is no effect after reinstalling sklearn and numpy with CONDA
some people in the Post said that they could delete some DLL files under Win32 to prevent error reporting and did not try
Knowing that CONDA may have its own problems (such as some DLL file configurations), I reinstalled sklearn with PIP
pip uninstall scipy
pip install scipy
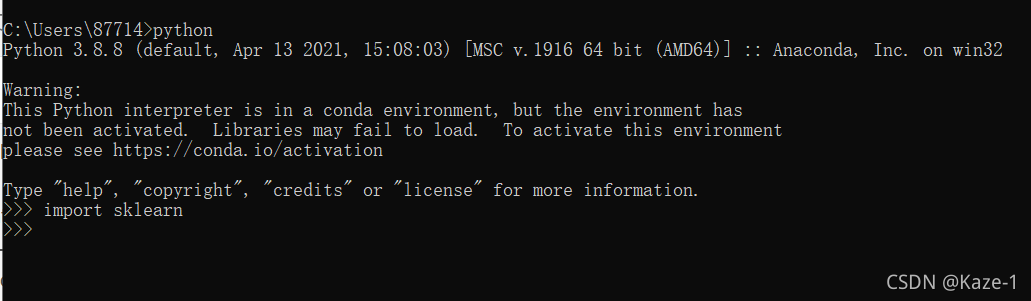
The problem is solved (of course, the image should be configured in advance)
PS: I still reported an error when I just used the Jupiter notebook. I found that I had to restart it.
Reference Resources:
https://stackoverflow.com/questions/55201924/scikit-learn-dll-load-failed-in-anaconda
Problem description
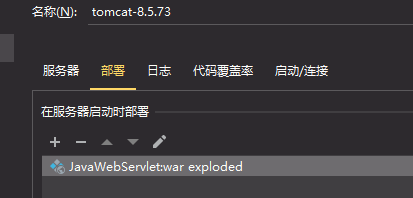
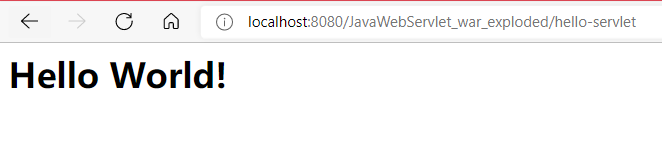
A new server template project is built with idea. After Tomcat is configured, the access report 404
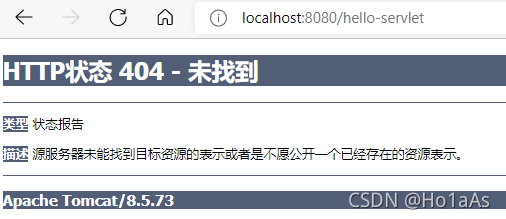 is accessed
reason
Tomcat cannot load message 404 because war is not loaded
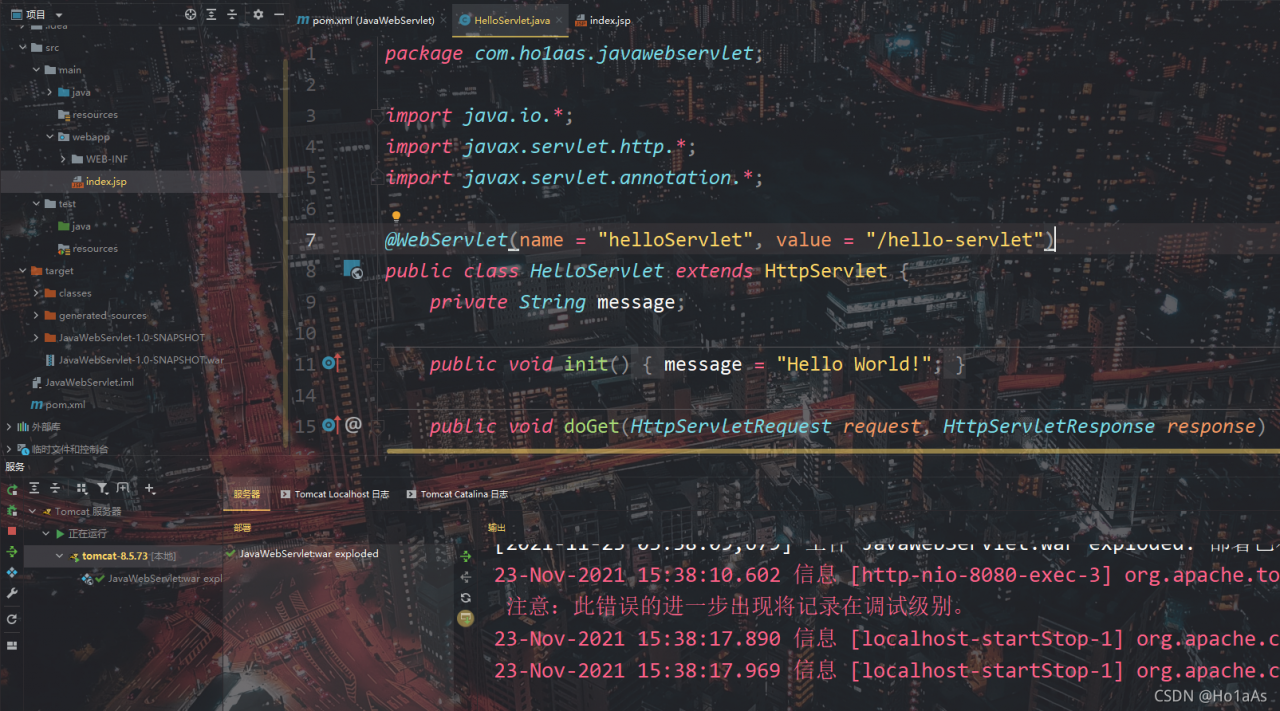
Solution:
An error occurs because the war artifact of this project is not loaded. You need to import this project as a artifact
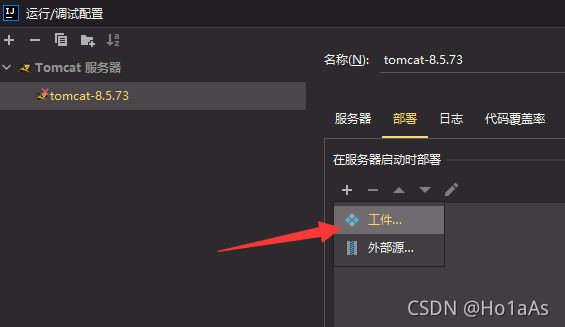
and then select war_ Compared with war, the structure of the artifact will be consistent with the source directory for easy development
now the URL is the home page of the artifact by default
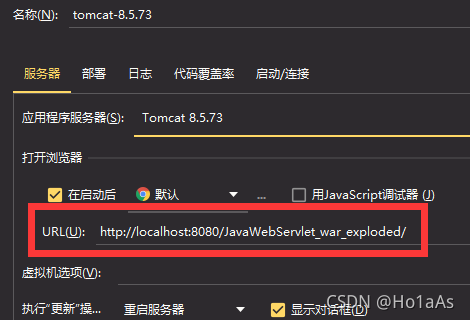
access
@TOC
the probability of this problem is that the CUDA version used for compilation is inconsistent with the CUDA version running
first check the CUDA version of the system (that is, the CUDA version used for compilation)
nvcc -V
In my pytorch + CONDA environment, you can use CONDA list to view the cudatoolkit version in the virtual environment. At first, the CUDA version of my system is 9.0 and the cudatoolkit version is 10.2. Therefore, the version is inconsistent, so the error message shown in the title appears. Later, I switched the CUDA version of the system and the problem was solved
brief description of the specific version switching method:
echo $path view CUDA path information, add the path of cuda10.2 and link it to/usr/local/CUDA. The specific instructions are
ln -s /usr/local/cuda10.2 /usr/local/cuda
Then modify the system path as follows:
vim ~/.bashrc
Add code at the end
export PATH=/usr/local/cuda:$PATH
export LD_LIBRARY_PATH=/usr/local/cuda/lib64:$LD_LIBRARY_PATH
Press ESC, enter: WQ, press enter to exit, and then enter on the command line
source ~/.bashrc
Update path information
now enter from the command line
nvcc -V
You can view the CUDA version after switching
1. Prompt for no access during installation
open the install file with sudo command, and remember to CD to the install directory
sudo ./install
if the program is stuck and cannot be opened after entering the password, open the terminal and enter the following command
xhost +SI:localuser:root
2. Prompt for no access when installing the toolbox using the built-in add on
use Chmod to adjust file access rights
sudo chmod -R o+rw /usr/local/MATLAB/RXXXXx
after adjusting the permissions, you can download it, but an unexpected error appears at the end, which makes it impossible to install it
download the MATLAB installer again and reinstall it. Note that you don’t need to reinstall it all. Just select the toolbox you want
Error reporting background
At present, I am working on a single page project of Vue. I temporarily replaced the system disk because I started a new project, which is actually a very easy reason to think of. However, the error “pointing to a component can not be found” on the console page at that time. In my mind, I first thought that there was a problem with my own partial introduction. After checking many introduction methods, I found that it did not seem to be the problem, Later, the reaction may be that the original things were moved because the disk was changed, and the dependencies are not in the current project directory. Although the version number of eckards is registered in package.json, the things are not detected by moudule, so naturally they can’t be retrieved.
Solution:
There is no problem running my code in the original environment, so the solution is very simple. Just download the required ecarts package and run the following command
// echarts download code
cnpm install [email protected] --save
//the reaseon for limiting version number:default 5 dont conatin Map components
Of course, because I changed the disk, I didn’t even have NPM, not to mention cnpm, not even inode… Of course, if you encounter these problems, just download the corresponding version you need
after downloading the dependencies, you can first go to package.json or the dependency file corresponding to your own project to check whether it is registered correctly, and then check whether the module has a corresponding package to develop a good development habit
result
After NPM running again, the IDE screen is displayed normally and the web page is displayed normally, OK.
(the picture will not be displayed here, otherwise the information security will be leaked.)
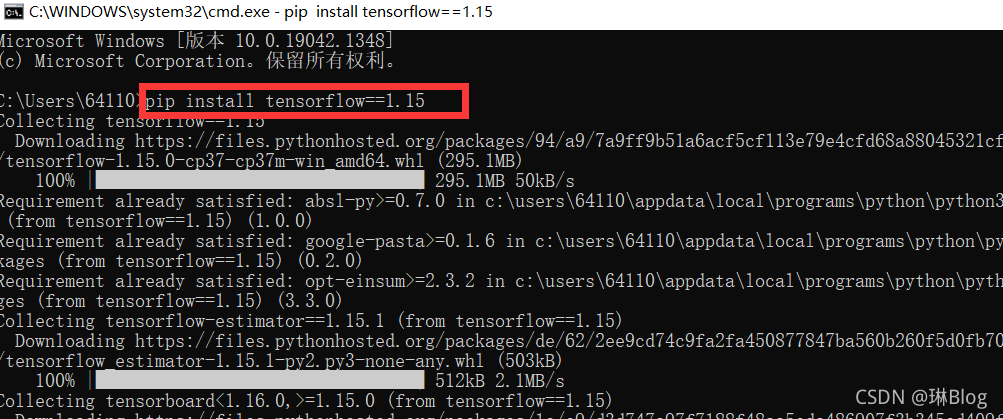
Installing tensorflow with PIP reports an error syntaxerror: invalid syntax
Solution: directly enter the installation statement in CMD
Locate the main.js file and the start code is:
import { createApp } from 'vue'
import App from './App.vue'
import router from './router'
import ElementUI from 'element-ui';
import 'element-ui/lib/theme-chalk/index.css';


createApp(App).use(ElementUI);

createApp(App).use(router).mount('#app')
Error message:
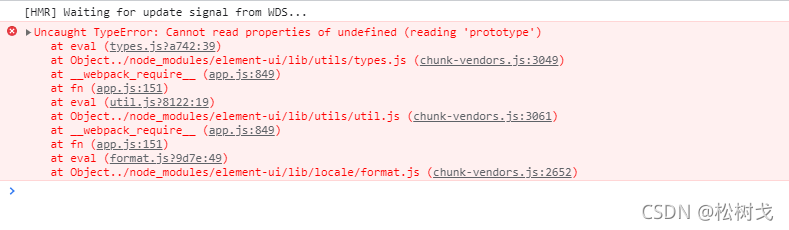
reason: vue3.0 no longer supports element UI, so element plus can be used to replace
NPM to install element plus
$ npm install element-plus --save
Refer to the official website of element plus and modify the main.js code to
import { createApp } from 'vue'
import App from './App.vue'
import router from './router'
import ElementPlus from 'element-plus'
import 'element-plus/dist/index.css'

const app = createApp(App)
app.use(ElementPlus)

app.use(router).mount('#app')
Error reporting solution:
I don’t know what I installed. Suddenly one day, the right-click display setting reported an error.
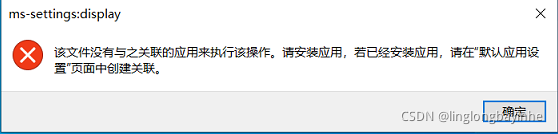
After several inquiries, the following methods were found:
1. Win + R, enter regedit and enter the registry.
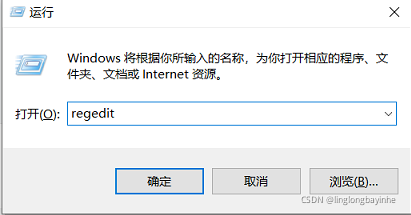
2. Find the corresponding file in the registry. Location: HKEY_CURRENT_USER\Software\Classes\ms-settings. Rename MS settings (e.g. MS settings1)
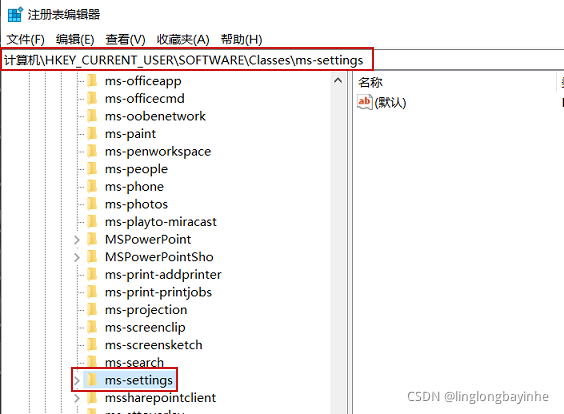
be accomplished!
Now, right-click on the desktop and click display settings to see it!
Vue3 + vite installation element plus error resolution
1. The console reports an error when running the project

Solution:
1 delete the node_Modules folder and package-lock.json
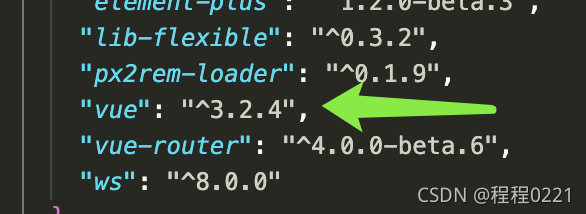
2 modify package.json
3 modify Vue version number must be above 3.2.2
4 reinstall I, but add – force to force installation, otherwise an error will be reported
npm i --force
Element plus could not find the problem in index.css
In main.js
Solution:
The solution is also very simple. Now that you have installed the element plus dependency, you can’t find the file. The probability is that the path has changed. So I manually turned to node modules and found that the whole theme chat folder was moved

In using vuex, the prettier – code formatter is downloaded and Automatic formatting requires the following configuration
Need to create .prettierrc in the root directory of the file for configuration
{

  "semi": false,

  "singleQuote": true,

  "trailingComma": "none"

}
Using eslint according to the error report
.eslintrc.js
Add commands in rules
You can ignore the space before the function
 rules: {
    'no-console': process.env.NODE_ENV === 'production' ?'error' : 'off',
    'no-debugger': process.env.NODE_ENV === 'production' ?'error' : 'off',
    'space-before-function-paren': 0
},Cause: the attribute cannot be resolved, and the entity class in the HQL statement is written incorrectly
Solution: please carefully check the case of entity classes