VS development VTK and ITK package setup is relatively complex, so we chose a lightweight IDE as the development tool.
Here Qt and VTK installation can refer to my previous article Win10 installation VS2017 + QT5.11 + VTK8.1.1 + ITK4.13, here focuses on how to use QCreator to use VTK.
This project’s GitHub address: Alxemade/VTK_ITK_SimpleTest/test_vtk/ Welcome Star and Fork.
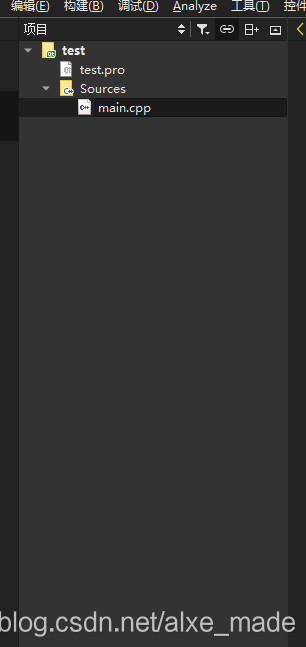
1. Create a new Qt Console Application in QTCreator
The project structure is shown in the figure below:
Then we enter the following code in main.cpp:
#include <QCoreApplication>

#include <vtkSmartPointer.h>
#include <vtkSphereSource.h>
#include <vtkPolyDataMapper.h>
#include <vtkActor.h>
#include <vtkImageViewer.h>
#include <vtkRenderWindowInteractor.h>
#include <vtkInteractorStyleImage.h>
#include <vtkJPEGReader.h>
#include <vtkRenderer.h>

#include<QVTKWidget.h>

int main(int argc,char **argv)
{
    QCoreApplication a(argc, argv);
    QVTKWidget widget;
    widget.resize(256,256);
    //Setupsphere
    vtkSmartPointer<vtkSphereSource>sphereSource=vtkSmartPointer<vtkSphereSource>::New();
    sphereSource->Update();
    vtkSmartPointer<vtkPolyDataMapper>sphereMapper=vtkSmartPointer<vtkPolyDataMapper>::New();
    sphereMapper->SetInputConnection(sphereSource->GetOutputPort());
    vtkSmartPointer<vtkActor>sphereActor= vtkSmartPointer<vtkActor>::New();
    sphereActor->SetMapper(sphereMapper);
    //Setupwindow
    vtkSmartPointer<vtkRenderWindow>renderWindow=vtkSmartPointer<vtkRenderWindow>::New();
    //Setuprenderer
    vtkSmartPointer<vtkRenderer>renderer=vtkSmartPointer<vtkRenderer>::New();
    renderWindow->AddRenderer(renderer);
    renderer->AddActor(sphereActor);
    renderer->ResetCamera();
    widget.SetRenderWindow(renderWindow);
    //mainWindow.setCentralWidget(widget);

    //mainWindow.show();
    widget.show();
    app.exec();
    return EXIT_SUCCESS;

}
Note: this is only an initial version and will need to be revised in the end.
CMAKE, compile, run and find a bunch of errors. Never mind, we need to add the VTK header and lib files.
Add the following code:
INCLUDEPATH += $$quote(C:/Program Files/VTK/include/vtk-8.1)
LIBS +=  $$quote(C:/Program Files/VTK/lib/vtk*.lib)
In this case, the path is the path where the output has been compiled by VTK.
2. Run the program above
Error: cannot open QApplication
QT += widgets
2. 2 Qwidget Must constuct a Qappliaction before Qwidget
We separate the Debug and Release versions. Modify the PRO file as follows:
QT -= gui

CONFIG += c++11 console
CONFIG -= app_bundle
QT += widgets
DEFINES += QT_DEPRECATED_WARNINGS
SOURCES += \
        main.cpp

SysStatus = $$system(if exist %windir%/SysWOW64 echo x64)  ## if contains SysWOW64 prove the windows is 64 bit

win32 {
    ## Windows common build here
    !contains(SysStatus, x64) {
        message("x86 build ")
        ## Windows x86 (32bit) specific build here

    } else {
        message("x86_64 build")
        ## Windows x64 (64bit) specific build here
        LABMR_PREFIX = E:/XC/vtk/vtk-8.1.1/build/lib
        ## TOOLS_PREFIX = quote(C:/Program Files)
    }
}
##VTK INCLUDEPATH Starts
INCLUDEPATH += $$quote(C:/Program Files/VTK/include/vtk-8.1)
##VTK Ends

CONFIG(debug, debug|release) {

## VTK Debug LIB Starts
LIBS += $${LABMR_PREFIX}/Debug/vtk*.lib
## VTK Debug LIB Ends

} else {

## VTK Release LIB Starts
LIBS += $${LABMR_PREFIX}/Release/vtk*.lib
## VTK Release LIB Ends
}
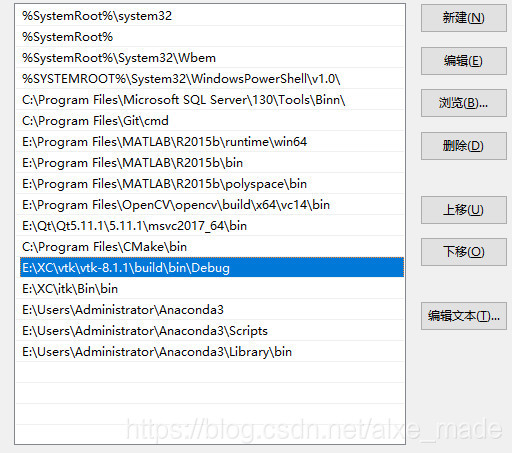
Also modify the system environment variable to:
2. 3 still can not open the normal file.
We have modified the CPP file:
# include & lt; QCoreApplication> and oreApplication a(argc, argv); with Core removed. Add two lines: #include <vtkAutoInit.h>
VTK_MODULE_INIT(vtkRenderingOpenGL2);
The final CPP file is as follows:
#include <QApplication>
#include <vtkAutoInit.h>
VTK_MODULE_INIT(vtkRenderingOpenGL2);
#include <vtkSmartPointer.h>
#include <vtkSphereSource.h>
#include <vtkPolyDataMapper.h>
#include <vtkActor.h>
#include <vtkImageViewer.h>
#include <vtkRenderWindowInteractor.h>
#include <vtkInteractorStyleImage.h>
#include <vtkJPEGReader.h>
#include <vtkRenderer.h>
#include<QVTKWidget.h>
int main(int argc,char **argv)
{
//QCoreApplication a(argc, argv);
QApplication app(argc, argv);
QVTKWidget widget;
widget.resize(256,256);
//Setupsphere
vtkSmartPointer<vtkSphereSource>sphereSource=vtkSmartPointer<vtkSphereSource>::New();
sphereSource->Update();
vtkSmartPointer<vtkPolyDataMapper>sphereMapper=vtkSmartPointer<vtkPolyDataMapper>::New();
sphereMapper->SetInputConnection(sphereSource->GetOutputPort());
vtkSmartPointer<vtkActor>sphereActor= vtkSmartPointer<vtkActor>::New();
sphereActor->SetMapper(sphereMapper);
//Setupwindow
vtkSmartPointer<vtkRenderWindow>renderWindow=vtkSmartPointer<vtkRenderWindow>::New();
//Setuprenderer
vtkSmartPointer<vtkRenderer>renderer=vtkSmartPointer<vtkRenderer>::New();
renderWindow->AddRenderer(renderer);
renderer->AddActor(sphereActor);
renderer->ResetCamera();
widget.SetRenderWindow(renderWindow);
//mainWindow.setCentralWidget(widget);
//mainWindow.show();
widget.show();
app.exec();
return EXIT_SUCCESS;
}
Then cmake, compile, and run:
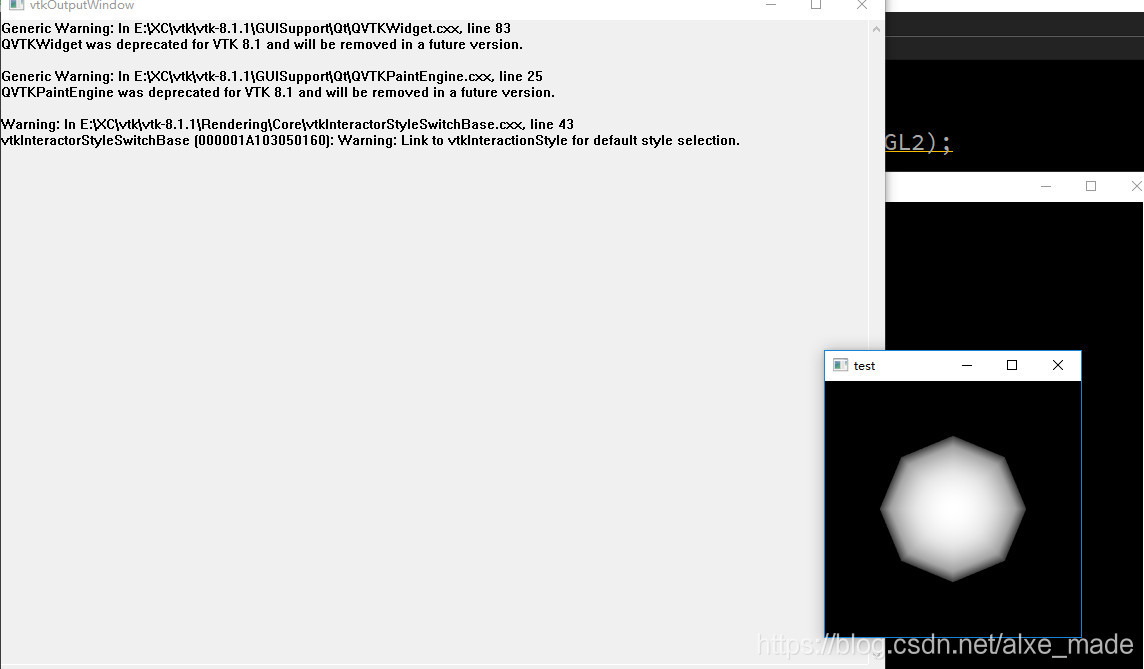
Over
The word that writes this basically is the word that oneself need to check later is more convenient.
Read More:
- VTK: VTK error problem set
- VTK notes — texture mapping
- Solutions to several VTK compilation errors (vtk5.8 + VS2010)
- VTK series: installation and introduction of VTK
- Configuration, compilation and installation of vtk8.1 in qt5.9
- [debug notes] pointer error when STD:: vector is used in VTK “access conflict when reading location XXX”
- Examples of VTK image reading and display
- [VTK] header file and lib file name often used in VTK
- Problems encountered in VTK installation
- Some errors in VTK compilation
- Summary of problems encountered in compiling and installing vtk7 + vs2013 / 2015 + cmake
- Problems in compiling VTK with cmake: solutions to error configuration process, project files may be invalid
- Two methods of cmake in VTK program
- Reading and display of various image formats in VTK
- Using qvtk renderwindoninteractor to load VTK widget
- The solution to the error of “no override found for * *” in the use of VTK
- Howto Install and Configure VTK on Ubuntu
- VTK + QT + vs compilation and installation configuration
- To solve problems in cmake VTK: error configuration process, project files may be invalid
- VTK cultivation 26: basic operation of image_ Three dimensional image slice extraction