Tag Archives: ubuntu

Authentication token manipulation error appears in ubuntu18.04 password modification

Today I need to change the password of ubuntu18.04, but when I changed the password, the following error occurred:

Authentication token manipulation error

The explanation given online is that there is no authority.
 
The solution

sudo mount -o remount,rw /

Just add a sudo

eric@eric-HP-Z420-Workstation:~$ sudo passwd eric
Enter new UNIX password:
Retype new UNIX password:
passwd: password updated successfully

reference
[1]. The modified Linux password times “the Authentication token manipulation error” wrong solution. https://help.aliyun.com/knowledge_detail/41542.html
[2].Fix “Authentication Token Manipulation Error” When Changing User Password In Ubuntu. https://www.codevoila.com/post/26/fix-authentication-token-manipulation-error-when-changing-user-password-in-ubuntu

locale.Error : the solution of unsupported locale setting

locale.Error: unsupported locale setting locale


Error: the solution set by unsupported locale
0. References 1. Cause of error 2. Solution


0. References
https://stackoverflow.com/questions/14547631/python-locale-error-unsupported-locale-setting


1. Report the cause of the error
The ubuntu 16.04 installed on the vagrant + virtualbox installed on the ubuntu 16.04 used the pip3 list and the python3-m venv venv both commands gave the error message as follows:

vagrant@ubuntu-xenial:~/microblog$ pip3 list
Traceback (most recent call last):
  File "/usr/bin/pip3", line 11, in <module>
    sys.exit(main())
  File "/usr/lib/python3/dist-packages/pip/__init__.py", line 215, in main
    locale.setlocale(locale.LC_ALL, '')
  File "/usr/lib/python3.5/locale.py", line 594, in setlocale
    return _setlocale(category, locale)
locale.Error: unsupported locale setting

The reason is that the system lacks the corresponding language package, which needs to be downloaded and installed.


2. Solutions
Use the locale locale to view the current language Settings:

vagrant@ubuntu-xenial:~$ locale
locale: Cannot set LC_ALL to default locale: No such file or directory
LANG=en_US.UTF-8
LANGUAGE=
LC_CTYPE="en_US.UTF-8"
LC_NUMERIC=zh_CN.UTF-8
LC_TIME=zh_CN.UTF-8
LC_COLLATE="en_US.UTF-8"
LC_MONETARY=zh_CN.UTF-8
LC_MESSAGES="en_US.UTF-8"
LC_PAPER=zh_CN.UTF-8
LC_NAME=zh_CN.UTF-8
LC_ADDRESS=zh_CN.UTF-8
LC_TELEPHONE=zh_CN.UTF-8
LC_MEASUREMENT=zh_CN.UTF-8
LC_IDENTIFICATION=zh_CN.UTF-8
LC_ALL=

It is found that there are two languages in this setting, one is en_us.utf-8 , and the other is zh_cn.utf-8 .
Use locale -a to view all available languages in the current system:

vagrant@ubuntu-xenial:~$ locale -a
C
C.UTF-8
en_US.utf8
id_ID.utf8
POSIX

It was found that zh_cn.utf-8 is missing in the available language above, and this is the reason for the error.
Use sudo apt install language-pack-zh-hans installation language:

vagrant@ubuntu-xenial:~$ sudo apt install language-pack-zh-hans
Reading package lists... Done
Building dependency tree       
Reading state information... Done
The following additional packages will be installed:
  language-pack-zh-hans-base
The following NEW packages will be installed:
  language-pack-zh-hans language-pack-zh-hans-base
0 upgraded, 2 newly installed, 0 to remove and 3 not upgraded.
Need to get 2110 kB of archives.
After this operation, 8545 kB of additional disk space will be used.
Do you want to continue?[Y/n] y
Get:1 http://archive.ubuntu.com/ubuntu xenial-updates/main amd64 language-pack-zh-hans-base all 1:16.04+20160627 [2108 kB]
Get:2 http://archive.ubuntu.com/ubuntu xenial-updates/main amd64 language-pack-zh-hans all 1:16.04+20160627 [1870 B]
Fetched 2110 kB in 3s (567 kB/s)           
perl: warning: Setting locale failed.
perl: warning: Please check that your locale settings:
    LANGUAGE = (unset),
    LC_ALL = (unset),
    LC_TIME = "zh_CN.UTF-8",
    LC_MONETARY = "zh_CN.UTF-8",
    LC_ADDRESS = "zh_CN.UTF-8",
    LC_TELEPHONE = "zh_CN.UTF-8",
    LC_NAME = "zh_CN.UTF-8",
    LC_MEASUREMENT = "zh_CN.UTF-8",
    LC_IDENTIFICATION = "zh_CN.UTF-8",
    LC_NUMERIC = "zh_CN.UTF-8",
    LC_PAPER = "zh_CN.UTF-8",
    LANG = "en_US.UTF-8"
    are supported and installed on your system.
perl: warning: Falling back to a fallback locale ("en_US.UTF-8").
locale: Cannot set LC_ALL to default locale: No such file or directory
Selecting previously unselected package language-pack-zh-hans-base.
(Reading database ... 89747 files and directories currently installed.)
Preparing to unpack .../language-pack-zh-hans-base_1%3a16.04+20160627_all.deb ...
Unpacking language-pack-zh-hans-base (1:16.04+20160627) ...
Selecting previously unselected package language-pack-zh-hans.
Preparing to unpack .../language-pack-zh-hans_1%3a16.04+20160627_all.deb ...
Unpacking language-pack-zh-hans (1:16.04+20160627) ...
Setting up language-pack-zh-hans (1:16.04+20160627) ...
Setting up language-pack-zh-hans-base (1:16.04+20160627) ...
Generating locales (this might take a while)...
  zh_CN.UTF-8... done
  zh_SG.UTF-8... done
Generation complete.

Finally, we generated the zh_cn.utf-8 language that we needed.
Using pip3 list and python3-m venv venv again will not give an error.

E: sub process / usr / bin / dpkg returned an error code (2) solution under Ubuntu

preface
It has been roughly two or three years with ubuntu, and this is the first time I have encountered this problem, so I wrote down
. Thank you very much for letting me solve the code[2] error
error


This error occurred

dpkg: unrecoverable fatal error, aborting:
 files list file for package 'linux-libc-dev:amd64' is missing final newline
E: Sub-process /usr/bin/dpkg returned an error code (2)

Linux-libc-dev: AMD64 cannot be found, we need to fix this problem.
The solution


Find the damaged package and remove its status.

sudo gedit /var/lib/dpkg/status

If a Linux-LIBc-dev error is reported, delete the following:

Package: linux-libc-dev
Status: install ok installed
Priority: optional
Section: devel
Installed-Size: 5077
Maintainer: Ubuntu Kernel Team <[email protected]>
Architecture: amd64
Multi-Arch: same
Source: linux
Version: 4.15.0-46.49
Replaces: linux-kernel-headers
Provides: aufs-dev, linux-kernel-headers
Conflicts: linux-kernel-headers
Description: Linux Kernel Headers for development
 This package provides headers from the Linux kernel.  These headers
 are used by the installed headers for GNU glibc and other system
 libraries. They are NOT meant to be used to build third-party modules for
 your kernel. Use linux-headers-* packages for that.
    rename, backup the original info directory
sudo mv /var/lib/dpkg/info /var/lib/dpkg/info_old

Create an empty Info directory

sudo mkdir /var/lib/dpkg/info

Use apt – get updated

sudo apt-get update

Reinstall the package

sudo apt-get -f install

Code [1] Error resolution

Using xrdp to realize windows remote desktop Ubuntu Linux


In general, we use SSH client to remotely log in Linux system. As for Linux remote login tools under the graphical interface, we usually think of VNC, but its security is not enough.
Here, I introduce the XRDP installation configuration method. We can easily use Windows remote desktop Linux.
XRDP installation configuration method
Open terminal: Install in turn
sudo apt-get install xrdp
sudo apt-get install vnc4server tightvncserver

Set the XRDP
echo “gnome-session –session=gnome-classic” > ~/.xsession
Ubuntu12.04 has unity and gnome multiple desktop managers. You need to specify one when you start up, otherwise
Even if the remote login is successful, it is only background.
XRDP’s configuration documents are in the /etc/xrdp directory of xrdp.ini and Sesman.in, generally selected by default.

Restart XRDP
sudo /etc/init.d/xrdp restart

Run MSTSC for Windows
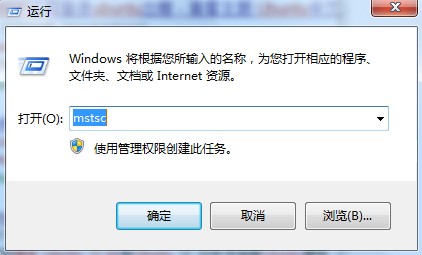
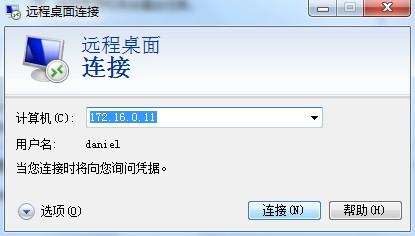
Windows remote desktop, open the input remote Ip, connection, enter the user password can be remote Linux.

Error encountered
1, XRDP access to Ubuntu only see the background, not the menu bar solution
Gnome-panel
sudo apt-get install gnome-panel

2, Failed to load session “gnome”
Try
on the desktop with ubuntu-2d
Type the command: echo “gnome-session — session= Ubuntu-2D “> ~/.xsession, and then restart XRDP.

3. Error:
Possiblitie to sesman IP 127.0.0.1 port 3350
sesman connect ok
sending login info to sesman
login successful for display 14

connecting to 127.0.0.1 5914
error – problem connecting
XRDP – Sesman. log, error:

[INFO ] starting Xvnc session…
[ERROR] X server for display 10 startup timeout[INFO ] starting xrdp-sessvc – xpid=2924 – wmpid=2923
[ERROR] X server for display 10 startup timeout
[ERROR] another Xserver is already active on display 10
[DEBUG] aborting connection…
if your log also has things like Xserver for display 10 startup timeout and another Xserver is already active on display 10
The root cause of the problem is TightvNC. The version in question conflicts with the X font, causing an error in connection to the Xserver.
Solutions:
apt-get purge tightvnc xrdp
apt-get install tightvncserver xrdp
Finally:
Start the XRDP service, sudo /etc/init.d/ XRDP restart, at which point the port is enabled and the aspect is configured by default.
By command: netstat -tnl
Check 3350 3389 5910 these three ports in LISTEN, generally no problem.
The name of the DPkg-L + package that tells you what files the package contains.
4, ubuntu 13.10 and later without background:
Thanks for the Suggestions in the comments:
XRDP does not support 13.10 GNOME. The solution is to install an XFCE interface.

sudo apt-get install xubuntu-desktop

And then:
echo xfce4-session > ~/.xsession

Set up the configuration file again
sudo gedit /etc/xrdp/startwm.sh
Insert
xfce4-session on the front line of./etc/x11/xsession
Restart XRDP
sudo service XRDP

pip Import Error:cannot import Name main solution

When using PIP for an installation operation, you run into this problem:


was later found to be caused by a change in the function in the library that updated PIP to 10.0.0.

solution:

sudo gedit /usr/bin/pip

Will the original:

from pip import main
if __name__ == '__main__':
    sys.exit(main())

To:

from pip import __main__
if __name__ == '__main__':
    sys.exit(__main__._main())

With respect to OK

Severe: error filterStart error resolution

My question is: same JDK version, same tomcat version, project written using jfinal under Windows, and then packaged under the webapps directory of tomcat6 for ubuntu12.04 server:
The following error occurs:

SEVERE: Error filterStart 
Aug 27, 2013 9:37:44 AM org.apache.catalina.core.StandardContext start 
SEVERE: Context [/test] startup failed due to previous errors 

Based on my own experience and solutions, here is my approach:
First remove &lt from web.xml; filter> Tag, and then restart Tomcat. The error will be reported in the background of Tomcat to see what is the cause of the error.
If a package is missing, the necessary package is imported, and any other errors resolve themselves. Mine is not short of bags

SEVERE: End event threw exception 
java.lang.reflect.InvocationTargetException 
        at sun.reflect.NativeMethodAccessorImpl.invoke0(Native Method) 
        at sun.reflect.NativeMethodAccessorImpl.invoke(NativeMethodAccessorImpl.java:57) 
        at sun.reflect.DelegatingMethodAccessorImpl.invoke(DelegatingMethodAccessorImpl.java:43) 
        at java.lang.reflect.Method.invoke(Method.java:616) 
        at org.apache.tomcat.util.IntrospectionUtils.callMethod1(IntrospectionUtils.java:928) 
        at org.apache.tomcat.util.digester.SetNextRule.end(SetNextRule.java:193) 
        at org.apache.tomcat.util.digester.Rule.end(Rule.java:229) 
        at org.apache.tomcat.util.digester.Digester.endElement(Digester.java:1138) 
        at com.sun.org.apache.xerces.internal.parsers.AbstractSAXParser.endElement(AbstractSAXParse 
r.java:604) 

According to the information I collected on the Internet, it is probably due to the inconsistency or lower version of the JDK version; Select a unified version of the development and running environments
If the version is not unified, the unified version, if the version is low, then change to a high version.
(However, I also have a problem here, if the server can not connect to the external network, then the program started under Tomcat is still an error)
Here is the download link for the JDK:
http://www.oracle.com/technetwork/java/javase/archive-139210.html

Docker run failed with the following error in logs, standard_ init_ linux.go:211 : exec user process caused “exec format error“

Standard_init_linux. go:211: exec User Process caused “exEC Format Error”
The paper
This problem is encountered in the secondary DockerUI project on the board, which adopts arm7L architecture. The image is based on the Centos Docker build of X86_64, and then the image is packaged into a tar file by Docker Save, and then the image is extracted from the tar file compressed by Docker Load. The image transfer itself is not a problem, and multiple operations have been performed prior to this.
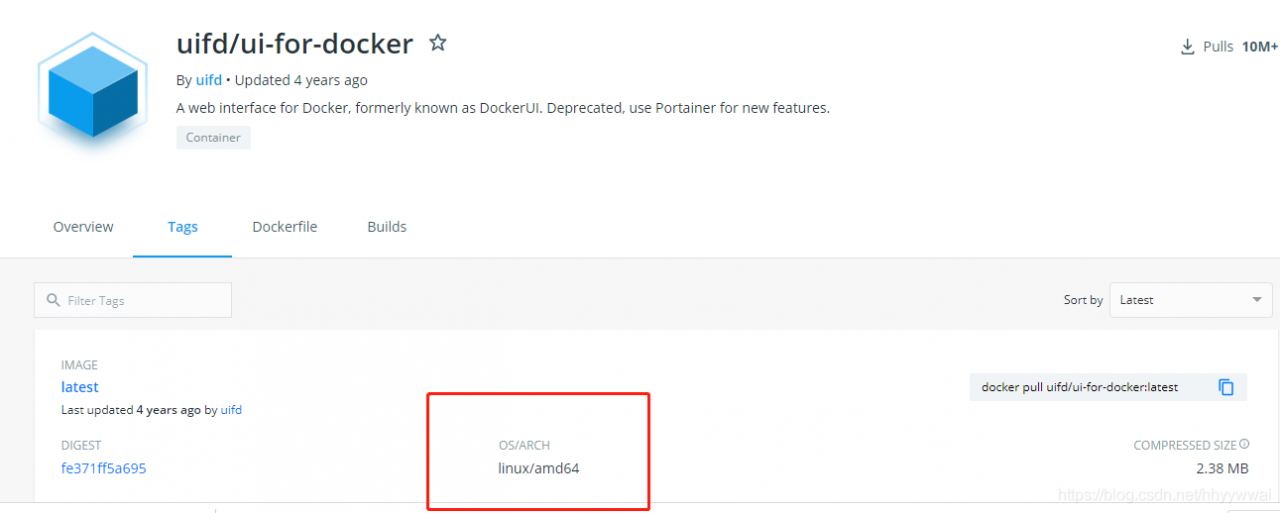
displays the container exit status when docker runs, and docker logs, the container, will report the above error. The reason is that the arch architecture is different, which will affect the docker build image.

1. Pull the official mirror, still report the same error.
2 search this image in dockerhub, sure enough, found a clue, as shown in the red box in the figure below:

Problem location
1. Problems on baidu generally point to entrypoint in dockerfile. I did not encounter various shell
2 and coding problems, because my project is pure CSS +js+ HTML. Finding the root of the problem on Google is that ARCH is different.
Solution
now that the root cause of the problem has been found, it is easy to handle, just need to rebuild docker build on the current arch Linux.
While e sometimes it feels like solving a case, follow the clues to find the root of the problem and solve it. The process was painful, but the results were pretty good.

Error ns when starting VirtualBox virtual machine after upgrading kernel_ ERROR_ FAILURE

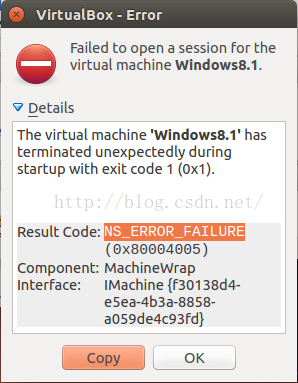
I updated the Ubuntu kernel today and everything seems to be going well. But when Trying to open a Previously created Windows 8.1 virtual machine inside VirtualBox, an error was reported:

Feeling confused, hard to create a virtual machine so can not be used?
After a long look, it turns out that the kernel driver for VirtualBox was not loaded successfully, presumably because the kernel had just been upgraded.
The solution is simple: simply execute the following command:

sudo /etc/init.d/vboxdrv setup

At this point, the VirtualBox kernel driver will be recompiled and loaded, possibly waiting a while.
After the command is executed, try to open the virtual machine again, and everything is fine.

Solution of grub loading error 17

Usually this error occurs when you install Windows and Ubutu Linux dual system on your computer. In the Windows environment, you make changes, such as deleting or formatting the Linux partition, resulting in the system can not find the Linux boot program when booting up, the MBR in Windows also appears damaged, the above error occurs.
After this kind of problem, there are many solutions, I will only talk about my practical operation of a relatively simple way.
Assuming you don’t have a cd-ROM drive, here’s how to do it:
(1) First of all, make a USB boot disk containing WinPE. You can go to the official website of the old peach to download the “WinPE-U disk version of the old peach”, and make your own USB boot disk with installation tips;
(2) Set the SYSTEM BIOS, adjust the startup sequence, and select USB-HDD;
(3) Download the MBR repair tool or PQ10.0 and put it on the U disk;
(4) Insert U disk, restart the computer, enter the WinPE system, use tools to repair your MBR under WinPE, such as open PQ10.0 in the toolbar there is a MBR repair, repair;
(5) Reset the BIOS, change the boot sequence, restart the computer.
After the above steps, you can boot up normally and enter your Windows system.

insmod: init_module ‘hello.ko’ failed (Exec format error)

With the metere kernel, an Android simulator has been run and another compiled kernel is being added dynamically.
I initially found a hello.c file from the Web and wrote the Makefile the way he did, but when I ran the command insmod, it reported an error:
insmod: init_module ‘hello.ko’ failed (Exec format error)
Period, check a lot of information is still not solved, and then to test it according to this blog, succeeded, the connection address: http://blog.csdn.net/yf210yf/article/details/9901375
Next I post his Makefie file. There is no problem with the hello.c file, but the problem is with the Makefile. Write the Makefile the way he writes it and you can dynamically insert your own compiled kernel. The following code is posted:
Obj – m: = hello – yf. O
hello – yf – objs: = hello. O

KID: = ~/android – kernel/goldfish
the PWD: = $(shell PWD)
the ARCH = arm
CROSS_COMPILE = arm eabi –
CC = $(CROSS_COMPILE) GCC
LD = $(CROSS_COMPILE) LD

all:
the make – C $(KID) ARCH = $(ARCH) CROSS_COMPILE = $(CROSS_COMPILE) M = ${PWD} modules

the clean:
rm-rf *. O. CMD *. Ko *. Mod. C. tmp_versions
however, I do not know why he writes this way right now, I am looking into it. I’ve been updating this blog since I figured it out, but this problem has been solved.
I think I understand why, but look at this code:
All:
mak-c $(KID) ARCH=$(CROSS_COMPILE) M=${PWD} modules

I think this piece of code is the key to solve this problem. First, with mak-c $(KID), the local path of the current source code is given into the compile environment. Then assign the ARCH and cross-compiled environment variables separately, so that the above problems will not occur. You should have no problem writing makefiles this way if you want to compile your own kernel.
——————————————————————————————————————————————————————————————————– ———————–
To update this, the ‘M=’ option is used to add ‘M=dir’ to the make modules command when the user needs to compile an external module based on a kernel. The program will automatically look for the module’s source code in the dir directory you specify, compile it, and generate the KO file. This allows the generated KO files to be dynamically inserted into the kernel.