When building the front-end package of the company’s test environment, an error was suddenly reported and the construction failed. After checking the log, an error was reported and the esbuild installation failed. I have not installed this esbuild on Jenkins server, and the code proposed by the development is no problem.
solution:
first look for the esbuild directory in the front-end package. I found that there are two esbuild directories in my front-end package, and then I went in and found that there are install JS file, NPM – V check your own NPM version. If it is greater than 7, execute
node node_modules/esbuild/install.js
after manual installation, build from Jenkins again, and there will be no error
Tag Archives: software test
Testlink 1.9.16 Error: Fatal error: Uncaught Error: Cannot use string offset as an array in D:\softe
Installed testlink 1.9.16 on Windows 10 with error when running tests:
Fatal error:*UncaughtError:*Cannotaccomplish use of strings along offset as an oararray in D:\softest\htdocs\testlink\lib\execute\execSetResults. php:1533 php(93):*processTestCase(NULL,*Object(stdClass),Object(stdClass),*Array,*Object(tree),*Object(testcase),*Object(tlAttachmentRepository)*#1{main}*thrownalong in D:\softest\htdocs\testlink\lib\execute\execSetResults. php on line 1533
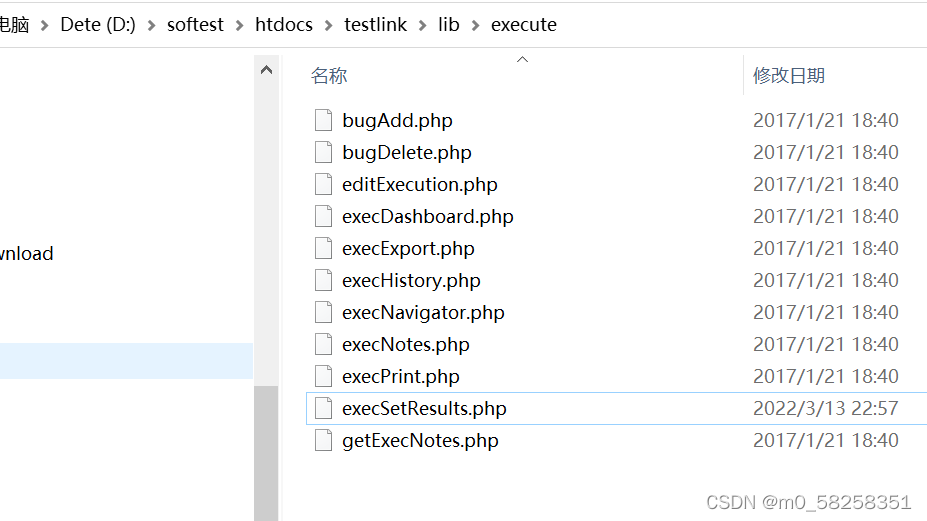
Open the path file provided in the error: D:\softest\htdocs\testlink\lib\execute\execSetResults. php database
By opening the memory book, Ctrl+F search for $finalFilters
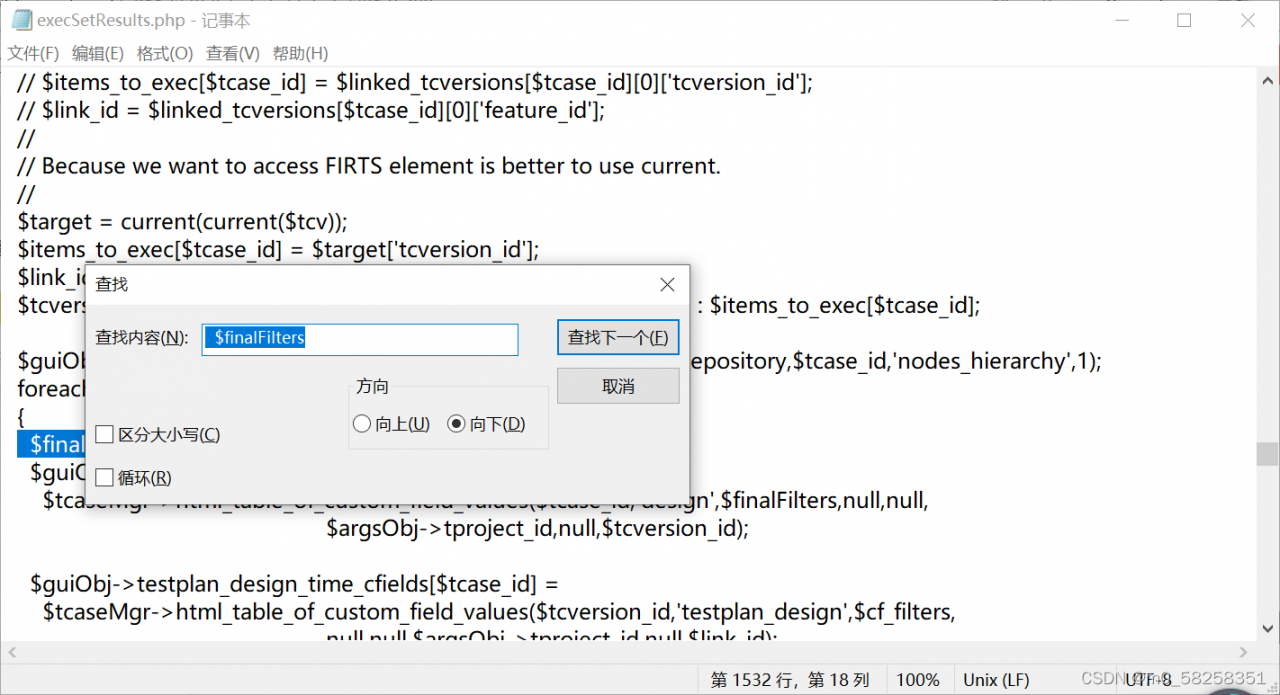
Replace
foreach($locationFilters as $locationKey => $filterValue)
  {

    $finalFilters=$cf_filters+$filterValue;
    $guiObj->design_time_cfields[$tcase_id][$locationKey] =........;
With
$finalFilters = array();
$guiObj-> design_time_cfields = array();
As below:
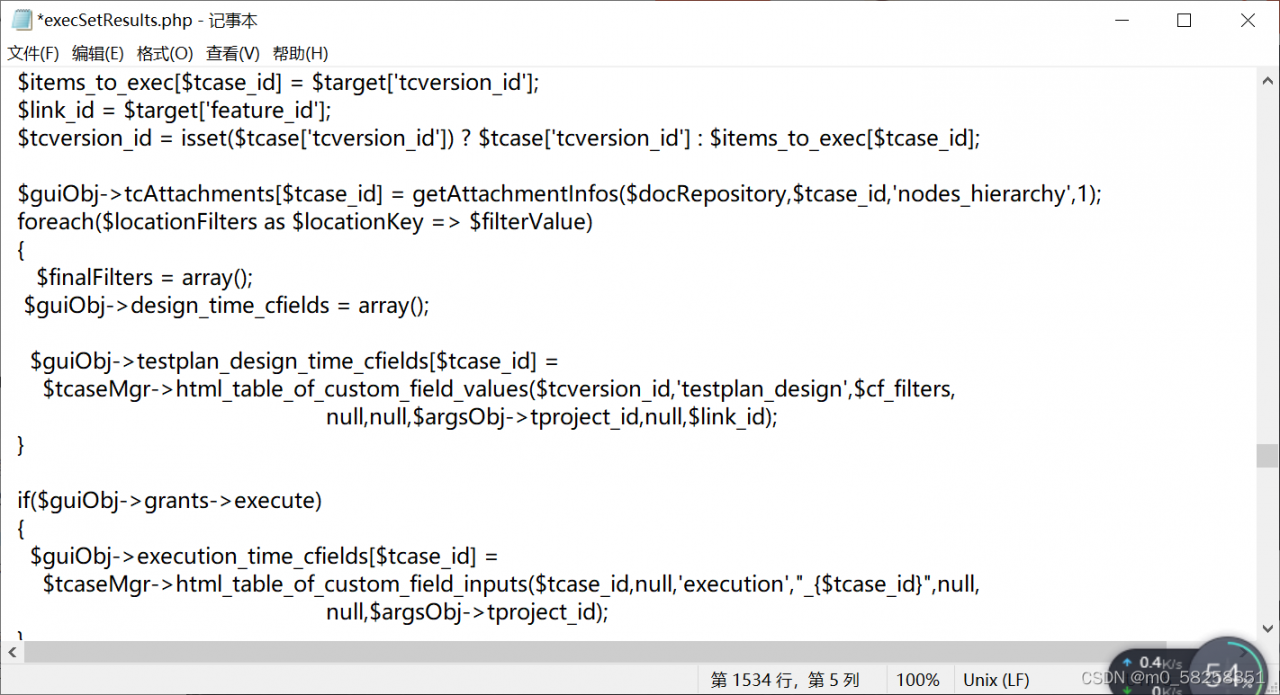
After returning, refresh new testlinks into the Internet immediately.
[Solved] selenium.common.exceptions.WebDriverException: Message: An unknown server-side error
Error code
from appium import webdriver
from selenium.webdriver.support.ui import WebDriverWait
desired_caps={}
desired_caps['platformName']='Android'
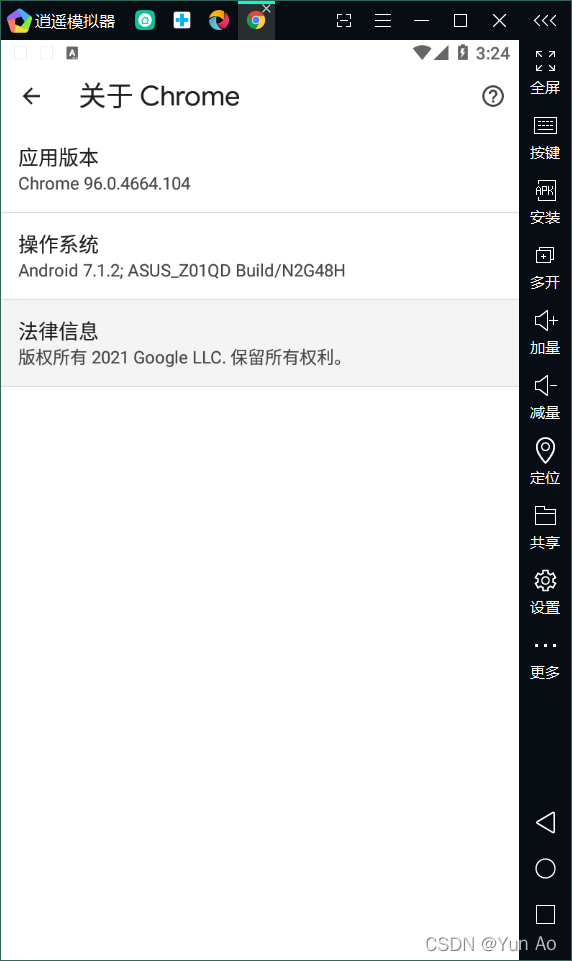
desired_caps['platformVersion']='7.1.2'
desired_caps['deviceName']='127.0.0.1:21503'
desired_caps['app']=r'D:\appium_app\dr.fone3.2.0.apk'
desired_caps['appPackage']='com.wondershare.drfone'
desired_caps['appActivity']='com.wondershare.drfone.ui.activity.WelcomeActivity'
# Port
driver=webdriver.Remote('http://localhost:4723/wd/hub',desired_caps)
driver.implicitly_wait(3)
driver.find_element_by_id('com.wondershare.drfone:id/btnBackup').click()
WebDriverWait(driver,15).until(lambda x:x.find_element_by_class_name('android.widget.Button'))
driver.find_element_by_class_name('android.widget.Button').click()
WebDriverWait(driver,8).until(lambda x:x.find_element_by_android_uiautomator('new UiSelector().text("Refresh")'))
driver.find_element_by_android_uiautomator('new UiSelector().text("Refresh")').click()
WebDriverWait(driver,8).until(lambda x:x.find_element_by_class_name('android.webkit.WebView'))
contexts=driver.contexts
print(contexts)
driver.switch_to.context('WEBVIEW_com.wondershare.drfone')
driver.find_element_by_id('email').send_keys('[email protected]')
driver.find_element_by_class_name('btn_send').click()
driver.switch_to.context('NATIVE_APP')
driver.find_element_by_class_name('android.widget.ImageButton').click
Error Messages:
selenium.common.exceptions.WebDriverException: Message: An unknown server-side error occurred while processing the command. Original error: No Chromedriver found that can automate Chrome '68.0.3440'. You could also try to enable automated chromedrivers download server feature. See https://github.com/appium/appium/blob/master/docs/en/writing-running-appium/web/chromedriver.md for more details
Solution:
own local appium server without chromedriver.exe configured
Configure chromedriver.exe
Try to ensure that the emulator version and the PC version of the same download
 ## Replace or Save chromedriver.exe
Default path:
C:\Users\AppData\Local\Programs\Appium\resources\app\node_modules\appium\node_modules\appium-chromedriver\chromedriver\win Replace chromedrive to the original one.
My installation path
C:\Users\yunao\node_modules\appium-chromedriver\chromedriver\win
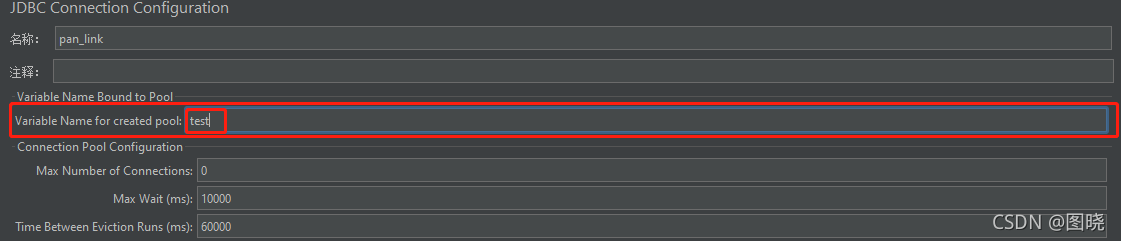
JMeter JDBC Error: No pool found named: ‘test‘ [How to Solve]
No pool found named
JMeter JDBC error reporting: no pool found named error information reason solution
JMeter JDBC reports an error: no pool found named
Error message
No pool found named: ‘test’, ensure Variable Name matches Variable Name of JDBC Connection Configuration
Reason
The JDBC request needs to connect to the database and needs the corresponding configuration information. If the database configuration information is not found, this error will be reported, Find the configuration information through the value filled in variable name of pool declared in JDBC connection configuration JDBC connection configuration provides the configuration information through the value filled in variable name of created pool. When there are multiple database configuration information, use variable name of pool declared in JDBC connection configuration and variable name of created pool, Ensure that the query request is not confused with the connected database
Solution
Fill the variable name of pool declared in JDBC connection configuration in the JDBC request and the variable name of created pool in the corresponding JDBC connection configuration into the same value

Mac Appium Error: Error executing adb Exec. Original error…
Appium error on MAC, error executing ADB exec. Original error
Error message: error executing adbexec. Original error: ‘command’/users/noogler/library/Android/SDK/platform tools/ADB – P 5037 – s clb7n18528000446 shell ‘settings delete global hidden_ api_ policy_ pre_ p_ apps; settings delete global hidden_ api_ policy_ p_ apps; settings delete global hidden_ api_ policy” exited with code 1
Process summary
Error information
: Error executing adbExec. Original error: ‘Command ‘/Users/noogler/Library/Android/sdk/platform-tools/adb -P 5037 -s CLB7N18528000446 shell ‘settings delete global hidden_ api_ policy_ pre_ p_ apps; settings delete global hidden_ api_ policy_ p_ apps; settings delete global hidden_ api_ policy’’ exited with code 1
Process
After clicking the start session button in appium, you can enter the page without screenshot and throw an error. After a long time in Google, stackworkflow, CSDN and GitHub failed to solve the problem for a long time. After updating the bundle tools of Android studio to the Android 11 version, it still has no effect. The SDK version of Android studio has 29 30 31. The Android device version connected to the computer is 10. The calling of the third-party Android SDK has been modified, but there is no solution.
adb shell settings put global hidden_ api_ policy_ p_ apps 1
*adb shell settings put global hidden_ api_ policy_ pre_ p_ Apps 1 reduces the version of appium desktop from 1.21 to 1.17!! So I tried to use version 1.21 on another iMac, and it also started successfully! The result of appium doctor is that all required and optional are installed. The Java SDK version is also 1.8. Try to find the appium configuration file to see if the configuration of 1.21 is different from that of 1.17. Finally, the ADB stopped responding, and the kill – server didn’t respond. It’s better to restart. Fortunately, after the restart, appium version 1.21 also successfully started the session, and no error was reported. 😂😂
Summary
If the results of appium doctor are all installed, there are also versions of Android SDK, JDK version is also 1.8, and so on. Direct suggestion
adb kill-server
adb start-server
adb shell
Maybe it can be solved. If there is no solution, you are welcome to throw out the mistakes and discuss them together. Even if I agree, it is not allowed to reprint
[Solved] httpd:httpd:Could not reliably determine the server‘s fully qualif domain name,using ::1 for Se
In the process of building lamp environment, installing Apache reported an error: starting httpd:httpd :Could not reliably determine the server’s fully qualif domain name,using ::1 for ServerName
Solution:
Edit server profile
vi /etc/httpd/conf/httpd.conf
Find the servername in the file www.example.com : 80 “change to” servername ” www.localhost.com : 80 ”
you can use ‘/’ to find (/ servername) www.example.com : 80)
and remove the previous # cancel comment
Set the server to boot
chkconfig httpd on
Restart Apache
/etc/init.d/httpd restart
Httprunner v3. X generates HTML report in assure format
This document records the process and steps of the initial report generation with allure.
Install allure first, download and configure the environment
reference documents:
https://www.cnblogs.com/wsy1103/p/10530397.html
After installation, the following steps begin:
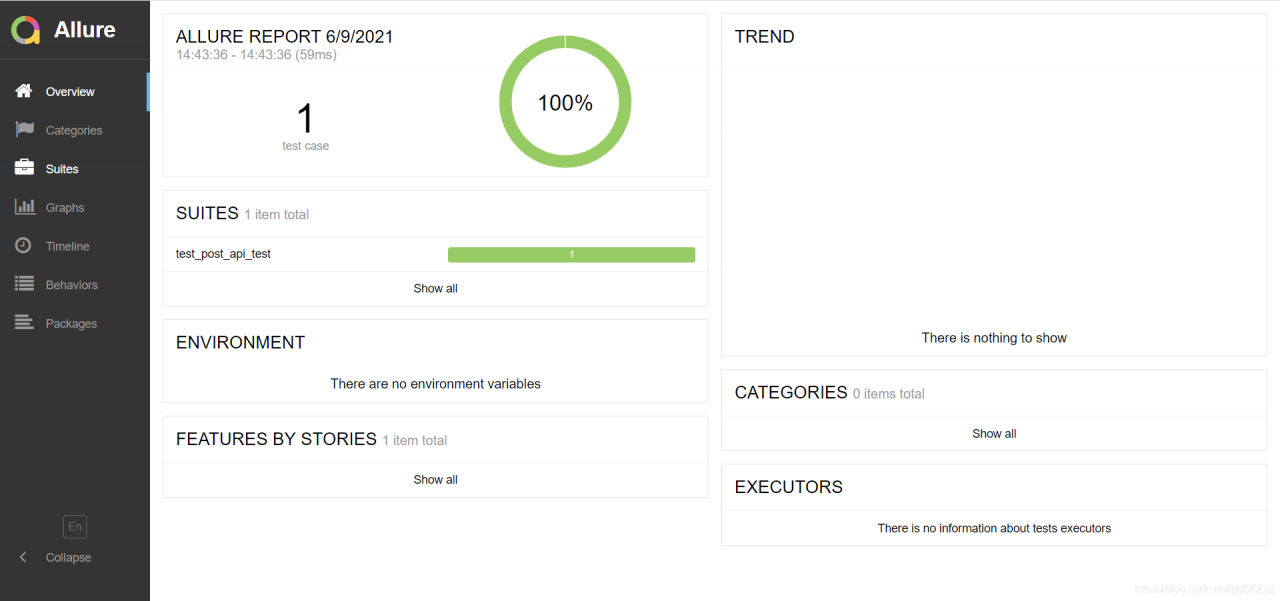
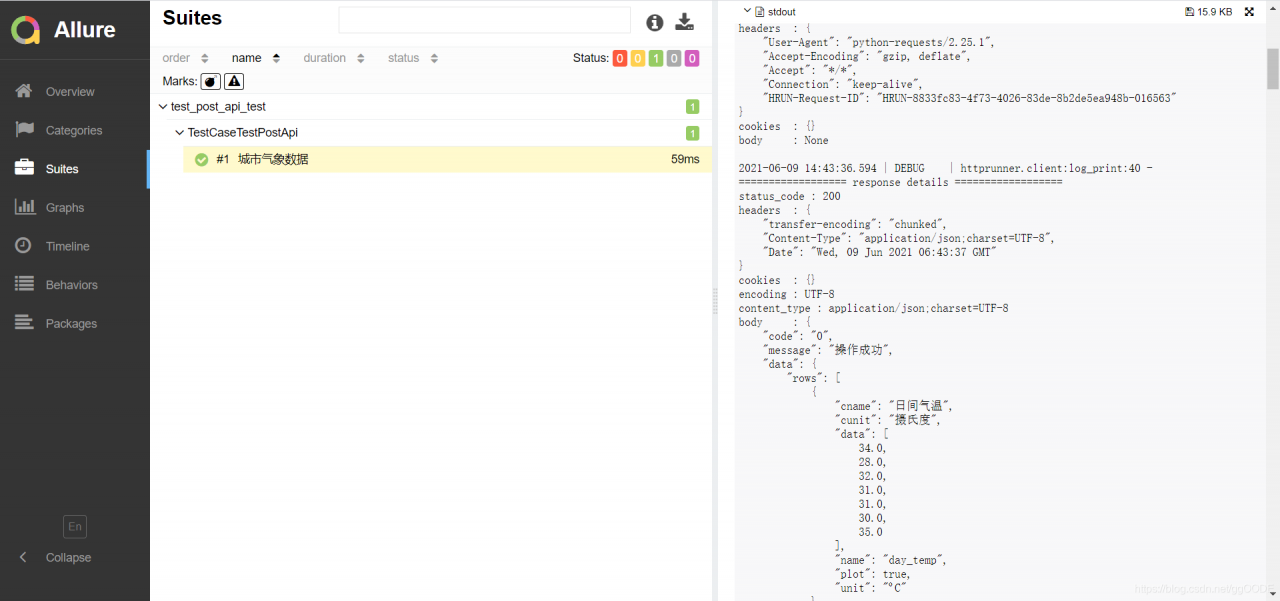
Step 1: generate report data with assure. The generated report data includes two files: one JSON file and one TXT file.
Switch to D: Python/Test & gt; The following is implemented:
hrun test_post_api.json --alluredir=report
Step 2: create the report data generated just now with assure, generate the report2 folder, – O means to specify the folder to generate the report, – C means to clean up the previous report directory before generating the report.
allure generate D:\Python\test\report -o D:\Python\test\report2 -c
Then open the assure report using the default browser to view it.
allure open D:\Python\test\report2
end. The effect of successful generation:
[frequently asked questions]
1. If the error prompt oserror: [winerror 6] handle is invalid, please refer to the document for solution:
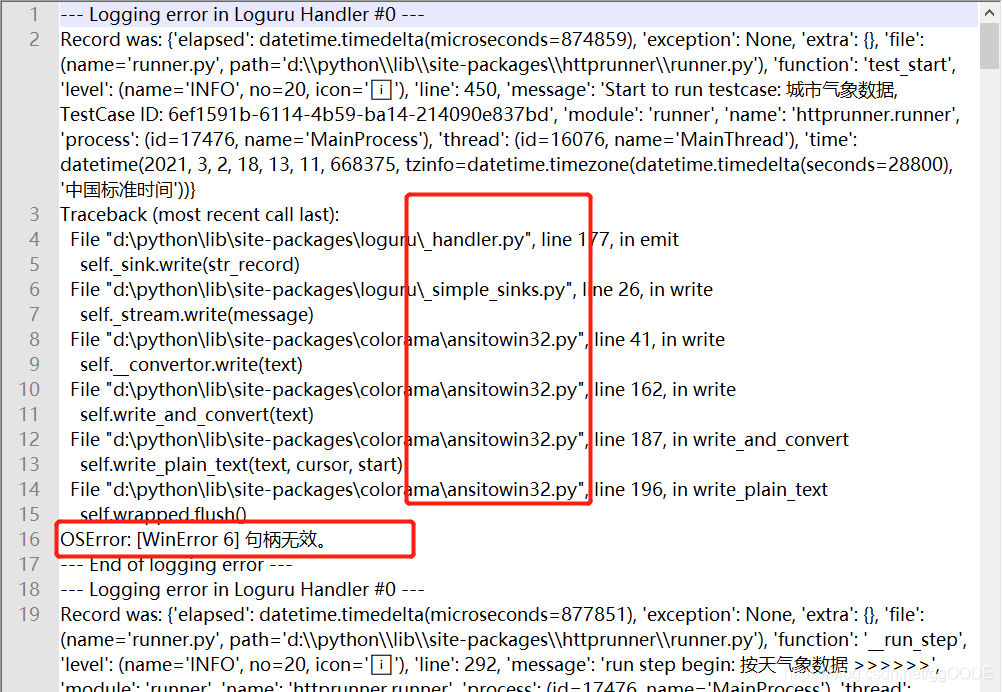
https://ask.csdn.net/questions/3017114
Add some code to runner. Py’s test_ Start method, and import colorama, Sys at the beginning of the file
2. If the Chinese encoding in the return body fails, please refer to the document for solution:
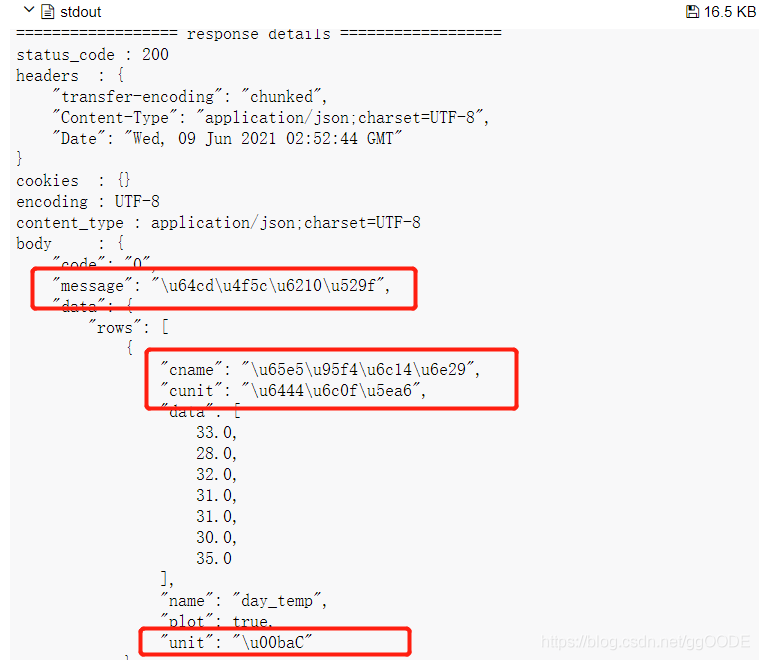
https://blog.csdn.net/zjxht62/article/details/116305944
Add some code to the log of client. Py_ In the print method, the default ASCII encoding is used for Chinese when json.dumps is serialized. To output real Chinese, you need to specify ensure_ ascii=False
[allure grammar]
$Hrun — alluredir allure results — clean alluredir # when the use case format is py file, you can replace “Hrun” with “pytest”, which has the same effect
– alluredir: generate the original data of allure report
allure results: save location of the original data
– clean alluredir: clear the historical data of allure results
$assure generate assure results – O assure report
– O specify the folder to generate the report
– C clean up the previous report directory before generating the report
Assure open assure report: start the default browser to open the assure test report
Can’t Dubbo’s @ service be injected into the spring container?
Solution: rebuild the module and test again
when testing the Dubbo provider, adding @ service under the Dubbo path to the business implementation code will report that a test class is not injected
org.springframework.beans.factory.unsatisfied dependencyexception: error creating bean with name ‘com.tanhua.dubbo.server.api.testrecommenduserapi XXXXXX,
No qualifying bean of type ‘com. Tanhua. Dubbo. Server. API. Recommenduserapi’ available: (I think the interface recommenduserapi was not injected), so I replaced it with spring’s @ service line; But shouldn’t Dubbo’s @ service have spring’s @ service function?Baidu for a long time did not belong to their correct answer; After carefully checking the scan package, the annotation @ runwith (springrunner. Class) @ springboottest
on the test class has been added, and the @ service under Dubbo still reports an error
at last, the module was simply rebuilt by copying and pasting, and the final test was successful!! But what’s wrong?I don’t know. Maybe it’s related to building a module! Hope it works…
How to Solve Automatic error keyerror:***‘
r  =  {'code': 200, 'body': {'code': 200, 'msg': 'request success', 'data': {'username': 'a***', 'mobile': '132**51', 'companyType': 6, 'token': 'ey**RI', 'companyName': '** Company', 'nickname': 'ab**'}}}
body = r['body']
print(body)     # {'code': 200, 'msg': 'request success', 'data': {'username': 'a***', 'mobile': '132**51', 'companyType': 6, 'token': 'ey**RI', 'companyName': '**Company', 'nickname': 'ab**'}}
# Initialize the database object
conn = init_db("db_1")
# Search Results
res_db = conn.fetchone("select mobile from hy_user where username = 'abc'")
print("Database query result is: %s"%res_db)
# Validate the results
user_mobile = body['mobile']
assert user_mobile == res_db['mobile']
Keyerror: ‘mobile’
Because mobile is in the data dictionary of body, change to user_ Mobile = body [‘data ‘] [‘mobile’]
Grpc client access server prompt: RPC error: code = unimplemented desc = unknown service possible reasons
Possible causes of specific errors and Solutions
Specific error
{"file":"/cmd/channel/xxx/prepay.go","level":"error","line":220,"msg":"xxx.DoPrepayGRPC error: xxx2Client.CreateOrder: rpc error: code = Unimplemented desc = unknown service xxx_global.xxx2","pid":63405,"requestid":"2_1615862450_86","sdkid":"xxx_global","time":"2021-03-16T10:40:50+08:00"}
Possible causes
1. The service called by the client is inconsistent with the service protocol of grpc;
2. When proto is consistent, the package name of proto is changed in the process of application generation.
Solution
1. You need to check whether the proto used by the client is consistent with that used by the service;
2. Check whether the package name of proto has changed.
Did not encounter other reasons leading to this error, know the students are welcome to leave a message in the comments area ha~
Points for attention in setting up robot framework + Python 3.7.0 environment
download python3.7.0 32 bit if the operating system is 32 bit and 64 bit if 64.
in addition RF does not support python3.8.5, the EDIT interface will not be expanded. Python3.7.5, ride file error not supported.
1.
python installation check the “add to PATH” option to automatically add environment variables, and remember python. Exe installation PATH
2.
pycharm after the installation completes, click file> settings> Project Interpreter interface Upper-right gear & GT; Add, click system interpreter to add python. Exe path, save exit
3.
and then click the [+] button in the upper right corner of the project interpreter to update PIP and setuotools
after entering the add library interface
4.
version number must be correct, otherwise it may not be supported
install wxPython (4.0.3), a Python cross-platform toolkit, ride is developed based on it, and you need to install
install the robotframework (3.2.2) automated test framework
install robotframe-ride (1.7.4.1), RF framework test editor, visual interface tool
install the robotframe-selenium 2library (3.0.0), and the keyword library
install robotframe-requests (0.7.1), RESTful interface request library
5.
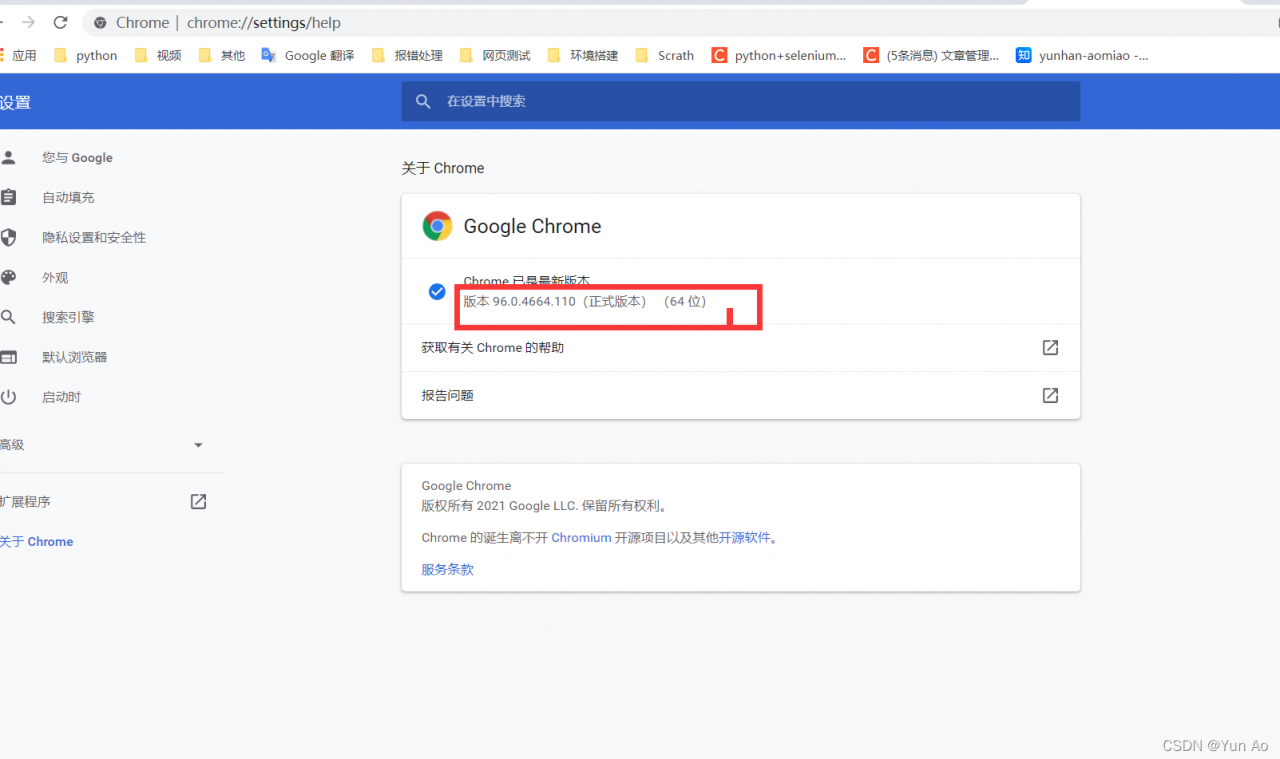
download the chromedriver corresponding to the Google browser version, put it in the python path installed and C:\Users\Administrator\AppData\Local\Google\Chrome\Application
6.
run the desktop ride.py file, or find
under the Scripts file under the python installation path