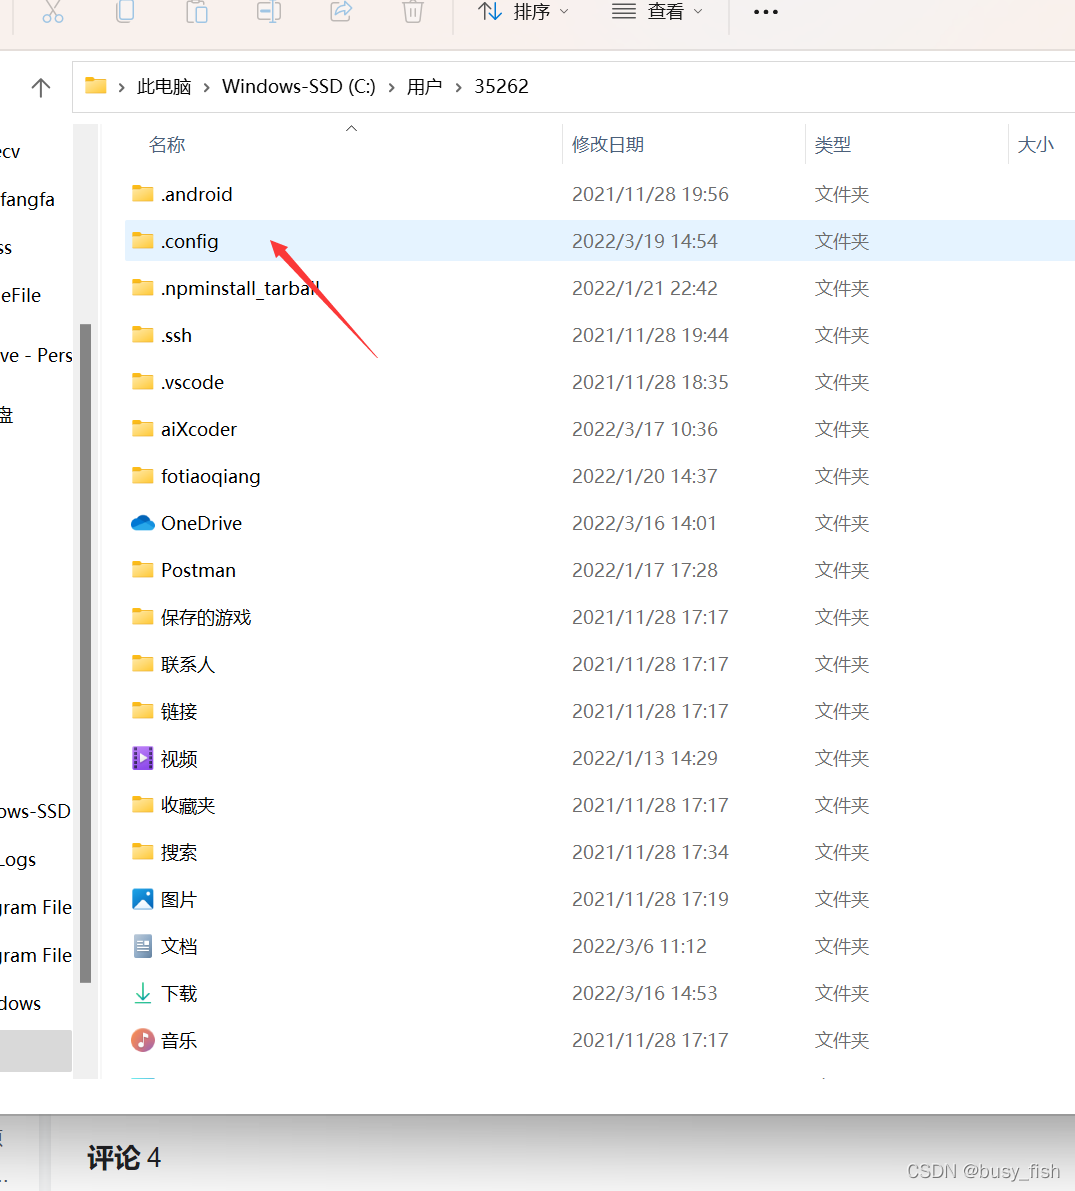
Today, I learned vue3 + typescript and encountered an error NPM updata check failed during installation, so I recorded it
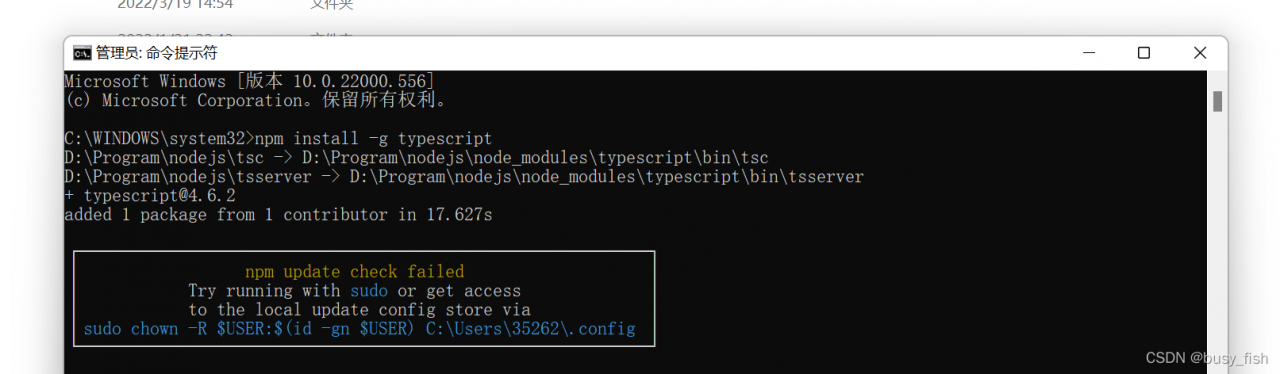
Just delete the corresponding error file and execute the command again

Today, I learned vue3 + typescript and encountered an error NPM updata check failed during installation, so I recorded it
Just delete the corresponding error file and execute the command again
Executing “sudo gem install -n /usr/local/bin cocoapods” gave me an error: “Failed to build gem native extension”.
Followed the online method, confirmed the ruby version 2.6.3, and installed rvm also reported an error (443 error), in short, tried everything I could find on stackoverflow
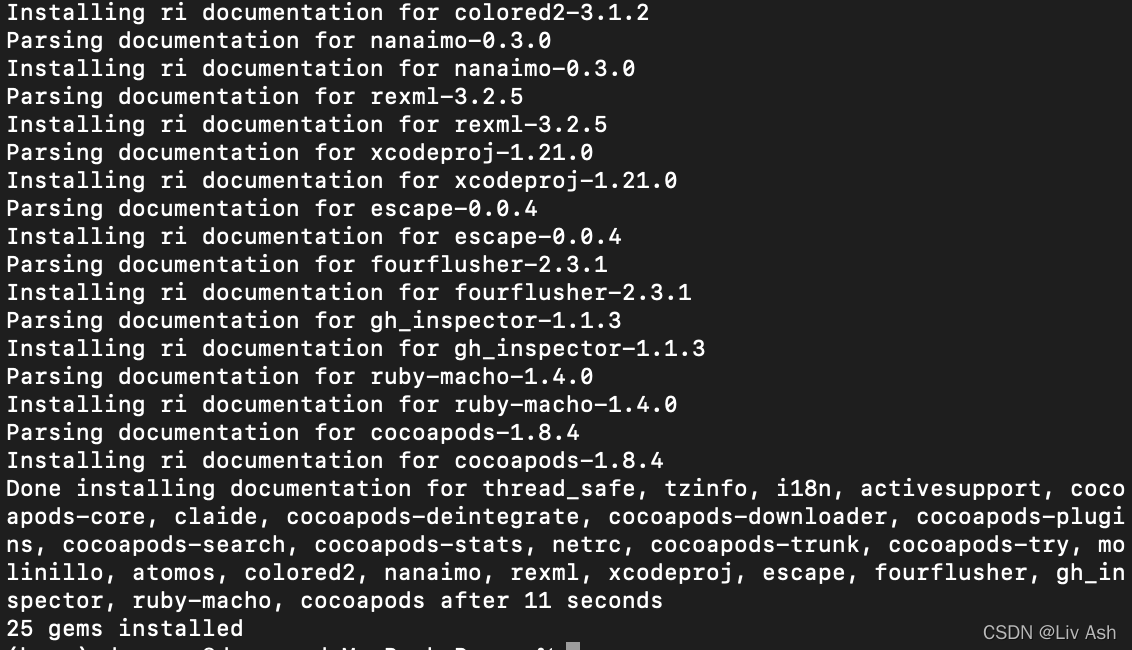
The final solution: specify a lower version when installing cocoapods: sudo gem install cocoapods
sudo gem install cocoapods -v 1.8.4
Directly solved.
Error:
If you want to reinstall the Monterey system on the M1 chip Mac, you repeatedly encounter the error ‘pkdownloader error 8’
Solution:
Download the installation package manually: InstallAssistant.pkg
1. After entering [option], menu bar -> Utilities -> Terminal
2、cd /Volumes/Macintosh HD
3、mkdir private/tmp
4, cp -R /Install/macOS monterey.app private/tmp (here is able to tab out, if the tab does not come out, it means the path is written wrong)
5、cd private/tmp
6、mkdir Contents/SharedSupport
7、curl -L -o Contents/SharedSupport/SharedSupport.dmg https://swcdn.apple.com/content/downloads/39/60/002-23774-A_KNETE2LDIN/ 4ll6ahj3st7jhqfzzjt1bjp1nhwl4p4zx7/InstallAssistant.pkg
8, and then wait for the download to complete, the process may also fail to download, it does not matter more than a few times on the good, my first time to about 80% error ‘error: RPC failed; curl 92 HTTP/2 stream 0 was not closed cleanly: INTERNAL_…’ Then I re-downloaded it once, and it worked!
9. After downloading, cd /Volumes/Macintosh HD/private/tmp
10, . /Contents/MacOS/InstallAssistant_springboard to execute the installation process, then follow the instructions in the graphical interface step by step
This article is reproduced in \ Author: Buyan \ original text: win10 installs Ubuntu system and reports the error wslregisterdistribution failed with error: 0x8007019e – jova – blog Garden (cnblogs. Com)
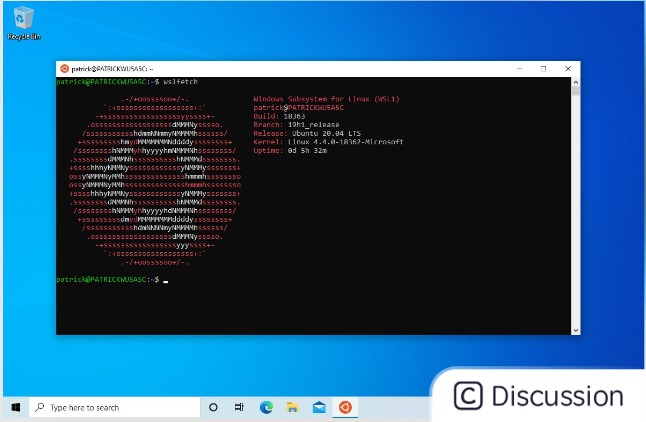
When installing the Ubuntu system in the windows app store, the error wslregisterdistribution failed with error: 0x8007019e is reported
1. Error reporting:
Installing, this may take a few minutes... Installation Failed! Error: 0x8007019e Press any key to continue...
2. Cause: Windows subsystem support is not installed.
3. Solution:
1. Win + X, select windows PowerShell (administrator)
2. Input: enable windowsoptionalfeature – Online – featurename Microsoft Windows subsystem Linux
3. Enter, enter y, restart!
4. Reopen the installed subsystem, wait a few minutes, and enter the account and password.
**
Error reporting:
Firstly, this error is not a problem with the installation or activation of MATLAB. Secondly, this occurs only when the remote desktop uses MATLAB.
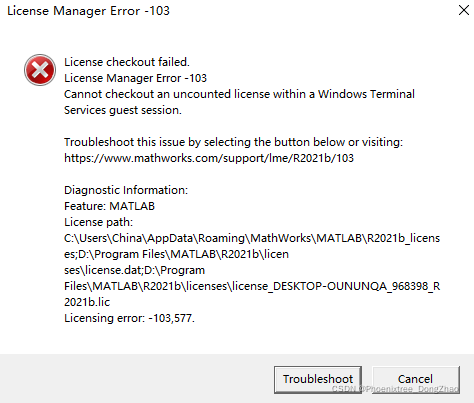
Cause analysis:
This is because matlab uses FLEXlm for license management, while FLEXlm does not support remote desktop access. However, you can use the license file with a little modification.
(reprint the solution of the license manager error – 103 reported by MATLAB on the remote desktop)
Solution:
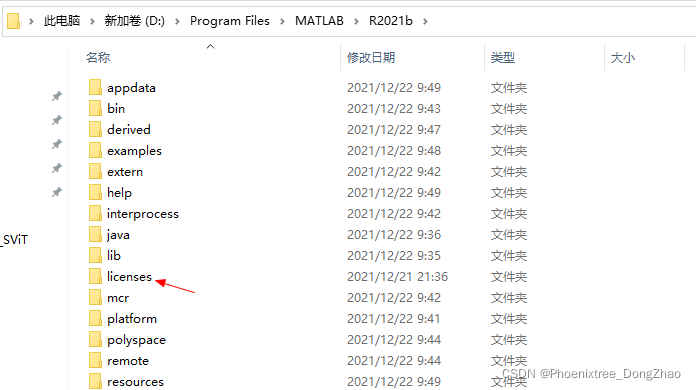
1. Enter the license file under r2021b\licenses:
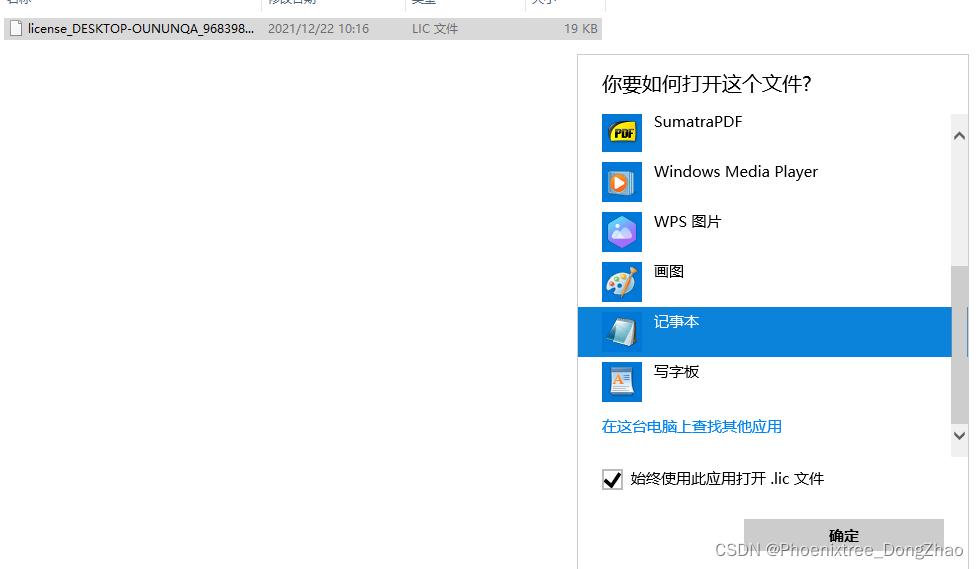
2. Open with Notepad:
3. Ctrl + H enters the replacement window and replaces’ sign = ‘with’ ts’_OK SIGN=’:
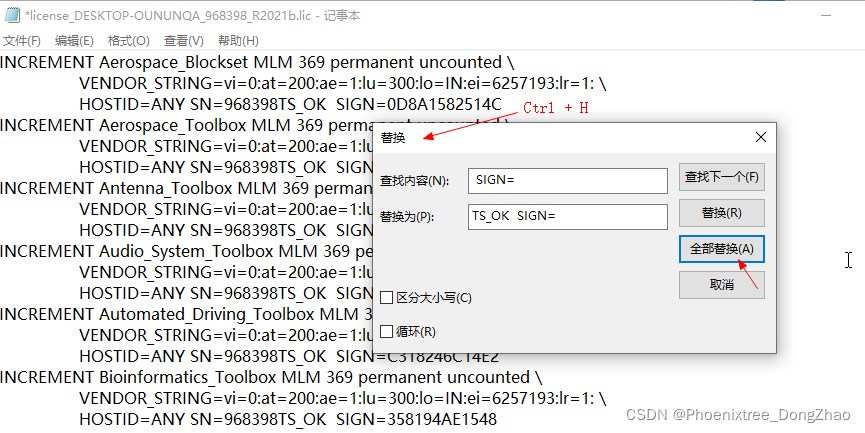
After modification, save.
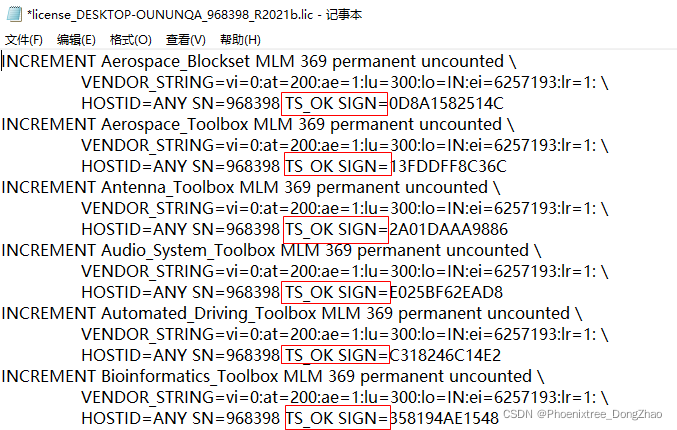
Directly open matlab again, you can succeed!
When installing Python and VC runtime library, the errors reported by many software are 0x80070660, saying that the temporary folder has no space or permission.
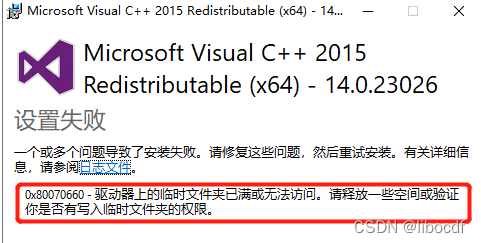
After detection, it is found that there is permission and space. Next solution
Solution:
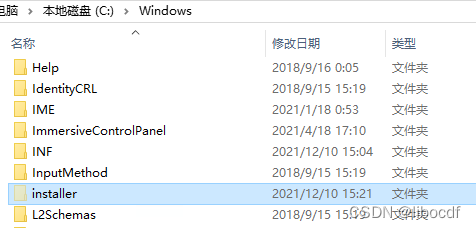
Create the installer folder in the %windir% directory.
The following methods are from YouTube. I’ve tried them and they’re useless. They may be useful to others. Let’s put them here for the time being
Method 1: win10 system, run “troubleshooting” and restart
Method 2: run the following command and restart
net stop wuauserv
net stop cryptSvc
net stop bits
net stop msiserver
ren C:\Windows\SoftwareDistribution SoftwareDistribution.old
ren C:\Windows\System32\catroot2 catroot2.old
net start wuauserv
net start cryptSvc
net start bits
net start msiserver
Method 3: rmdir/S/Q C: \ windows \ softwaredistribution \ download \ sharedfilecache
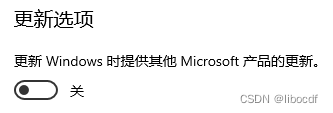
Method 4: Windows Update – & gt; Advanced options} turn off the “provide additional Microsoft product updates when updating windows” option and restart
Method 5: install VC runtime library_ redist. x[Arch]. exe
What I just want to share with you today is the activation code of VMware Workstation Pro 10-15 version. The activation codes provided this time are all real and effective.
VMware Workstation Pro 15 activation license
UY758-0RXEQ-M81WP-8ZM7Z-Y3HDA
VF750-4MX5Q-488DQ-9WZE9-ZY2D6
UU54R-FVD91-488PP-7NNGC-ZFAX6
YC74H-FGF92-081VZ-R5QNG-P6RY4
YC34H-6WWDK-085MQ-JYPNX-NZRA2
VMware Workstation Pro 14 activation license
FF31K-AHZD1-H8ETZ-8WWEZ-WUUVA
CV7T2-6WY5Q-48EWP-ZXY7X-QGUWD
VMware Workstation Pro 12 activation license
5A02H-AU243-TZJ49-GTC7K-3C61N
VF5XA-FNDDJ-085GZ-4NXZ9-N20E6
UC5MR-8NE16-H81WY-R7QGV-QG2D8
ZG1WH-ATY96-H80QP-X7PEX-Y30V4
AA3E0-0VDE1-0893Z-KGZ59-QGAVF
VMware Workstation Pro 10 activation license
1Z0G9-67285-FZG78-ZL3Q2-234JG
4C4EK-89KDL-5ZFP9-1LA5P-2A0J0
HY086-4T01N-CZ3U0-CV0QM-13DNU
Note: If it is WinXP or 32-bit system, please use 10.x version; after 11.x version, Win7 or higher 64-bit system is supported.
Docker-CE
[root@localhost ~]#  yum list installed | grep docker
containerd.io.x86_64                       1.4.6-3.1.el7               @docker-ce-stable
docker-ce.x86_64                           3:20.10.7-3.el7             @docker-ce-stable
docker-ce-cli.x86_64                       1:20.10.7-3.el7             @docker-ce-stable
docker-ce-rootless-extras.x86_64           20.10.7-3.el7               @docker-ce-stable
docker-scan-plugin.x86_64                  0.8.0-3.el7                 @docker-ce-stable
[root@localhost ~]#  yum remove -y docker-ce*
Loaded plugins: fastestmirror, langpacks
Resolving Dependencies
--> Running transaction check
---> Package docker-ce.x86_64 3:20.10.7-3.el7 will be erased
---> Package docker-ce-cli.x86_64 1:20.10.7-3.el7 will be erased
--> Processing Dependency: docker-ce-cli for package: docker-scan-plugin-0.8.0-3.el7.x86_64
---> Package docker-ce-rootless-extras.x86_64 0:20.10.7-3.el7 will be erased
--> Running transaction check
---> Package docker-scan-plugin.x86_64 0:0.8.0-3.el7 will be erased
--> Finished Dependency Resolution

Dependencies Resolved

================================================================================
 Package                    Arch    Version            Repository          Size
================================================================================
Removing:
 docker-ce                  x86_64  3:20.10.7-3.el7    @docker-ce-stable  115 M
 docker-ce-cli              x86_64  1:20.10.7-3.el7    @docker-ce-stable  156 M
 docker-ce-rootless-extras  x86_64  20.10.7-3.el7      @docker-ce-stable   24 M
Removing for dependencies:
 docker-scan-plugin         x86_64  0.8.0-3.el7        @docker-ce-stable   13 M

Transaction Summary
================================================================================
Remove  3 Packages (+1 Dependent package)

Installed size: 309 M
Downloading packages:
Running transaction check
Running transaction test
Transaction test succeeded
Running transaction
  Erasing    : docker-ce-rootless-extras-20.10.7-3.el7.x86_64               1/4
  Erasing    : 3:docker-ce-20.10.7-3.el7.x86_64                             2/4
  Erasing    : docker-scan-plugin-0.8.0-3.el7.x86_64                        3/4
  Erasing    : 1:docker-ce-cli-20.10.7-3.el7.x86_64                         4/4
  Verifying  : 3:docker-ce-20.10.7-3.el7.x86_64                             1/4
  Verifying  : 1:docker-ce-cli-20.10.7-3.el7.x86_64                         2/4
  Verifying  : docker-ce-rootless-extras-20.10.7-3.el7.x86_64               3/4
  Verifying  : docker-scan-plugin-0.8.0-3.el7.x86_64                        4/4

Removed:
  docker-ce.x86_64 3:20.10.7-3.el7
  docker-ce-cli.x86_64 1:20.10.7-3.el7
  docker-ce-rootless-extras.x86_64 0:20.10.7-3.el7

Dependency Removed:
  docker-scan-plugin.x86_64 0:0.8.0-3.el7

Complete!
Docker CE is a community version, which has not been verified by kubernetes. There may be compatibility problems!
The detailed error information is as follows:
C:\Users\zig>docker info
error during connect: Get http://%2F%2F.%2Fpipe%2Fdocker_engine/v1.39/info: open //./pipe/docker_engine: The system cannot find the file specified. In the default daemon configuration on Windows, the docker client must be run elevated to connect. This error may also indicate that the docker daemon is not running.
Modification method:
cd "C:\Program Files\Docker\Docker"
./DockerCli.exe -SwitchDaemon
Reason: Especially on windows machine when you see the above error after a docker update, try the above commands. It appears like the Docker Desktop UI may indicate that you are already using Linux Containers, but the update may have messed up that setting. Running the above commands will set to Linux Containers and there after you can work happily.
Installing, this may take a few minutes...
Installation Failed!
Error : 0x8007019e
Press any key to  continue ...
1.win+x, select Windows PowerShell (Administrator)
2. Input: Enable-WindowsOptionalFeature -Online -FeatureName Microsoft-Windows-Subsystem-Linux
3. Press Enter, enter Y, and restart!
4. Reopen the installed subsystem, wait a few minutes, and enter the account and password.
When I encountered this problem when installing FreeSWITCH yesterday afternoon, I didn’t solve it all afternoon, and I took many detours. If you install libyuv-devel directly through yum, you will get an error saying that the installation package cannot be found. Later, through the online chat on the FreeSWITCH official website, I asked FreeSWITCH staff to find out how to install libyuv-devel (please refer to: http://pkgs.org/centos-6/epel-x86_64/libyuv-devel-0-0.12. 20120727svn312.el6.x86_64.rpm.html ). However, the same error is reported after installation, and it feels that it is useless to install libyuv-devel through this method. Later, the problem was solved perfectly by the following methods.
Personal installation environment:
OS: CentOS6.5 64-bit
FreeSWITCH Ver: 1.6.0
The official manual installed by FreeSWITCH (for CentOS6.*):
https://freeswitch.org/confluence/display/FREESWITCH/CentOS+6
Problems encountered during installation and solutions
1. When executing “./configure -C”, if there is an error, it means that the development package file (library file) is missing. This error is easier to solve. If any library file is missing, install the corresponding library file.
2. During the execution of “make && make install”, I encountered a troublesome error, which was not resolved for an entire afternoon yesterday afternoon, so this article was mainly written to share this error.
Error content: Makefile:797: *** You must install libyuv-dev to build mod_fsv. Stop.
solution:
(1) Download the libyuv source code and compile it
cd freeswitch/libs
git clone https://freeswitch.org/stash/scm/sd/libyuv.git
cd libyuv
make -f linux.mk CXXFLAGS=”-fPIC -O2 -fomit-frame-pointer -Iinclude/”
make install
cp /usr/lib/pkgconfig/libyuv.pc /usr/lib64/pkgconfig/
(If you just install libyuv, there will be errors next. I will list the files that I need to install after reporting the error as follows)
(2) Download the libvpx source code and compile it
cd ..
git clone https://freeswitch.org/stash/scm/sd/libvpx.git
cd libvpx
./configure –enable-pic –disable-static –enable-shared
(If Configuration failed appears. Cause of error It is: Neither yasm nor nasm have been found, please refer to the following “※” to solve the error.)
make
make install
cp /usr/local/lib/pkgconfig/vpx.pc /usr/lib64/pkgconfig/
(※) Download and compile yasm
yasm is an assembler compiler, which is an upgraded version of nasm.
Download address of yasm: http://www.tortall.net/projects/yasm/releases/
yasm decompression command: tar -zxvf ****.tar.gz (I download
Yasm-1.3.0.tar.gz ) yasm compile and install: ① ./configure, ② make, ③make install After
yasm is installed, go back to the second step and reinstall libvpx
(3) Download and compile opus
cd ..
git clone https://freeswitch.org/stash/scm/sd/opus.git
cd opus
./autogen.sh
./configure
make
make install
cp /usr/local/lib/pkgconfig/opus.pc /usr /lib64/pkgconfig
(4) Download libpng and compile
cd ..
git clone https://freeswitch.org/stash/scm/sd/libpng.git
cd libpng
./configure
make
make install
cp /usr/local/lib/pkgconfig/libpng* /usr/lib64/pkgconfig/
After downloading and installing the above four dependent files, after re-executing FreeSWITCH’s “./configure”, “make && make install” can install FreeSWITCH normally. At least the installation was successful on my side.
If there are other errors after the above four dependent files are installed, re-execute “./configure” and “make” if the following errors are reported, please refer to the following solutions:
(1) The system does not install lua error
CXX mod_lua_la-mod_lua.lo
mod_lua.cpp:37:17: error: lua.h: No such file or directory
mod_lua.cpp:38:21: error: lauxlib.h: No such file or directory
mod_lua.cpp:39: 20: error: lualib.h: No such file or directory
Solution: yum install lua lua-devel
(2) The system lacks sndfile library files
make[4]: Entering directory `/usr/local/src/freeswitch-1.6.0/src/mod/formats/mod_sndfile’
Makefile:796: *** You must install libsndfile-dev to build mod_sndfile. Stop
solution:
Download the package libsndfile-1.0.26.tar.gz and upload it to the server
Download address http://www.mega-nerd.com/libsndfile/#Download
tar zxvf libsndfile-1.0.26.tar.gz
./configure
make
make install
cp
Re-execute /usr/local/lib/pkgconfig/sndfile.pc /usr/lib64/pkgconfig Re-execute FreeSWITCH’s “./configure”, then make and make install.
Find the lib\site-packages\jupyterlab\commands.py file in
the python installation directory, line 83:
change into: