[root@localhost samba]# smbpasswd samba
新SMB密码:
重新键入新SMB密码:
找不到用户samba的条目。
解决方法,加参数“——”:
# smbpasswd – oracle
新SMB密码:新增用户samba
Hot Swap failed:add method not implemented
This new feature encapsulates the ability to substitute modified code in a running application through the debugger APIs.
– ‘HotSwapping’ using JVM:http://www.jug.mk/blogs/ipenov/entry/hotswapping_using_jvm
Currently, HotSwap only supports the modification of method body, and does not support the modification of class and method signature (such as modifying class name, method name, method parameter, adding or deleting a method, adding or deleting a class file, etc.). HotSwap cannot be deployed to the service hot. ) There is a reason to consider these limitations. Replacing a class definition requires an association between the new class and the old class, where the association is the full name (and perhaps other information) of the class, and the class name has been changed so that you don’t know which class to replace. As for the modification of the method signature, it should allow for the run-time method invocation, replacing the existing method invocation with the method signature.
many people on the Internet misunderstand the concept of hot deployment and hot loading, so the behavior of disorderly configuration, here is a hint.
hot deployment: the container state is in operation to deploy or redeploy the entire project. In this case the entire memory is usually emptied and reloaded. Simply put, Tomcat or some other Web server will help us reload the project.
hot loading: when the container state is run, it reloads the changed compiled class. In this case, memory will not be emptied,sessin will not be lost, but it is easy to cause memory overflow, or no method can be found. Because memory cannot be converted into a pair, there are exceptions to changing the structure and model of a class, and there is no problem with changing variables and methods that already exist. In medium mode, it is best used during debugging to avoid the whole project loading.
debug mode supports hot loading. Very easy to use.
– IDEA TOMCAT WEB development SSH modify classes don’t restart the deployment of hot load IDEA8: http://3000pzj.javaeye.com/blog/503222
deployment is a common occurrence during project development, especially during debug. But if you have to redeploy the entire project every time you fix a bug so you can test fix or continue to debug other bugs, that’s a nightmare for developers. But no one wants a nightmare, and thanks to the JVM’s hotSwap and Intellij Idea’s support for Debug and hotSwap, the dream has stayed true (a bit of an overplay). Today’s article describes the most convenient and efficient debug effects achieved by setting up Intellij Idea for hot deployment. I want to get some background and concepts before going into the specifics of the setup.
HotSwap: “HotSwap” is a feature in JPDA (Java Platform Debugger Architecture), and JPDA enhancement is a new feature from Java 2 SDK1.4. HotSwap allows you to replace class definitions in the JVM with new class definitions, which allows developers to replace the modified class with an older class in the JVM without having to restart the server during debug.
numpy.core.umath How to solve the problem of failed to import
install the gpu version of TensorFlow
encountered this problem when installing the gpu version of TensorFlow.
the solution is
- at the command line:
pip install -U numpy -i https://pypi.tuna.tsinghua.edu.cn/simple/
and then it’s good ~
C:\Users\Sean>python
Python 3.6.6 (v3.6.6:4cf1f54eb7, Jun 27 2018, 03:37:03) [MSC v.1900 64 bit (AMD64)] on win32
Type "help", "copyright", "credits" or "license" for more information.
>>> import tensorflow as tf
>>>
VirtualBox problem solving set -[drm:vmw_host_log [vmwgfx]] *ERROR* Failed to send host log message
environment description:
virtual machine: VirtualBox version 6.0.14 r133895 (Qt5.6.2)
virtual machine: Ubuntu 18.04 LTS
problem description: [DRM :vmw_host_log [VMWGFX]] ERROR Failed to send host log message
screenshot:

solution:
- shut down the target system;
- VirtualBox main panel, select the virtual machine to be modified on the left, click “Settings” on the right;
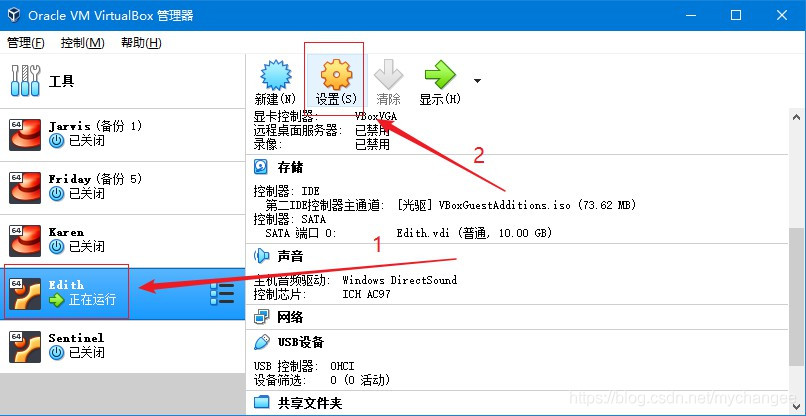
- Settings page, click “display” on the left, select “screen” on the top right, select “video card controller” on the bottom, and select VBoxVGA;

- Start the target system, but you can find that there are no more prompts.
Altium designer failed to add class member problem
there are three common solutions to this problem:
the first is to delete the PCB file and create a new one, which is the most unacceptable.
the second way is to delete the CLASS in question, please refer to this article. http://blog.sina.com.cn/s/blog_6b79ac7d0101furd.html
there is another one that I just encountered this time. The problem is that although the schematic diagram encapsulation is drawn in the schematic library, there is no encapsulation when the actual schematic diagram is opened.
the solution is as follows:
1, 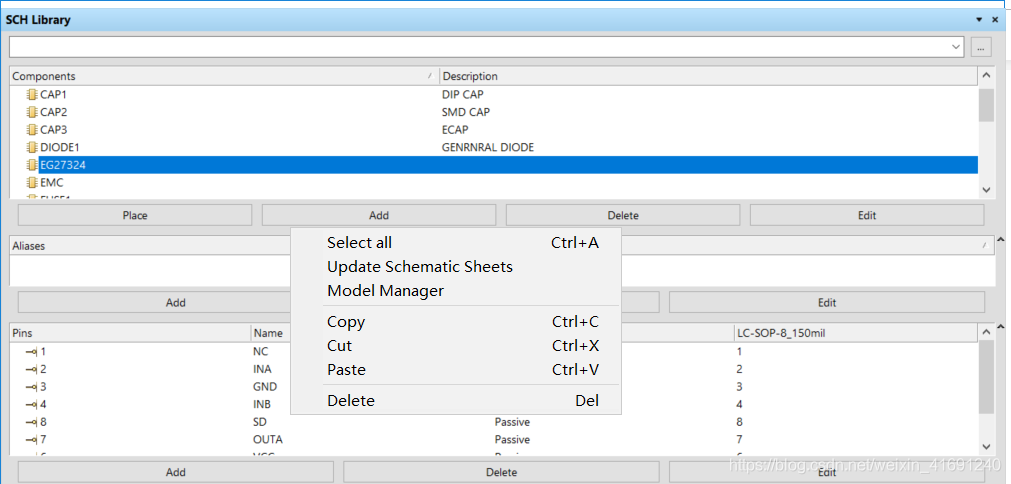
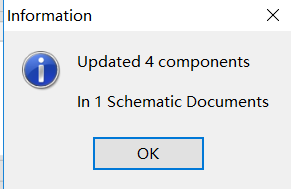
dot Update, will prompt you to Update successfully.
2. Update the schematic diagram to PCB
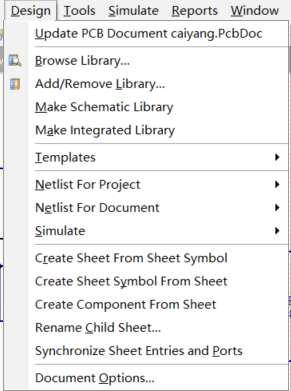
and then we’re done.
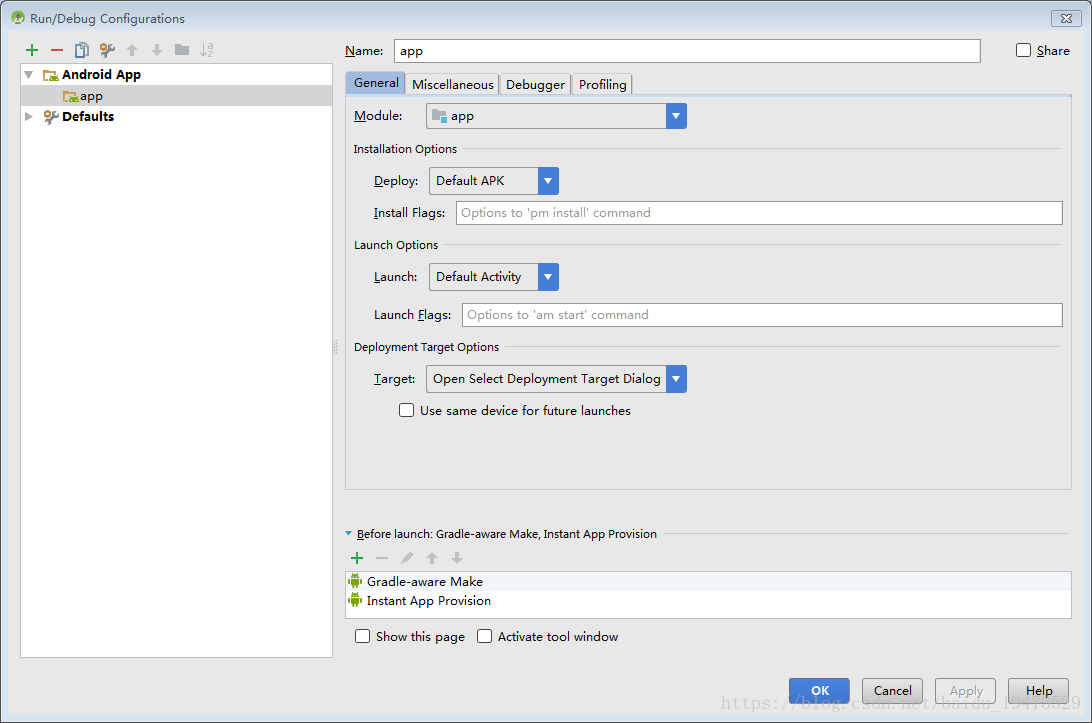
AS3.5 Error gradle project sync failed.Basic functionality(e.g.editing,debugging) will not work
Android Studio has reported an error for the gradle project sync failed.Basic functionality(e.g.editing,debugging) will not work
1. Environment configuration of Android SDK
Next you should encounter a yellow box: gradle project sync failed.Basic functionality(e.g.editing,debugging) will not work
this error don’t worry
you first need to configure the Android environment variable
environment configuration of Android SDK
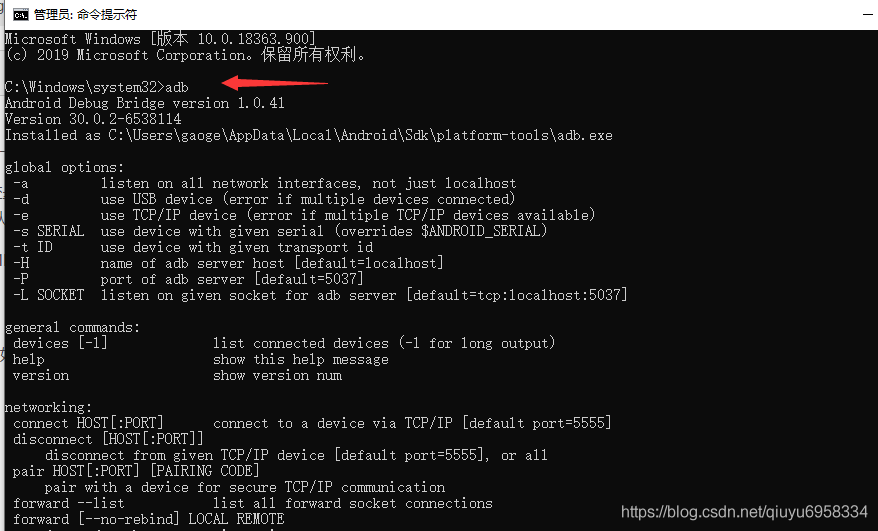
is the same as Java JDK, computer — properties — advanced system Settings — environment variable in the bottommost right corner — system variable below — new
1, create a new environment variable, the variable name is ANDROID_HOME, the variable value is D:\adt-bundle-windows-x86_64-20140702\ SDK (subject to your installation directory, make sure there are tools, add-ons and other folders in it), click ok.
2. Add the value of the user variable after PATH; %ANDROID_HOME%\platform-tools; Click Ok. Add the system variable PATH; D:\adt-bundle-windows-x86_64-20140702\sdk\tools
to test whether the JDK is installed successfully:
click run — type CMD — enter — type adb — enter. If a lot of English appears, as shown in the figure below, it means the configuration is successful. After typing Android, start Android SDK Manager. Or type “Android-h”.

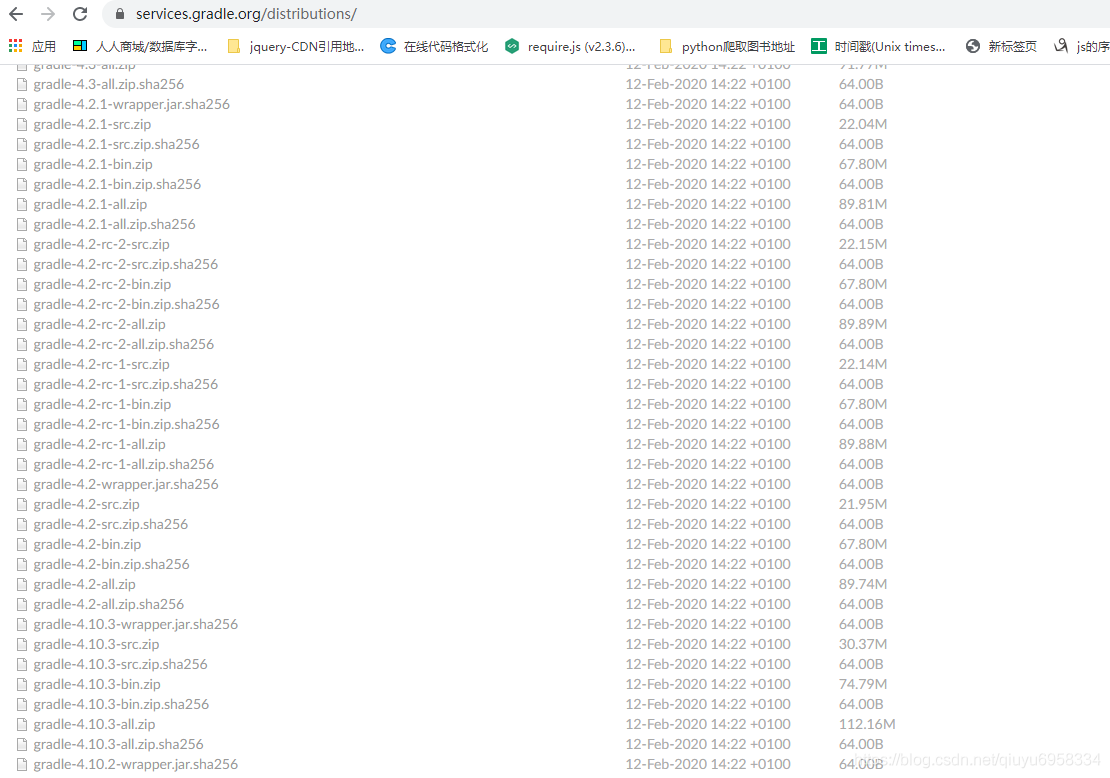
click to download
https://services.gradle.org/distributions/
“Hive metadata problem” hive.metastore.HiveMetaException : Failed to get schema version.
raini@biyuzhe:~$ schematool -dbType mysql -initSchema
SLF4J: Class path contains multiple SLF4J bindings.
SLF4J: Found the binding in [the jar: file:/home/raini/app/apache – hive – 2.1.1 – bin/lib/log4j – slf4j – impl – against 2.4.1. Jar!/org/slf4j/impl/StaticLoggerBinder class]
slf4j: Found the binding in [the jar: file:/home/raini/app/hadoop – 2.8.0/share/hadoop/common/lib/slf4j – log4j12-1.7.10. Jar!/org/slf4j/impl/StaticLoggerBinder class]
slf4j: See http://www.slf4j.org/codes.html#multiple_bindings for an explanation.
SLF4J: Actual binding is of type [org.apache.logging.slf4j.Log4jLoggerFactory]
Metastore connection URL: jdbc:mysql://localhost:3306/hive?createDatabaseIfNotExist=true& UseSSL =false
Metastore Connection Driver : com.mysql. JDBC.Driver
Connection User: hive
Starting Metastore schema initialization to 2.1.0
Initialization script hive – schema – 2.1.0. Mysql.
SQL Initialization script completed
org.. Apache hadoop. Hive. Metastore. HiveMetaException: Failed to get the schema version.
physicist cause: com.mysql.jdbc.exceptions.jdbc4.MySQLSyntaxErrorException : Table ‘hive.VERSION’ doesn’t exist
SQL Error code: 1146
Use –verbose for detailed stacktrace.
*** schemaTool failed ***
problem above, after installing hive 2.1.1, formatting was not successful, and did not find metastore (using mysql, but still fine before upgrade)
reason:
previously used hive 1.2.1, mysql connection metastore use user user is hive, may metadata deletion is not clean or some configuration file cannot be deleted,
solution:
USES another user.
mysql> create user 'hive1'@'%' identified by 'hive1';
mysql> grant all on *.* to 'hive1'@localhost identified by 'hive1';
mysql> flush privileges;
and modify: XML hive – site.
< property>
& lt; name> javax.jdo.option.ConnectionUserName< /name>
& lt; value> hive1< /value>
& lt; /property>
& lt; property>
& lt; name> javax.jdo.option.ConnectionPassword< /name>
& lt; value> hive1< /value>
& lt; /property>
this is the step required for hive2.0.
mysql> The SOURCE/home/raini/app/hive/scripts/metastore/upgrade/mysql/hive – schema – 2.1.0. Mysql. SQL;
start hive to fix ~
question 2:
hive (default)> create database anserchapp;
FAILED: Execution Error, return code 1 from org.apache.hadoop.hive.ql.exec.DDLTask. MetaException(message:Got exception: java.io.IOException Failed on local exception: java.io.IOException: Couldn’t set up IO streams; Host Details: Local Host is: “biyuzhe/127.0.1.1”; destination host is: “user”:8020; )
Settings:
mysql> ALTER DATABASE hive character set latin1;
Query OK, 1 row affected (0.00 SEC)
error:
hive (default)> create database anserchapp;
FAILED: Execution Error, return code 1 from org.apache.hadoop.hive.ql.exec.DDLTask. MetaException(message:java.lang.IllegalArgumentException: java.net.UnknownHostException: user)
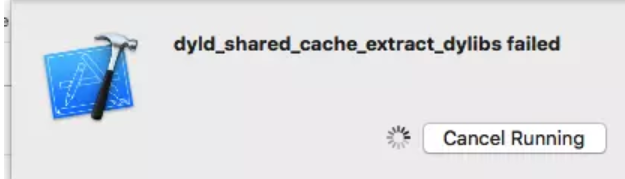
IOS automation: error dyld in Xcode compilation_ shared_ cache_ extract_ Dylibs failed — the solution is as follows
background: almost on the Internet on the error dyld_shared_cache_extract_dylibs failed related documents, different methods have been tried again, are not good.
error screenshot:
1. Summarize several methods on the Internet as follows:
method 1: delete path:/Applications/Xcode. The app/Contents/Developer/Platforms/iPhoneOS platform/DeviceSupport, ios corresponding version in a directory. — According to the online post, I think it is suitable to upgrade Xcode through App Store and xcode method is higher than ios version.
to provide a reference links: https://www.jianshu.com/p/be8b8f1dcc1e
method 2:
open window > Devices and simulators
don't work right click on the device, and select the unpair
this step is the key, then phone will prompt whether to trust, click don't trust
click control + in the lower left corner of the panel, and select the corresponding device, click next, then the computer will prompt you to click on the trust equipment button
then click on the cell phone on the trust of the button again, The control panel shows that the addition was successful
done
to provide a reference links: https://www.jianshu.com/p/e276a784fbee
method 3:
the path:/Applications/Xcode. The app/Contents/Developer/Platforms/iPhoneOS platform/DeviceSupport, next is responsible for the paste before a real machine debugging package are available, and then put the directory name directly into your ios mobile phone version of the name, according to online posts after think fit through the app Store to upgrade the Xcode and Xcode method is higher than the ios version.
method 4: - English is below the post content communication of the answer to the last one answer question)
1. Go to ~ the users/user name/Library/Developer/Xcode/iOS DeviceSupport/13.2/Symbols/System/Library/Caches/com. Apple. Dyld
(change the path, do not use the system, there is a certain difference, where 13.2 is your phone version ios version number according to your phone ios version to replace the path)
2.create empty file if it is not there -. Processed_dyld_shared_cache_arm64e (create an empty file if there is no file processed_dyld_shared_cache_arm64e)
3. restart xcode and enjoy!
to provide a reference link: https://forums.developer.apple.com/thread/108917,
method 5:
the paths:/Applications/Xcode. The app/Contents/Developer/Platforms/iPhoneOS platform/Developer/SDKs/iPhoneOS. under the SDK,
iPhone os. SDK copy, renamed as iPhoneOS13.3. SDK

Second, my inspiration comes from the combination of the fourth method and the second method:
1. Go to ~ the users/user name/Library/Developer/Xcode/iOS DeviceSupport/13.3 (17 c54)/Symbols/System/Library/Caches/com. Apple. Dyld
2. copy processed_dyld_shared_cache_arm64e or processed_dyld_shared_cache_arm64e file from the previous version to the corresponding directory and rename processed_dyld_shared_cache_arm64e
3. restart xcode and enjoy!
although there are only three steps, but I spent a whole day trying various combinations of methods to finally find this way, make a note for later use or other friends reference
Webpack error module build failed: typeerror: fileSystem.statSync is not a function
follow the video operation, delete node_modules directory, webpack
ERROR in ./src/js/index.js
Module build failed: TypeError: fileSystem.statSync is not a function
    at module.exports (/Users/mac/source/9-01/node_modules/babel-loader/lib/utils/exists.js:7:25)
    at find (/Users/mac/source/9-01/node_modules/babel-loader/lib/resolve-rc.js:13:9)
    at Object.module.exports (/Users/mac/source/9-01/node_modules/babel-loader/lib/index.js:113:132)
Baidu once, someone said because
webpack version inconsistency results. So reinstall
npm install webpack --save-devThere are many warnings when performing this step
npm notice save webpack is being moved from dependencies to devDependencies
npm WARN [email protected] requires a peer of webpack@2 || 3 but none is installed. You must install peer dependencies yourself.
npm WARN [email protected] requires a peer of jquery@>=1.8.0 but none is installed. You must install peer dependencies yourself.
npm WARN [email protected] No description
npm WARN [email protected] No repository field.
The babel-Loader version requires a more advanced WebPack, so execute the following statement to install version 3.0
npm install [email protected] --save-devExecute the WebPack and it will run successfully.
Error: failed to find conversion function from unknown to text
ERROR: failed to find conversion function from unknown to text.
later on, I found that I used alias in it. If the alias is used directly, it will report the above error.
so add ::text to text type ::int to int
Android Studio Error:Some file crunching failed, see logs for details
error description:
Error:Some file crunching failed, see logs for details
recently a lot of readers have asked me why I still get an error after I add it according to my method. So let me add a little bit here.
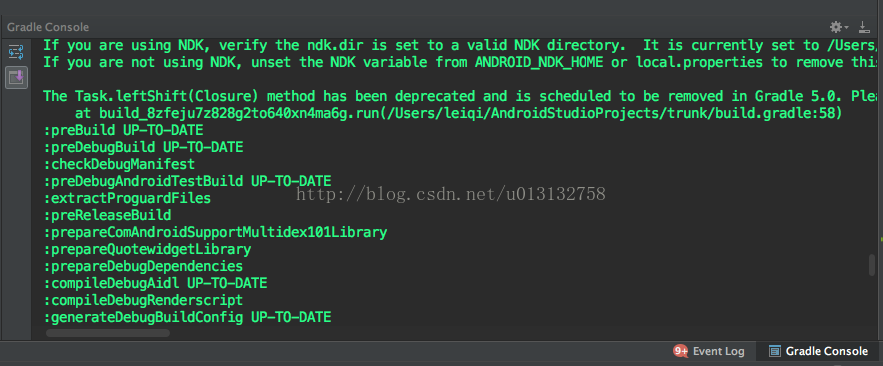
note ⚠ ️ : this is a question! So if you read the error log for Gradle, you can read the error log for Gradle.
click on the Gradle Console in the lower right corner. View gradle detail log:
problem 1:
images in resource files are not PNG files.

problem 2:
is not given. Figure 9 has margins.

Log Log 1:
AAPT: libpng error: Not a PNG file
Error: Some file crunching failed, see logs for details
:app:mergeDebugResources FAILED
FAILURE: Build failed with an exception.
* What went wrong:
Execution failed for task ‘:app:mergeDebugResources’.
> Error: Some file crunching failed, see logs for details
* Try:
Run with –stacktrace option to get the stack trace. Run with –info or –debug option to get more log output.
BUILD FAILED
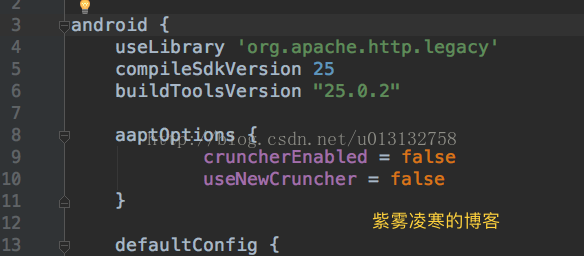
reason 1 solution:
in the build.gradle file of project app, add:
in the android TAB
aaptOptions {
        cruncherEnabled = false
        useNewCruncher = false
}
reason 2 solution:
We looked at the log and found that there is no margin. What is margin?Let’s look at the following two pictures

Boundless space (with no black edges)
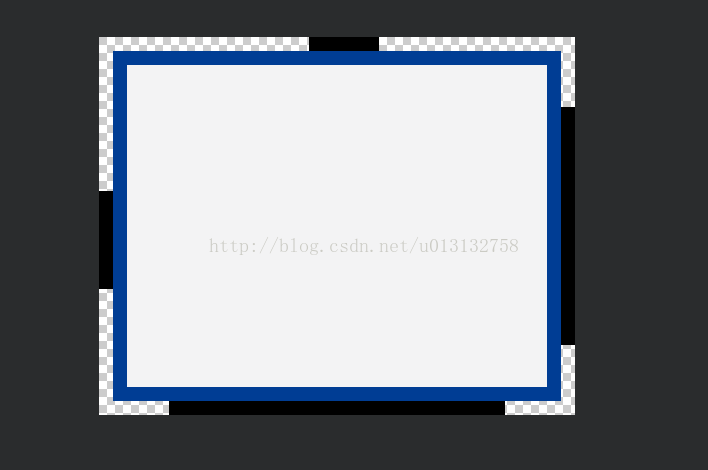
There are margins and there are black edges all around.
so how to set up?
Click on the white edge, the position of the click will be black, left and right or drag up and down to change the black edge, so as to set the size of the margin.
error reasons may not only have the above two kinds of log, if you encounter other reasons, welcome everyone harassment!!
android studio Error Gradle project sync failed. Please fix your project and try again
-
Android Studio may report Gradle project sync failed. Please fix your project and try again, the reason should be that some of the Gradle items are not properly configured.
-
open File – >
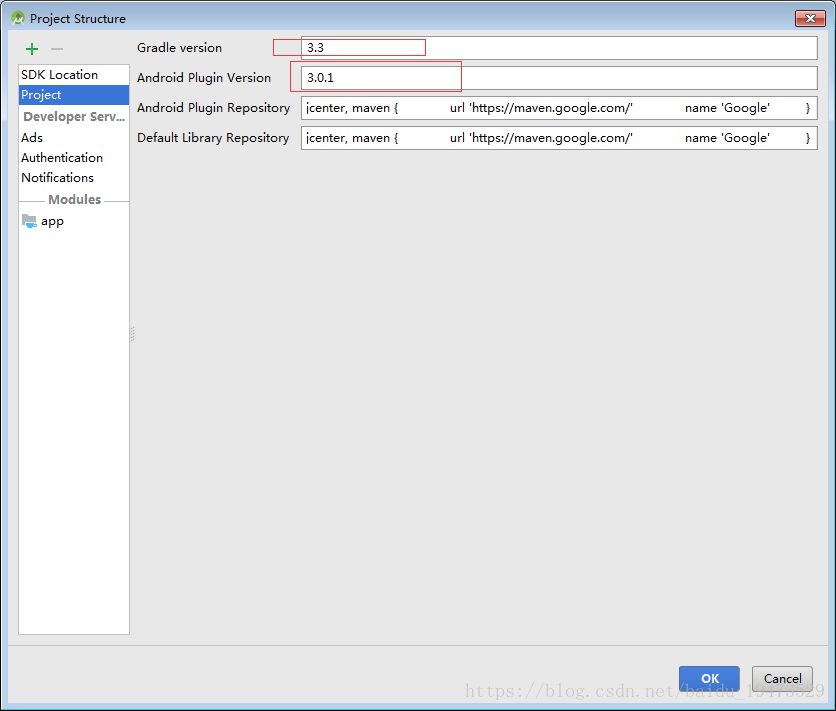
- the two versions must be locally available, and must be compatible. How do you know if you have them locally?The following 2 pictures show their respective paths.
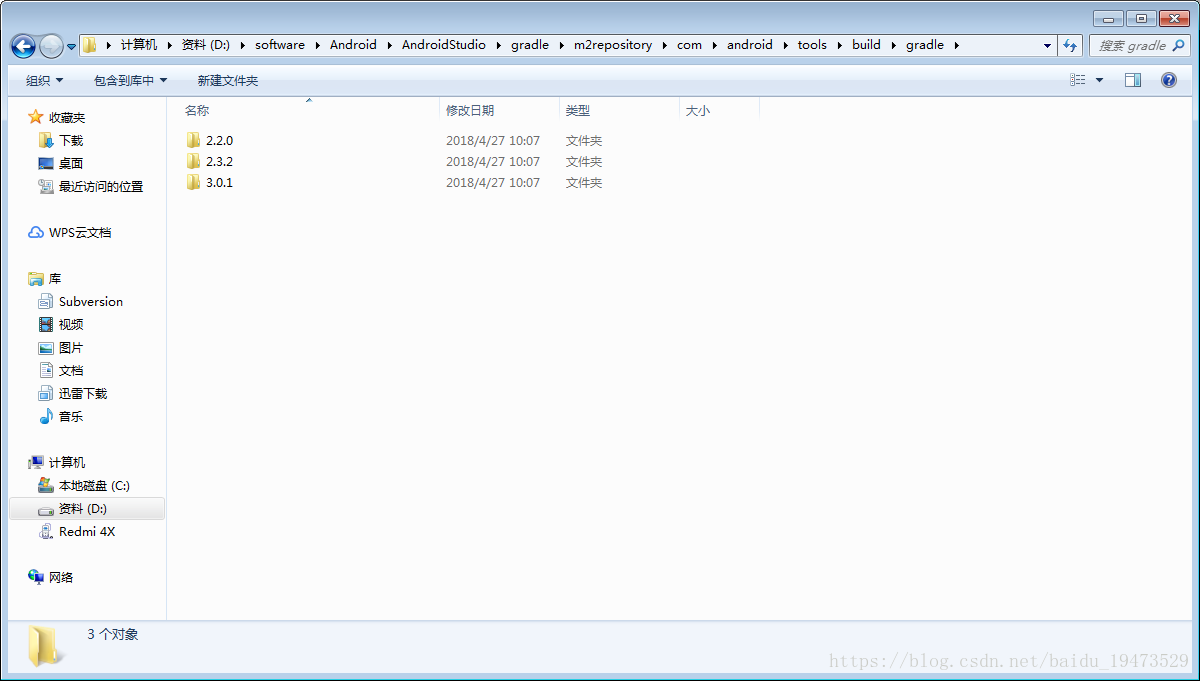
(gradle\m2repository\com\ Android \tools\build\gradle)
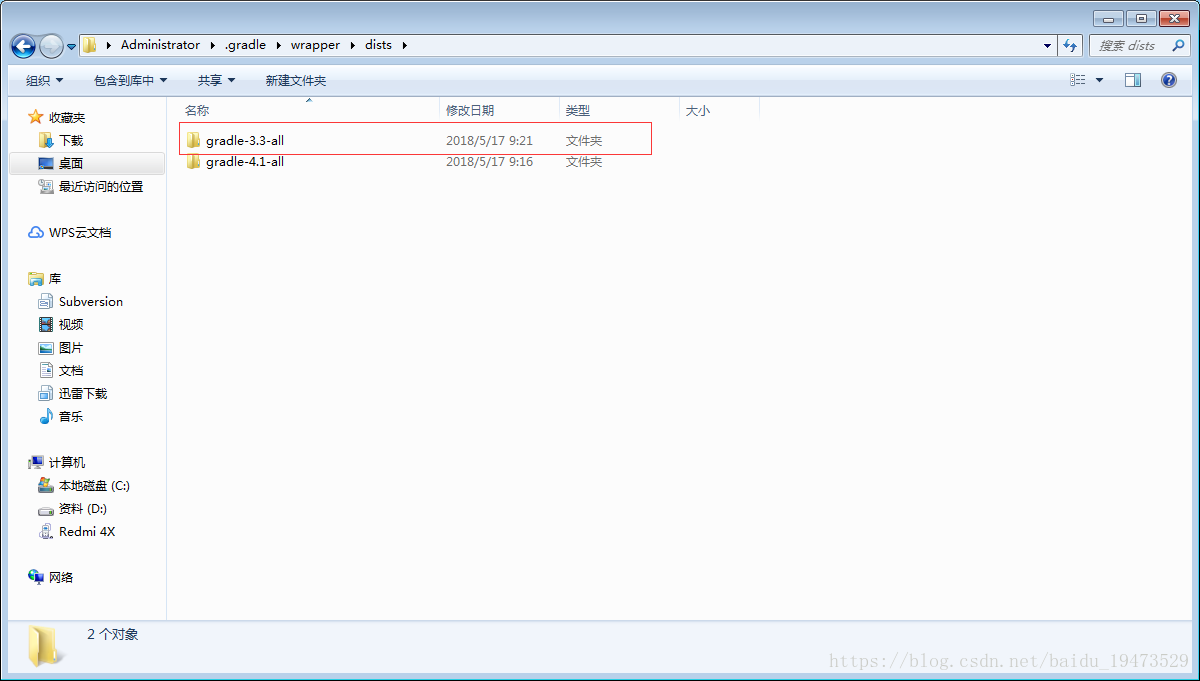
(the default path for Windows is in C:\Users\ administrator.gradle \wrapper\ covariance)
If the following packets cannot be downloaded, you must manually download them by following the value of the distributionUrl property in the gradle\wrapper\gradle-wrapper.properties file under the current project.
the synchronized
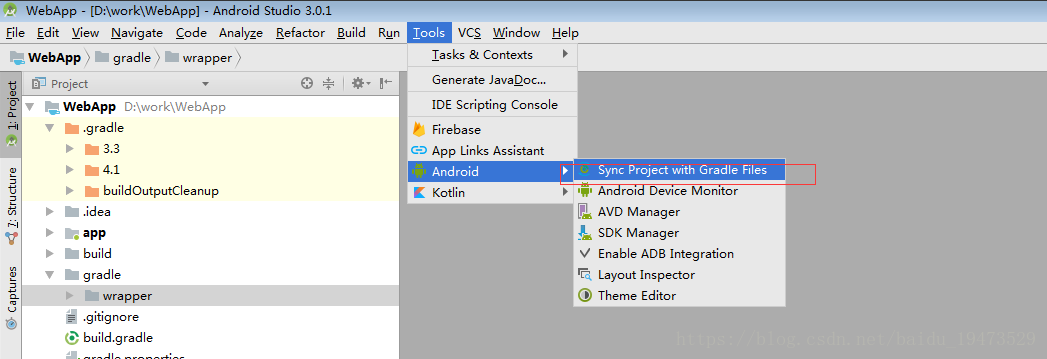
you can now run the project.