Category Archives: How to Fix

Install of Android studio_ FAILED_ OLDER_ Solutions to SDK

Installation did not succeed.
The application could not be installed: INSTALL_FAILED_OLDER_SDK
The application’s minSdkVersion is newer than The device API level.


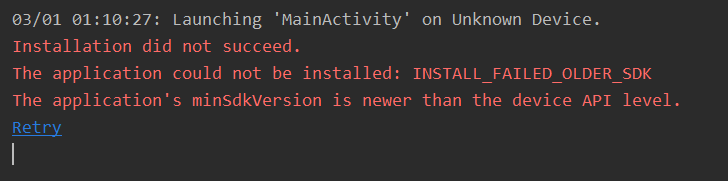
means that the SDK version of the device I am using is lower than the required SDK version

solution:
find the project location
project location \app\build. Gradle
note that it is under the app folder, not the well-known one (under the gradle folder)

, minSdkVersion
, minSdkVersion
, minSdkVersion set the range is 14-16,
and targetSdkVersion I test from 1 to 10000 no problem, but still do not suggest to randomly change
according to the personal computer Settings are different, don’t ask me how I got this range, I tried for a long time

specific version number is as follows

android {

compileSdkVersion 29
buildToolsVersion "29.0.3"

defaultConfig {
    applicationId "com.example.myapplication"
    minSdkVersion 15
    targetSdkVersion 29
    versionCode 1
    versionName "1.0"

    testInstrumentationRunner "androidx.test.runner.AndroidJUnitRunner"
}

gradle version is the latest 3.6.0


this time reminds me of the time when I used a very low version and could not be automatically updated to the latest version. I could only install the tesorflow library from the PIP on the official website, which was not suitable for the 3.7 version. As a result, I reinstalled two versions of python, including 2.0 version but not 3.6 version

openssl TXT_DB error number 2 failed to update database

Installing the production client key file with openvpn error<

(root@cmjs – live01 – 636 2.0) #. /create key client1

Generate a 1024-bit RSA private key for ……+ + + + + +
……bb0 writes the new private key to ‘client1. key’

You will be asked to enter the information that will be incorporated into your certificate request.
You will be entering what is called a Proprietary Name or DN. there are quite a few fields, but you can leave some blank. For some fields, there will be a default value.
If you enter ‘. , the field will be empty.

Country name (2 letter code) (EN):
Name of state or province (full name) (CA):
Name of location (e.g., city) (NJ):
Name of organization (e.g., company) [Fort-Funston]:
Organizational unit name (e.g., section)[Changeme]:
Common name (e.g., your name or the hostname of your server)[client1]:
Name[changeme]: [mail@host
Email Address. Domain):

Please enter the following additional attributes to send with your certificate request

Password[] challenge:
An optional company name[]:Use configuration from /etc/openvpn/easy-rsa/easy-rsa/2.0/openssl-1.0.0.cnf

Check the request for matching signatures.

The proprietary name of the signature subject is as follows
countryName: printable: “EN”
stateOrProvinceName: printable: “CA”
localityName: printable: ‘NJ’
organizationName: printable: ‘Fort-Funston’
organizationalUnitName: printable: ‘changeme’
commonName:client
name:printable:’changeme’
Email address:IA5STRING:’mail@host ‘domain’
The certificate will be certified at 09:50:21 GMT on 1 August 2024 (3650 days).
Sign the certificate? [y/n]: y

openssl TXT_DB error number 2 failed to update database

The reason is that the commonName is the same as the commonName which generated the ca file and the server key.

Gms2 (gamemaker Studio 2) running problems encountered in the project

 recently used GMS2

There were a few problems when I started running the official Demo, so let's focus on the solution

FAILED: Run Program Complete

There is an error running Demo directly under Win10:
 C:\Windows\system32\cmd.exe exited with non-zero status (1)
elapsed time 00:00:02.5630000s for command "C:\ProgramData/GameMakerStudio2/Cache/runtimes\runtime-2.0.1.16/bin/Igor.exe" -options="C:\Users\Kaiser\AppData\Local\Temp\GameMakerStudio2\build.bff" -- Windows Run started at 02/12/2017 20:25:49
FAILED : Run Program Complete

This is a problem with the running environment installation, which may be related to antivirus software or system permissions. Solutions:

  1. file/prefrences/feeds/master to download the latest Runtime, if is the latest delete reshipment
  2. close to kill soft
  3. with administrator privileges to open GMS2

    System.ComponentModel.Win32Exception (0x80004005): The system cannot find the file specified

    This is also a typical installation environment failure problem

    C:\ProgramData/GameMakerStudio2/Cache/runtimes\runtime-2.0.1.16/windows/Runner.exe  -game "C:\Users\Dave\AppData\Local\Temp\GameMakerStudio2\Test_50CBC7E2\Test.win"
    System.ComponentModel.Win32Exception (0x80004005): The system cannot find the file specified
       at System.Diagnostics.Process.StartWithCreateProcess(ProcessStartInfo startInfo)
       at System.Diagnostics.Process.Start()
       at Igor.Command.ExecuteCommandSync(String _command, String _args, Boolean _fail_on_error, String _cwd, Dictionary`2 _env, Boolean as_admin) in c:\hudson\ZeusBase\ZeusGreen\GameMaker\Zeus\Igor\Program.cs:line 64
       at Igor.WindowsBuilder.Run() in c:\hudson\ZeusBase\ZeusGreen\GameMaker\Zeus\Igor\Builders\WindowsBuilder.cs:line 144
    elapsed time 00:00:03.6157316s for command "C:\ProgramData/GameMakerStudio2/Cache/runtimes\runtime-2.0.1.16/bin/Igor.exe" -options="C:\Users\Dave\AppData\Local\Temp\GameMakerStudio2\build.bff"  -- Windows Run started at 11/17/2016 12:29:14 AM

    和第一个问题一样,Runtime安装失败,步骤类似可以使用同样的方法解决

    关于无法创建Temp文件夹

    这个比较特别可能是没有对应磁盘的文件,GMS1曾经尝试在C盘根目录创建游戏文件失败,可以将临时文件修改为其他磁盘解决问题

    如图修改:

    查看原文:http://www.51xyyx.com/3226.html

When using ionic to build Android APK, Cordova error is reported: requirements check failed for JDK 1.8 or greater

after the local environment variables of JDK and jre are configured locally, Java, javac and so on can output normally in the command line, but when using ionic cordova build android to package ionic, it will prompt CordovaError: Requirements check failed for JDK 1.8 or greater.

I checked that the local Java version is 10+. Later, I found on the Internet that cordova only supports jdk8, so I need to lower the JDK version to adapt.

Reference links:

https://stackoverflow.com/questions/40628240/cordova-requirements-check-failed-for-jdk-1-8-or-greater

reproduced in: https://www.cnblogs.com/viola-sh/p/9355649.html

How to solve the import failure by prompting beautifulsoup under pychar

is usually channelled through IDEA tips, but this time I found that BeautifulSoup failed and suggested

SyntaxError: Missing parentheses in call to ‘print’. Did you mean print(int “Unit tests have failed! .

Internet search attempts, are not consistent, and finally found that the project package management interface import only effective, the following is the process:

File –> Settings (CTRL + Alt + s) – & gt; Project:(Project name) -> Project Interpreter. As shown below:

click “+” and enter Beautifulsoup to find the plugin you want to install.

note: Python2 was chosen to install BeautifulSoup and Python3 was chosen to install bs4.

Failed building wheel for psutil solution

PIP installation toroch failed to install psutil. The specific prompt is as follows:

problem:

as indicated in the error message, Python. H header file

is missing

solution:

install the corresponding version of the python-dev file, under ubuntu

sudo apt-get install python3.6-dev

reference

https://github.com/giampaolo/psutil/issues/1143

MongoDB Error: Failed to start mongod.service: Unit mongodb.service is masked

Reference:

reference: http://club.verimake.com/topics/36 http://stackoverflow.com/questions/37014186/running-mongodb-on-ubuntu-16-04-lts

on MongoDB: Failed to start mongod. Service: Unit MongoDB. Service is masked, you can follow the following steps:
opens the following file:

sudo vim /etc/systemd/system/mongodb.service

Paste the following into the file and save

[Unit]
Description=High-performance, schema-free document-oriented database
After=network.target

[Service]
User=mongodb
ExecStart=/usr/bin/mongod --quiet --config /etc/mongod.conf

[Install]
WantedBy=multi-user.target

execute the following command:

sudo systemctl enable mongod.service
sudo systemctl daemon-reload
sudo service mongod start

Failed to download package files error after re installing Ubuntu

:

afternoon after reinstalling the Ubuntu virtual system, the “failed to download package files” error

appeared when downloading the software or updating the package

address:

modify the download source Settings

  1. press Alt+ F2 and enter softwa-property-gtk.
  2. changes the download location to “master server” or another server near your country of residence.
    select other select good Chinese site. If you’re in a university, tsinghua or another university is the.edu. Cn suffix. Choose Ali in China can also, or click choose the best server to let the system choose.

Reference

https://askubuntu.com/questions/73997/how-do-i-fix-a-failed-to-download-package-files-error

Error in Python connection to mongodb pymongo.errors.OperationFailure : Authentication failed.

python connected mongo, appear pymongo. Errors. OperationFailure: Authentication failed. Error because authentication rights were not granted.
the initial join script is:


import pymongo
myclient = pymongo.MongoClient("mongodb//root:[email protected] :10000/")  xx.xx.xx.xx 是数据库服务器  root是数据库的用户名,123456是数据库的密码
mydb = myclient["test-db"]       #test-db是数据库名称 
mycol = mydb["cust_refund"]    #cust_refund是数据库的中一个数据表
for x in mycol.find({"Id":"80","testId":"1375"}):
  print(x)  

at first glance, as if that’s right, but using the statement above, at runtime, an error:
pymongo. Errors. OperationFailure: Authentication failed.

is viewed because authentication rights have not been granted.

At this point, add authenticate() function to authenticate as follows:

import pymongo
myclient = pymongo.MongoClient("mongodb://xx.xx.xx.xx :10000/")  xx.xx.xx.xx  是数据库服务器
mydb = myclient["test-db"]       #test-db是数据库名称 
mydb.authenticate('root','123456')
mycol = mydb["cust_refund"]    #cust_refund是数据库的中一个数据表
for x in mycol.find({"Id":"80","testId":"1375"}):
  print(x)  

so, once again, you can open the database.

more test communication, you can add friends

Perfect solution Error:Execution failed for task ‘: APP:transformClassesWithDexForDebug ‘… Problem

believe that everyone in the Android development can not avoid to be integrated in the process of the third party after a project, integration, sometimes it will encounter this ash often hate transformClassesWithDexForDebug, detailed Log is as follows:


Error:Execution failed for task ':APP:transformClassesWithDexForDebug'.
> com.android.build.api.transform.TransformException: com.android.ide.common.process.ProcessException: java.util.concurrent.ExecutionException: java.lang.UnsupportedOperationException

The main reason for this problem is that the introduction of Libary overlaps with some Libs in existing projects. Please check in detail and make sure that there is only one copy of lib in use, such as v4, v7, utdid.jar, etc.

if you use other android’s official support library see, http://developer.android.com/tools/support-library/features.html

if there is still a problem after the above situation check, you can try to use the following configuration to solve the problem

defaultConfig {
    ...
    minSdkVersion 14
    targetSdkVersion 21
    ...

    //Enabling multidex support.
    multiDexEnabled true
}
dependencies {
    compile ´com.android.support:multidex:1.0.1´
}


and then in the manifest we introduce this, if there is a custom AppApplication, let your own AppApplication inherit this class

<?xml version="1.0" encoding="utf-8"?>
<manifest xmlns:android="http://schemas.android.com/apk/res/android"
    package="com.example.android.multidex.myapplication">
    <application
        ...
        android:name="android.support.multidex.MultiDexApplication">
        ...
    </application>
</manifest>

may also be a JDK version 1.8 problem, which is not an accident, so suspect that Gradle has compatibility problems with JDK 1.8 and try to reduce the number of JDK dependencies to 1.7

compileOptions {
    sourceCompatibility JavaVersion.VERSION_1_7
    targetCompatibility JavaVersion.VERSION_1_7
}

can be run or there will be errors after the configuration is completed, so we can also add this sentence in app.bulid and re-run after that. The specific amount or 4g can be seen from the computer configuration modification (2g, 3g, 6g, 8g).

dexOptions {
    javaMaxHeapSize "4g"
}

the above is the Error: I met in the Execution failed for task ‘: APP: transformClassesWithDexForDebug’ all solutions, sharing out hope to help everyone.