Category Archives: How to Fix

CUDA Visual Studio Integration Installation failed

To sum up, the first possible reason for the failure of cuda installation is the graphics driver problem (it is obvious that the surface driver problem is mentioned in this tip), and the other reason is that cuda has not been unmounted cleanly. After the update of the graphics driver, cuda failed to load, and only reinstall cuda
uninstall cuda first. I tried to install CUDA again, but the error of “CUDa Visual Studio Integration Installation failure” appeared during the Installation. I had been looking for a long time but could not find the Installation log of CUDa. Turned over an article

https://devtalk.nvidia.com/default/topic/1032284/cuda-setup-and-installation/cuda-visual-studio-integration-installation-failed/ speculation may be associated with nsight integrated debugging tools in vs.
then uninstall the


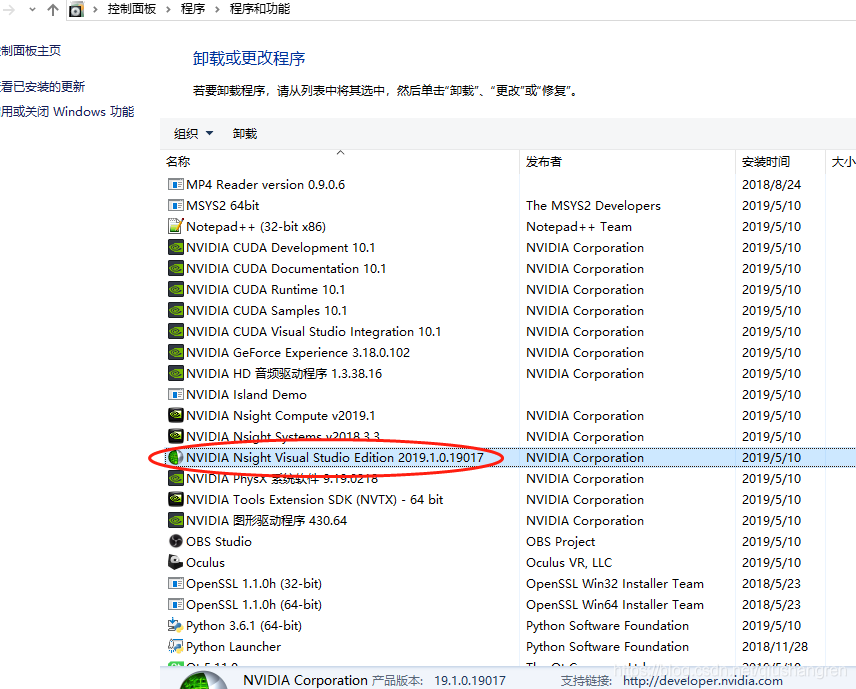
finally cuda can be installed correctly. This tool was always supposed to be installed by myself, but later I reinstalled it and found that It must be installed when I installed CUDA. Of course, I may cancel this thing in the configuration options when Installing CUDA.

Error:Failed to notify project evaluation listener.

when the plug-in flutter is done, Error:No such property: gradsion for class: JetGradlePlugin is reported when linking two modules. Error, then according to

compare and modify gradle version number in classpath and gradle.properties before distributionUrl.

, but then Error:Failed to notify project evaluation listener. The problem was found by query that classpath and distributionUrl were not the same between Module and the main project.

little problem takes a long time, problem log.

UITableView failed to obtain a cell from its dataSource?

error cause:

The

cell is called earlier. The cell is first looped and then created. The order is wrong.

cell object is empty, then check carefully, it is static BOOL nibsRegistered error.

, the first time the object is created, the class variable becomes YES, and then when you recreate the object, you can’t do nibWithNibName, so it won’t run.

When the

tableview is loaded, it will report an error in cellForRowAtIndexPath, because it does return nil cell, so you have to trust the program to give you feedback. Cellforow data source method, you can’t return nil cell.

Openproj reported error errno = 193 in 64 bit operating system

1. Double-click to open OpenProj. Exe unresponsive solution:

1) modify openproj1.4.0.ini, change Maximum Version=any to Maximum Version=1.7 and save.

2) double-click OpenProj. Exe again, the path to select the jre will pop up, select the directory where the native jre is installed ( important: you must select the 32-bit jre, and the Java version is below 1.8, the reason will be explained below )

second, prompt “Failed to load Java VM Library” error solution:

1) open “start” -> Run “, enter “%USERPROFILE%”, and open to the user’s home directory.

2) open “AppData” in home directory -> Roaming “- & gt;” OpenProj “- & gt;” {13702021-43FB-480C-912F-D9B74A538288} “Directory, there is a” OpenProj1.4.0.ini “file below.

3) edit this file by changing the JRE Path= to the directory where the native JRE is installed ( important: you must select a 32-bit JRE and the Java version is below 1.8, for reasons explained below )

the prompt “Failed to load the Java VM Library” of the reason for the error, mainly because of the compiler OpenProj is to use a 32-bit JDK, and so in 64 the JRE to run have a problem, and seemingly version does not support Java8 +, anyway I use Java8 will appear first, double-click the have no reaction, after changing Java 7 32 bit was no problem, the hope can help solve this problem more and more people

Command “python setup.py egg_info” failed with error code 1 in /private/var/folders/14/4hz051qx0wqd3

error when installing drf-haystack in MAC virtual environment:
the Command “python setup. Py egg_info” failed with the error code 1 in/private/var/folders/14/4 hz051qx0wqd3_7wygk3gj980000gn/T/PIP – install – 49 azdncl/django – haystack/

before installing django-haystack, install setuptools

pip install setuptools-scm

to install django-haystack.

if the above methods still report errors, you can install certifi and fix the problem

pip install certifi==2017.7.27.1

Failed to execute tools\ android.bat : minutes! The same thing on the Internet, can’t it be solved? Look at this one!

viewers think that the solution also please point like, receive a Tibet (convenient to meet later), forward to share.

people have encountered the situation and Internet users are not quite the same, respectively introduce the two how to solve:

case 1: the most common, which is now a search on the Internet can be encountered;

error:

solution:

find “tools_r25.2.2-windows.zip” in folder temp and unzip it to overwrite the tools folder.

Open sdkmanager. exe after

and the above prompts will not appear.

situation 2: this is a situation that I personally encountered different from other netizens. My Android SDK was installed with Android development components when I installed Visual Studio, and the common online methods did not work.

error:

Error generating Ca in OpenSSL: TXT_ DB error number 2

from: http://zhoujuxi.blog.163.com/blog/static/56607590201192571745629

Sign the certificate?[y/n]:y

failed to update database

TXT_DB error number 2

occurs because

This thing happens when certificates share common data. You cannot have two
certificates that look the same.

method 1 :

modify demoCA under index.txt.attr

Java code
  

  1. unique_subject = yes

    to

    Java code
      

    1. unique_subject = no

      method 2 :

      delete demoCA under the index. TXT, and then touch

      Java code
        

      1. rm index. TXT
      2. touch index. TXT

        method three :

        sets the common name to a different

        the second method I use when I encounter such situations;

        ref: blog.sina.com.cn/s/blog_6151984a0100f0q4.html

MySQL error — multiple methods of failed to find valid data directory and MySQL setting password appear

MYSQL error – Failed to find valid data directory

operating environment: windows10

database version: mysql.8.0.16

problem description:

MySQL service is starting.
MySQL service cannot start. The
service did not report any errors.

solution:

  • manually empty the files in the data folder under the installation path (possibly due to incomplete files due to previous initialization failure)
  • into the bin path remove mysql service
  • under the bin path enter mysqld –initialize-insecure (the program will create many files under the data folder)
  • continue to enter mysqld -install (service has been reinstalled)
  • start mysql service, enter net start mysql

the MYSQL error, Failed to find valid data directory. _Nikita – _failed CSDN blog to find valid data directory.
https://blog.csdn.net/Hellen0708/article/details/93377724

=================================================================================

=================================================================================

=================================================================================

the mysql database password _qq_26486949 blog blog – CSDN _mysql password
https://blog.csdn.net/qq_26486949/article/details/88373487

mysql database password Settings

mysql newly installed does not have a password by default, so it needs to be set manually.

method 1: use the SET PASSWORD command

log in to MySQL first.

format: mysql> Set password for username @localhost = password(‘ new password ‘);

example: mysql> set password for root@localhost = password(‘123’);

method 2: mysqladmin

format: mysqladmin-u username -p old password password new password

example: mysqladmin-uroot-p123456 password 123

method 3: edit user table

directly with UPDATE

log in to MySQL first.

mysql> use mysql;

mysql> update user set password=password(‘123′) where user=’root’ and host=’localhost’;

mysql> flush privileges;

method 4: use the GRANT statement mysql> Grant all on *.* to ‘root’@’localhost’ IDENTIFIED BY ‘your password ‘with grant option; mysql> flush privileges;

method 5: when you forget the root password or initialize the password, you can do this:

Take Windows as an example:

1. Close the running MySQL service.
2. Open a DOS window and go to mysql\bin directory.

3. Enter mysqld –skip-grant-tables enter. Skip-grant-tables means to skip permission table authentication when starting MySQL service.

4. Open another DOS window (because the DOS window is no longer active) and go to the mysql\bin directory.
5. Enter mysql enter. If successful, mysql prompt &gt will appear. .

6. Connection permission database: use mysql; .

. Update user set password=password(“123″) where user=”root”; Don’t forget to put a semicolon at the end.

if ERROR 1054(42S22) Unknown column ‘password’ in ‘field list’ occurs, this is because the password field is no longer available in mysql database in version 5.7, and the password field is changed to authentication_string. The statement should be update User Set Authentication_string =password(“123″) where user=”root”;

7. Flush privileges (mandatory step) : flush privileges; .

8. Quit quit.
9. Log out of the system, enter again, log in with the username root and the new password 123 that you just set.