Category Archives: How to Fix

How to Disable Autoconfiguration IPv4 Address

To fix it, enter these from Command Prompt:

C:\Users\lyngtinh> netsh interface ipv4 show inter

result as:

Idx Met MTU State Name

— ———- ———- ———— —————————

1 50 4294967295 connected Loopback Pseudo-Interface 1

11
10 1500 connected Local Area Connection

11: <=Keep it in mind

Next run this command:

C:\Users\lyngtinh>netsh interface ipv4 set interface
11 dadtransmits=0 store=persistent

Next, enter

Run > services.msc
> disable DHCP Client service

Final, restart your server.

Good luck!

How to Change Local Path in TFS

How to change the local path after download file from TFS source control
File -> Source Control -> Workspaces -> Choose the workspace in question and click “Edit”.

You can also use the dropdown in Source Control Explorer, or ‘tf workspace’ at a command line within the old path.
From:http://social.msdn.microsoft.com/Forums/en-US/tfsversioncontrol/thread/d0c6982f-4f5e-4b1c-830b-3af9fb127922

Configuring C + + environment with atom under ubuntu1404

[Local Environment]
Operating system: Ubuntu 14.04 64bits

1. Atom download address
Download address: https://atom.io/
Select the version: Download.deb
Open Atom: Enter Atom into the terminal. The Atom interface is shown below:

Atom’s interface looks like this:

In the welcome Guide there is “Install a Package”, click on “Open Installer” as shown below:


2. Install the following three plug-ins:

Linter – GCC linter GCC – make – run

As shown in the figure below: to Install linter-gcc, click “Install”. Linter is the same as GCC-make run

3. Modify the linter-GCC path:

Refer to the figure above and click “Setting” under linter-gcc: make sure the path /usr/bin/g++


Scroll down and check “Lint on-the-fly”. If not checked, code will only be compiled if the file is saved, as shown below:

The effect of the check is as follows:

After installation, press “F6” to compile and run the program. Write a small program to test as follows.

Two plug-ins are recommended to be installed in the same way as the previous plug-ins:

activate-power-mode

Effect:


minimap

Effect:

A similar thumbnail to sublime Text, shown in the upper right corner of the applet test.

Python and other development environments can also be configured under Atom, and you can be interested in baidu below.

Continue Long Statements on Multiple Lines Matlab

This example shows how to continue a statement to the next line using ellipsis (...).

s = 1 - 1/2 + 1/3 - 1/4 + 1/5 ...
      - 1/6 + 1/7 - 1/8 + 1/9;

Build a long character string by concatenating shorter strings together:

mystring = ['Accelerating the pace of ' ... 
            'engineering and science'];

The start and end quotation marks for a string must appear on the same line. For example, this code returns an error, because each line contains only one quotation mark:

mystring = 'Accelerating the pace of ... 
            engineering and science'

An ellipsis outside a quoted string is equivalent to a space. For example,

x = [1.23...
4.56];

is the same as

x = [1.23 4.56];

Vector delete pop of element_ back(),erase(),remove()

The member function pop_back() of vector can delete the last element.
The function Erase (), in turn, can remove elements that are indicated by an Iterator, as well as elements of a specified range.
— You can also use the generic algorithm remove() to remove elements in a vector container.
— The difference is: Remove generally does not change the size of the container, whereas member functions such as pop_back() and Erase () do.
1, pop_back ()

void pop_back();

Delete last element
Removes the last element in the
vector, effectively reducing the container
size by one.

This destroys the removed element.

#include <iostream>
#include <vector>
using namespace std;
int main()
{
	vector<int> vec;
	int sum(0);
	vec.push_back(10);
	vec.push_back(20);
	vec.push_back(30);
	while(!vec.empty())
	{
		sum += vec.back();
		vec.pop_back();
	}
	cout<<"vec.size()="<<vec.size()<<endl;
	cout<<"sum = "<<sum<<endl;
	system("pause");
	return 0;
}

0

60
2、erase()
C++98

iterator erase (iterator position);
iterator erase (iterator first, iterator last);

C++11

iterator erase (const_iterator position);
iterator erase (const_iterator first, const_iterator last);

Deletes an element in the specified location or deletes an element in the specified range
Removes from the vector of either a single element (position) or a range of elements ( [first, last) .) including the first, not including the last.

This effectively reduces the container size by the number of elements removed, which are destroyed.
It reduces the size of the container. After the iterator is used on the erase element, it subsequently fails, i.e., the iterator can no longer operate on the vector.

#include <iostream>
#include <vector>
using namespace std;
int main()
{
	vector<int> vec;
	for(int i=0;i<10;i++)
	{
		vec.push_back(i);
	}
	vec.erase(vec.begin()+5);//erase the 6th element
	vec.erase(vec.begin(),vec.begin()+3);
	for(int i=0;i<vec.size();i++)
	{
		cout<<vec[i]<<' ';
	}
	cout<<endl;
	system("pause");
	return 0;
}

// Output 3, 4, 6, 7, 8, 9
3. Remove () Not recommended

#include <iostream>
#include <vector>
using namespace std;
int main()
{
	vector<int> vec;
	vec.push_back(100);
	vec.push_back(300);
	vec.push_back(300);
	vec.push_back(300);
	vec.push_back(300);
	vec.push_back(500);
	cout<<&vec<<endl;
	vector<int>::iterator itor;
	for(itor=vec.begin();itor!=vec.end();itor++)
	{
		if(*itor==300)
		{
			itor=vec.erase(itor);
		}
	}
	for(itor=vec.begin();itor!=vec.end();itor++)
	{
		cout<<*itor<<" ";
	}	
	system("pause");
	return 0;
}

How do I change the default background color of all FIGURE objects created in MATLAB

A list of factory-defined graphics settings that can be manipulated can be obtained by executing this command at the MATLAB prompt:
 
get(0,’Factory’)
To set the default color for all graphics objects, the ‘defaultfigurecolor’ property of the ROOT graphics object needs to be defined as follows:
 
set(0,’defaultfigurecolor’,[1 1 1])
Once the property is set, all succesive figures created will inherit this property from the ROOT graphics object.
More information on setting default color properties for handle graphics objects can be found here:
 
<http://www.mathworks.com/access/helpdesk/help/techdoc/index.html?/access/helpdesk/help/techdoc/creating_plots/f7-21465.html

How to use matlab xlswrite

Take matrix A=[1, 2, 3, 4;5, 6, 7, 8] as an example for introduction
Case 1:
Enter data into the specified EXCEL, without specifying the workbook or cell location
Enter xlswrite(‘1.xlsx’,A) in the MATLAB main window and press enter and we will see in excel 1.xlsx and sheet1 as follows

Note: 1 If you put Sheet2 before Sheet1, the data will be written to Sheet2.
2 When this command is executed, the Excel being written should be in the closed state.
Example 2:
Type xlswrite(‘1.xlsx’,A,2) in the main window into the specified sheet without specifying A cell, and press enter

We are putting A matrix in the second sheet. And we need to be careful because we are in sheet3 and not Sheet2.

    example 3 write the data to the specified sheet, specify the location, enter xlswrite(‘1.xlsx’,A,3,’C5′) in the main window of MATLAB, enter

We will see in Sheet2 in the third position that matrix A was written from c5 cell. We could also have written xlswrite(‘1.xlsx’,A,3,’ c5 :F6′). Same result, but the former is simpler and more convenient.

From: http://www.taody.com/zhishi/93f9803fea09f4e0e56f555a.html

Uninstall Anaconda under Windows

Find the Uninstall-Anaconda. Exe file in the directory where you installed your Anaconda and run the Uninstall file.
After uninstalling, if there are still problems with the version, switch to anaconda2 and install Anaconda3 instead. 2 and 3 can be installed on a computer at the same time.

Blender graphic tutorial: loop cut for polygon modeling commands

The polygon modeling command is only available under edit mode

this command is called Loop Cut and Slide short for Loop Cut shortcut key (Ctrl + R)


Blender loop cut operation design is very smooth. The basic steps are as follows:

    first press the shortcut key on the object to be looped Ctrl + R. At this time, different previews will be generated with different mouse positions. When previewing, scroll mouse wheel up and down to increase or decrease the number of ring cut edges, and the preview effect will also change accordingly (this step is optional). If you are satisfied with the preview, click the left mouse button. Slide the mouse to move the cut edge of the ring (optional). If you are satisfied with the preview, click the left mouse button again.

The whole process requires two left mouse clicks

Markdown real time preview of sublime Text3

As mentioned above in Sublime Text3’s Package Control Installation and Usage, Sublime has powerful plug-in extensions, and this article details how to preview or even refresh the preview in real time when writing Markdown documentation with Sublime.


0. Review: Plug-in installation method, which will be used repeatedly in the future

    combination Ctrl+Shift+P bring up the command panel and enter Package Control: Install Package, press enter and enter the Package name to be installed (one by one, not multiple at the same time) in the search box. After a few seconds, the installation will be successful


    The plugin is introduced
    Introduces a few common plug-ins for the Markdown class:

    function

    0

    2

    4

    5

    6

    8

    0

    2

    3

    4

    function
    1 MarkdownEditing 3 a plug-in that improves the Markdown editing features in Sublime Markdown
    7 MarkdownPreview 9 Markdown to HTML, Preview in the browser
    MarkdownLivePreview provides real-time preview in the edit box
    LiveReload 1 a plug-in that provides real-time refresh preview of documents such as md/ HTML

    5
    The next few plug-ins are presented at a time.


    1. MarkdownEditing
    The Markdown editor, as the name suggests, is a must-have plug-in for Markdown writers, which not only highlights the syntax of Markdown but also supports syntax highlighting for many programming languages.
    special note: MarkdownEditing is enabled only for files in md\mdown\ MMD \ TXT format.
    features
    MarkdownEditing implements a series of optimizations for the editing of Markdown documents, both visually and conveniently. Such as:
    Color schemes like Byword and iA Writer automatically match asterisks (*), underscores (_), and back quotes (‘) in selected text by pressing the above symbols to automatically add matching symbols before and after the selected text to facilitate bold, italic, and code box input
    Effect:


    2. MarkdownLivePreview
    function
    Real-time preview Markdown file, md file on the left and preview results on the right. Can be used with MarkdownEditing.
    use
    MarkdownLivePreview turns off live preview by default, so now that you have the plugin installed, you should definitely use it. Open in Preferences -& GT; Package Settings -> MarkdownLivePreview -> Add a "markdown_live_preview_on_open" to the right of Settings: true,, and restart sublime.
    This is because the default configuration on the left side is unchangeable (read only), and the edit area on the right side is the user-defined area.
    rendering

C + + pauses the black window system (“pause”); (get ch(), getchar(), system (pause)’s connection and difference

In a c++ program, if it is a window, sometimes it will disappear with a flash. If you don’t want it to disappear, add:

system(“pause”);

Note: Do not add after the return statement, it will not be executed.

Analysis:

System () is a call to the system command;

pause pause command;

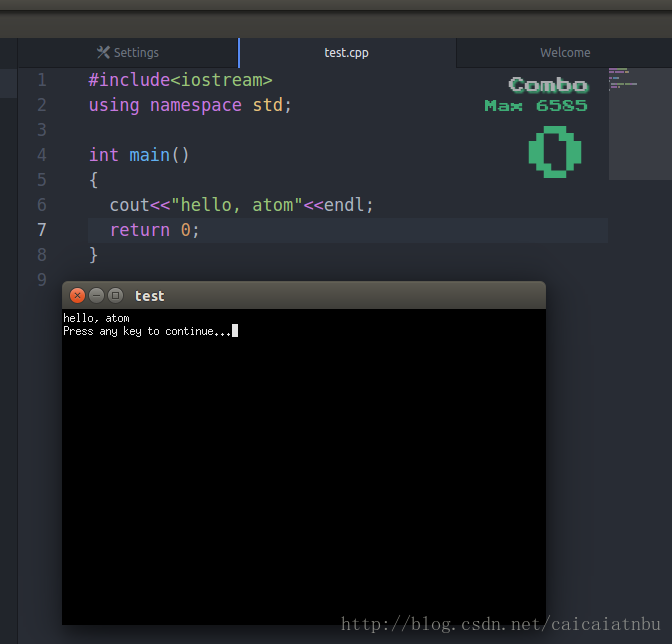
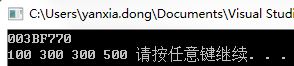
When run here, it will say “Press any key to continue…” or “Press any key to continue…” ;

In VS2008, can be called directly

VC 6.0, to add the following header file!

#include < stdlib.h>  
The

Supplement: http://bbs.csdn.net/topics/390231844

http://www.gidnetwork.com/b-61.html (the answer), 9/f,

1:

I don’t know why I often see people declare “void main” on CSDN

is not a standard entry point for C++

standard supports only two kinds of announcements

first type “int main”

int main(int argc, char *argv[]))

declares “void main” may have unexpected results

this doesn’t just apply to C++, C works as well

is this the textbook’s fault?Or is it the professors’ fault?

2:

do not use system(“pause”) to pause. Use STD ::cin. Get or getchar() instead.

why don’t you use system(“pause”)?

for two reasons

1: not portable
Two: it’s very expensive

where is it important?Let’s look at the process of system(“pause”)

1: pause your program

2: start the OS in the sub-process

3: finds the command to execute and allocates the memory for it

4: wait for input

5: recycle memory

6: end OS

7: continue your program

Getch () :
header file: conio. H
function purpose: read a character from the console, but not displayed on the screen
e.g. :
char ch; Or int ch;
getch (); Or ch = getch ();
with getch (); It waits for you to press any key before continuing with the following statement;
with ch = getch (); It waits for you to press any key, assigns the ASCII character to ch, and then executes the following statement.

getchar():
Extract characters from IO stream!
this function is declared in the stdio.h header file and used to include the stdio.h header file. Such as:
# include< stdio.h>
int getchar (void);
getch has the same basic functions as getchar, except that getch gets the key value directly from the keyboard and does not wait for the user to press enter. As soon as the user presses a key,
getch returns immediately. Getch returns the ASCII code entered by the user and returns -1 on error. The
getch function is commonly used in program debugging. During debugging, the relevant results are displayed in a critical position for viewing, and then the getch function is used to pause the program,
when any key is pressed after the program continues to run.

the first is that the two functions exist in different header files, this one basically you write #include< stdio.h> Getchar (), can accept a character, press enter to end, and display on the screen, and can clear forward just write
2. Getch (), receive a character, on the screen does not show
you write more, practice should be understood
Getchar () gets a character from the input device that is displayed on the screen, getch gets a character from the input device,
but the character is not displayed on the screen, for example:
#include < stdio.h>
int main()
{
printf(“%c”,getchar()); Suppose you get a character f from the keyboard here and press enter and you’ll see something like this
f
f
the first f is the f that you typed in, the second f is the f that printf gets
#include < stdio.h>

int main () {
printf (” % c “, getchar ());
}
suppose you enter an f and the result is
f this f is the printf output f
getchar is optimized,
getchar input character, until you press enter, then execute the code
getch without hitting enter
System (“pause”) can freeze the screen to observe the execution results of the program.
getch can not only pause the program
but also get a character
system(“pause”) is just a simple pause
the difference is the mechanism of action, although the effect looks the same. The
system return value is the result after you call the Shell command, and the getch() function will return the result provided by the function.
usually, the return value of Shell command may be unexpected and uncertain. Sometimes, it is impossible to judge whether the command
is executed successfully through the return value, which will have an impact on the program that conducts subsequent processing according to the return value. The return value of the function determines whether the
line is held successfully. But you don’t judge the return value at all, and you don’t process it, so you don’t have to worry about these differences.