There is a bug in the Gitlab CE 10.6.4 I used. When an empty project is created, the owner account is used to set the local project as git pushand the error “You are not allowed to push code to this project” will be encountered.
Because it’s an empty project, it doesn’t even have a Master branch yet, so it’s not really the Protect Branch.
The cause of this problem is that the git push GitLab is reading another incorrect username in Manage Windows Credentials on Windows and is rejected by GitLab.
When git pushyou will be prompted for the user name and password. After you enter the owner’s user name and password, you will be able to successfully git push.
This should be a design flaw of GitLab, which is that GitLab assumes that on a GitLab, you always have one account to log in to.
Reference: https://gitlab.com/gitlab-com/support-forum/issues/207
If you encounter similar permissions problems with GitLab (too large or too small or denied), you can first check that the Credential of GitLab in Manage Windows Credentials is incorrect.
Category Archives: How to Fix
Vs fatal error C1083: unable to open include file: “sys / socket. H”: no such file
Under Windows winsock. H/winsock2. H
Linux under the sys/socket. H
br>
# include & lt; winsock.h> Or # include & lt; winsock2.h>
< arpa/inet.h> Use & lt; windows.h> Replace
Linux under the sys/socket. H
br>
# include & lt; winsock.h> Or # include & lt; winsock2.h>
< arpa/inet.h> Use & lt; windows.h> Replace
Vs2017 C + + cannot open source file: “sdkddkver. H”, “stdio. H”, “TCHAR. H”
The first time it was installed, the error in the picture appeared. Searched for this for a long time, thought is the installation problem, uninstall reinstall several times…… Thirty grams of stuff, it’s no joke.
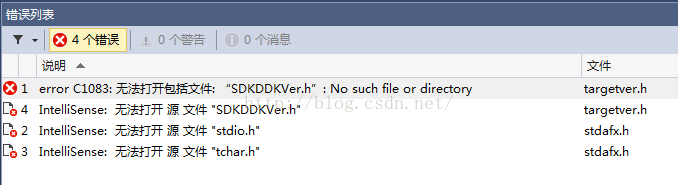
But finally found that the reason for this problem is!! In the case of Visual Studio default installation, there are files that are not checked by default, that is, they are not installed by default. (Also should be because Win10SDK installation failed, but how to install also can not install, even if…

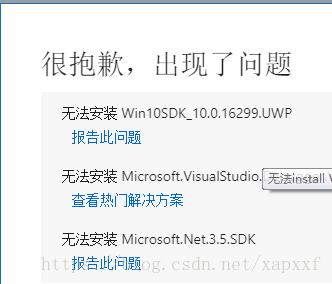
, causing problems)
But!!!!! H and stdio.h exist in these files.
It is not installed by default, as shown in the figure below:
Because oneself is this pit for a long time, think the net search is all sorts of separate download, the latter search, and then reconfigure and so on incomparable trouble operation. Here are some of the easiest ways to do it once and for all
Solution:
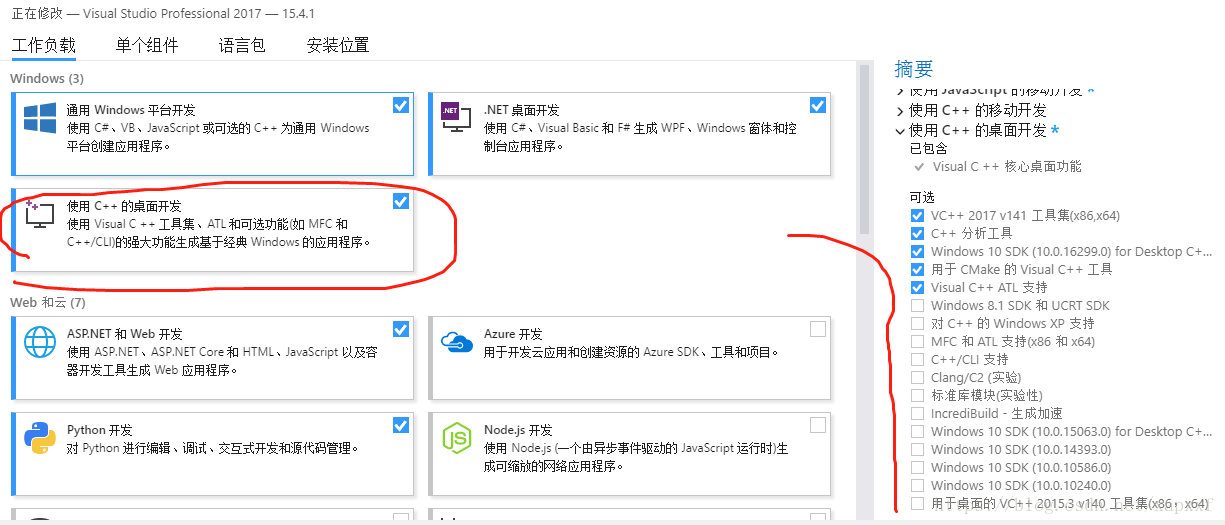
Just go to Programs and Functions, go to VS, right-click, modify, and check those, and you’re done.
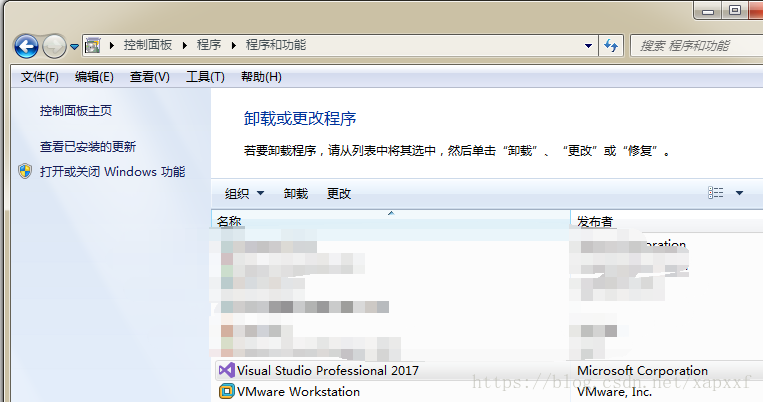
Right-click and go to Change
Then you can see:

Then, click More and Select – Modify (check the box). After the completion of the picture, found that I forgot that several are unsolved problems ticked)
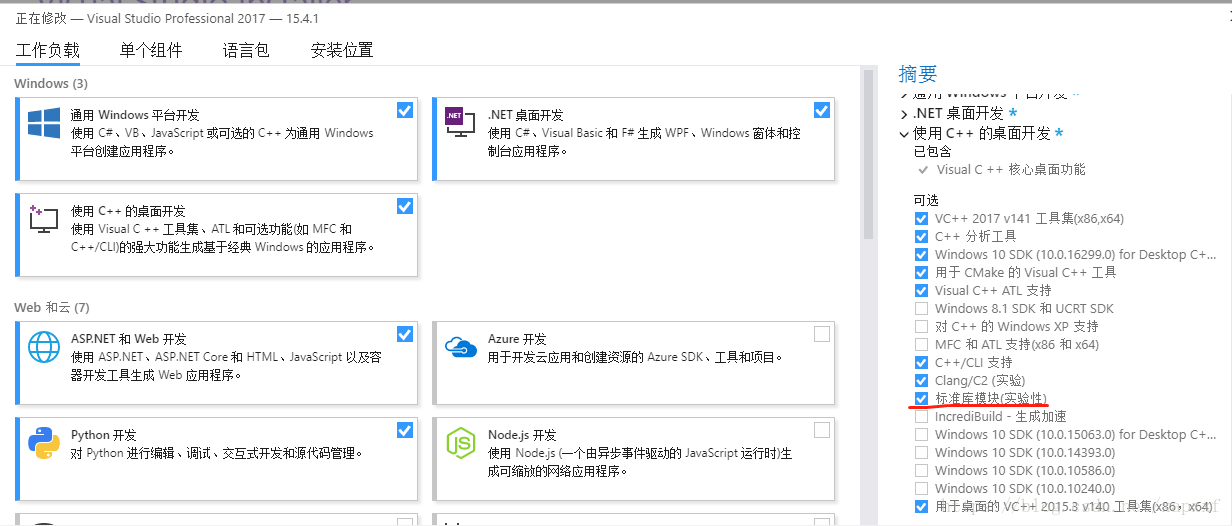
C++, check, and then confirm the modification OK, wait for the installation, problem solved. You don’t have to go to download WindowsSDK yourself.
Solve!
(after this can be used, my development needs can basically meet, but this is the installation of Win10SDK failure, the helpless move)
Separate installation, you can reference this article: http://blog.csdn.net/hhh1108/article/details/50352027
There is also a point of benefit, so you can install to other disks. Configure it yourself. VS will be installed on the C drive.
Of course, if you can install the Win10SDK on your computer, you should not have this problem.
OpenGL Programming Guide 8th Edition 9th Edition vs2015 vs2017 configuration method
“OpenGL Programming Guide” 8th Edition 9th Edition VS2015 VS2017 configuration method
“OpenGL programming guide” source download and source code in VS2015 VS2017 configuration method
directory
“OpenGL programming guide” version 8 version 9 environment configuration VS2015
1. Source download:
2. Cmake build configuration
3. VS2015 configuration
4. Run the example
5. Special Settings
“OpenGL programming guide” source download and source code in VS2015 VS2017 configuration method
directory
“OpenGL programming guide” version 8 version 9 environment configuration VS2015
1. Source download:
2. Cmake build configuration
3. VS2015 configuration
4. Run the example
5. Special Settings
1. Source download:
Version 9 can be downloaded from the official website: http://www.opengl-redbook.com/
Making the source address: https://github.com/openglredbook/examples
Note, direct source code downloaded from making, using CMake build VS2015 always appear a lot of mistakes, later on the issue of https://github.com/openglredbook/examples/issues/2, found that has successfully solved the great god, therefore, recommended directly download the source code of the lot:
https://github.com/elmindreda/examples
For the convenience of everyone to use, here I have configured the VS2015 to provide everyone to download, save you to build:
https://download.csdn.net/download/guyuealian/10878513 (direct download decompression, opened by VS2015/VS2017 my_build/vermilion9 SLNS, detected and then you can happy to run the example la la la la la)
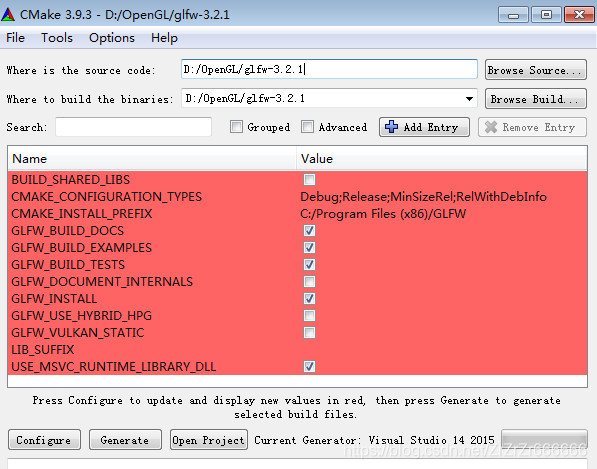
2. Cmake build configuration
Install Cmake in Windows and set the following Settings:

If you click “Configure” :, the compiler will be selected, and you can select Visual Studio 14 2015 for VS2015
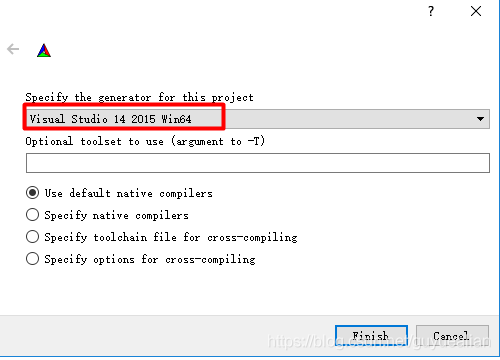
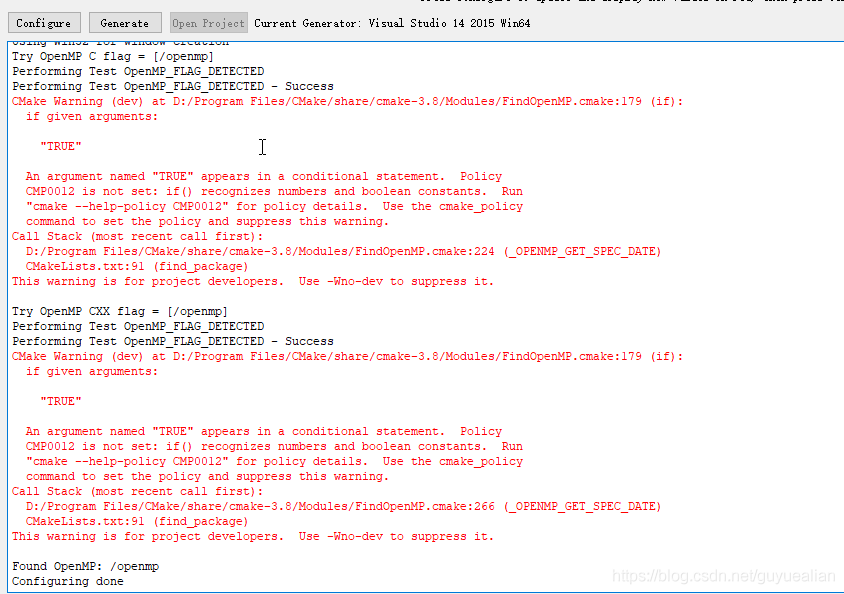
“Configuring Done” indicates that the configuration is OK. Forget the warnings that appear in red
Click “Generate” : “Generate done” will be displayed.
Finally, “Open Project” will be opened by default with VS2015
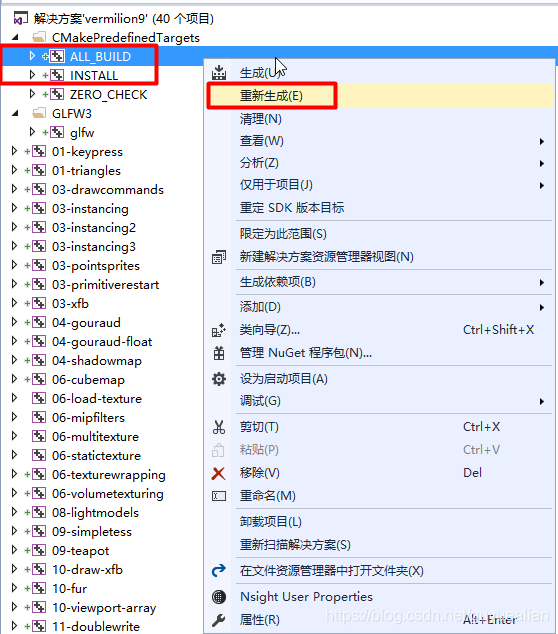
3. VS2015 configuration
Mouse select “ALL_BUILD” → Recompile
Select “Install” → Recompile with the mouse
4. Run the example
If you want to test running an example from a book, just select the example, like “01-triangles,” set it to “Set as Start Project,” and you’ll be ready to go

A triangular window will appear after successful operation:
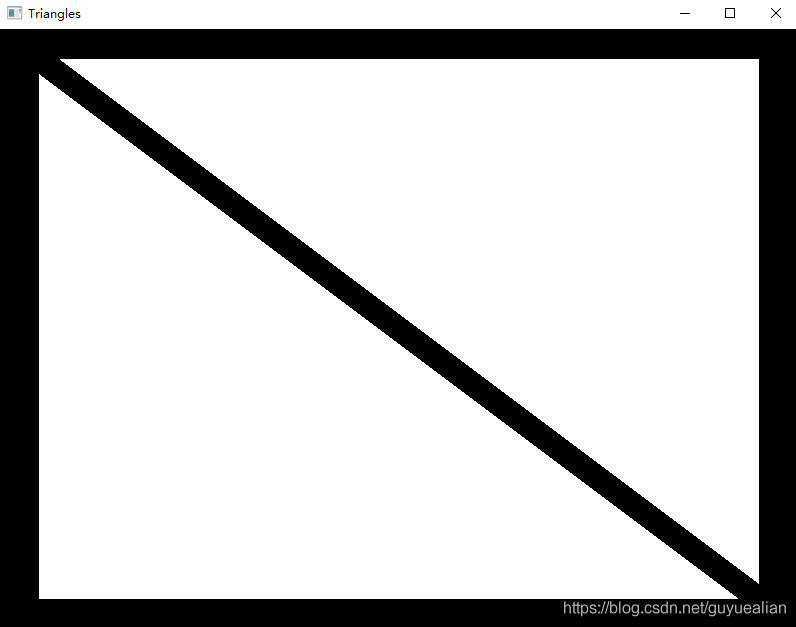
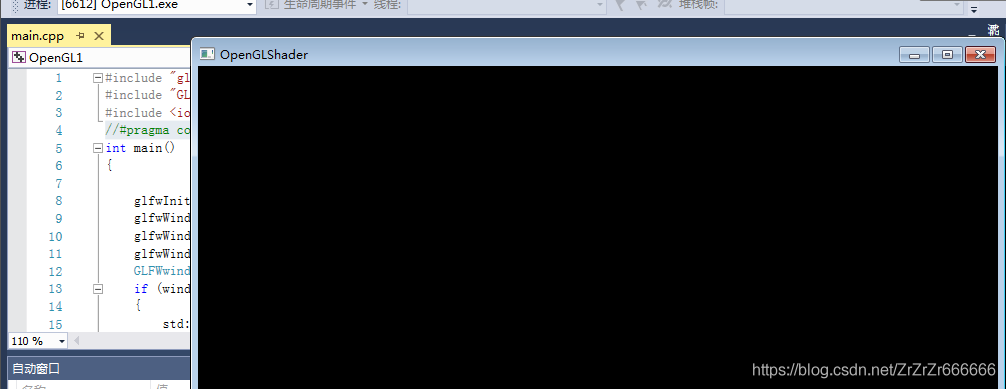
5. Special Settings
Some examples, such as “12-imageprocessing,” will show a black window with nothing at all. This is because some of the shaders are not set to the correct file paths. Many of the resource files in the book are in: examples, bin, media.
A simple way to do this is to set up the working directory so that the relevant resource files can be found at runtime:
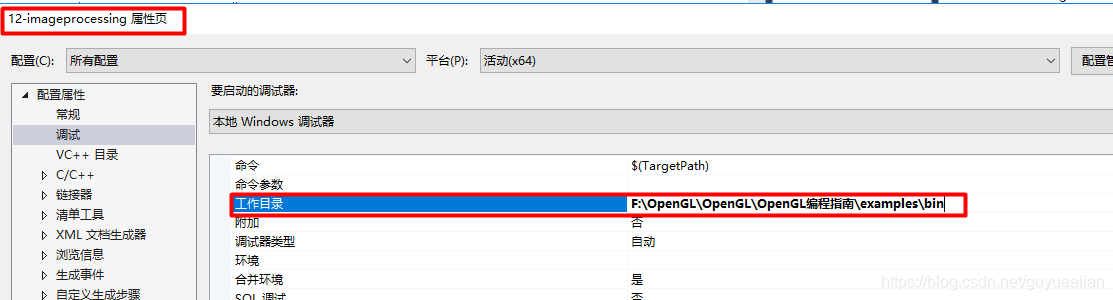
The working directory is: $(projectDir).. \bin

Vs2015 + OpenGL environment configuration
The article from http://jingyan.baidu.com/article/d5c4b52bca5005da560dc5d6.html
http://www.linuxidc.com/Linux/2013-02/78959p2.htm
Look at both of them if I don’t make sense
Download the GLUT library http://www.opengl.org/resources/libraries/glut/glutdlls37beta.zip
(If you can’t get out, remember over the wall. I gotover the wallfrom BBB1 and downloaded it directly in the browser.)
Copy the static function libraries Glut. lib and Glut32.lib into the lib folder of the file directory after extracting them
X:\Program Files (x86)\Microsoft Visual Studio 12.0\VC\lib
Will glut. DLL, glut32 DLL this two dynamic library file into the operating system directory under the C: \ Windows \ system32 folder (32-bit system) or C: \ Windows \ SysWOW64 (64 – bit systems).
For compatibility, it is best to copy the corresponding files in both directories.
Copy the extracted header file Glut. h into the following directory:
X:\Program Files (x86)\Microsoft Visual Studio 12.0\VC\ Include \GL
Tip: If there is no GL folder in the incluce directory, you will need to create it manually
Verification method:
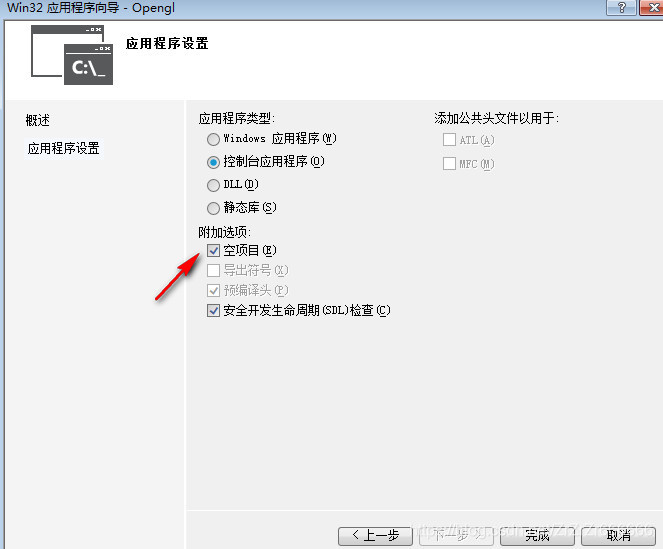
Create a blank Win32 console application
2,
Add the include directory at the beginning of the code
#include < GL/glut.h>
3. Then you can edit your own OpenGL program
4,
For example: Copy the following code into the newly configured VS
#include < GL/glut.h>
#include < stdlib.h>
#include < math.h>
#include < stdio.h>
static int year = 0,spin=0, day = 0;
static GLint fogMode;
const int n = 100;
Const GLFloat R = 1.0F;
Const GLFloat Pi = 3.1415926536 F;
void DrawCircle()
{
Int I;
glClear(GL_COLOR_BUFFER_BIT);
glBegin(GL_LINE_LOOP);
for (i = 0; i < n; ++i)
{
GlColor3f (1.0, 0.0, 0.0);
glVertex2f(R*cos(2 * Pi/n*i), R*sin(2 * Pi/n*i));
}
glEnd();
glFlush();
}
void init(void)
{
GlFloat Position [] = {0.5, 0.5, 3.0, 0.0};
glEnable(GL_DEPTH_TEST); // prevent occlusion
glLightfv(GL_LIGHT0, GL_POSITION, position);
GlEnable (GL_LIGHTING);
glEnable(GL_LIGHT0);
{
GLFloat Mat [3] = {0.1745, 0.01175, 0.01175};
glMaterialfv(GL_FRONT, GL_AMBIENT, mat);
Mat [0] = 0.61424; Mat [1] = 0.04136; Mat [2] = 0.04136;
glMaterialfv(GL_FRONT, GL_DIFFUSE, mat);
Mat [0] = 0.727811; Mat [1] = 0.626959; Mat [2] = 0.626959;
glMaterialfv(GL_FRONT, GL_SPECULAR, mat);
GlMaterialf (GL_FRONT GL_SHININESS, 0.6 * 128.0);
}
glEnable(GL_FOG);
{
GlFloat fogColor[4] = {0.5, 0.5, 0.5, 1.0};
fogMode = GL_EXP;
glFogi(GL_FOG_MODE, fogMode);
glFogfv(GL_FOG_COLOR, fogColor);
GlFogf (GL_FOG_DENSITY, 0.35);
glHint(GL_FOG_HINT, GL_DONT_CARE);
GlFogf (GL_FOG_START, 1.0);
GlFogf (GL_FOG_END, 5.0);
}
GlClearColor (0.5, 0.9, 0.9, 1.0); Fog color/* * /
}
void display(void)
{
glClear(GL_COLOR_BUFFER_BIT | GL_DEPTH_BUFFER_BIT);
GlColor3f (0.0, 1.0, 1.0);
GlPushMatrix (); // Remember your position
GlutSolidSphere (1.0, 20, 16); /* Draw solar radius, 20 longitude, 16 latitude */
GlRotatef (spin, 0.0, 1.0, 0.0); // Rotate around a vector at a given Angle (positive is counterclockwise)
GlTranslatef (2.0, 1.0, 0.0);
GlRotatef (spin, 1.0, 0.0, 0.0);// revolution
GlRectf (0.1, 0.1, 0.5, 0.5);
GlColor3f (0.0, 0.0, 1.0);
GlutWireSphere (0.2, 8, 8); /* Draw the first asteroid */
GlColor3f (1.0, 0.0, 0.0);
GlTranslatef (2.0, 1.0, 0.0);
Glrotatef (2 * spin, 0.0, 1.0, 0.0);
GlutSolidSphere (0.5, 16, 8);
glPopMatrix(); // Return to the original position
glutSwapBuffers();
}
void spinDisplay(void)
{
spin = spin + 2;
if (spin > 360).
spin = spin – 360;
glutPostRedisplay();
}
void mouse(int button,int state,int x,int y )
{
switch (button)
{
case GLUT_LEFT_BUTTON:
if (state == GLUT_DOWN)
glutIdleFunc(spinDisplay);
break;
case GLUT_MIDDLE_BUTTON:
if (state == GLUT_DOWN)
glutIdleFunc(NULL);
break;
default:
break;
}
}
void reshape(int w, int h)
{
glViewport(0, 0, (GLsizei)w, (GLsizei)h);
glMatrixMode(GL_PROJECTION);
glLoadIdentity();
GluPerspective (60.0, (GLFloat)w/(GLFloat)h, 0.5, 20.0);
glMatrixMode(GL_MODELVIEW);
glLoadIdentity();
GluLookAt (0.0, 10.0, 10.0, 0.0, 0.0, 0.0, 0.0, 1.0, 0.0);
}
void keyboard(unsigned char key, int x, int y)
{
switch (key) {
case ‘d’:
day = (day + 10) % 360;
glutPostRedisplay();
break;
case ‘D’:
day = (day – 10) % 360;
glutPostRedisplay();
break;
case ‘y’:
year = (year + 5) % 360;
glutPostRedisplay();
break;
case ‘Y’:
year = (year – 5) % 360;
glutPostRedisplay();
break;
case 27:
exit(0);
break;
default:
break;
}
}
int main(int argc, char** argv)
{
glutInit(& argc, argv);
glutInitDisplayMode(GLUT_DOUBLE | GLUT_RGB);
glutInitWindowSize(400, 400);
glutInitWindowPosition(100, 100);
GlutCreateWindow (” OpenGL Programming — Yang Chao “);
init();
//glutDisplayFunc(DrawCircle);
glutDisplayFunc(display);
glutReshapeFunc(reshape);
//glutKeyboardFunc(keyboard);
glutMouseFunc(mouse);
glutMainLoop();
return 0;
}
5,
http://jingyan.baidu.com/album/d5c4b52bca5005da560dc5d6.html?picindex=5
So we have the picture
Construction of vs2015 OpenGL configuration environment
OpenGL configuration
Main solutions:
What is OpenGL?How to configure successfully to create a window?
1. OpenGL is what?
A set of specifications that defines a set of functions, what arguments are passed in, and what results are sent out. Since it is only such a set of specifications, anyone can implement functions in different ways as long as they conform to the specifications. VS with OpenGL library (should be able to directly use VS own, but here is the configuration of their own this way, after your add)
OpenGL itself is a big state machine: there are many variables can be set up so that we can control its operations. The state of OpenGL is often referred to as a context. So what we do with OpenGL is we change the context in which it runs by changing its state, so that OpenGL gives us the results that we want
2. The configuration
2.1 What tools need to be prepared for configuration?
2.VS2015
. Glad source is used to encapsulate the function called in OpenGL library
4>make is used to compile source code (GLFW library).
2.1.1 download GLFW
Website address is: http://www.glfw.org/download.html (you need over the wall to access)
in baidu network location to download, links:
https://pan.baidu.com/s/1ceyucgFRYImnjmG-LmkuwA password: 9 SMQ
2.1.2 download Cmake
Through CMake GLFW source is needed to compile the
website address is: https://cmake.org/download/ (also need over the wall to access)
baidu network location to download
link: http://pan.baidu.com/s/1clPRIm password: ct24
install CMake, the following configuration, click the configure, choose vs2015 (vs) according to oneself, click the generate, later. At this point, look at the cmake file under the generated GLFW project.
 ## 2.1.3
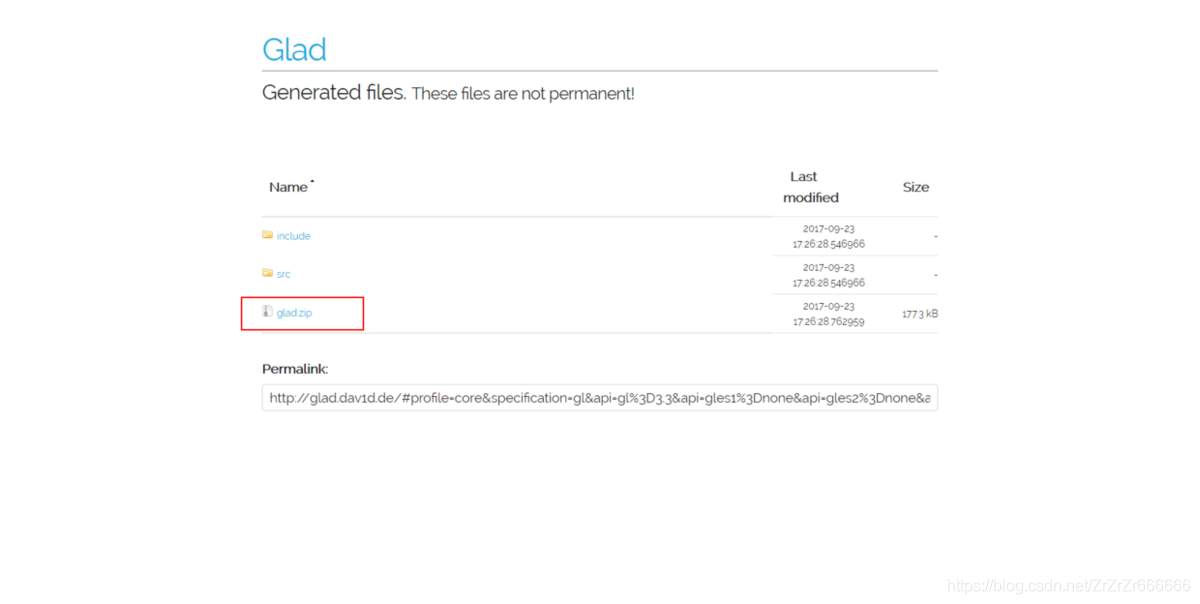
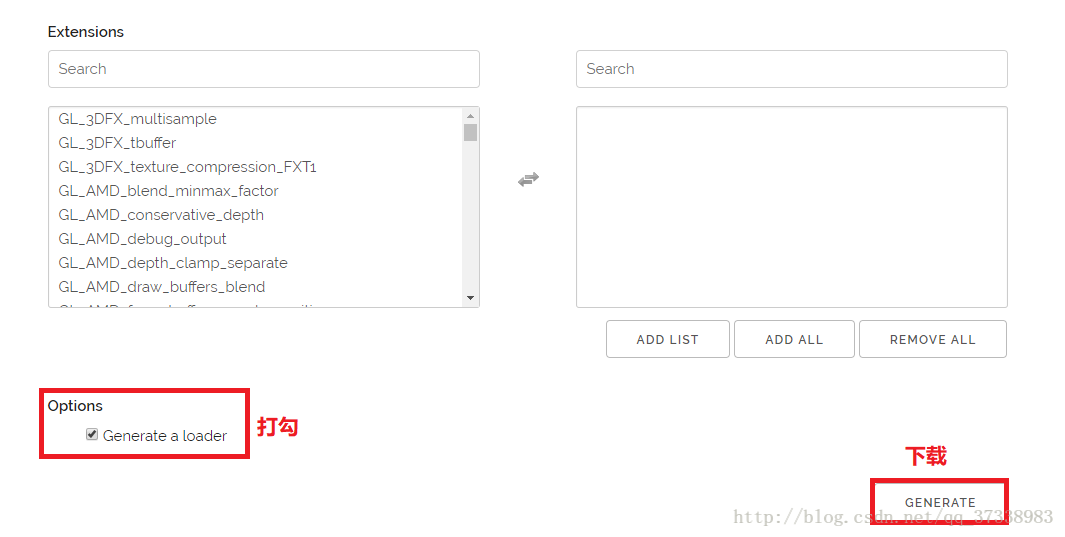
Click the Generate button at the bottom right corner of the page, and on the following page, click Glad. Zip to press
2.1.4 The download is done, the next to assemble the library used
1
1
1
1
1
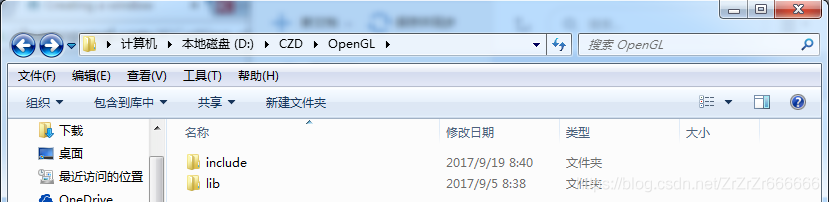
1 New folder Opengl
2. Will GLFW directory of the include directory is copied to the Opengl directory to
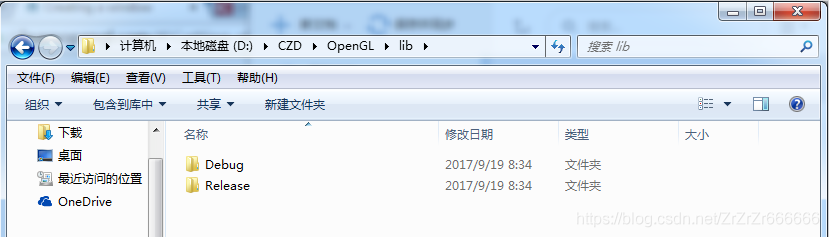
3. Opengl folder under a new folder, named lib
4. Will be compiled GLFW library is copied to the lib folder
GLFW library position is: GLFW – 3.2.1 \ SRC, the inside of the Debug and Release two directory replication, copied to the lib folder
note: Debug and Release do not exist at the beginning of this time, you need to open the GLFW solution in VS2015, run the two modes (Debug/Release), to produce, run after the Win32 folder will have these two folders, do not bother, just copy the two SRC. A lot of readers didn’t know what I was looking at on the blog, so let me make a statement here.
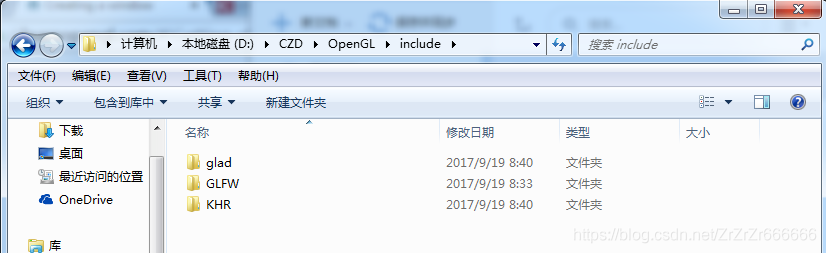
5. Copy glad decompression folder, the include directory two folders glad and KHR copy, copy to the OpenGL directory, include folder
Include
 lib
lib
ah
2.1.5 OK, finally can use VS2015 to create projects, add libraries
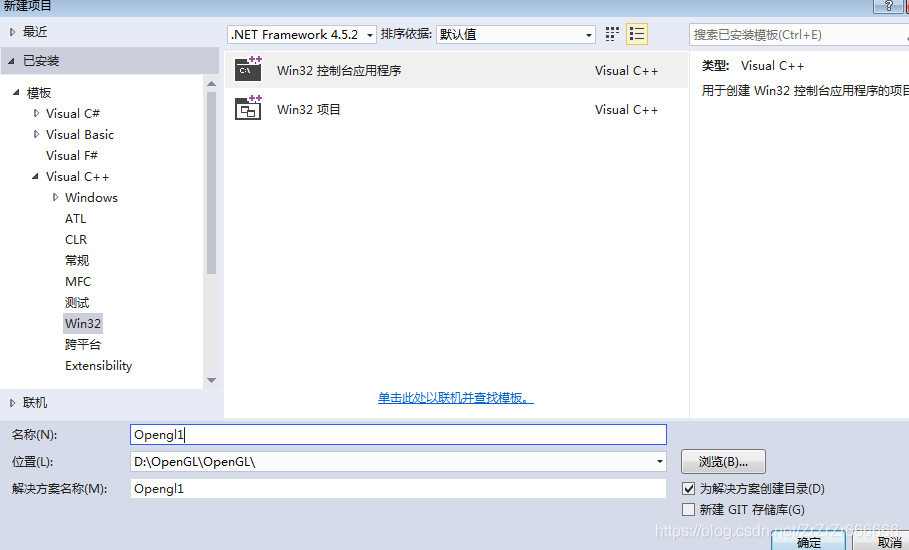
1.VS2015, create an empty project, 
 copy from glad folder to project source file.
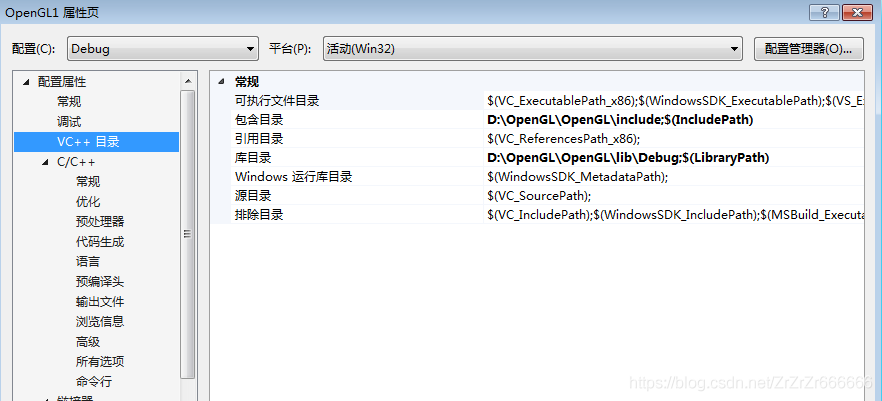
 click on the project, set the properties, VC ++ directory, set respectively
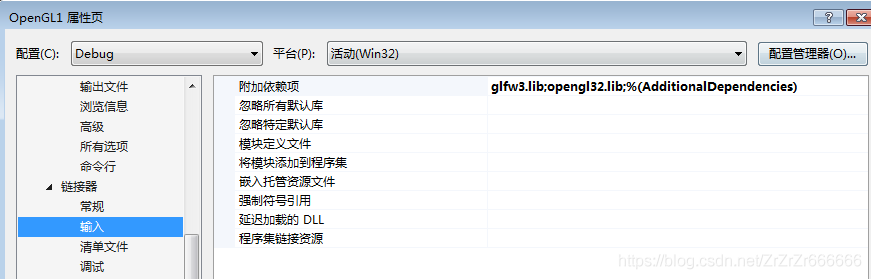
br> *>lick on the connector, enter, and add additional dependencies
** Note: !!!!!!!!!!!
OpenGL environment configuration under VS2010 / vs2012 / vs2015
Please read every word carefully.
In order to learn “OpenGL Super Bibliography (Fifth Edition)” must configure OpenGL environment, is the so-called work to do its thing must first benefit its device. Through a lot of online configuration tutorial, have a lot of problems, but also has the essence of the detailed tutorial, such as a blog: http://www.zyh1690.org/build-opengl-super-bible-fifth-edition-development-environment/. While the tutorial is detailed, there are a few details that the blog doesn’t go into. Configuring the OpenGL environment must be careful and patient. Because a little oversight can cause the final configuration environment to fail. Although this is for the “Win7 X64 +VS2010” environment configuration process, but I in VS2012/VS2015 also built successfully, VS2012/VS2015 configuration OpenGL principle is also very simple, is one of the Microsoft Visual Studio 10.0 to add files into Microsoft Visual Studio 12.0 or Microsoft Visual Studio 15.0 to add related files.
Configure environment:
win7 X64 + Visua Studio 2010
win7 X64 + Visua Studio 2012
win7 X64 + Visua Studio 2015
Required configuration files and tools:
Baidu cloud disk Download Address:
Link: http://pan.baidu.com/s/1kVsKUGJ password: XXQQ
Link: http://pan.baidu.com/s/1slu9RK5 password: asj8
Here is the official setup:>; > > > > > > > > > > > > > > > > > > > > > > > Line & gt; > > > > > > > > > > > > > > > > > > > > > > > > Line & gt; > > > > > > > > > > > > > > > > > > > > > > > >
The FreeGLUT configuration
Open the x:\x\ FreeGlut-2.8.1 \VisualStudio\2010\ FreeGlut.SLN project project, (if you are configuring VS2015, you can select x:\x\…. \2015\ FreeGlut.SLN Project Project)
The solution is generated in Debug mode and Release mode, respectively. (You can generate only one. It is recommended to compile in debug mode without execution. If you run the pop-up black box, ignore it. 32-bit operating systems note that eventually, when running the code in Bluebook chapter01\ Block, if you encounter a problem with freeglut_static. Lib not being opened, you should choose Debug_Static mode to recompile and generate the required freeglut_static. Lib and add it to the specified folder.)
You will see the generated.dll and.lib files in the x:\x\ FreeGlut-2.8.1 \lib\x86 directory. Please add _d to the.dll and.lib files in the Debug directory to distinguish them later. As shown in figure:

X :\x\ FreeGlut-2.8.1 \ Include \GL: :\Program Files (x86)\Microsoft Visual Studio 10.0\VC\ Include \GL: : : : : : : : : : : : : : : : : : : : : : : : : : : : : : : : : : : : : : : : : : : : : : : : : :
Copy the.dll file in the x:\x\ FreeGlut-2.8.1 \ Lib \x86 folder (and the Debug folder) to the C:\ Windows&syswow64 directory (x86 to the System32 directory).
Copy the.lib file in the x:\x\ FreeGlut-2.8.1 \lib\x86 folder (and the Debug folder) to x:\x\Microsoft Visual Studio 10.0\VC\lib.
So now the FreeGlut is done!
(Once you’ve done this, you can code check.
Test 1: build Win32 console project, add test code, compile and run.
Test two: build Win32 console project, add test code, compile and run.
II. GLEW configuration
Copy the.h file in the folder x:\x\glew-1.11.0\include\GL to the directory x:\Program Files (x86)\Microsoft Visual Studio 10.0\VC\include\GL.
Copy the.lib file in the folder x:\x\glew-1.11.0\lib\Release\Win32 to the directory x:\x\Microsoft Visual Studio 10.0\VC\lib.
Copy the.dll file from the x:\x\glew-1.11.0\bin\Release\Win32 folder to the C:\ WindowsSYSWOW64 directory. (If not, skip it.)
(Note that if VS2015 is supplied, you need to put the configuration file in x:\x\Microsoft Visual Studio 15.0…. C)
Third, GLUT configuration
Copy the.h file in the folder x:\x\ Glutdlls37Beta to the directory x:\Program Files (x86)\Microsoft Visual Studio 10.0\VC\include\GL.
Copy the.lib file under the x:\x\ Glutdlls37Beta folder to the x:\x\Microsoft Visual Studio 10.0\VC\lib directory.
Copy the.dll file under the x:\x\ Glutdlls37Beta folder to the C:\ WindowsSYSWOW64 directory.
(Note that if VS2015 is supplied, you need to put the configuration file in x:\x\Microsoft Visual Studio 15.0…. )
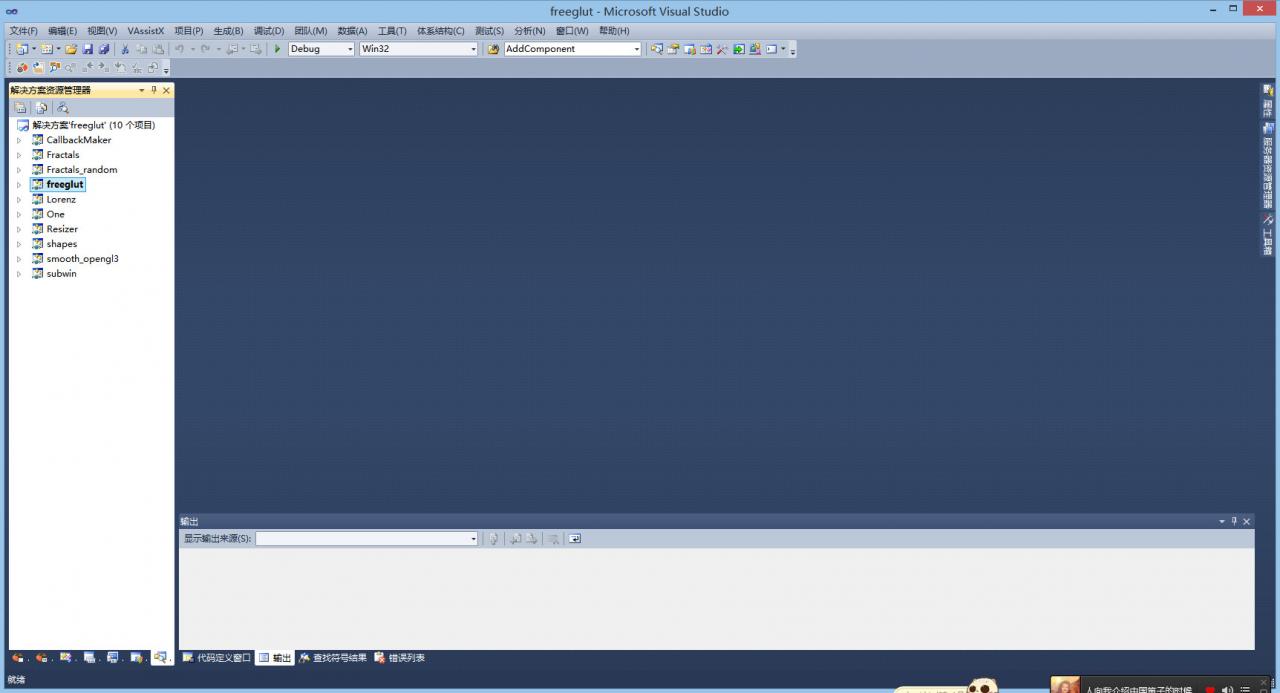
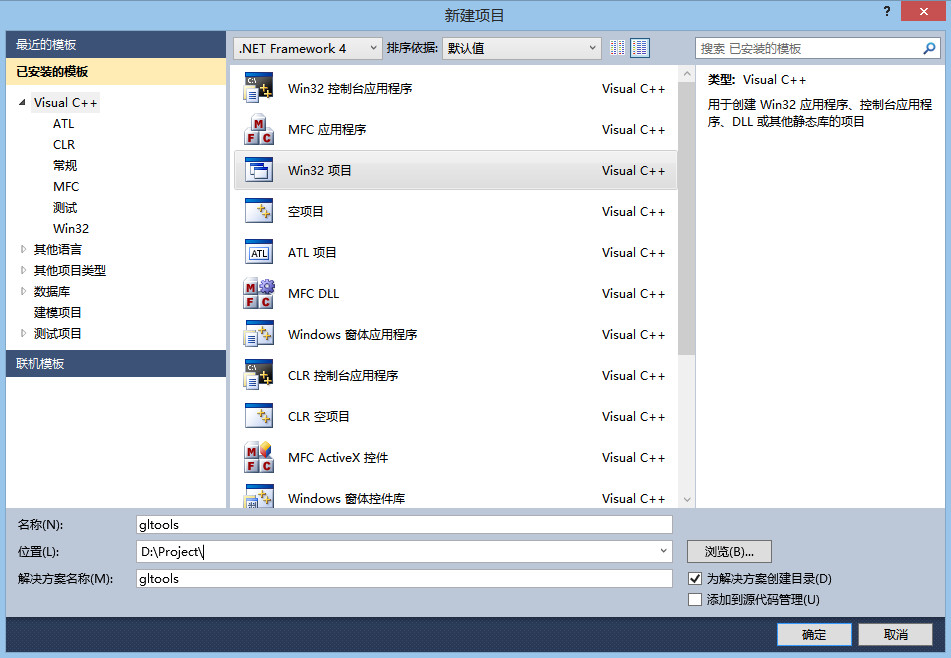
4. Build GLTools library
Create a new GLTools Win32 project, as shown in the figure below:
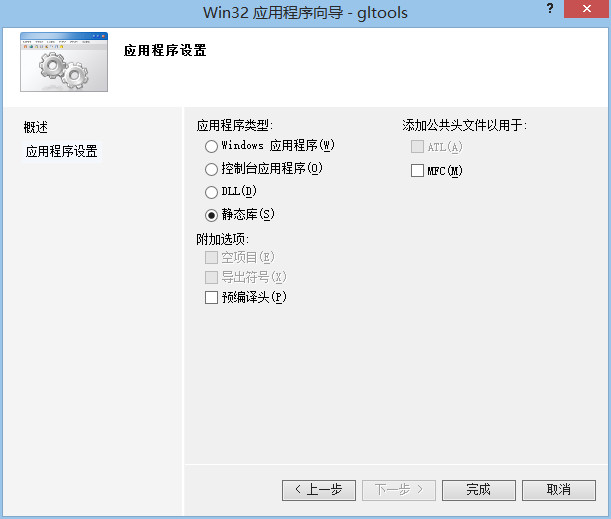
First compile, (original here has error, below is I modify)
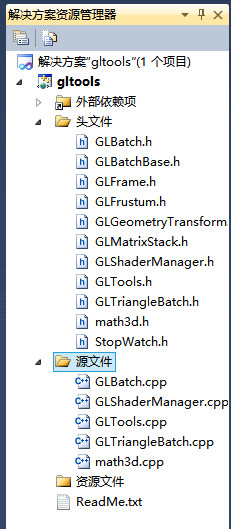
Copy the.cpp file (excluding glew.c file) in the x:\x\SB5\Src\GLTools\ Src directory to x:\x\ GLTools\ GLTools.
Copy the.h file (excluding the GL folder) in the x:\x\SB5\Src\GLTools\include directory to x:\x\ GLTools\ GLTools.
Right-click on the header file and the source file respectively and add ->; The existing item adds.h and.cpp files to the project. As shown in figure:
The compiler prompts are as follows:
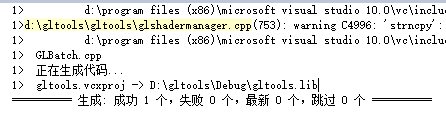
The gltools.lib file was generated successfully. It can be viewed under the x:\x\gltools\Debug directory.
Copy the.lib file to the x:\Program Files (x86)\Microsoft Visual Studio 10.0\VC\lib folder.
Copy the.h file to the x:\Program Files (x86)\Microsoft Visual Studio 10.0\VC\include folder (note that this is not the GL folder).
So gltools is OK.
Five, the test
Let’s test the environment using the examples given in the book. If the test is successful, then the OpenGL environment is ready.
The project of establishing TEST:
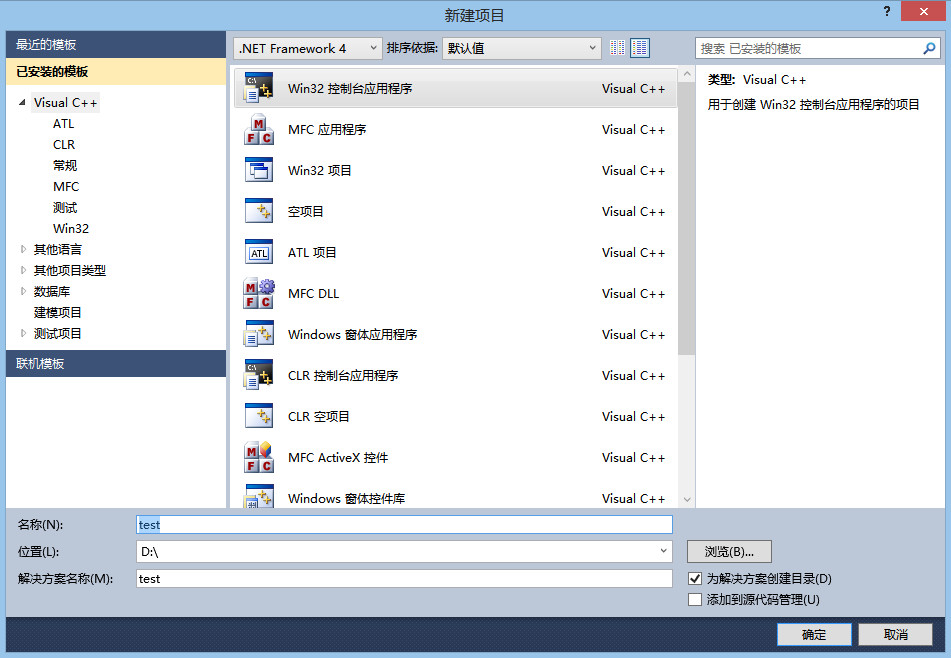
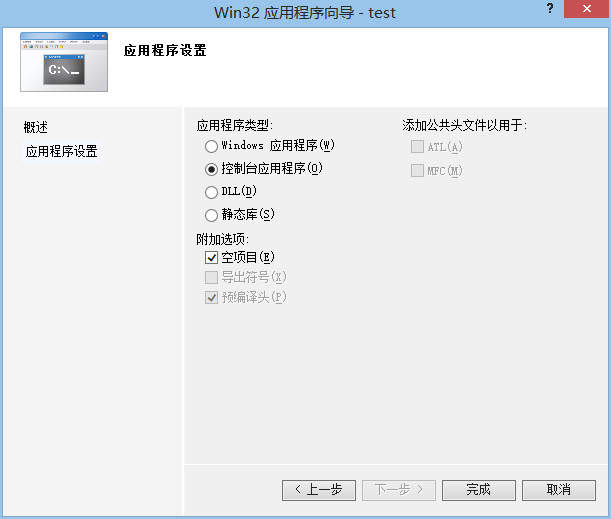
We use the example from Chapter 1 to test by copying all the files in the x:\x\SB5\Src\Chapter01\Block into the x:\x\test\test folder. Also right-click on the source file and add ->; The existing entries include the block.cpp file.
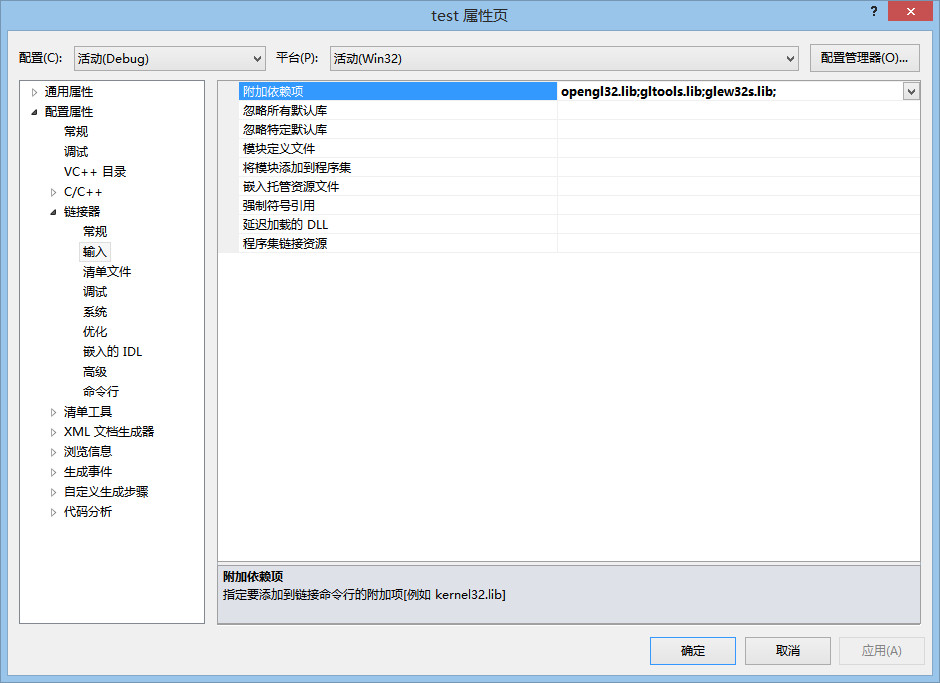
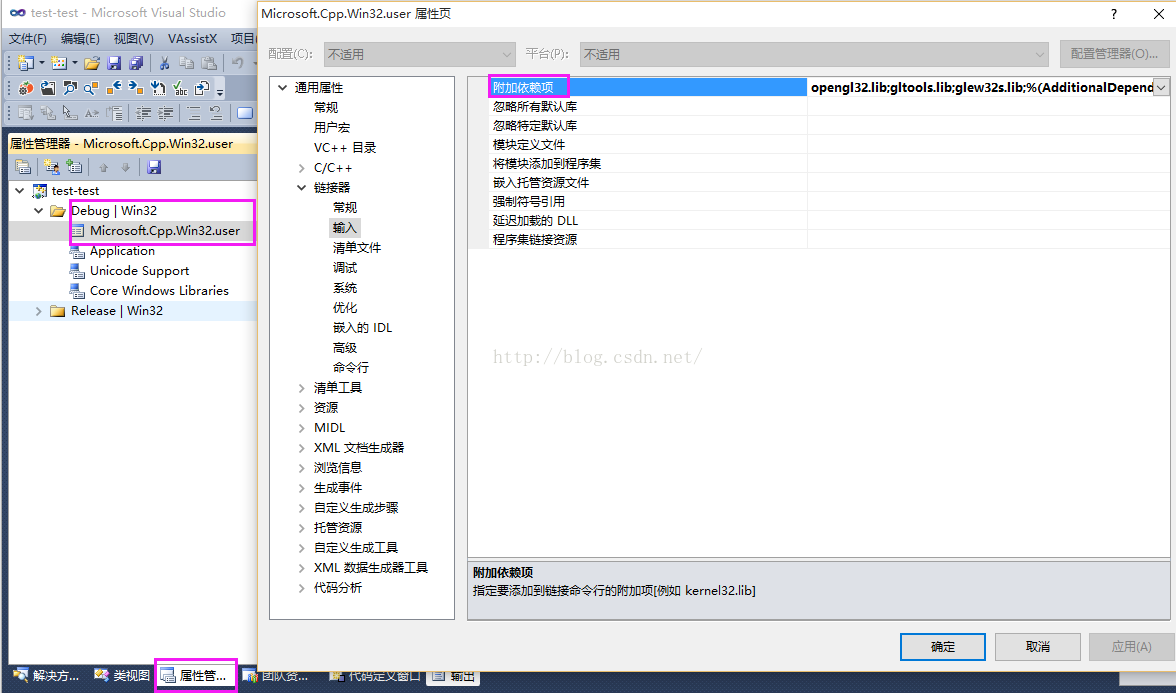
Adding Additional Dependencies (first figure) :(This way of adding dependencies only works for the current Test project. To make these.lib files available to other projects, you should add dependencies to the properties manager, as shown in the second figure below.
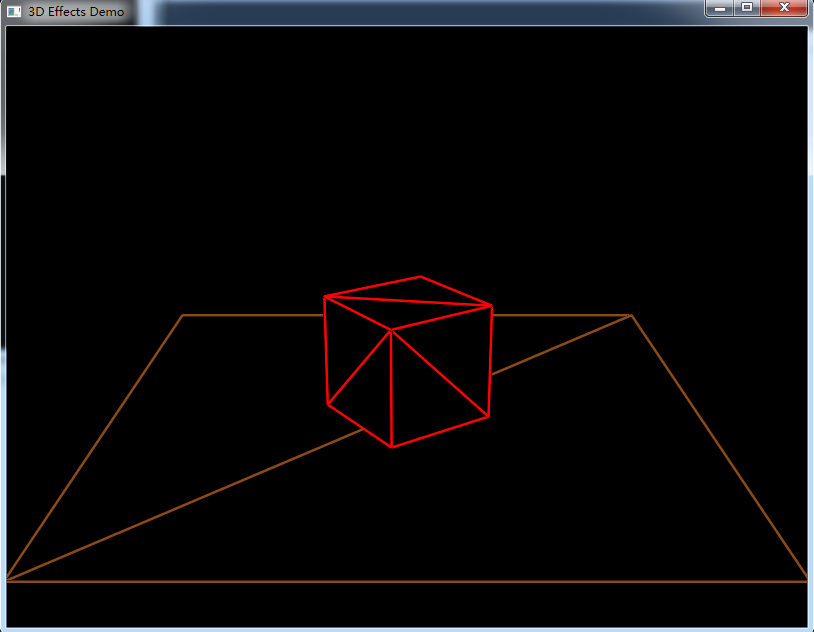
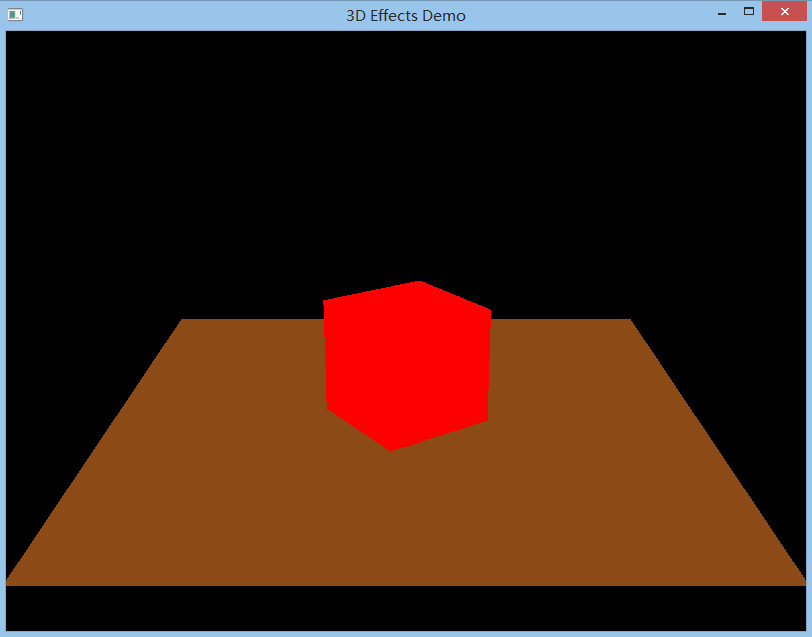
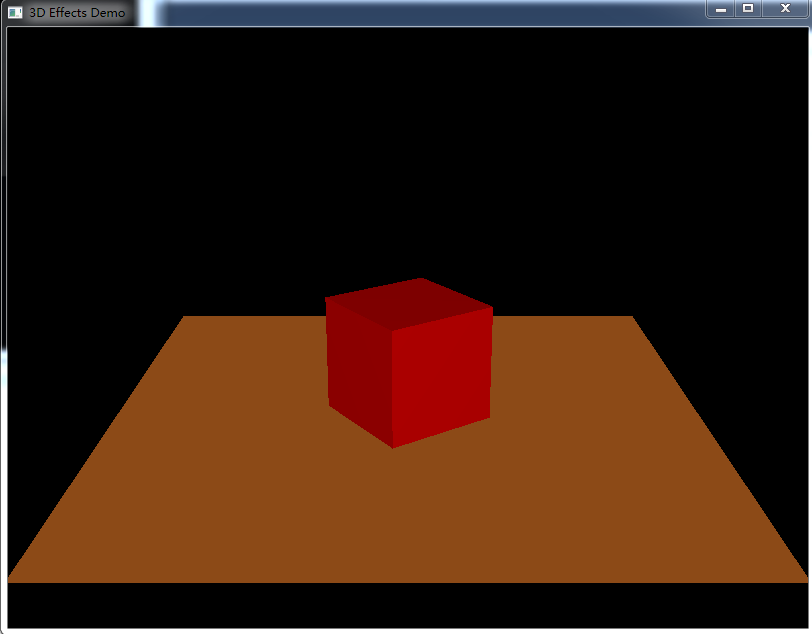
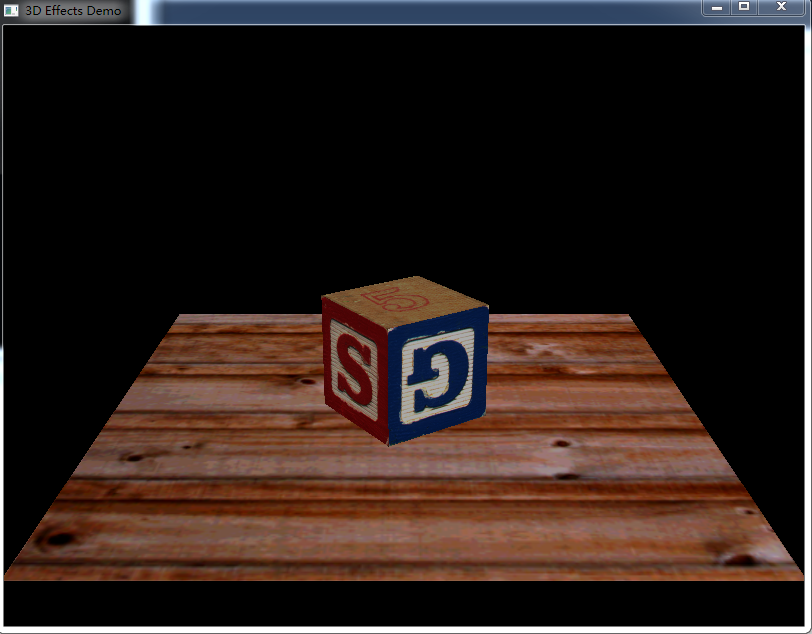
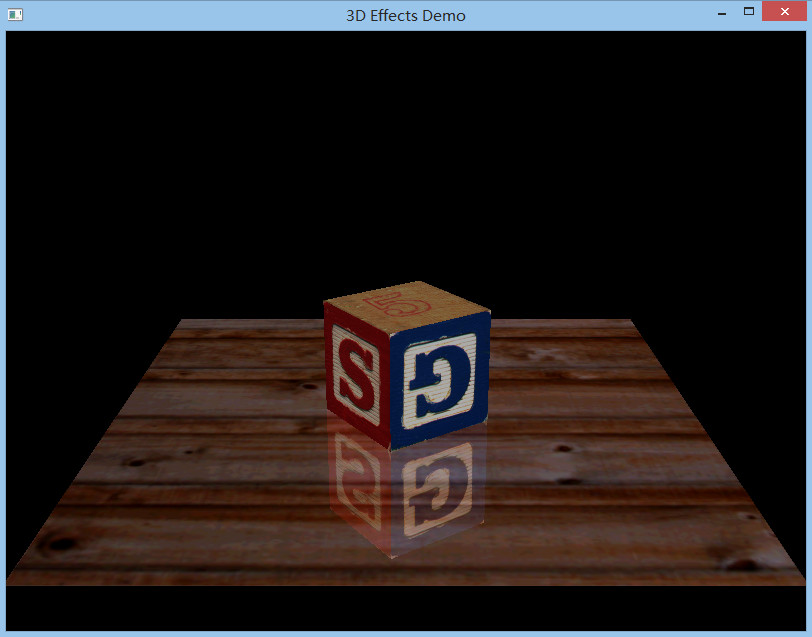
Compile and run the project, and the effect is as follows :(If there is an error in compilation, search the error information with Baidu Browser to find the corresponding solution. Or check out “Some special cases handling” at the end of this blog post for help.)
Press the space bar to transform the display effect, a total of six effects:

VI. Handling of some special cases:
Configuring the OpenGL environment exactly as described above will work on most computers. However, there are always exceptions. If the configuration fails, the following configuration details may help you solve the problem.
Case1: freeglut_static.lib could not open the problem
OpenGL SuperBibliography \SB5\SB5\ FreeGlut-2.6.0 \VisualStudio2008Static\Release FreeGlut_Static. Lib to X :\Program Files (x86)\Microsoft VisualStudio 10.0\VC\ Lib If you fail, try Plan 2.
Solution 2: Take a closer look at the FreeGLUT configuration section of this blog post, which is highlighted in bold red. Pay attention to configuration details.
case2: “math3d.h” : No such file or directory
C :\project\gltools\gltools\math3d.cpp(45): fatal error C1083: failed to open the “math3d.h” : No such file or directory header file.
Case3: UCrtBased. DLL missing
in Visual Studio 2015
Can follow this link: http://blog.csdn.net/so_geili/article/details/53009680, choose the “solution” to solve the problem.
Install and uninstall under Linux system Node.js
First, say unloading
1. Uninstall NPM first
Sudo NPM uninstall NPM -g
2. Remove node
Yum remove nodejs NPM -y
See if there’s any residue
Go to /usr/local/lib and delete all nodes and node_modules folders
Go to /usr/local/include and delete all nodes and node_modules
Go to /usr/local/bin and delete the node’s executable
Two, again install
1. Go to the Node.js website and download the Linux zip package, put it in your own directory, and then unzip it.
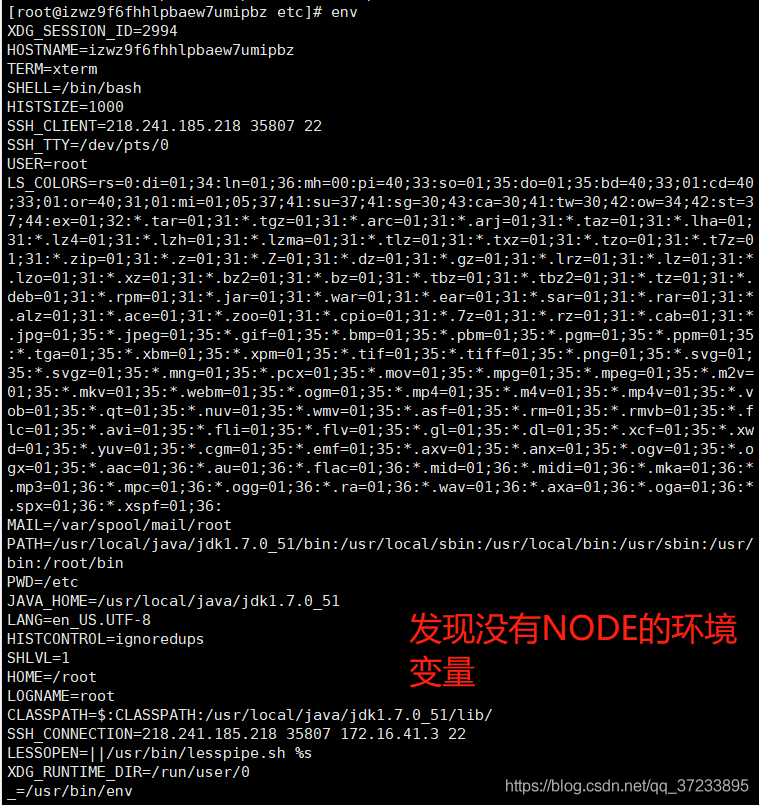
2. After unzipping, it’s time to configure the environment variables.
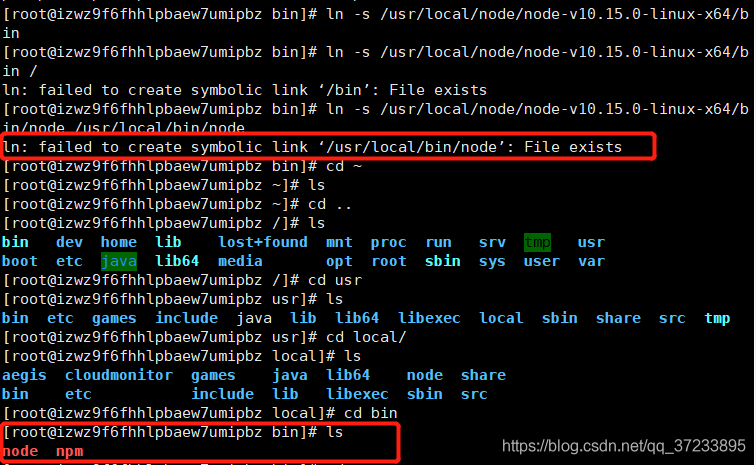
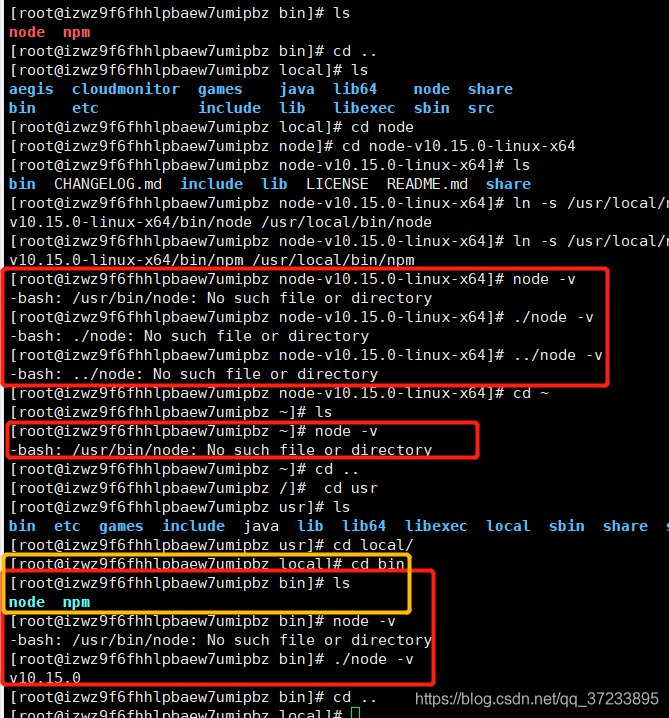
2.1. Establish soft links first. What does soft links mean?Stick a picture

Delete the node and NPM in /usr/lcoal/bin if any of the following problems occur in the resume soft link
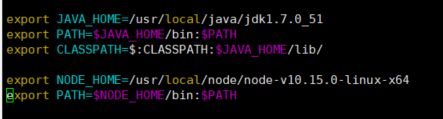
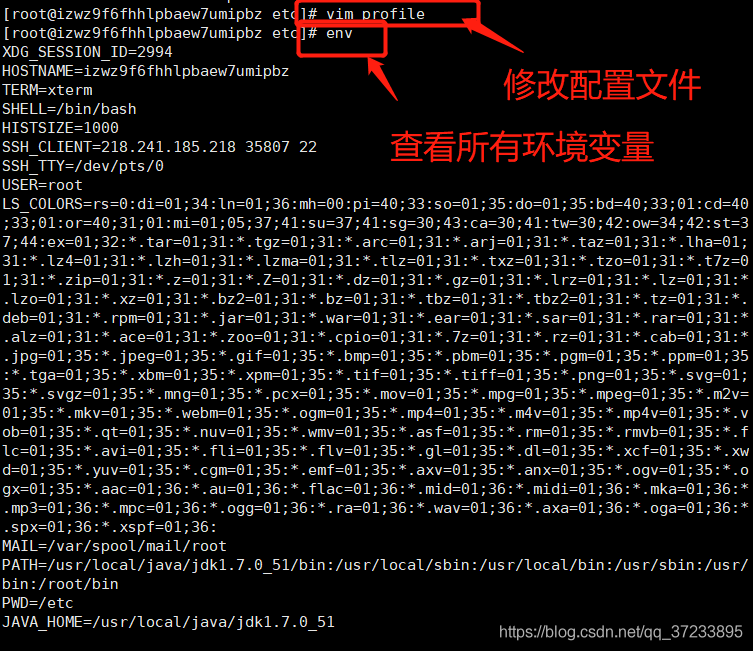
3. Change the configuration file to /etc/profile
3.1. Modify the content

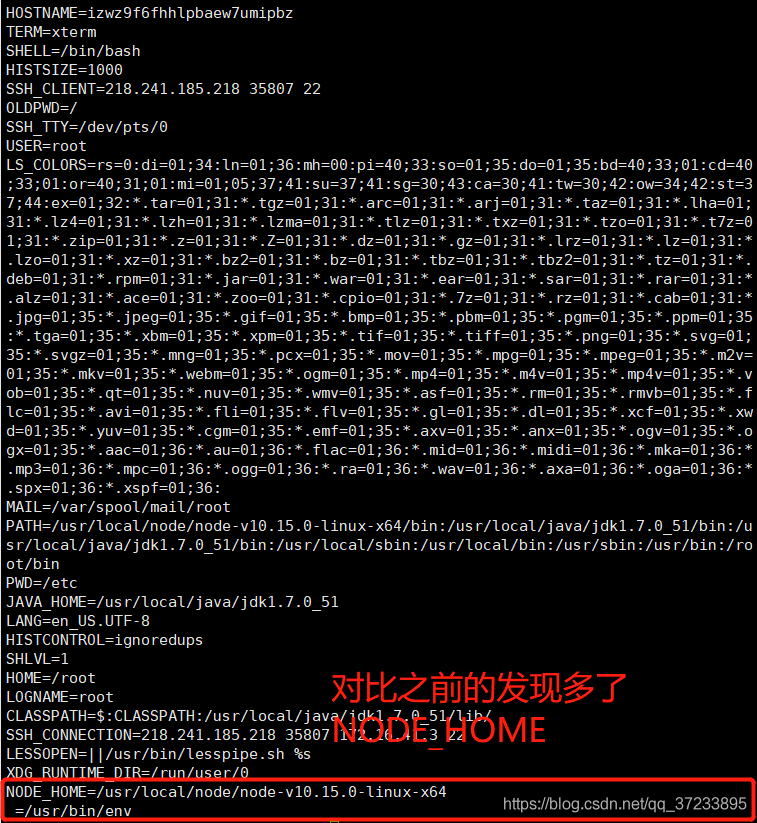
Almost like this, the beginning of their own also more chaotic.

1. Uninstall NPM first
Sudo NPM uninstall NPM -g
2. Remove node
Yum remove nodejs NPM -y
See if there’s any residue
Go to /usr/local/lib and delete all nodes and node_modules folders
Go to /usr/local/include and delete all nodes and node_modules
Go to /usr/local/bin and delete the node’s executable
Two, again install
1. Go to the Node.js website and download the Linux zip package, put it in your own directory, and then unzip it.
2. After unzipping, it’s time to configure the environment variables.
2.1. Establish soft links first. What does soft links mean?Stick a picture
Delete the node and NPM in /usr/lcoal/bin if any of the following problems occur in the resume soft link
3. Change the configuration file to /etc/profile
3.1. Modify the content
Almost like this, the beginning of their own also more chaotic.
Vs2015 configuring OpenGL development environment: configuration of glfw library and glad Library
Recently, I was doing the acquisition of point cloud data for Kinect v2, and I saw that a blog was using OpenGL, so I configured the environment accordingly, which was the first step for me to obtain point cloud. The blogger answered my question enthusiastically and suggested me to use PCL, which could display the point cloud and also save the point cloud. OpenGL configuration is a bit troublesome, but overall it is much easier to have the data. I have been looking for the data for a long time, and there are many problems in the process, but they have been solved one by one, Mark.
So what I’m going to say here is that Glut doesn’t need to be configured, it’s too low. Pro test, will never report error, very smooth.
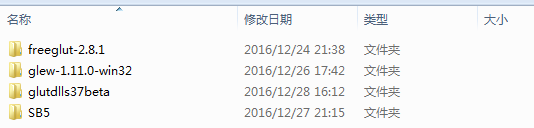
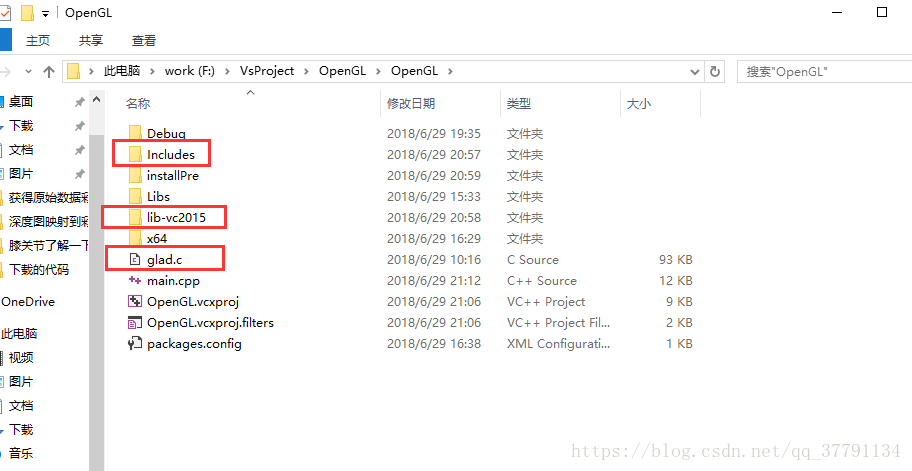
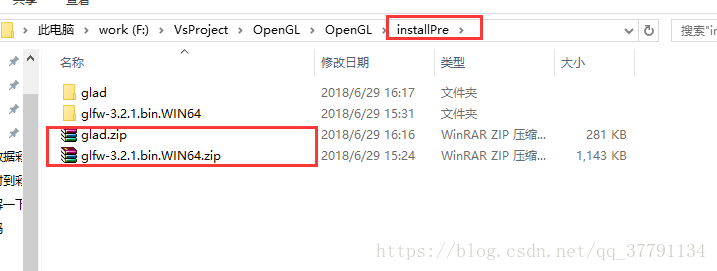
I am afraid that the back will be a little unclear, so I build the file, screenshots for everyone to see.
Build the project OpenGL empty with VS.
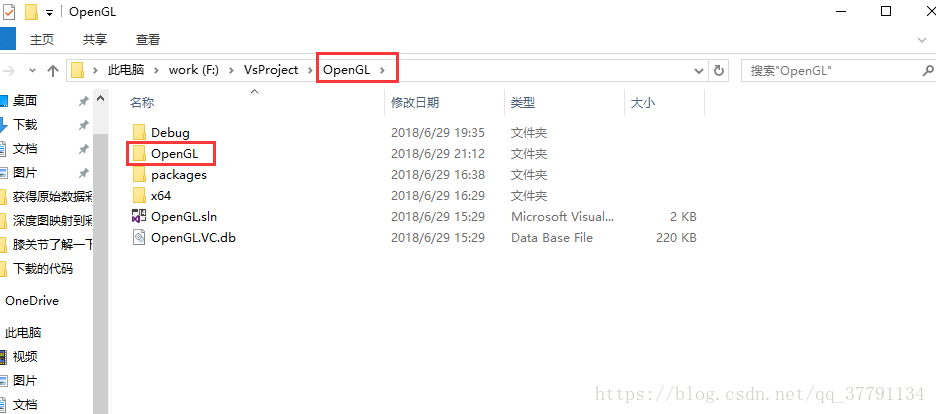
Then build an Include in OpenGL (the next step is Indlude). The two files prepared are shown in the red box below.
So what I’m going to say here is that Glut doesn’t need to be configured, it’s too low. Pro test, will never report error, very smooth.
I am afraid that the back will be a little unclear, so I build the file, screenshots for everyone to see.
Build the project OpenGL empty with VS.
Then build an Include in OpenGL (the next step is Indlude). The two files prepared are shown in the red box below.
1. Go to GLFW official website to download the corresponding version of the configuration file:
http://www.glfw.org/download.html
Whether your system is 32-bit or 64-bit, it is recommended to download a 32-bit configuration file, as shown below:
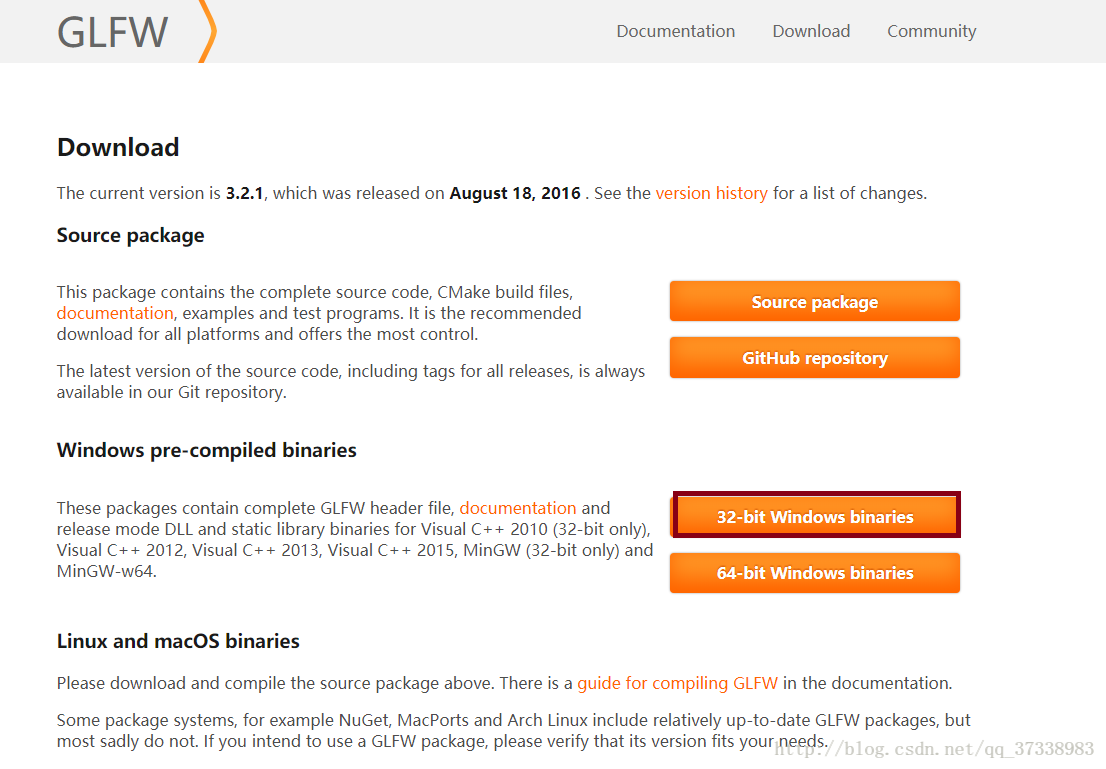
But I have a 64 bit configuration is also good, no problem.
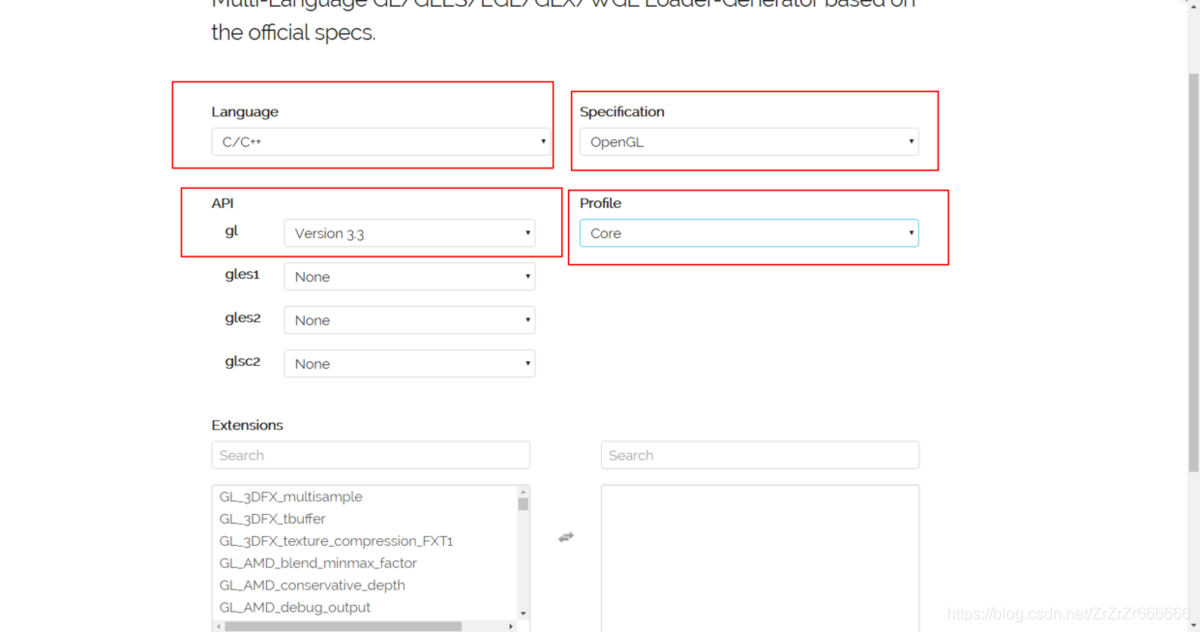
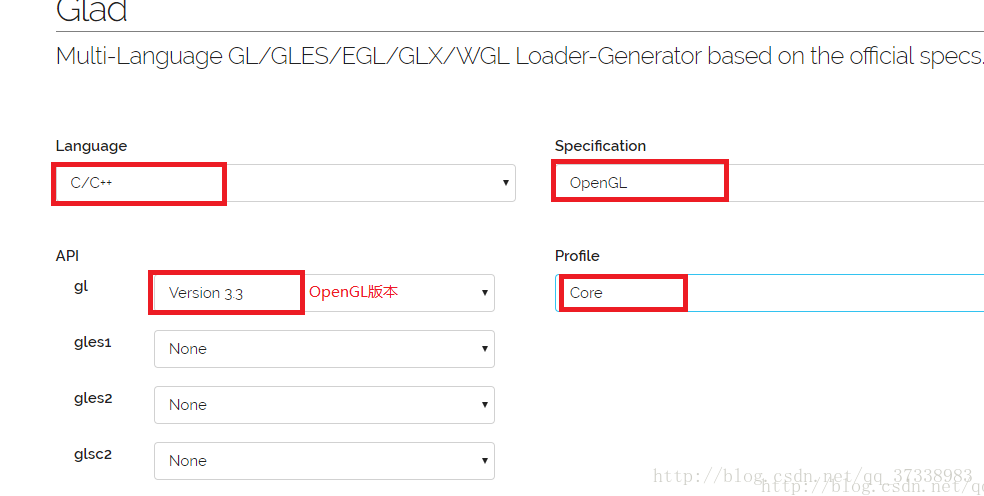
Go to the GLAD online service to get the GLAD. H profile http://glad.dav1d.de/
Fill in the following information to get the glad.zip file:
2. Unzip the downloaded file to get the configuration library of each version of VS. You can choose according to the version of VS you have installed. After decompression glad.zip can see two folders: include and SRC, we will include KHR and glad in folder folder to include new folder, as shown in the figure below:
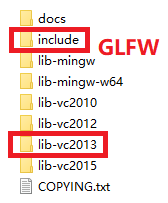

Then place the lib-vc2013 folder and include folder in the same folder, as shown in the figure below:

Good to here folder finishing work, then see how to configure!!
3. Copy the glfw3.dll files from the lib-vc2013 folder to the system folders: C:\ windows\ System32 and C:\ windows\ SysWOW64.
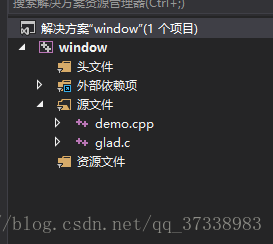
4. Open VS2013, create a new console application, create a new demo.cpp, and add the glad.c in the SRC folder from which the glad.zip is unzips to the project, as shown in the figure below:
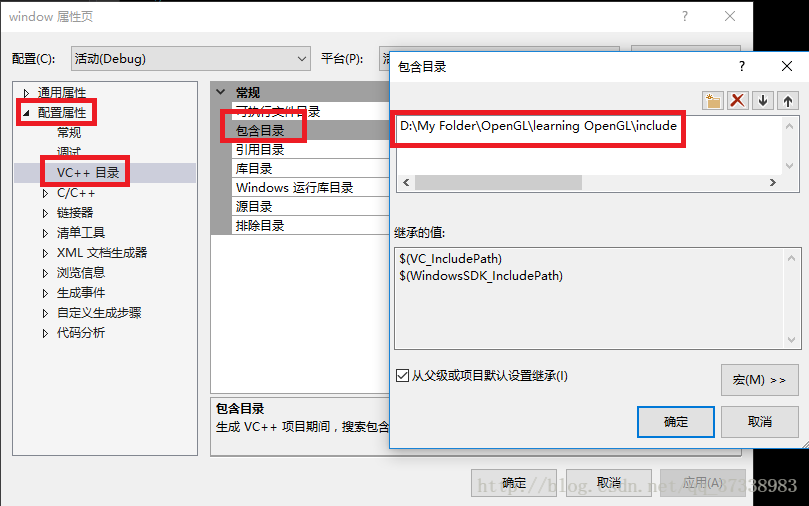
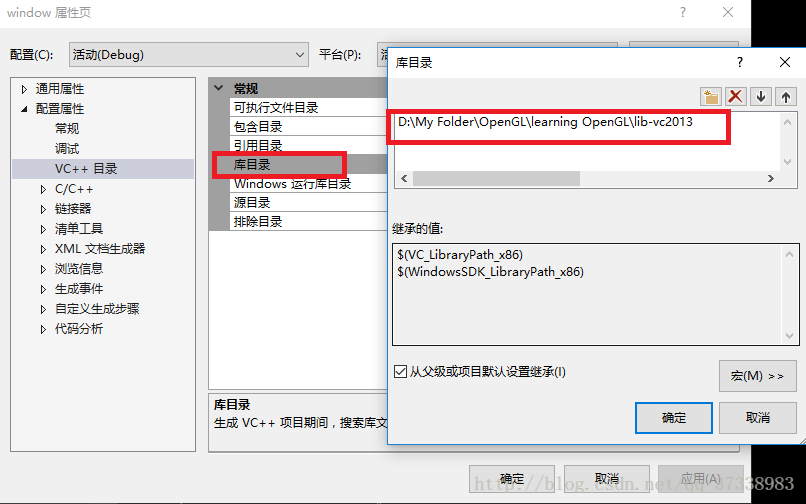
5. Link to contain directory and library directory, right-click Solution: Properties ->; Configure properties ->; VC++ Directory: Include the paths to the two folders from Step 2, as shown in the figure below:
6. Link libraries: opengl32.lib and glfw3.lib. Right-click Solution: Properties ->; Configure properties ->; The linker – & gt; Add a dependency, as shown in the figure below:
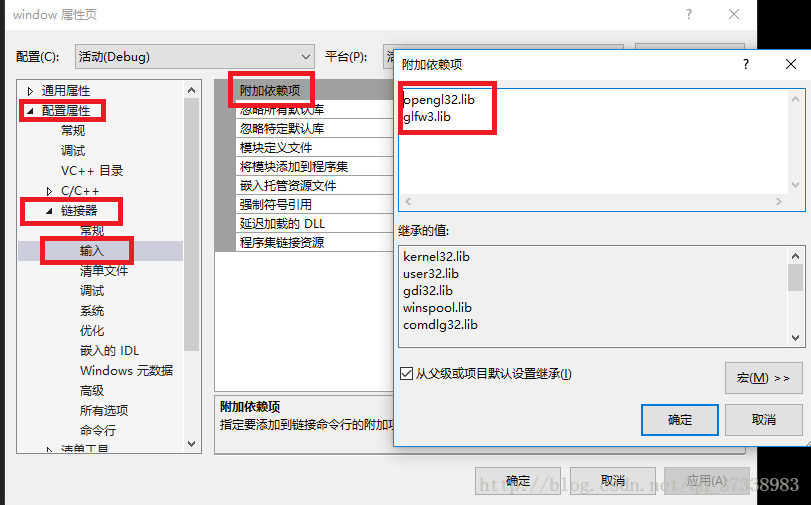
OpenGL32. lib above, VS installed with the built-in ha, don’t worry about not.
Here, the configuration is complete, let’s run the first example!!
The demo will see:
https://blog.csdn.net/qq_37338983/article/details/78997179 (blog write very clear)
You can leave me a message if you have any questions.
Installing and uninstalling nodejs in Linux
Installation:
1. Download
Uname -a to view the Linux system version, go to the NodeJS official website to download the corresponding NodeJS compressed file
2. Upload & amp; Unpack & amp; renamed
Yum install -y LRZSZ and install the file node-v10.16.0-linux-x64.tar.xz. If you want to install LRZSZ, do not install the file node-v10.16.0-linux-x64.tar.xz.
⑵ Unzip tar-xvf node-v10.16.0-linux-x64.tar.xz. ⑵ Unzip tar-xvf node-v10.16.0-linux-x64.tar.xz
⑶ Rename it to nodejs: mv node-v10.16.0-linux-x64 nodejs
3. Establish soft connection and make it global (APP is the directory where I installed NodeJS)
(1) ln -s/app/nodejs/bin/node/usr/local/bin /
2 ln -s/app/nodejs/bin/NPM/usr/local/bin /
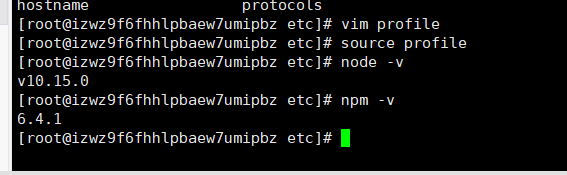
4. Check global
Any position node – v view nodejs version of NPM – v view NPM version number, such as display shows successful installation
Uninstall:
yum remove nodejs NPM -y
yum remove nodejs NPM -y
yum remove nodejs NPM -y
2. Manually delete residual files
Go to /usr/local/lib and delete all nodes and node_modules
go to /usr/local/include and delete all nodes and node_modules
to /usr/local/bin and delete all nodes’ executables
3. If you need to install again, follow the above installation method
1. Download
Uname -a to view the Linux system version, go to the NodeJS official website to download the corresponding NodeJS compressed file
2. Upload & amp; Unpack & amp; renamed
Yum install -y LRZSZ and install the file node-v10.16.0-linux-x64.tar.xz. If you want to install LRZSZ, do not install the file node-v10.16.0-linux-x64.tar.xz.
⑵ Unzip tar-xvf node-v10.16.0-linux-x64.tar.xz. ⑵ Unzip tar-xvf node-v10.16.0-linux-x64.tar.xz
⑶ Rename it to nodejs: mv node-v10.16.0-linux-x64 nodejs
3. Establish soft connection and make it global (APP is the directory where I installed NodeJS)
(1) ln -s/app/nodejs/bin/node/usr/local/bin /
2 ln -s/app/nodejs/bin/NPM/usr/local/bin /
4. Check global
Any position node – v view nodejs version of NPM – v view NPM version number, such as display shows successful installation
Uninstall:
yum remove nodejs NPM -y
yum remove nodejs NPM -y
yum remove nodejs NPM -y
2. Manually delete residual files
Go to /usr/local/lib and delete all nodes and node_modules
go to /usr/local/include and delete all nodes and node_modules
to /usr/local/bin and delete all nodes’ executables
3. If you need to install again, follow the above installation method
Configuring OpenGL in Visual Studio 2015
This article is republished from Baidu Lesson: Configuring OpenGL in Visual Studio 2015

Program test:
#include "stdafx.h"
#include <GL/glut.h>


void init(void)
{
	glClearColor(1.0, 1.0, 1.0, 0.0);
	glMatrixMode(GL_PROJECTION);
	gluOrtho2D(0.0, 200.0, 0.0, 150.0);
}

void lineSegment(void)
{
	glClear(GL_COLOR_BUFFER_BIT);
	glColor3f(0.0, 0.4, 0.2);
	glBegin(GL_LINES);
	glVertex2i(180, 15);
	glVertex2i(10, 145);
	glEnd();
	glFlush();
}

int main(int argc, char** argv)
{
	glutInit(&argc, argv);
	glutInitDisplayMode(GLUT_SINGLE | GLUT_RGB);
	glutInitWindowPosition(50, 100);
	glutInitWindowSize(400, 300);
	glutCreateWindow("An Example OpenGL Program");

	init();
	glutDisplayFunc(lineSegment);
	glutMainLoop();
	return 0;
}
Program running results:
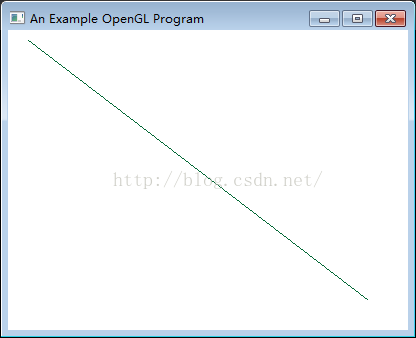
The simplest course of configuring OpenGL in vs2015
This may be the simplest configuration of OpenGL related library method, this semester needs to learn graphics, so the Internet to find a variety of configuration OpenGL method, found that many people are copied to copy, many methods are wrong. Otherwise, the PC environment is different and various.lib file lookup errors appear in the configuration. Also many methods need to configure the external environment, is also troublesome. Today I will introduce my own method, do not need to consider the computer environment, convenient and simple.
1. Upgrade to VS2015
I am using VS2015. I do not know about the previous version, nor do I know whether it can be used, so I suggest you to upgrade to 2015. After all, do you use the new version or not?
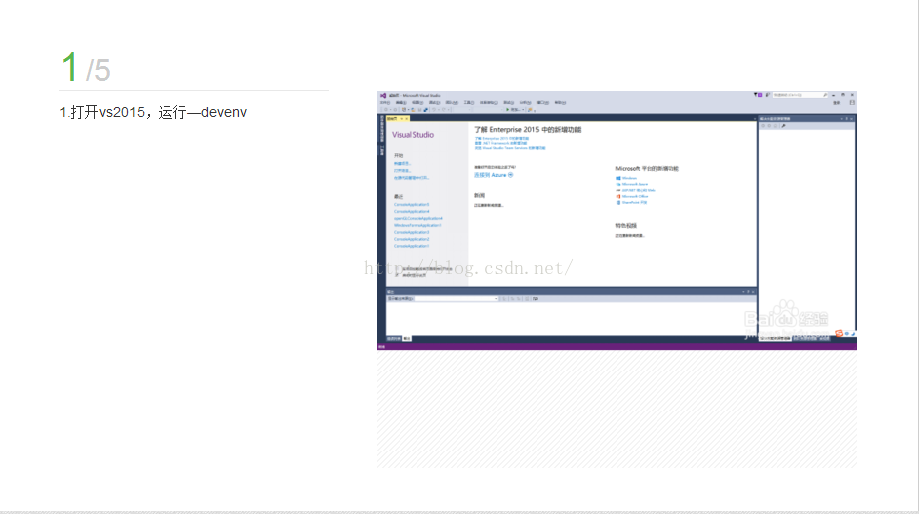
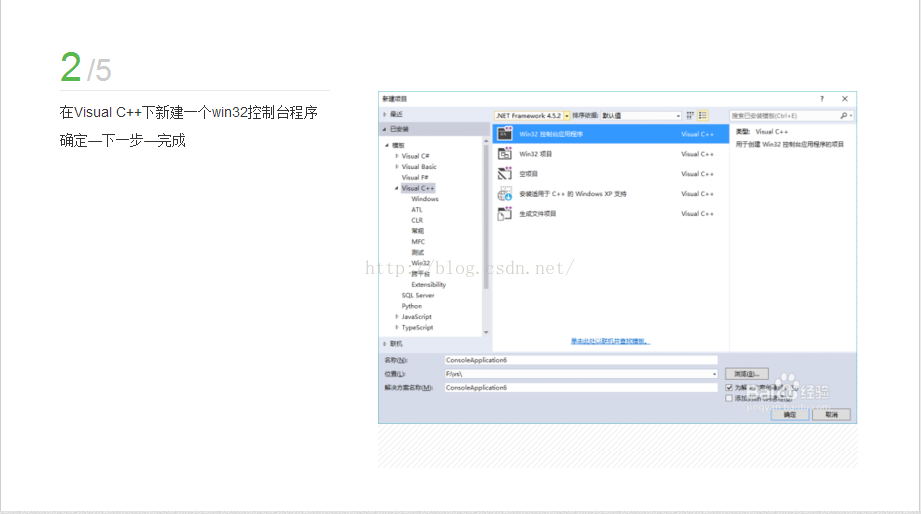
2. Open VS2015 and create a new Win32 project (won’t create the wall to go).
Name it whatever you want, place it whatever you want.
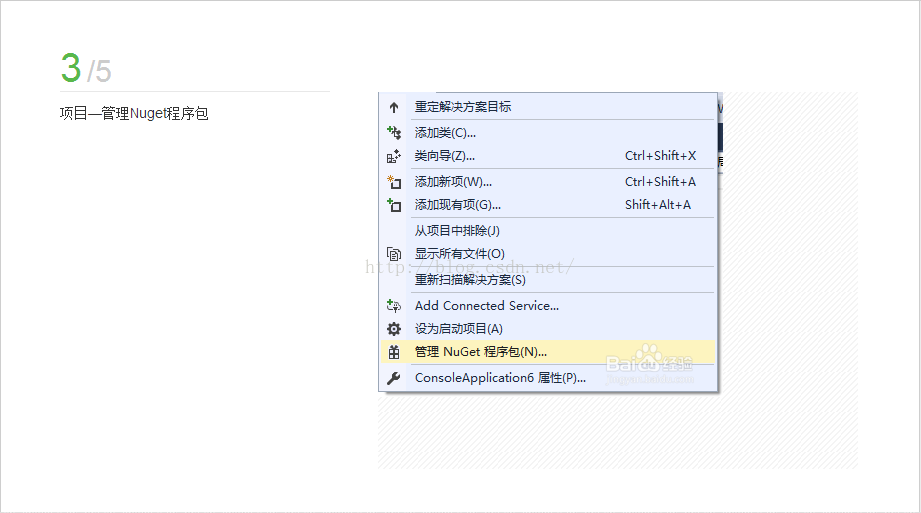
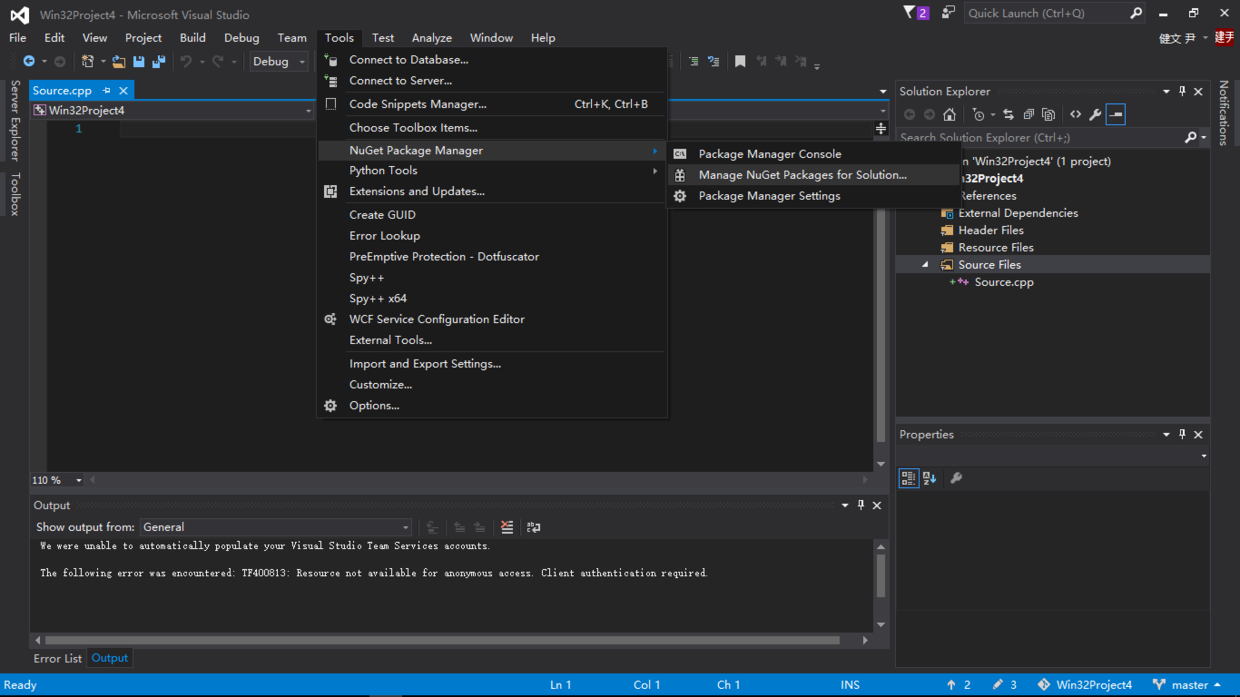
3. Use NUTGET
This step is the most important and the only step in the configuration process.
vs2015 toolbars -> NuGet Package Manager-> Manage Nuget Packages for solution
The diagram below
1. Upgrade to VS2015
I am using VS2015. I do not know about the previous version, nor do I know whether it can be used, so I suggest you to upgrade to 2015. After all, do you use the new version or not?
2. Open VS2015 and create a new Win32 project (won’t create the wall to go).
Name it whatever you want, place it whatever you want.
3. Use NUTGET
This step is the most important and the only step in the configuration process.
vs2015 toolbars -> NuGet Package Manager-> Manage Nuget Packages for solution
The diagram below
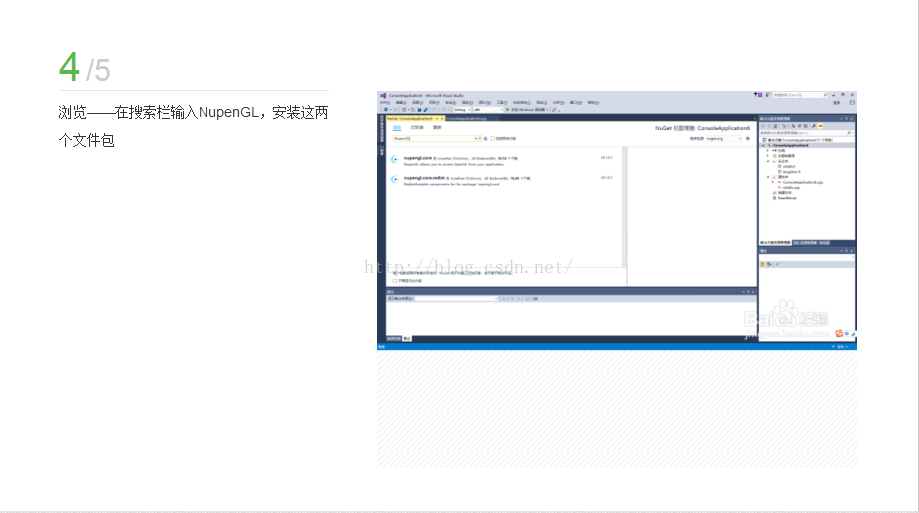
And then you see something like this
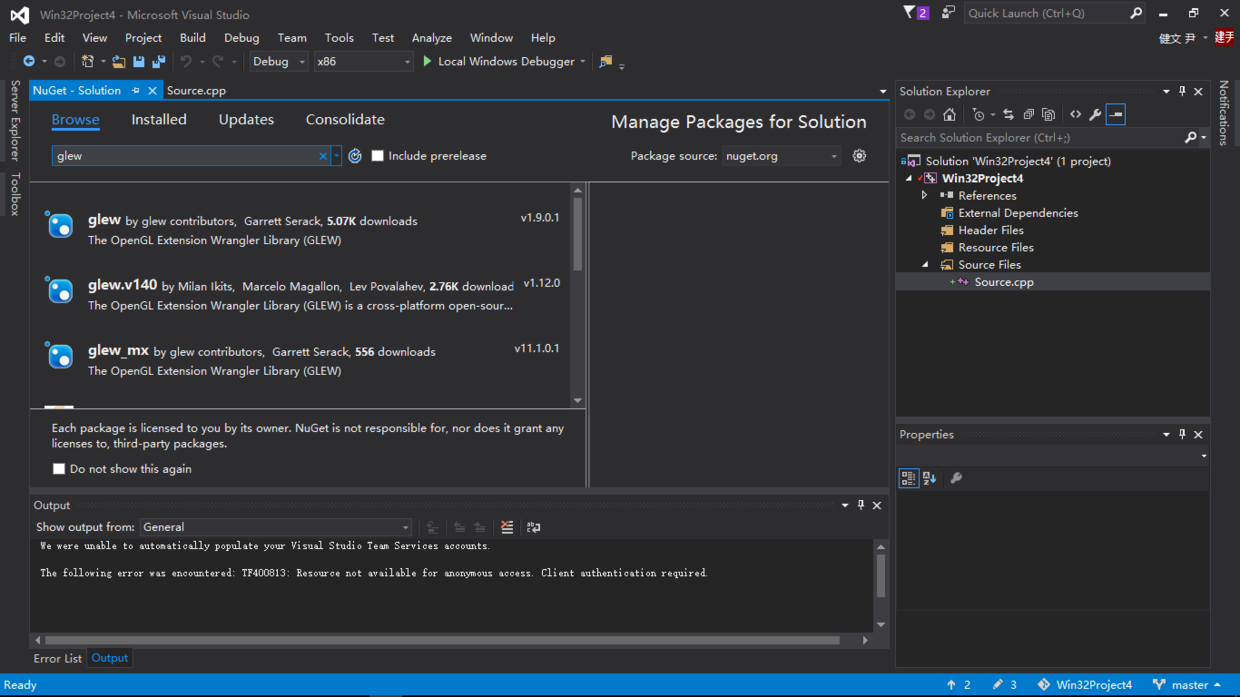
Search the Browse window for any library you want. For example, here I want to configure glew and freeGLUT, I’ll search glew and then click Install at the top.
When configuring FreeGLUT, remember to select the second one. In fact, you can look at the installation amount, and select the one with the highest installation amount as the safest install.
4. Test
#include <stdio.h>
#include <GL/glew.h>
#include <GL/glut.h>
void init()
{
    glClearColor(0.0f, 0.0f, 0.0f, 0.0f);
}

void display()
{
    glClear(GL_COLOR_BUFFER_BIT);
}

int main(int argc, char* argv[])
{
    glutInit(&argc, argv);
    glutInitWindowPosition(100, 100);
    glutInitWindowSize(800, 480);
    glutInitDisplayMode(GLUT_RGBA);

    glutCreateWindow("opengl");

    glewInit();

    init();

    glutDisplayFunc(display);

    glutMainLoop();
    return 0;
}
Run this code, if run successfully indicates that the configuration is successful, do not need any reference code what, super convenient!!
if you’re running failure is your problem, it’s ok with me (low ˇ ∀ ˇ “)