A few days ago, at the time of reconstructing an Android project, joined the
 RXJava ,  RxAndroid ,  Retrofit  to support development response type, and refactor the code, refactoring everything but in running an  Java lang. NoClassDefFoundError  this error, and in a few test machine shows the name of the class is different also, For example, on MI4, there is no Handler, and on Huawei, there is no OKHttputils class. This is very confusing. After searching Google, we can't find the problem, but on another Samsung test machine, there is no problem, and finally we find that Multidex is the problem.

Some third party libraries were added during the refactoring, which pushed the number of methods in the entire Android application beyond 65535. The following error should occur when packaging
java.lang.IllegalArgumentException: method ID not in [0, 0xffff]: 65536
at com.android.dx.merge.DexMerger$6.updateIndex(DexMerger.java:501)
at com.android.dx.merge.DexMerger$IdMerger.mergeSorted(DexMerger.java:282)
at com.android.dx.merge.DexMerger.mergeMethodIds(DexMerger.java:490)
at com.android.dx.merge.DexMerger.mergeDexes(DexMerger.java:167)
at com.android.dx.merge.DexMerger.merge(DexMerger.java:188)
at com.android.dx.command.dexer.Main.mergeLibraryDexBuffers(Main.java:439)
at com.android.dx.command.dexer.Main.runMonoDex(Main.java:287)
at com.android.dx.command.dexer.Main.run(Main.java:230)
at com.android.dx.command.dexer.Main.main(Main.java:199)
at com.android.dx.command.Main.main(Main.java:103)

multiDexEnabled true z multiDexEnabled true  defaultConfig z multiDexEnabled true Automatically when a method is more than 65535 hit two Dex package named  classes. Dex   classes2. Dex , some methods were scored the second Dex package, namely the  classes2. Dex , resulted in 5.0 the following models can't run the error.

Here's the solution:

1. defaultConfigcode> m>dexEnabled true is used>enable MultiDex

2.  is added in the dependence on the compile 'com. Android. Support: multidex: 1.0.1'  support package for 5.0 the following systems

3. If your project already contains the Application class, then let it inherits. Android support. Multidex. MultiDexApplication class, if your Application has inherited the other classes and do not want to do change, so there's another way of using, overwrite attachBaseContext () method:
public class MyApplication extends FooApplication {
        @Override
    protected void attachBaseContext(Context base) {
        super.attachBaseContext(base);
        MultiDex.install(this);
    }
}
 >
> 

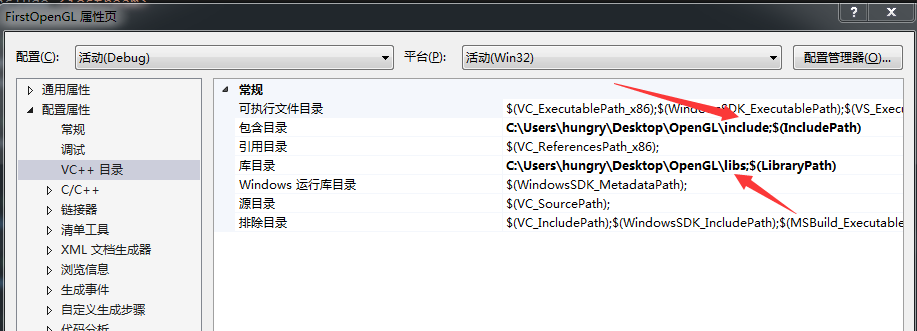


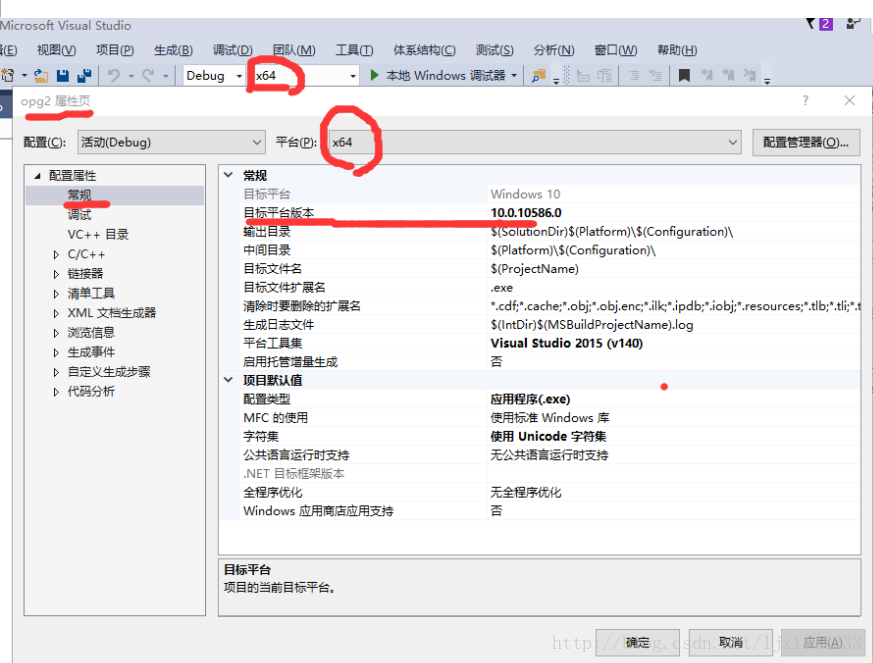
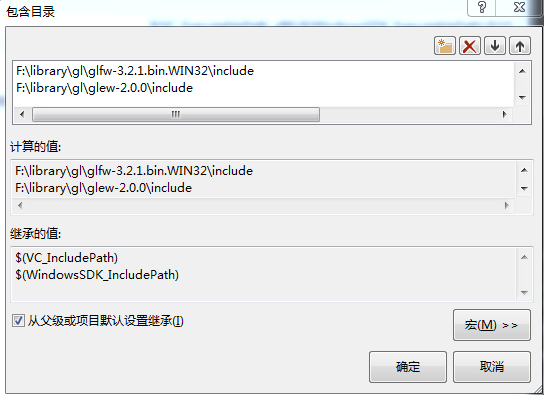
 : Packages \nupengl. Core.0.1.0.1\build\native\include
  : Packages \nupengl. Core.0.1.0.1\build\native\include

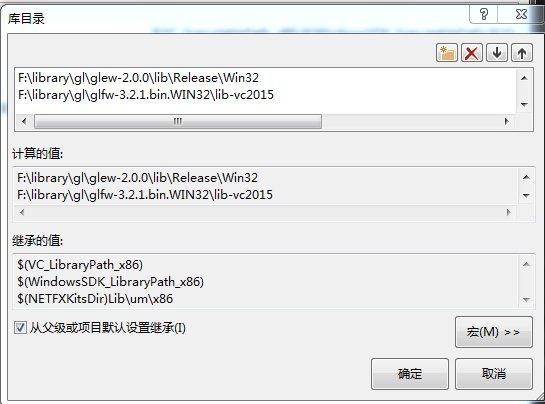 :
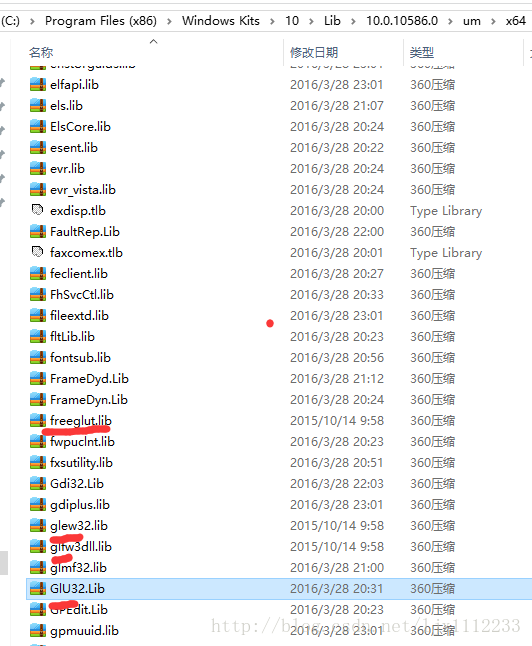
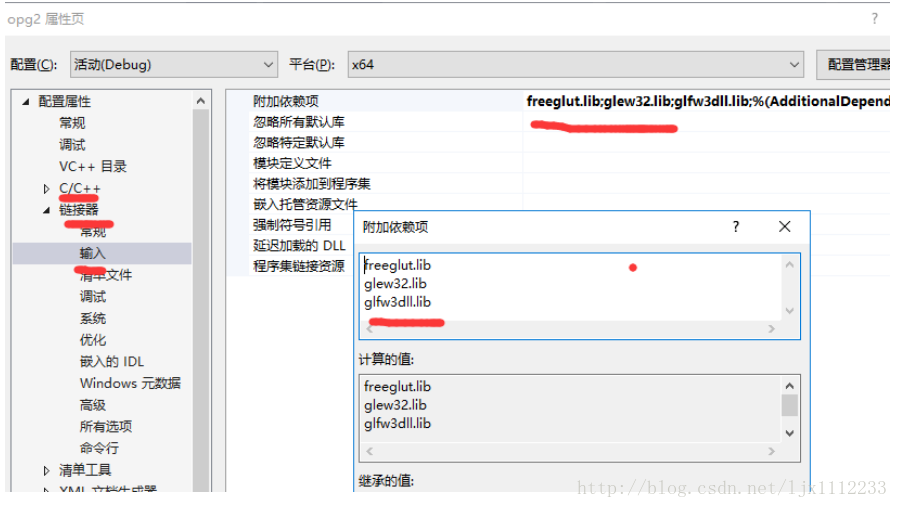
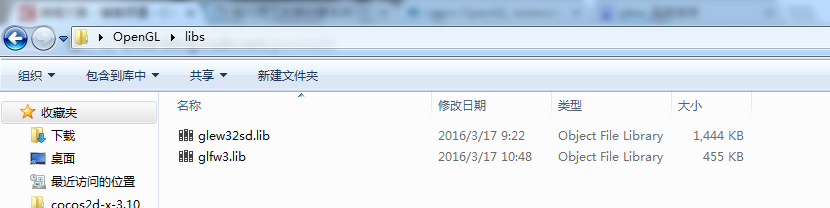
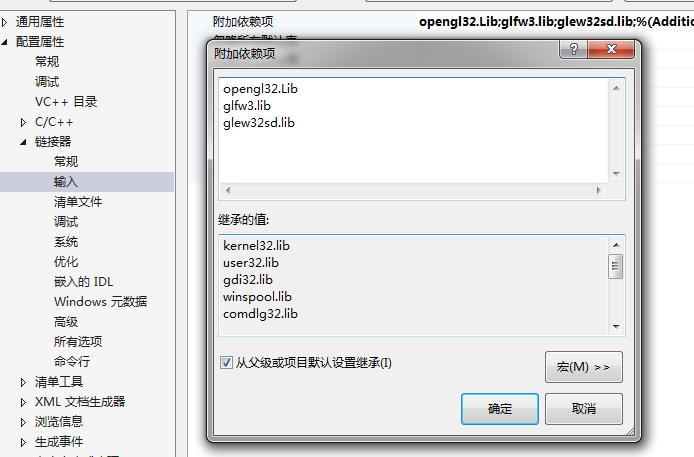
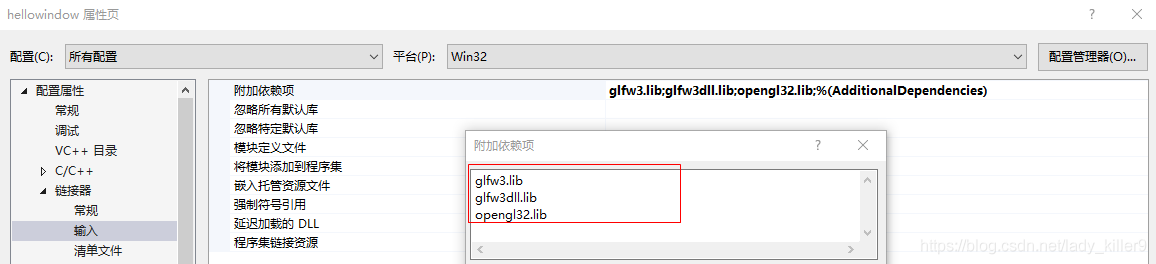
: 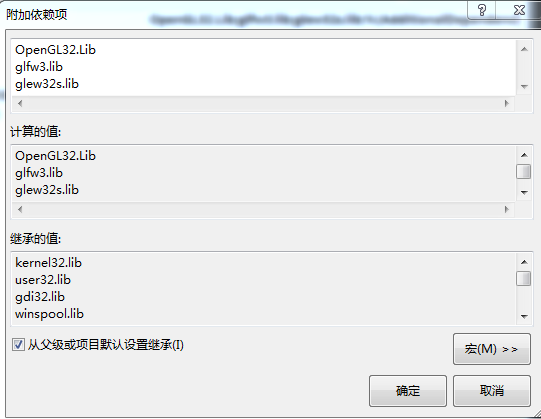 :>; Input is added in the additional dependencies OpenGL32. Lib, glfw32. Lib, glew32s. Lib