Tag Archives: VS2013

Vs2013 + glfw + glew configure OpenGL development environment

Transfer: http://blog.csdn.net/u011926277/article/details/50912638

Recently found a very good learning OpenGL basics website, click open the link. Since the configuration environment section is not very detailed, after many days of struggle, the development environment was successfully configured, for the record.
1. Download GLFW. The URL is: Click the open link. Because still have over the wall, so use the github download.
2. Download cMake. The URL is: Click the open link. The download is the version used by the author of this site, the Win32 Installer.
3. Download Glew. The URL is: Click the open link. Download the zip package, because the method used here is native compilation.

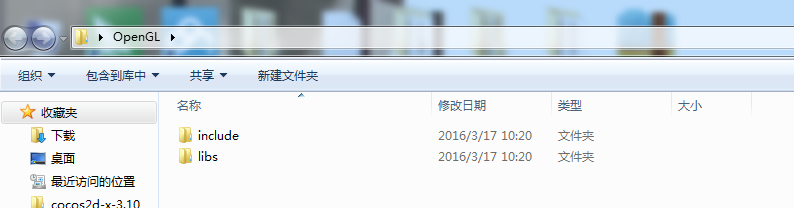
1> After the tool is prepared, a folder is set up in a directory to place the source code and library. OpenGL folder is set up on the machine, and include and libs folders are set up under it to place the source code and library respectively. The screenshot is shown below.

2> Since glew does not use cMake, glew is compiled first to get the required libraries.
A. Unpack Glew’s zip package, enter the build directory, and open the corresponding project with the corresponding version of VS (select the project under VS12 directory). VS2013 is used for this machine.
B. Open glew.sln with VS2013 or later and compile the project (right-click ->; Generate the solution).
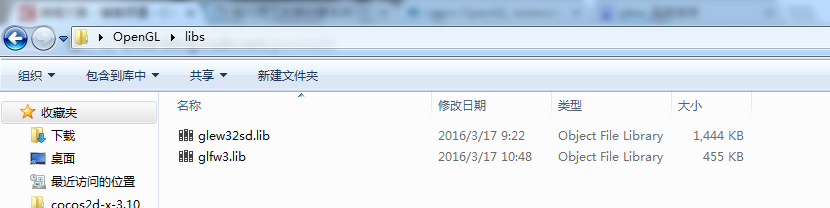
C. Open glew-2.0.0\lib\Debug\Win32 and copy glew32sd.lib to OpenGL/libs.
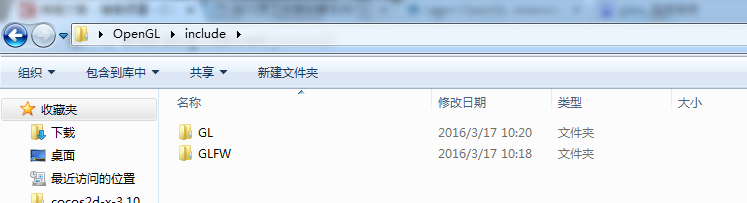
D. Copy the GL folder from glew-2.0.0\include folder to the OpenGL/include folder.

3> To prepare the GLFW library, use the CMake tool to first generate the project and then compile it. The process is as follows.
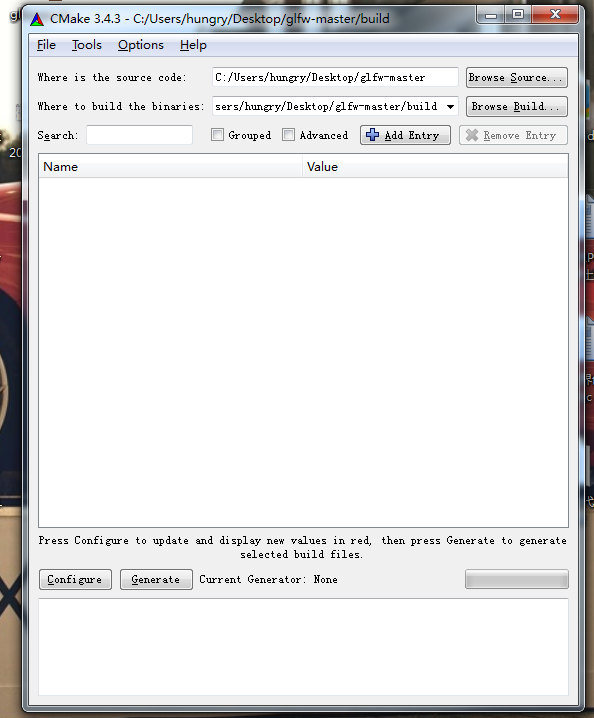
A. After installing cMake, open cMake (cmake-gui) and click Browse Source to set the directory to the GLFW directory.
B. Click Browse Build and set the directory to the GLFW/Build folder. (The Build folder here needs to be created by yourself) as follows.

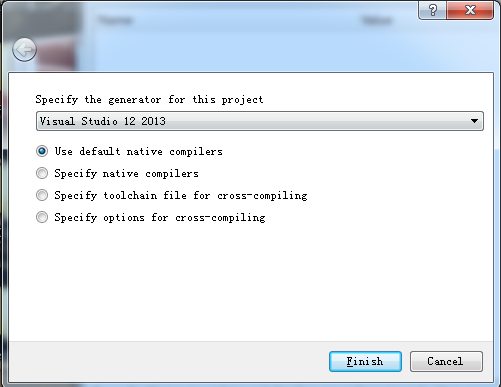
C. Click Configure in the lower left corner and select the target platform. Since this is VS2013, select Visio Studio 12 2013 and click OK.
D. Then click Configure again, and click Generate to build the project. The selection status is as follows.

E. Close cMake. Open the project in vs2013, compile it, and generate glfw3.lib after success.
F. Build \ SRC \Debug directory has just compiled the project generated glfw3.lib library, copy this library to the OpenGL/libs directory.
G. Copy the GLFW folder under GLFW-master /include to the OpenGL/include folder.
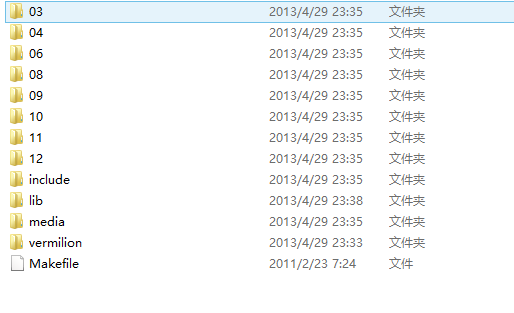
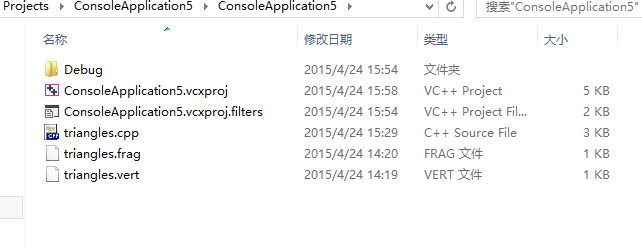
H. The files in the finally generated OpenGL folder are as follows:


4> At this point the basic environment is configured, and the next step is to link the libraries to the source code in a newly created, empty project, and import some libraries manually. The specific process is as follows.
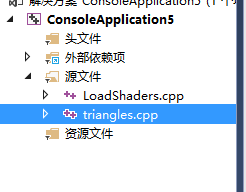
A. Create an empty project. (C ++ project)
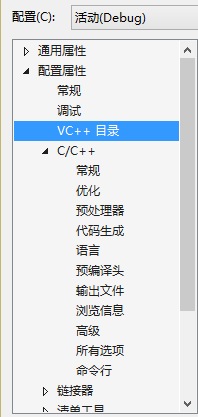
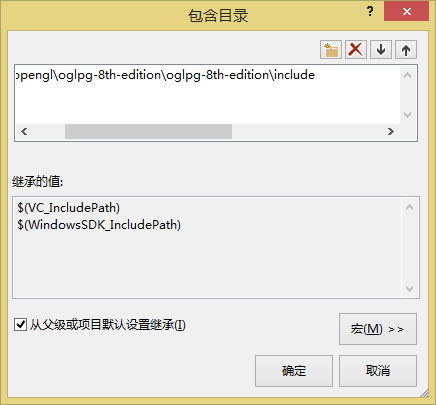
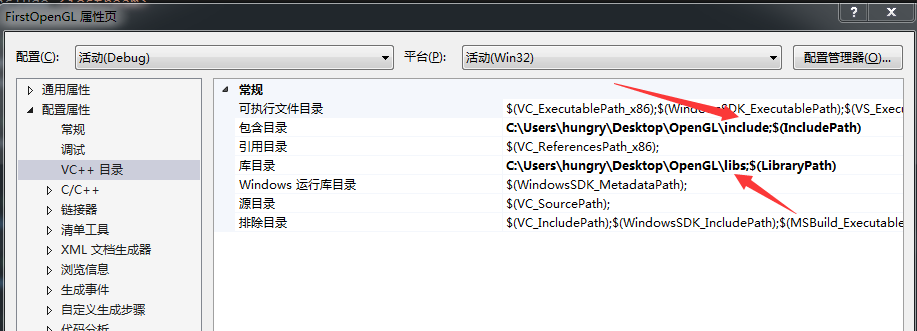
B. Right-click item ->; Property – & gt; Configure properties ->; Vc + + directories – & gt; Include the directory, add the path to OpenGL/include.
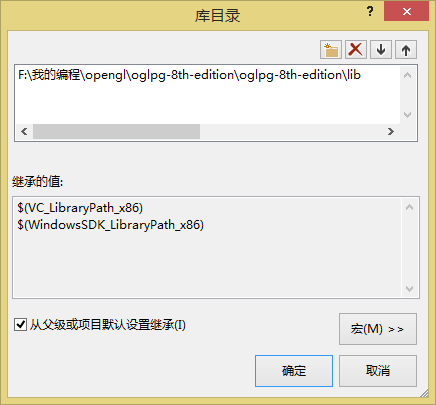
C. Right-click item ->; Property – & gt; Configure properties ->; Vc + + directories – & gt; Add the path to OpenGL/libs. The screenshot is shown below.

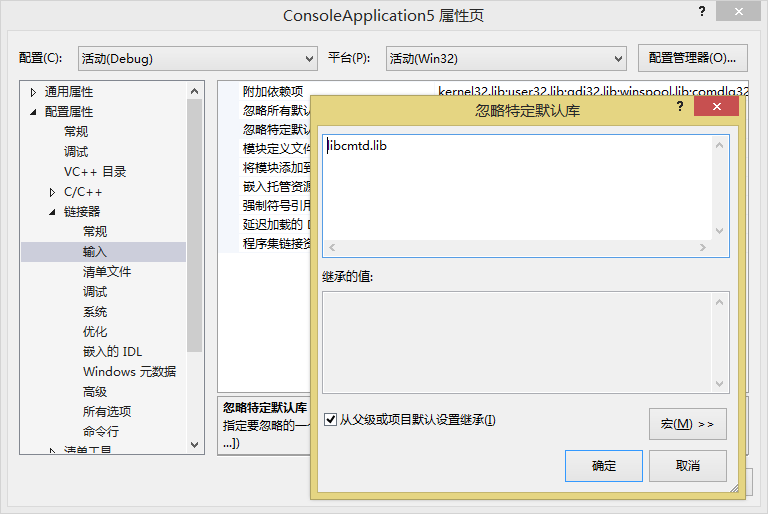
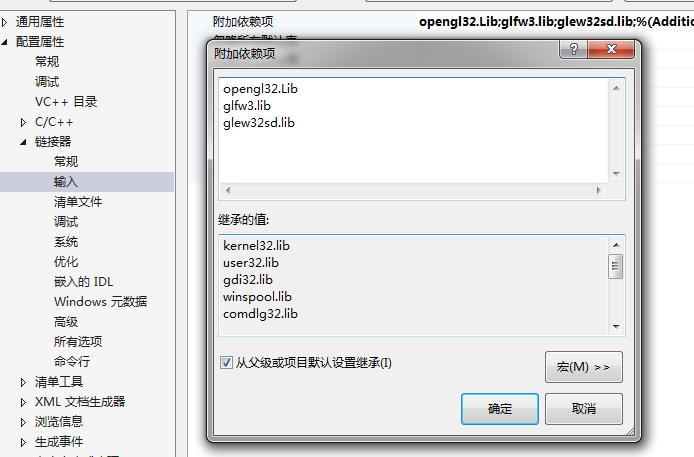
D. Right-click item ->; Property – & gt; Configure properties ->; The linker – & gt; Input – & gt; Attach dependencies to which to add
opengl32.Lib
glfw3.lib
glew32sd.lib
, the screenshot is as follows.

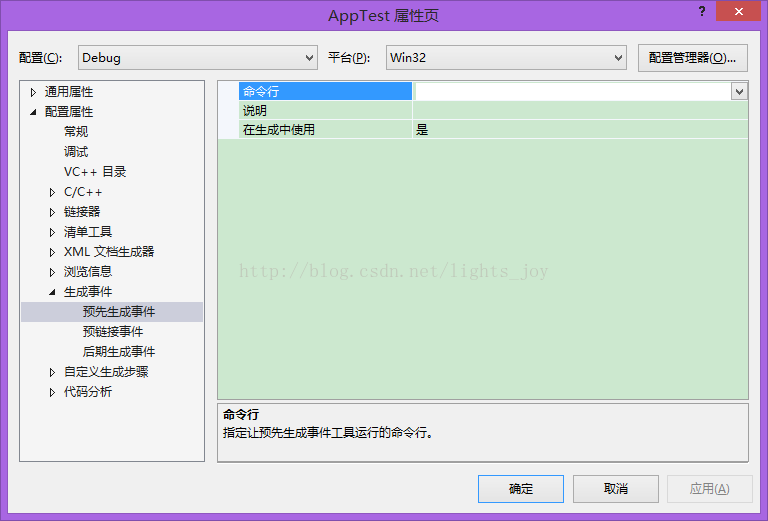
E. After saving the configuration in turn, you can enter the code in the Main class and test it. If no error is reported, that is, the environment is configured successfully, the test code can be tested from the beginning of the website or, or copy the code below.

#include <iostream>  

// GLEW  
#define GLEW_STATIC  
#include <GL/glew.h>  

// GLFW  
#include <GLFW/glfw3.h>  


// Function prototypes  
void key_callback(GLFWwindow* window, int key, int scancode, int action, int mode);

// Window dimensions  
const GLuint WIDTH = 800, HEIGHT = 600;

// The MAIN function, from here we start the application and run the game loop  
int main()
{
	std::cout << "Starting GLFW context, OpenGL 3.3" << std::endl;
	// Init GLFW  
	glfwInit();
	// Set all the required options for GLFW  
	glfwWindowHint(GLFW_CONTEXT_VERSION_MAJOR, 3);
	glfwWindowHint(GLFW_CONTEXT_VERSION_MINOR, 3);
	glfwWindowHint(GLFW_OPENGL_PROFILE, GLFW_OPENGL_CORE_PROFILE);
	glfwWindowHint(GLFW_RESIZABLE, GL_FALSE);

	// Create a GLFWwindow object that we can use for GLFW's functions  
	GLFWwindow* window = glfwCreateWindow(WIDTH, HEIGHT, "LearnOpenGL", nullptr, nullptr);
	if (window == nullptr)
	{
		std::cout << "Failed to create GLFW window" << std::endl;
		glfwTerminate();
		return -1;
	}
	glfwMakeContextCurrent(window);
	// Set the required callback functions  
	glfwSetKeyCallback(window, key_callback);

	// Set this to true so GLEW knows to use a modern approach to retrieving function pointers and extensions  
	glewExperimental = GL_TRUE;
	// Initialize GLEW to setup the OpenGL Function pointers  
	if (glewInit() != GLEW_OK)
	{
		std::cout << "Failed to initialize GLEW" << std::endl;
		return -1;
	}

	// Define the viewport dimensions  
	glViewport(0, 0, WIDTH, HEIGHT);

	// Game loop  
	while (!glfwWindowShouldClose(window))
	{
		// Check if any events have been activiated (key pressed, mouse moved etc.) and call corresponding response functions  
		glfwPollEvents();

		// Render  
		// Clear the colorbuffer  
		glClearColor(0.2f, 0.3f, 0.3f, 1.0f);
		glClear(GL_COLOR_BUFFER_BIT);

		// Swap the screen buffers  
		glfwSwapBuffers(window);
	}

	// Terminate GLFW, clearing any resources allocated by GLFW.  
	glfwTerminate();
	return 0;
}

// Is called whenever a key is pressed/released via GLFW  
void key_callback(GLFWwindow* window, int key, int scancode, int action, int mode)
{
	std::cout << key << std::endl;
	if (key == GLFW_KEY_ESCAPE && action == GLFW_PRESS)
		glfwSetWindowShouldClose(window, GL_TRUE);
}

cop

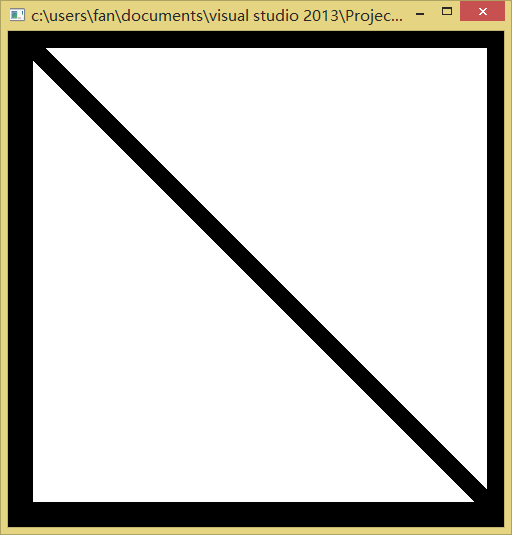
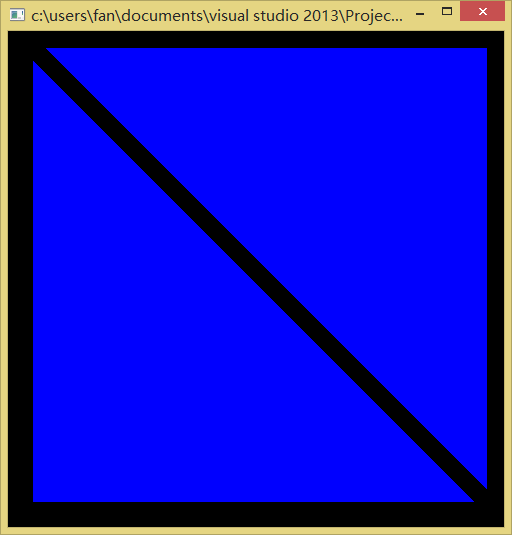
F. After compilation and running, the following window appears on behalf of successful environment configuration.

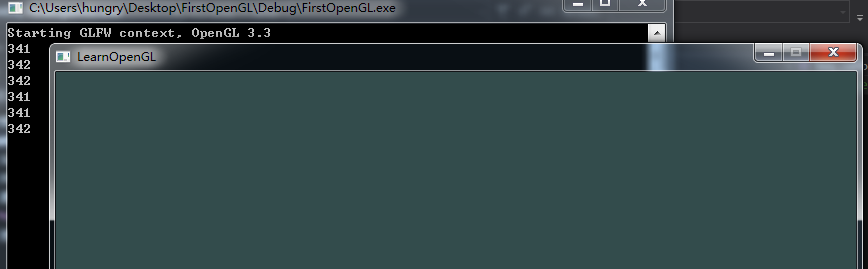
At this point, the environment configuration is complete.

Thanks again for sharing, the environment is finally matched!!

On the configuration of OpenGL Red Book eighth edition environment in vs2013

I just started learning OpenGL, bought a copy of OpenGL Red Book 8,
The first example has been studied for a while and is finally ready to run. I wonder if there are any children’s shoes that have the same problem as me.
Here’s how I configured it:
First go to http://www.opengl-redbook.com/ and download the source code of the Little Red Book. Unzip it to get this

Then open VS2013 and create an empty Win32 console project.
Then right-click on the project properties and click on the VC ++ directory

Include directory – Edit and add the include folder in the Red Book source directory

Library directory – Edit and add the lib folder
in the Red Book source directory

Add and source files to the project, and paste the code from the first example of the Little Red Book

///
//
// triangles.cpp
//
///
#include <iostream>
using namespace std;
#include "vgl.h"
#include "LoadShaders.h"
enum VAO_IDs { Triangles, NumVAOs };
enum Buffer_IDs { ArrayBuffer, NumBuffers };
enum Attrib_IDs { vPosition = 0 };
GLuint VAOs[NumVAOs];
GLuint Buffers[NumBuffers];
const GLuint NumVertices = 6;
//---------------------------------------------------------------------
//
// init
//
void init(void)
{
	glGenVertexArrays(NumVAOs, VAOs);
	glBindVertexArray(VAOs[Triangles]);
	GLfloat vertices[NumVertices][2] = {
		{ -0.90, -0.90 }, // Triangle 1
		{ 0.85, -0.90 },
		{ -0.90, 0.85 },
		{ 0.90, -0.85 }, // Triangle 2
		{ 0.90, 0.90 },
		{ -0.85, 0.90 }
	};
	glGenBuffers(NumBuffers, Buffers);
	glBindBuffer(GL_ARRAY_BUFFER, Buffers[ArrayBuffer]);
	glBufferData(GL_ARRAY_BUFFER, sizeof(vertices),
		vertices, GL_STATIC_DRAW);
	ShaderInfo shaders[] = {
		{ GL_VERTEX_SHADER, "triangles.vert" },
		{ GL_FRAGMENT_SHADER, "triangles.frag" },
		{ GL_NONE, NULL }
	};
	GLuint program = LoadShaders(shaders);
	glUseProgram(program);
	glVertexAttribPointer(vPosition, 2, GL_FLOAT,
		GL_FALSE, 0, BUFFER_OFFSET(0));
	glEnableVertexAttribArray(vPosition);
}
//---------------------------------------------------------------------
//
// display
//
void display(void)
{
	glClear(GL_COLOR_BUFFER_BIT);
	glBindVertexArray(VAOs[Triangles]);
	glDrawArrays(GL_TRIANGLES, 0, NumVertices);
	glFlush();
}

//---------------------------------------------------------------------
//
// main
//
int main(int argc, char** argv)
{
	glutInit(&argc, argv);
	glutInitDisplayMode(GLUT_RGBA);
	glutInitWindowSize(512, 512);
	glutInitContextVersion(4, 3);
	glutInitContextProfile(GLUT_CORE_PROFILE);
	glutCreateWindow(argv[0]);
	if (glewInit()) {
		cerr << "Unable to initialize GLEW ... exiting" << endl;
		exit(EXIT_FAILURE);
	}
	init();
	glutDisplayFunc(display);
	glutMainLoop();
}

compile once found not through, will quote cannot resolve external command error,

This is because loadShaders.cpp could not be found
In the Little Red Book source directory there is a lib folder with LoadShaders
Right-click on the project’s source file to add an existing item

The libcmtd.lib library is in conflict with other libraries, so we can ignore it
Right-click on the project — Properties — Linker — Enter and add it in Ignore the specific default library

Now in the compilation once found can pass out

But it’s a white triangle, not a blue triangle, and you need to create two new texts in the project directory
Renamed Triangles. Vert and Triangles. Frag

The code is as follows:

triangles.vert

#version 430 core
layout(location = 0) in vec4 vPosition;
void
main()
{
	gl_Position = vPosition;
}

triangles.frag

#version 430 core
out vec4 fColor;
void
main()
{
	fColor = vec4(0.0, 0.0, 1.0, 1.0);
}

>
>

Velt-0.1.3 development: generating events

Happy shrimp
http://blog.csdn.net/lights_joy/ (QQ group: Visual EmbedLinux Tools 375515651).
Welcome to reprint, but please keep the author’s information

Velt, the full name of Visual EmbedlinuxTools, is a Visual Studio plugin similar to Visual GDB to assist Linux development. With this plug-in, you will be able to develop Linux applications (including compilation and debugging) in the Visual Studio IDE, and you can also compile the uboot and Linux kernel, and locate the source code correctly based on error messages at compile time. The current version is 0.1.2, which only supports VS2013, and is a plug-in that has just started development. Can be downloaded in CSDN download channels (http://download.csdn.net/detail/lights_joy/8359251), the installation process, see the Linux development: using Vs2013 + VELT – 0.1.0 from environment to build “. Here are its basic functions:

    supports x86 Linux, HI3516, HI3520, MinGW platforms. Complete the compilation of UBOOT, and automatically locate the corresponding file location according to the error information compiled. Complete the Linux kernel compilation, and automatically locate the corresponding file location according to the compilation error information. Complete the configuration of the Linux kernel. You do not use Makefiles to compile Linux applications. Connect to the target machine using SSH and debug the application with GDB. Connect the target machine with Telnet and debug the application with GDB.

Three build events are defined in VS:


MSBuild defines these three goals as:

  <Target Name="PreBuildEvent" Condition="'$(PreBuildEventUseInBuild)'!='false'">
    <Message Text="Description: %(PreBuildEvent.Message)" Condition="'%(PreBuildEvent.Message)' != '' and '%(PreBuildEvent.Command)' != ''"/>
    <Exec Command="%(PreBuildEvent.Command)$(_BuildSuffix)" Condition="'%(PreBuildEvent.Command)' != ''"/>
  </Target>

  <Target Name="PreLinkEvent" Condition="'$(PreLinkEventUseInBuild)'!='false'">
    <Message Text="Description: %(PreLinkEvent.Message)" Condition="'%(PreLinkEvent.Message)' != '' and '%(PreLinkEvent.Command)' != ''"/>
    <Exec Command="%(PreLinkEvent.Command)$(_BuildSuffix)" Condition="'%(PreLinkEvent.Command)' != ''"/>
  </Target>

  <Target Name="PostBuildEvent" Condition="'$(PostBuildEventUseInBuild)'!='false'">
    <Message Text="Description: %(PostBuildEvent.Message)" Condition="'%(PostBuildEvent.Message)' != '' and '%(PostBuildEvent.Command)' != ''"/>
    <Exec Command="%(PostBuildEvent.Command)$(_BuildSuffix)" Condition="'%(PostBuildEvent.Command)' != ''"/>
  </Target>

In effect, you just throw the commands you entered here to cmd.exe to execute.
For the MinGW platform, this is perfectly fine, but for platforms such as Linux you need to reload the task and leave it to bash.

Vs2013 package deployment error: isdev: error – 6003: an error occurred streaming

I used InstallShield 2015 and all the way to the end of “rebuild the solution,” the following error kept appearing:

ISDEV : error -6003: An error occurred streaming 'C:\Program Files\InstallShield\2009\Support\0x0804.ini' into setup.exe
ISDEV : error -6003: An error occurred streaming 'C:\Program Files\InstallShield\2009\Redist\Language Independent\i386\instmsiw.exe' into setup.exe
ISDEV : error -6003: An error occurred streaming 'C:\Program Files\InstallShield\2009\Redist\Language Independent\i386\instmsia.exe' into setup.ex

Back and forth redeployed several times are like this, the last word on the net:
shut down the computer anti-virus software, solved!
drunk drunk