Category Archives: How to Fix

Win10 starts infinite loop auto repair, and the repair fails

Background: since the last normal use a few hours ago, no software or patch has been installed. The only action: repair the network with Netsh command prompt, and then restart according to the prompt.

Phenomenon: after win10 starts, it prompts “diagnosing computer…” “Repairing…” , and then repair failure, dead loop. Up to the successful start, a total of 15 restarts.

Solution (failure):
1) according to the solutions of Baidu and Google, the advanced option is used to start, and the start fails.
2) after that, use the command prompt Bcdedit to turn off the automatic repair {UUID}, but it still fails.
3) security mode (with network) cannot be restarted.
4) there are still files on the desktop, which cannot be ghost, factory recovery, etc.
……

Solution (temporary success):
Advanced Options -> disable driver signature -> Restart successfully and enter the desktop.

PS:

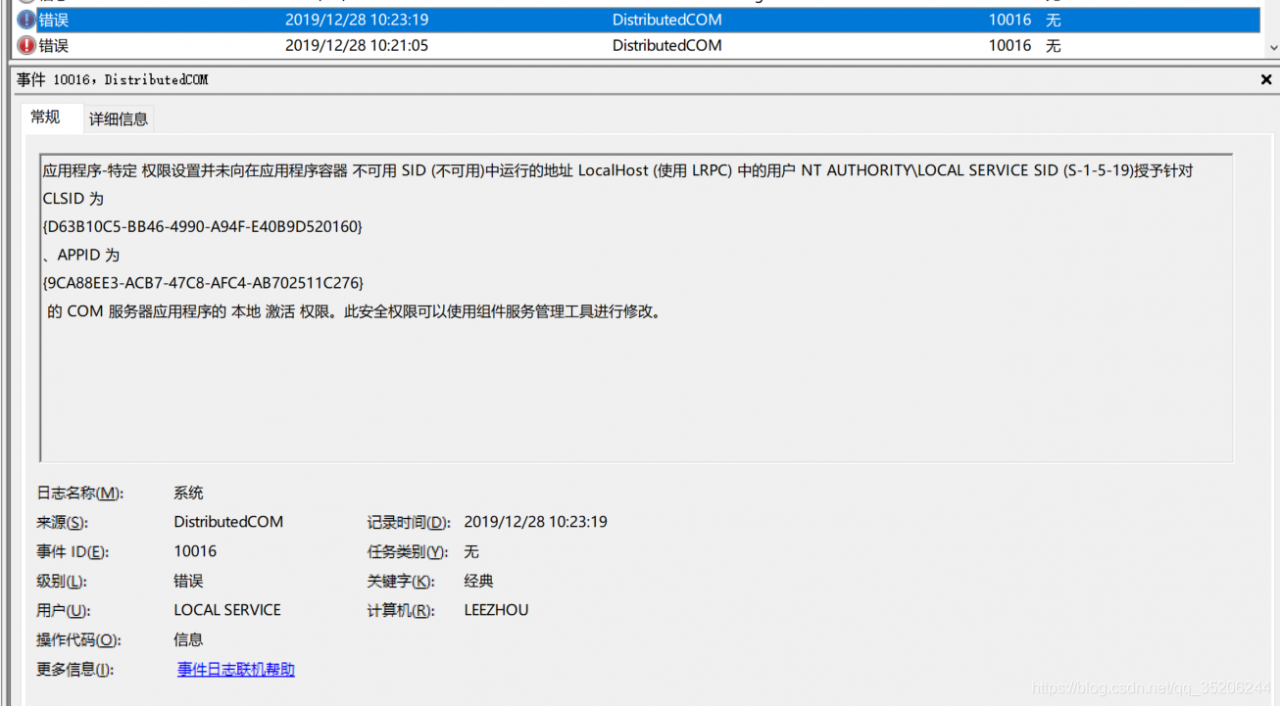
    after restart, the device manager shows that all devices are in normal use (USB, NIC, etc.) after restart, because there is no blue screen, all minidump files are not captured, and specific errors cannot be analyzed. After restart, system32 -, logfiles -, SRT – srtTrail.txt The file indicates that the repair failed 15 times, but the error is not pointed out.

Postscript: similar solutions, https://blog.csdn.net/qq_ 40570892/article/details/83540275

Svn warehouse migration in Windows Environment

Background: due to server changes, SVN warehouse needs to be migrated to a new server.
Environment: Windows Server 2008 R2

PS: attention, *. Vsvnbak backup file is only applicable to the backup and recovery of SVN server. SVN server cannot use this file when changing the host for resource migration!


The svnadmin command is used to backup and restore the warehouse to realize data migration.

1、 Source SVN server:
1. Download the console CD to the visualsvn server/bin directory
2. Execute svnadmin dump source warehouse address/Project & gt; destination backup folder/project name

For example:

If the command is executed successfully, you will see the console execute the backup command to back up all version history to the target file. If "access denied" is prompted, please check the access permission of the source warehouse folder and give the authorization

3. Manually copy the generated . Dump file to the target host

2、 Target host

1. Install the SVN server
2, console CD to the installation directory, svnadmin load target path/warehouse name & lt; . dump backup file
3. The backup recovery is successful, as shown in the figure below, you will see the file version

Oracle complete uninstall manual

When you uninstall RDMBS such as SQL server and Oracle, if it is not unloaded cleanly, it will lead to the problem that it cannot be re installed. The fundamental reason is that there are too many registry keys, local files, and even hidden files left behind. According to personal experience, this article searches and sorts out some steps that may be able to uninstall Oracle cleanly for your reference.

Environmental Science:

Oracle 11g 11.2.0.40Windwos 7


1、 Uninstall Oracle

1. Start control panel management tools services stop all Oracle related services services.msc

2. Start – program – Oracle – Oracle installation products – Universal installer: start to uninstall Oracle except 11g_ All products except home1


2、 Cleaning up registry keys

1. Clear the related key in the registry

shortcut key win + R - "regedit

HKEY_ LOCAL_ Machine/software/Oracle delete this directory and all its children
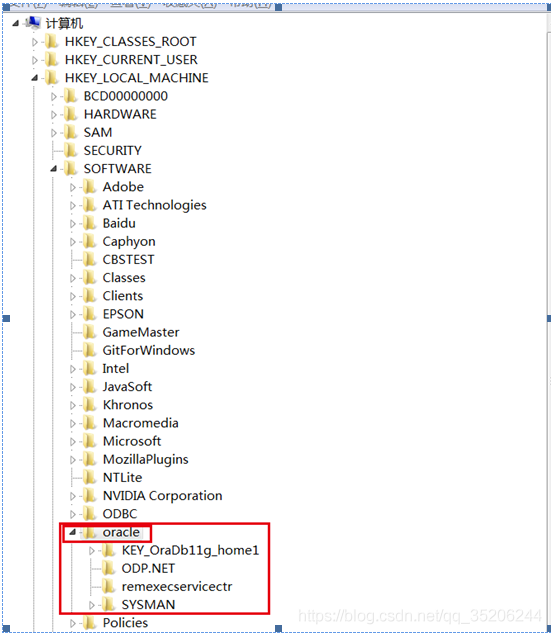
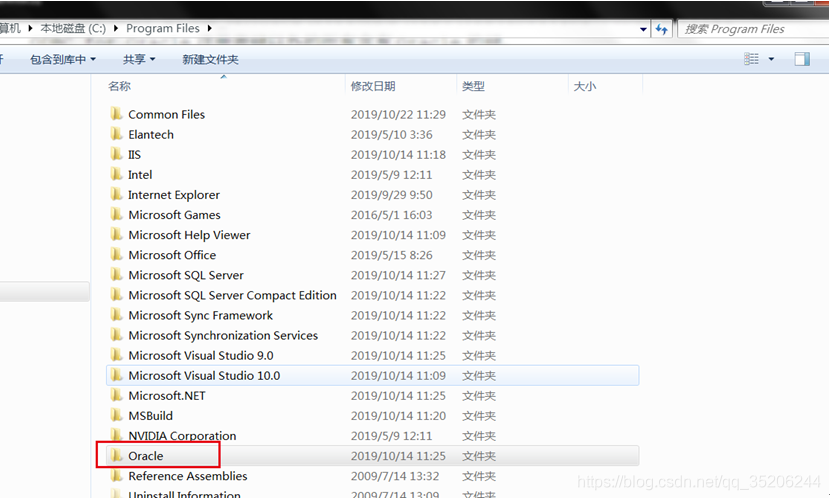
hkey_ LOCAL_ Delete all directory entries beginning with Oracle or oraweb
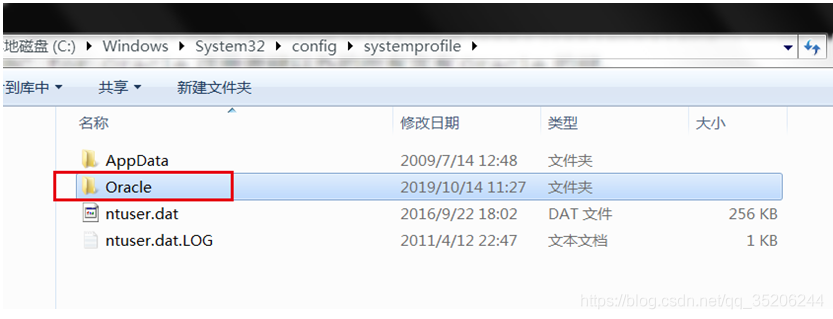
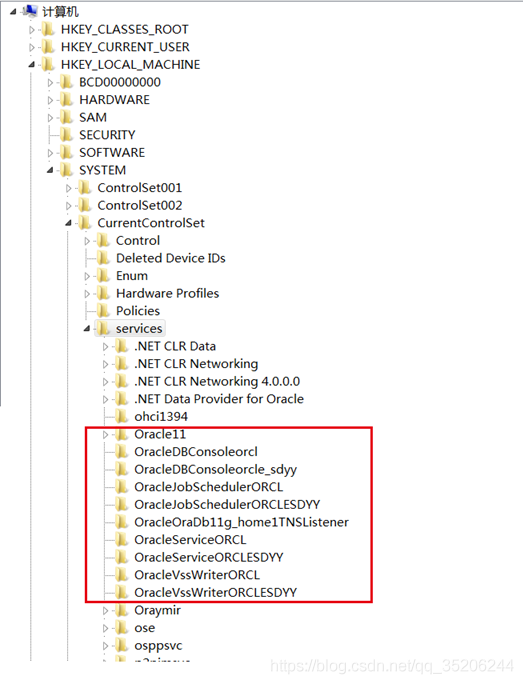
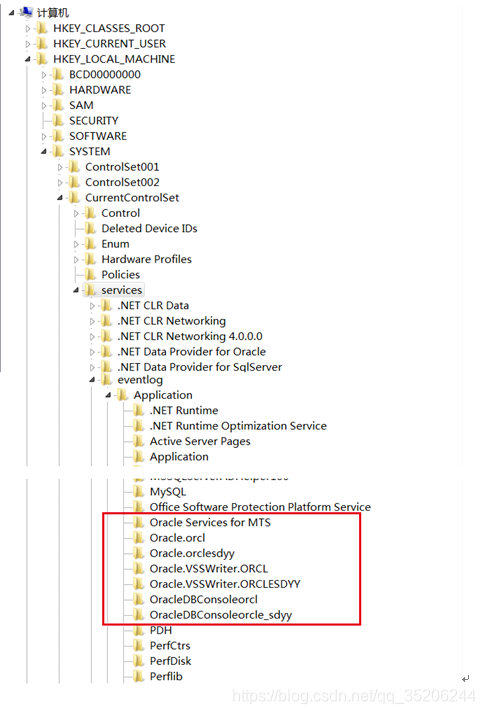
hkey_ LOCAL_ Delete all Oracle start directories and their subkeys
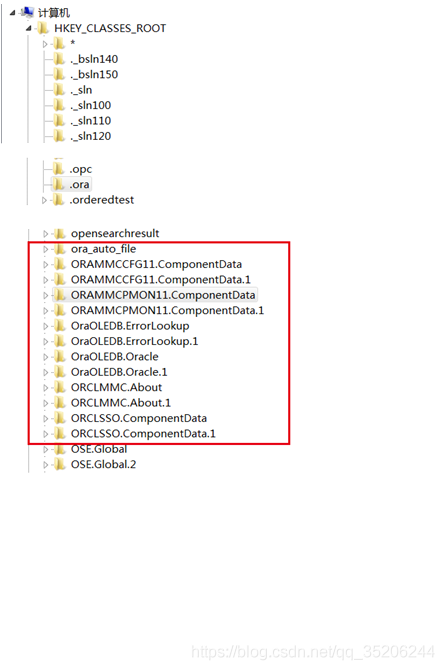
hkey_ CLASSES_ Root delete all the directories with ora, Oracle, orcl and enumora prefixes and their subkeys

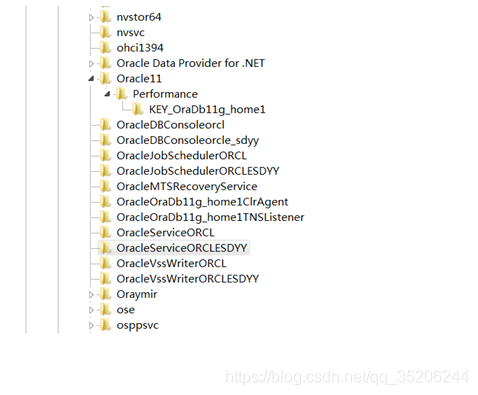
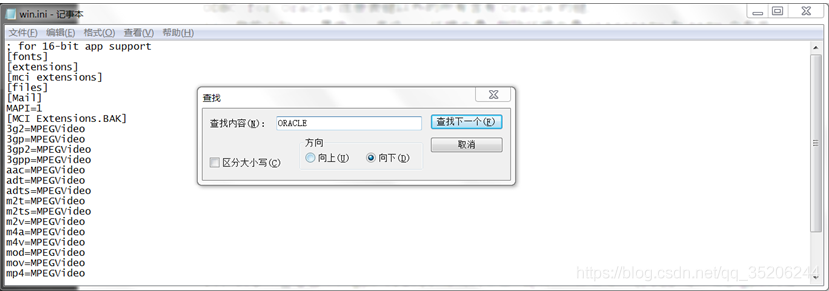
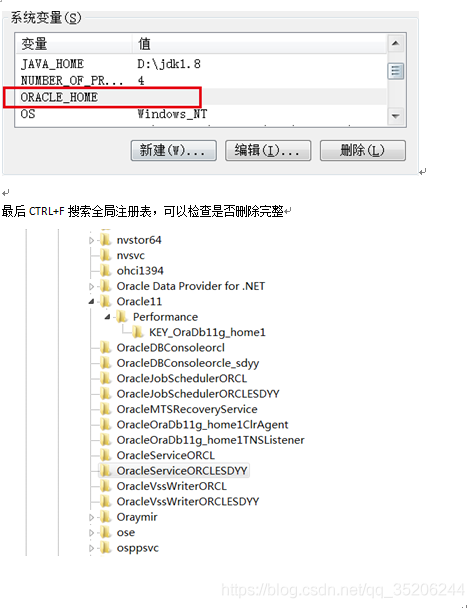
hkey_ CURRENT_ User/software/Microsoft/Windows/CurrentVersion/Explorer/menuorder/start menu/programs, directory of all Oracle prefixes and its children HKEY_ LOCAL_ MACHINE\SOFTWARE\ODBC\ ODBCINST.INI All Oracle related directories and their subitems except Microsoft ODBC for Oracle

2. Clear environment variables

My computer - properties - Advanced - environment variables, delete Oracle related environment variables in path and classpath

3. In the start menu, clear the Oracle directory

4. Delete the Oracle related directory from the disk (unauthorized access, locked, etc. after restarting the computer, the file occupation can be released and deleted)

Event manager error: source distributedcom

Foreword: Windows 10. The event viewer frequently captures system errors and queries the cause.

Error:
using event viewer, the error is as follows:

Application specific permission settings are not granted to the user NT authority/local service Sid (s-1-5-19) in the address localhost (using LRPC) running in the application container's unavailable Sid (unavailable). For
CLSID is {d63b10c5-bb46-4990-a94f-e40b9d520160} , appid is {9ca88ee3-acb7-47c8-afc4-ab702511c276}
, local activation permission of COM server application. This security permission can be modified using the component services management tool.

Shortcut command:

Event Viewer: Win + R eventvwr.msc Device Manager: Win + R devmgmt.msc

Problem location:
when using vs to develop a. Net project, the project involves RPC, but the driver of the supporting hardware device is not installed in the local development environment. Therefore, when the program is compiled and started, the event viewer will report an error.

Problem analysis:

The problem belongs to the developer class, and has nothing to do with the windows operating system error. You can install the corresponding hardware driver by yourself.

Other similar solutions:

If windows 7, windows 10 and other operating system related, built-in programs report such errors, you can refer to the following tutorial for authorization solution.
Solutions to similar problems (CLSID and appid are different from this article, but the source of the problem is distributedcom): Solutions

Postscript: the above is the process of personal problems and treatment, I hope it can help you.

WebView load webpage, HTTP call error

Project error:

 "Mixed Content: The page at 'https://wx.vzan.com/live/tvchat-427320897?v=637539910901869888#/' was loaded over HTTPS,
 but requested an insecure video 'http://i3.vzan.cc/m3u8/20200221/a487a8d9b2164043bb632165a0cc129c/v.f24306.m3u8'. 
 This request has been blocked; the content must be served over HTTPS.", 
 source: https://wx.vzan.com/live/tvchat-427320897?v=637539910901869888#/ (0)

Error analysis:

Starting from 9.0 (API level 28) on Android, plaintext communication support is disabled by default, which is officially said to be unsafe. Because the video source we play is HTTP protocol, we can’t play it.

Idea 1: add uses cleartext traffic

Indicates whether the application intends to use plaintext network traffic, such as plaintext http. The default value for applications with a target API level of 27 or lower is “true.”. For applications with API level 28 or higher, the default value is “false”.

 <!--Android 9.0 video playback function-->>
  <application
      android:usesCleartextTraffic="true" 
        >
   
  </application>

After modification, some models are still not feasible.

Idea 2: Android access to x5webview

Better article links: https://www.cnblogs.com/cuichen16/p/10785945.htm
After adding, Android 10.0 or above is not feasible for higher version mobile phones

Idea 3: setmixedcontentmode

//Allow cross-domain
webSetting.setAllowFileAccessFromFileURLs(true);
webSetting.setAllowUniversalAccessFromFileURLs(true);
webSetting.setSupportMultipleWindows(true);
if (Build.VERSION.SDK_INT >= 21) {
	webSetting.setMixedContentMode(android.webkit.WebSettings.MIXED_CONTENT_ALWAYS_ALLOW); // This sentence is crucial and can be added after
}

Finally, after adding the above three contents, the last step can be finished. If not, please continue to Baidu and keep looking for the key code.

nginx: [error] open() “/usr/local/nginx/logs/nginx.pid“ failed (2: No such file or directory)

An error was reported when starting nginx: nginx: [error] open() “/ usr/local/nginx/logs/ nginx.pid ”Failed (2: no such file or directory)
solutions
are different every time I encounter them. I have encountered two solutions here, and I’d like to share them here

Situation 1: nginx.conf Of nginx.pid Annotated
Enter nginx.conf Catalog editor

sudo vi /usr/local/nginx/conf/nginx.conf

Just cancel the comments and restart nginx

sudo nginx -s reload 

Case 2: no configuration directory is specified

Enter to use the specified nginx.conf Restart nginx in the form of file (first, make sure that the PID in the first case is not commented, otherwise it may be opened for the first two times, but an error will still be reported later)

sudo /usr/local/nginx/sbin/nginx -c /usr/local/nginx/conf/nginx.conf


Xgboost error solution

problem

Anaconda uses xgboost1.3.3 package to generate the following error message:

Starting in XGBoost 1.3.0, the default evaluation metric used with the
objective ‘ binary:logistic ’ was changed from ‘error’ to ‘logloss’.
Explicitly set eval_ metric if you’d like to restore the old behavior.

Solution

View the versions of packages that can be installed in the xgboost history.
Change xgboost package to historical version:

pip install xgboost==1.2.0

Making Python script into exe command under Windows

Making Python script into exe command under Windows

Method 1: use windows batch processing (Windows command script)

    create a new fanyi.bat file, which is as follows.

    @echo off
    python3 D:\test\fanyi.py %1
    
      add the current folder to the environment variable, re open a CMD window, and enter the command Fanyi Hello

      The second method uses pyintaller module to generate EXE file

        install pyinstaller module

        pip install pyinstaller
        
          enter the D: [test directory, and execute the generate command

          pyinstaller fanyi.py
          

          Generated fanyi.exe The file is in the D::

            add the folder to the environment variable and execute the command in CMD

“ValueError: check_hostname requires server_hostname“ when trying to update conda

After updating CONDA, an error is reported:
valueerror: check_ hostname requires server_ Hostname
this is the problem of scientific Internet port.
Solutions:
1. Check the port number of Science Internet.
2. Add the port number in the. Condarc file.
Check where. Condarc is under windows.
windows:C:\users\username\,linux:/home/username/
3、pip install urllib3==1.25.11。
The contents of condarc file are as follows:

ssl_verify: true
show_channel_urls: true
report_errors: false

Add a piece of code below and modify it as follows:

ssl_verify: true
show_channel_urls: true
report_errors: false
proxy_servers: {http: 127.0.0.1:8888, https: 127.0.0.1:8888}

note that if you change the following 8888 to your own port number, the estimation of each port is different.

Solution to the exception of PEM file logging in EC2

Logging in to EC2 will use

ssh -i <pem flie> ec2-user@<EC2 Public DNS>

To log in. Here are two possible problems and solutions

PEM file permission problem. After typing the SSH command, the following error will be displayed

@@@@@@@@@@@@@@@@@@@@@@@@@@@@@@@@@@@@@@@@@@@@@@@@@@@@@@@@@@@
@ WARNING: UNPROTECTED PRIVATE KEY FILE! @
@@@@@@@@@@@@@@@@@@@@@@@@@@@@@@@@@@@@@@@@@@@@@@@@@@@@@@@@@@@
Permissions 0644 for 'us.pem' are too open.

This can be solved by modifying the PEM file permissions.

chmod 600 us.pem

Request passphrase

After typing the SSH command, the system prompts as follows

Enter passphrase for key '/root/us.pem':

And no matter what text you enter, repeat the above prompt.

It was used in windows

Sublime text after opening the PEM file, copy the content to VI of Linux to generate the PEM file.

After that, we use Notepad of windows to open the PEM file, and then copy it to VI of Linux.

Get the height of mobile phone status bar through reflection

//Get the height of the status bar by reflection, the return is the height of the status bar
    public int getStatusHeight(){
        try {
            Class<?> c = Class.forName("com.android.internal.R$dimen");
            Object o = c.newInstance();
            Field field = c.getField("status_bar_height");
            int x = (int) field.get(o);
            return mContext.getResources().getDimensionPixelOffset(x);
        } catch (Exception e) {
            e.printStackTrace();
            return 0;
        }
    }