Category Archives: How to Fix

ModuleNotFoundError: No module named ‘sklearn.datasets.samples_generator‘

No module named ‘sklearn.datasets.samples_ generator’

Causes and solutions of error reporting

Problem reporting error

from sklearn.datasets.samples_generator import make_blobs

reason

samples_ The generator module has been removed in the new version of scikit learn .

samples_ The corresponding classes/functions in the generator module can be imported directly from sklearn. Datasets .

resolvent

Method 1:

Import make directly from sklearn. Datasets _ blobs

from sklearn.datasets import make_blobs

Method 2:

Version problem, reduce version

pip install scikit-learn==0.22.1

Reference: link

come on

thank you

work hard

The. Exe crashed program ends abnormally when the QT project is copied to the new environment

Tip: if the project has been successfully compiled and run on a computer, the code of the project itself is OK

Based on such preconditions, the problem should be directly located in the direction of environment configuration.

The third-party library I use this time is opencv:

        1. Include the opencv path in the project pro file and add the corresponding library file

INCLUDEPATH += D:/openCV/opencv/build/include

LIBS += D:/openCV/opencv/build/x64/vc15/lib/opencv_world451.lib
LIBS += D:/openCV/opencv/build/x64/vc15/lib/opencv_world451d.lib

        2. Find the corresponding. DLL file from the opencv installation path and copy it to the running program path generated by the project


The too many open files solution appears in stream classes such as files.list

Problem scenario

In the background code of the blog, the design without database is adopted, and all information is based on the file system. When it comes to traversing some file information, the java.nio.file.files class and files.list are used for traversal. However, for stream methods such as files.list, if the resource is not closed, an error of too many open files will appear over time.

Solution

Use try with resource to automatically free resources.

Not improved:

...
Files.list(path).forEach(...)
...

Improved writing:

try (Stream<Path> fileList = Files.list(path)) {
    fileList.forEach(...)
} catch (Exception a) {
    ......
}

In this way, the open files will be automatically closed when using files.list to prevent errors. Similarly, it can also be used on other classes that inherit autoclosable, and subsequent problems will be sorted out.

Conclusion

The efficiency and rationality of the code still need to be considered, otherwise the preliminary test can’t see the problem, and it’s too late to regret for a long time.

The spring boot project directly replaces the referenced jar package

Shiro was used in an old spring boot project. Recently, Shiro broke a security vulnerability. So we need to upgrade the Shiro version in the project. However, this project was developed by former employees a long time ago, and the source code can no longer be found. So try to upgrade Shiro by replacing jar directly.

Wrong attempt

Usually, HTML can be replaced directly. JS can directly open WinRAR and replace the file directly. I thought jar packages can also be replaced directly. If you find that the jar is directly replaced, an error will be reported.

The error information is as follows:

java -jar spring-zs-1.0-update.jar                                                          [18:02:05]
Exception in thread "main" java.lang.IllegalStateException: Unable to open nested entry 'BOOT-INF/lib/shiro-web-1.5.3.jar'. It has been compressed and nested jar files must be stored without compression. Please check the mechanism used to create your executable jar file
	at org.springframework.boot.loader.jar.JarFile.createJarFileFromFileEntry(JarFile.java:285)
	at org.springframework.boot.loader.jar.JarFile.createJarFileFromEntry(JarFile.java:260)
	at org.springframework.boot.loader.jar.JarFile.getNestedJarFile(JarFile.java:248)
	at org.springframework.boot.loader.jar.JarFile.getNestedJarFile(JarFile.java:237)
	at org.springframework.boot.loader.archive.JarFileArchive.getNestedArchive(JarFileArchive.java:103)
	at org.springframework.boot.loader.archive.JarFileArchive.getNestedArchives(JarFileArchive.java:87)
	at org.springframework.boot.loader.ExecutableArchiveLauncher.getClassPathArchives(ExecutableArchiveLauncher.java:72)
	at org.springframework.boot.loader.Launcher.launch(Launcher.java:49)
	at org.springframework.boot.loader.JarLauncher.main(JarLauncher.java:51)

Correct steps

Unpack through jar command

My project jar name is spring-zs-1.0. Jar

jar -xvf spring-zs-1.0.jar

After decompression, replace the jar package in./boot-inf/lib directory. I replaced Shiro — 1.2.2.jar with Shiro — 1.5.3.jar

Repackage

jar -cfM0 new.jar ./

This will generate a new jar package!

If you also use MacOS system, you should pay attention to one thing. The MacOS system will automatically generate
. DS in some directories_ Store files, so you should delete these hidden. DS files before repackaging_ Store, otherwise an error will be reported.

reference resources

https://blog.csdn.net/weixin_ 45417347/article/details/101539040

[XMR] Could NOT find HWLOC (missing: HWLOC_LIBRARY HWLOC_INCLUDE_DIR)

【XMR】Could NOT find HWLOC (missing: HWLOC_ LIBRARY HWLOC_ INCLUDE_ DIR

Analysis and solution of error reporting details

Error reporting details

After installing centos8.4 minimal , compile xmrig mining program without pumping, and execute:

cmake .. -DCMAKE_BUILD_TYPE=Release -DUV_LIBRARY=/usr/lib64/libuv.a

Error after compilation:

-- The C compiler identification is GNU 8.4.1
-- The CXX compiler identification is GNU 8.4.1
-- Detecting C compiler ABI info
-- Detecting C compiler ABI info - done
-- Check for working C compiler: /usr/bin/cc - skipped
-- Detecting C compile features
-- Detecting C compile features - done
-- Detecting CXX compiler ABI info
-- Detecting CXX compiler ABI info - done
-- Check for working CXX compiler: /usr/bin/c++ - skipped
-- Detecting CXX compile features
-- Detecting CXX compile features - done
-- Looking for syslog.h
-- Looking for syslog.h - found
CMake Error at /usr/share/cmake/Modules/FindPackageHandleStandardArgs.cmake:165 (message):
  Could NOT find HWLOC (missing: HWLOC_LIBRARY HWLOC_INCLUDE_DIR)
Call Stack (most recent call first):
  /usr/share/cmake/Modules/FindPackageHandleStandardArgs.cmake:458 (_FPHSA_FAILURE_MESSAGE)
  cmake/FindHWLOC.cmake:25 (find_package_handle_standard_args)
  src/backend/cpu/cpu.cmake:30 (find_package)
  src/backend/backend.cmake:1 (include)
  CMakeLists.txt:37 (include)
  
-- Configuring incomplete, errors occurred!
See also "/root/xmrig/build/CMakeFiles/CMakeOutput.log".

Problem analysis

The error message is very clear. The hwloc module cannot be found.

terms of settlement

The solution is simple: install the hwloc module. Unfortunately, centos8.4 minimal can’t be installed directly through Yum at present. You can only download the source code and compile it yourself.

First, we download the hwloc module code:

git clone https://github.com/open-mpi/hwloc.git

Then enter the hwloc source code directory and execute the compilation and installation statement:

./autogen.sh
./configure
make
make install

Then execute the cmake statement

cmake .. -DCMAKE_BUILD_TYPE=Release -DUV_LIBRARY=/usr/lib64/libuv.a

Able to execute successfully:

-- The C compiler identification is GNU 8.4.1
-- The CXX compiler identification is GNU 8.4.1
-- Detecting C compiler ABI info
-- Detecting C compiler ABI info - done
-- Check for working C compiler: /usr/bin/cc - skipped
-- Detecting C compile features
-- Detecting C compile features - done
-- Detecting CXX compiler ABI info
-- Detecting CXX compiler ABI info - done
-- Check for working CXX compiler: /usr/bin/c++ - skipped
-- Detecting CXX compile features
-- Detecting CXX compile features - done
-- Looking for syslog.h
-- Looking for syslog.h - found
-- Found HWLOC: /usr/local/lib/libhwloc.so  
-- Found UV: /usr/lib64/libuv.a  
-- Looking for __builtin___clear_cache
-- Looking for __builtin___clear_cache - found
-- WITH_MSR=ON
-- argon2: detecting feature 'sse2'...
-- Performing Test FEATURE_sse2_NOFLAG
-- Performing Test FEATURE_sse2_NOFLAG - Success
-- argon2: feature 'sse2' detected!
-- argon2: detecting feature 'ssse3'...
-- Performing Test FEATURE_ssse3_NOFLAG
-- Performing Test FEATURE_ssse3_NOFLAG - Failed
-- Performing Test FEATURE_ssse3_FLAG
-- Performing Test FEATURE_ssse3_FLAG - Success
-- argon2: feature 'ssse3' detected!
-- argon2: detecting feature 'xop'...
-- Performing Test FEATURE_xop_NOFLAG
-- Performing Test FEATURE_xop_NOFLAG - Failed
-- Performing Test FEATURE_xop_FLAG
-- Performing Test FEATURE_xop_FLAG - Success
-- argon2: feature 'xop' detected!
-- argon2: detecting feature 'avx2'...
-- Performing Test FEATURE_avx2_NOFLAG
-- Performing Test FEATURE_avx2_NOFLAG - Failed
-- Performing Test FEATURE_avx2_FLAG
-- Performing Test FEATURE_avx2_FLAG - Success
-- argon2: feature 'avx2' detected!
-- argon2: detecting feature 'avx512f'...
-- Performing Test FEATURE_avx512f_NOFLAG
-- Performing Test FEATURE_avx512f_NOFLAG - Failed
-- Performing Test FEATURE_avx512f_FLAG
-- Performing Test FEATURE_avx512f_FLAG - Success
-- argon2: feature 'avx512f' detected!
-- Found OpenSSL: /usr/lib64/libcrypto.so (found version "1.1.1g")  
-- The ASM compiler identification is GNU
-- Found assembler: /usr/bin/cc
-- Configuring done
-- Generating done
-- Build files have been written to: /root/xmrig-base/build

Postscript

If you have any questions, please leave a message below.
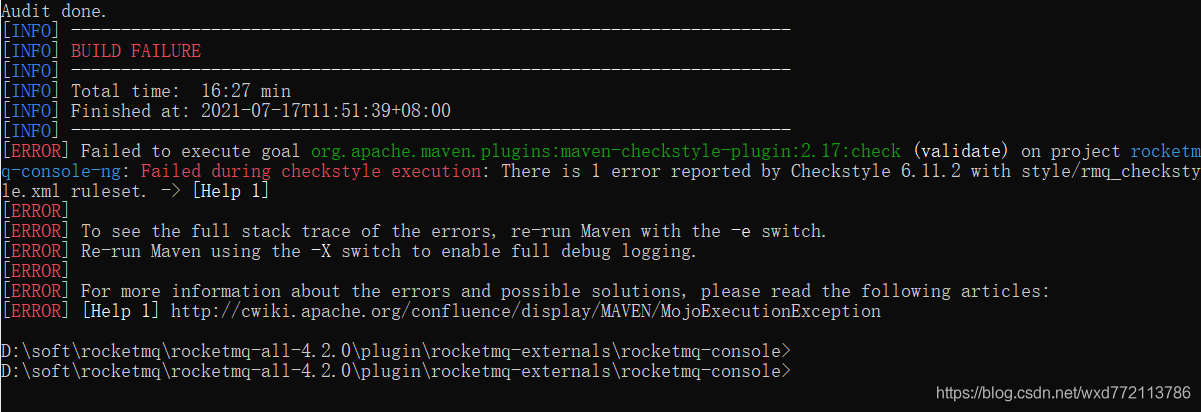
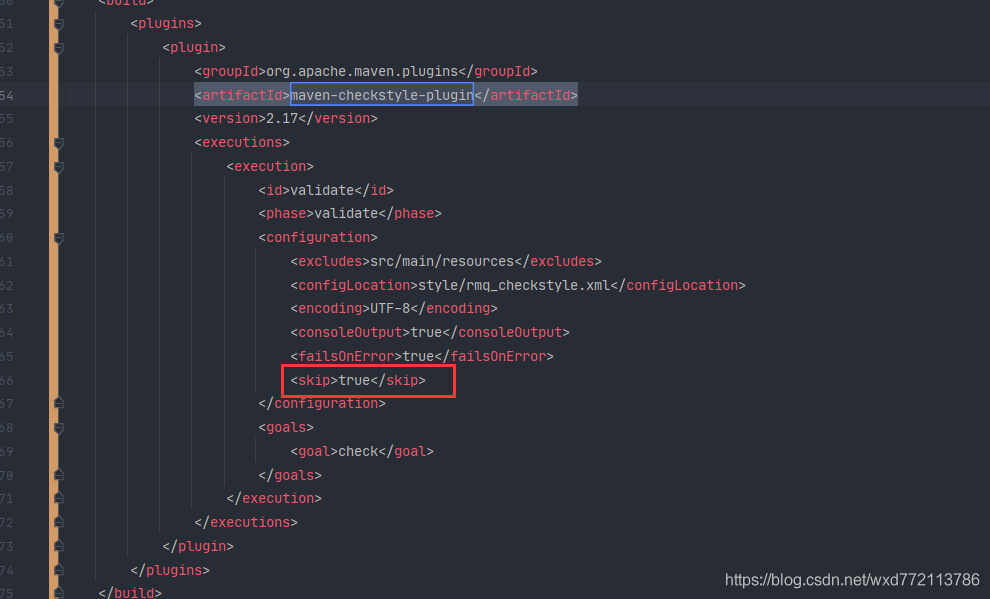
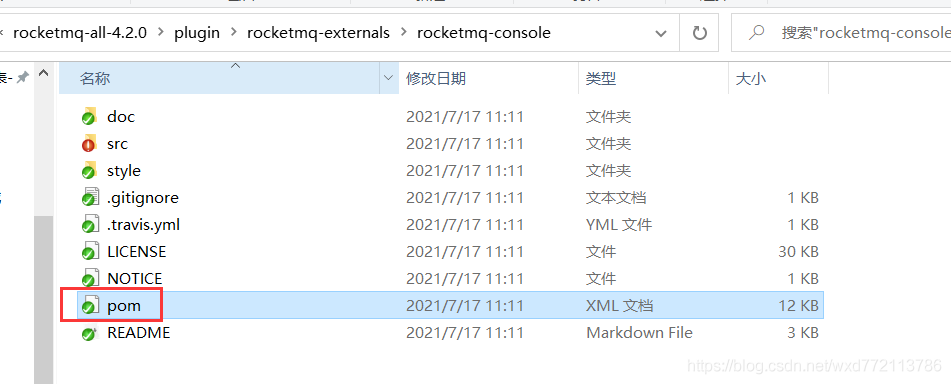
Error in pyinstall package Python program: jinja2.exceptions.templatenotfound: Chart_ Solution to component.html

Recently, I wrote a visualization program in Python and used the daopycharts Library in the middle. There is no problem running it alone. However, after using pyinstall to package it into a separate EXE file, the running program reported an error: jinja2.exceptions.templatenotfound: chart_ component.html

After searching for relevant information on the Internet, it is said that pyinstaller and pyecarts are incompatible. The solutions after trying are as follows:

1. Change the packaging method and use the – D parameter to package it into a file instead of using the – f parameter to package it directly into an EXE file

as   pyinstaller -D -p d:\path run.py

-p   d: \ path is the site packages path of the imported package in your file. If the path of the pyecarts library on the computer is C: \ Python 37 \ lib \ site packages, it is written here as – P   C:\Python37\Lib\site-packages

Run.py is the target entry file that needs to be packaged

2. After pyinstaller is packaged, it will generate two folders: build and dist. open the dist folder and copy the pyecarts folder under C: \ Python 37 \ lib \ site packages to this directory

Run the packaged exe program, and the error message disappears

RocketMQ Failed to execute goal org.apache.maven.plugins:maven-checkstyle-plugin:2.17:check…

Question

Analysis: according to the error prompt, it should be the problem of maven checkstyle plugin.

solve

Method 1: find the plug-in maven checkstyle plugin: 2.17 and add the skip attribute.

  Modify pom.xml

  Method 2: find the plug-in tag corresponding to maven checkstyle plugin: 2.17 and comment it out.

Clear the original target directory and recompile it!

maven_ Unable to create servlet file under Java Web project

Add the following code in pom.xml:

<!-- https://mvnrepository.com/artifact/javax.servlet/javax.servlet-api -->
<dependency>
   <groupId>javax.servlet</groupId>
   <artifactId>javax.servlet-api</artifactId>
   <version>4.0.1</version>
   <scope>provided</scope>
</dependency>
 
<!-- https://mvnrepository.com/artifact/jstl/jstl -->
<dependency>
   <groupId>jstl</groupId>
   <artifactId>jstl</artifactId>
   <version>1.2</version>
</dependency>

Terminal appears after anconda is installed on MAC (base)

After MAC reinstalls anaconda, it is found that each time terminal is opened, anconda’s environment is started by default. However, I don’t want to use anconda’s environment by default, as shown in the following figure.

The closing method is as follows

Method 1:

Every time you exit the base environment through CONDA deactivate on the command line, return to the automatic environment of the system

Method 2

1. By setting Auto_ activate_ Set the base parameter to false to implement:

conda config --set auto_activate_base false

2. If you want to enter, you can use CONDA activate base

3. If you go back and hope to keep it all the time, pass

conda config --set auto_activate_base true

recovery