Argv is the command line parameter
that you get when you run a python file
the following code file is a.py, when I am not using the IDE tool, only the command line window to run, go to the directory where the file is, input: python a py output results as follows
import sys
a=sys.argv
b=len(sys.argv)
print(a)
print(b)

输出:
['a.py']
1
is the same code as above, when I run it, input: python a. zhang output:
['a.py', 'zhang']
2
continue running input: python a.p zhang kang output:
['a.py', 'zhang', 'kang']
3python a. zhang kang
#encoding=utf-8
import sys
a=sys.argv[0]
b=sys.argv[1]
c=sys.argv[2]
print("filename:",a)
print("param1:",b)
print("param2:",c)

输出:
('filename:', 'a.py')
('param1:', 'zhang')
('param2:', 'kang')The routine of benewake tfmini-s / tfmimi plus / tfluna / tf02 Pro / tf03 radar on Python
test environment
Window 10, Python 3.8.6
requirements library
numpy pyserial
Routines
#创建日期:2020年10月10日
#版本:初版
#此程序对应北醒TF系列默认配置下串口版本有效
#此程序只提供参考和学习

# -*- coding: utf-8 -*-
import serial.tools.list_ports
import time
import numpy as np

ser = serial.Serial()
ser.port = 'COM13'    #设置端口
ser.baudrate = 115200 #设置雷达的波特率

def getTFminiData():
   while True:
      count = ser.in_waiting #获取接收到的数据长度
      if count > 8:
         recv = ser.read(9)#读取数据并将数据存入recv
         #print('get data from serial port:', recv)
         ser.reset_input_buffer()#清除输入缓冲区
         if recv[0] == 0x59 and recv[1] == 0x59:  # python3
            distance = np.int16(recv[2] + np.int16(recv[3] << 8))
            strength = recv[4] + recv[5] * 256
            print('distance = %5d  strengh = %5d' % (distance, strength))
            ser.reset_input_buffer()

         if recv[0] == 'Y' and recv[1] == 'Y':  # python2 //此处标示出文件读取成功
            lowD = int(recv[2].encode('hex'), 16)
            highD = int(recv[3].encode('hex'), 16)
            lowS = int(recv[4].encode('hex'), 16)
            highS = int(recv[5].encode('hex'), 16)
            distance = np.int16(lowD + np.int16(highD << 8))
            strength = lowS + highS * 256
            print('distance = %5d  strengh = %5d' % (distance, strength))
      else:
         time.sleep(0.005) #50ms
if __name__ == '__main__':
   try:
      if ser.is_open == False:
         try:
            ser.open()
         except:
            print('Open COM failed!')
      getTFminiData()
   except KeyboardInterrupt:  # Ctrl+C
      if ser != None:
         ser.close()
#创建日期:2020年10月10日
#版本:初版
#此程序对应北醒TF系列默认配置下串口版本有效
#此程序只提供参考和学习
# -*- coding: utf-8 -*-
import serial.tools.list_ports
import time
import numpy as np
ser = serial.Serial()
ser.port = 'COM13' #设置端口
ser.baudrate = 115200 #设置雷达的波特率
def getTFminiData():
while True:
count = ser.in_waiting #获取接收到的数据长度
if count > 8:
recv = ser.read(9)#读取数据并将数据存入recv
#print('get data from serial port:', recv)
ser.reset_input_buffer()#清除输入缓冲区
if recv[0] == 0x59 and recv[1] == 0x59: # python3
distance = np.int16(recv[2] + np.int16(recv[3] << 8))
strength = recv[4] + recv[5] * 256
print('distance = %5d strengh = %5d' % (distance, strength))
ser.reset_input_buffer()
if recv[0] == 'Y' and recv[1] == 'Y': # python2 //此处标示出文件读取成功
lowD = int(recv[2].encode('hex'), 16)
highD = int(recv[3].encode('hex'), 16)
lowS = int(recv[4].encode('hex'), 16)
highS = int(recv[5].encode('hex'), 16)
distance = np.int16(lowD + np.int16(highD << 8))
strength = lowS + highS * 256
print('distance = %5d strengh = %5d' % (distance, strength))
else:
time.sleep(0.005) #50ms
if __name__ == '__main__':
try:
if ser.is_open == False:
try:
ser.open()
except:
print('Open COM failed!')
getTFminiData()
except KeyboardInterrupt: # Ctrl+C
if ser != None:
ser.close()
output as follows:
distance =    38  strengh =  8685
distance =    39  strengh =  8522
distance =    38  strengh =  8441
distance =    38  strengh =  8383
distance =    38  strengh =  8355
distance =    38  strengh =  8323
distance =    38  strengh =  8290
distance =    38  strengh =  8261
distance =    39  strengh =  8241
distance =    39  strengh =  8231
distance =    38  strengh =  8234
Can’t multiply sequence by non int of type ‘float’
example:
num1=input(‘input the first num: ‘)
num2=input(‘input the second num: ‘)
num3=num1*num2
print(num3)
input the first num: enter the integer on the keyboard and enter
input the second num: once again, the keyboard input integer, press enter
start error: can’t multiply sequence by non-int of type ‘float’
reason: the input () function inputs a string format, so the integer you type on the keyboard isn’t actually a positive integer, it’s a string. So num3=num*num will report an error when executing the statement. Because num1 and num2 are strings, they cannot be multiplied.
solution: num1 and num2 cast into integer
specific solution
1. Change the third line of the code to: num3=int(num1)*int(num2)
2. Change the first and second lines to: num1=int(‘input the first num: ‘)
num2 = int (input (‘ input the first num: ‘))
recommends the first solution
Display spaces and tab symbols in vscode
one of the most annoying aspects of python is code alignment, and tabs and Spaces are not the same, so you want to display them for ease of reference. Baidu online a solution, and I am not exactly the same, but still solved.
– extensive chemical and

2. Enter renderWhitespace in the search box and select all to display the space.
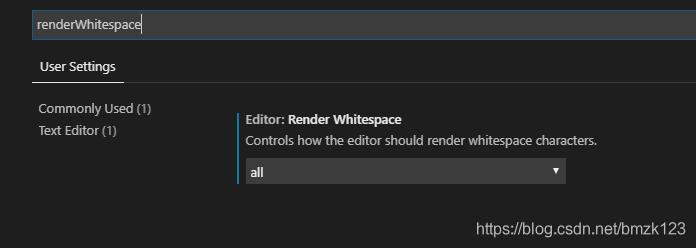
baidu to solution: https://www.jianshu.com/p/e9ee1de056b2
Python common error: if using all scalar values, you must pass an index (four solutions)
(author: Chen’s freebies)
1, error scenario:
import pandas as pd
dict = {'a':1,'b':2,'c':3}
data = pd.DataFrame(dict)
2, error reason:
The dictionary
is passed in directly with the nominal attribute value and index is required, that is, index is set when the DataFrame object is created.
3, solution:
Creating DataFrame objects with a
dictionary is a common requirement, but it can be written differently depending on the object form. Look at the code, the following four methods can correct this error, and produce the same correct results, which method to use according to your own needs.
import pandas as pd

#方法一:直接在创建DataFrame时设置index即可
dict = {'a':1,'b':2,'c':3}
data = pd.DataFrame(dict,index=[0])
print(data)

#方法二:通过from_dict函数将value为标称变量的字典转换为DataFrame对象
dict = {'a':1,'b':2,'c':3}
pd.DataFrame.from_dict(dict,orient='index').T
print(data)

#方法三:输入字典时不要让Value为标称属性,把Value转换为list对象再传入即可
dict = {'a':[1],'b':[2],'c':[3]}
data = pd.DataFrame(dict)
print(data)

#方法四:直接将key和value取出来,都转换成list对象
dict = {'a':1,'b':2,'c':3}
pd.DataFrame(list(dict.items()))
print(data)List indexes must be integers or slices, not tuple solution
solution:
convert to tuple: dataSet=np.array(dataSet)
or dataSet can be converted to matrix: mat(dataSet), both
is feasible
Reading and saving opencv Python video
Capture Video from Camera
gets video from the camera:
to capture video, you need to create a VideoCapture object. Its parameters can be the device index or the name of the video file (described below). The device index simply specifies the number of which camera. Zero represents the first camera and one represents the second camera. After that, you can capture the video frame by frame. But finally, don’t forget to release the capture.
import numpy as np
import cv2

cap = cv2.VideoCapture(0)

while(True):
    # Capture frame-by-frame
    ret, frame = cap.read()

    # Our operations on the frame come here
    gray = cv2.cvtColor(frame, cv2.COLOR_BGR2GRAY)

    # Display the resulting frame
    cv2.imshow('frame',gray)
    if cv2.waitKey(1) & 0xFF == ord('q'):
        break

# When everything done, release the capture
cap.release()
cv2.destroyAllWindows()
cap.read () : returns a Boolean (True/False). This returns true if the frame was read correctly, false otherwise. You can check this return value to see if the video is over.
cap. IsOpened () : checks if the cap is initialized. If it is not initialized, open it with cap.open () . The above code reports an error when the CAP is not initialized.
Get (propId) :
cap.get (propId) : accesses some of the features of the video, where propId is a number from 0 to 18, each number representing the video’s Property Identifier. Some of these values can be modified using cap.set (propId, value) , and value is the modified value.
For example, I check the frame width and height by cap.get (3) and cap.get (4). The default value is 640×480. But I want to change it to 320×240, using ret = cap.set (3, 320) and RET = cap.set (4, 240).
Playing Video from file
to play video from file:
is the same as capturing video from the camera, just change the camera index and video file name. When displaying frames, select the appropriate cv2.waitkey () time. If this value is too small, the video will be very fast, and if it is too large, the video will be slow (this can be used to display the video in slow motion). Normally, 25 milliseconds will do.
import numpy as np
import cv2

cap = cv2.VideoCapture('vtest.avi')

while(cap.isOpened()):
    ret, frame = cap.read()

    gray = cv2.cvtColor(frame, cv2.COLOR_BGR2GRAY)

    cv2.imshow('frame',gray)
    if cv2.waitKey(1) & 0xFF == ord('q'):
        break

cap.release()
cv2.destroyAllWindows()
Saving a Video
save video:
creates a VideoWriter object, specifying the output file name (for example: output.avi). Then you specify the FourCC code (FourCC is the 4-byte code used to specify the video codec. List of available code. Next, pass in frames per second (FPS) and frame size. The last is the isColor flag. If it is True, the encoder encodes a color frame; otherwise, a grayscale frame.
import numpy as np
import cv2

cap = cv2.VideoCapture(0)

# Define the codec and create VideoWriter object
fourcc = cv2.VideoWriter_fourcc(*'XVID')
out = cv2.VideoWriter('output.avi',fourcc, 20.0, (640,480))

while(cap.isOpened()):
    ret, frame = cap.read()
    if ret==True:
        frame = cv2.flip(frame,0)

        # write the flipped frame
        out.write(frame)

        cv2.imshow('frame',frame)
        if cv2.waitKey(1) & 0xFF == ord('q'):
            break
    else:
        break

# Release everything if job is finished
cap.release()
out.release()
cv2.destroyAllWindows()
official document
From in Python__ future__ The role of import *
when we read the code, we always see it beginning with the words from __import * with ___. What this does is introduce the features of the new version into the current version, meaning that we can use some of the features of the new version in the current version.
For example, in python2.x and python3.x the standard way of writing print is
# python 2.x
print "Hello World"

# python 3.x
print("Hello World")
If you want to use python2.x to experience python3.x, use the import print_function from ___ future__,
# python 2.x
from __future__ import print_function
print("Hello World")
and in that case if you go back to python2.x the standard way of writing it would be an error,
# python 2.x
from __future__ import print_function
print "Hello World"

>>> print "Hello World"
  File "<stdin>", line 1
    print "Hello World"
                      ^
SyntaxError: invalid syntax
in addition to the print function, the module with ___ future__ has many other functions,
1. Integer division
# python 2.x
5/2
>>> 2

from __future__ import division
5/2
>>> 2.5
2. With
# python 2.x
try:
    with open('test.txt', 'w') as f:
    f.write('Hello World')
finally:
    f.close()

# 用with替代上述异常检测代码:
from __future__ import with_statement
with open('test.txt', 'w') as f:
    f.write('Hi there!')
3. Absolute introduction (absolute_import)
Absolute
is mainly introduced for python2.4 and earlier versions which, when introducing a.py file, first look for it in the current directory. If so, the file in the current package is referenced first. If we want to reference python’s built-in.py file, we need to use
from __future__ import absolute_import
Method of ignoring case in Python string comparison
1. Regular expression, use the IGNORECASE flag
>>> import re
>>> m = re.search('multi', 'A mUltiCased string', re.IGNORECASE)
>>> bool(m)
2.
converts two strings to the same uppercase before comparing, using upper() or lowercase,lower()
>>> s = 'A mUltiCased string'.lower()
>>> s
'a multicased string'
>>> s.find('multi')
2
Python random selects elements randomly from a collection
USES the python random module’s choice method to randomly select an element
foo = ['a', 'b', 'c', 'd', 'e']
from random import choice
print choice(foo)
USES the python random module’s sample function to randomly select a set of elements from the list
list = [1, 2, 3, 4, 5, 6, 7, 8, 9, 10]
slice = random.sample(list, 5)  #从list中随机获取5个元素,作为一个片断返回
print slice
print list #原有序列并没有改变。 The conversion between [Python] bytes and hex strings.
[Python] bytes and hex string conversion.
repeatedly played around with the assembly parsing and readable printing of code streams in several environments, always encountering hex string and bytes conversion, recorded here.
- on python 2.7.x (which is really hard to handle in older environments), the hex string is converted between bytes like this:
>>> a = 'aabbccddeeff'
>>> a_bytes = a.decode('hex')
>>> print(a_bytes)
b'\xaa\xbb\xcc\xdd\xee\xff'
>>> aa = a_bytes.encode('hex')
>>> print(aa)
aabbccddeeff
>>>
- in python 3 environment, because the implementation of string and bytes has changed significantly, this conversion can no longer be completed with encode/decode.
2.1 before python3.5, one way of doing this conversion was to look like this:
>>> a = 'aabbccddeeff'
>>> a_bytes = bytes.fromhex(a)
>>> print(a_bytes)
b'\xaa\xbb\xcc\xdd\xee\xff'
>>> aa = ''.join(['%02x' % b for b in a_bytes])
>>> print(aa)
aabbccddeeff
>>>
2.2 after python 3.5, you can do the following:
>>> a = 'aabbccddeeff'
>>> a_bytes = bytes.fromhex(a)
>>> print(a_bytes)
b'\xaa\xbb\xcc\xdd\xee\xff'
>>> aa = a_bytes.hex()
>>> print(aa)
aabbccddeeff
>>>
last
data = b'\x820\xb100\x03\xc3\xb4'
print('type(data) = ', type(data))
#type(data) =  <class 'bytes'>


lst = list(data)
print(lst)
print(type(lst[0]))
#[130, 48, 177, 48, 48, 3, 195, 180]
#<class 'int'>

tmp = data.hex()

print(type(tmp), tmp)
# <class 'str'> 8230b1303003c3b4

strr = '8230b1303003c3b4'

num = bytes.fromhex(strr)

print(type(num), num)
# <class 'bytes'> b'\x820\xb100\x03\xc3\xb4'
Explanation of the function strip(), lstrip(), rstrip() in Python
1. strip()
Strip (s[, chars]), which returns a copy of the string and removes the leading and suffix characters. means which characters you want to remove from the string, so you pass them in as arguments. This function only deletes the header and tail characters, not the middle ones. ) if the strip() parameter is empty, the blank character of the string header and tail (including \n, \r, \t, etc.) will be deleted by default.
#这里注意字符串a的两端都有一个空白字符,字符a和n之间也有一个。
a=" \rzha ng\n\t "
print(len(a))

b=a.strip()
print(b)
print(len(b))

输出:
11
zha ng
6
when the argument is empty, the whitespace, \r, \n, \t on both ends are deleted, but the whitespace in the middle stays the same. So let’s take a look at and what does look like when you have parameters:
a="rrbbrrddrr"
b=a.strip("r")
print(b)

输出:bbrrdd
, the middle character r has not changed, both ends have been deleted, now let’s look at passed in multiple character parameters :
a="aabcacb1111acbba"
print(a.strip("abc"))
print(a.strip("acb"))
print(a.strip("bac"))
print(a.strip("bca"))
print(a.strip("cab"))
print(a.strip("cba"))

输出:
1111
1111
1111
1111
1111
1111
, what do you see in this code?Contrary to what you might think, it doesn’t matter if you pass “ABC” or any other arrangement of ABC’s, what matters is that the function only knows that the characters you want to delete are “a”, “b”, “C”. The function takes the arguments you pass and breaks them down into characters, then removes the characters from the head and tail. Got it!
2. Lstrip () and rstrip()
these two functions are basically the same as the above strip(), and the parameter structure is the same, except that the left (head) is removed and the right (tail) is removed.
a=" zhangkang "
print(a.lstrip(),len(a.lstrip()))
print(a.rstrip(),len(a.rstrip()))

输出:
('zhangkang ', 10)
(' zhangkang', 10)
when there are no parameters, one gets rid of the white space on the left and one gets rid of the white space on the right. When passing parameters:
a="babacb111baccbb"
print(a.lstrip("abc"))
print(a.rstrip("abc"))

输出:
111baccbb
babacb111