Capture Video from Camera
gets video from the camera:
to capture video, you need to create a VideoCapture object. Its parameters can be the device index or the name of the video file (described below). The device index simply specifies the number of which camera. Zero represents the first camera and one represents the second camera. After that, you can capture the video frame by frame. But finally, don’t forget to release the capture.
import numpy as np
import cv2

cap = cv2.VideoCapture(0)

while(True):
    # Capture frame-by-frame
    ret, frame = cap.read()

    # Our operations on the frame come here
    gray = cv2.cvtColor(frame, cv2.COLOR_BGR2GRAY)

    # Display the resulting frame
    cv2.imshow('frame',gray)
    if cv2.waitKey(1) & 0xFF == ord('q'):
        break

# When everything done, release the capture
cap.release()
cv2.destroyAllWindows()
cap.read () : returns a Boolean (True/False). This returns true if the frame was read correctly, false otherwise. You can check this return value to see if the video is over.
cap. IsOpened () : checks if the cap is initialized. If it is not initialized, open it with cap.open () . The above code reports an error when the CAP is not initialized.
Get (propId) :
cap.get (propId) : accesses some of the features of the video, where propId is a number from 0 to 18, each number representing the video’s Property Identifier. Some of these values can be modified using cap.set (propId, value) , and value is the modified value.
For example, I check the frame width and height by cap.get (3) and cap.get (4). The default value is 640×480. But I want to change it to 320×240, using ret = cap.set (3, 320) and RET = cap.set (4, 240).
Playing Video from file
to play video from file:
is the same as capturing video from the camera, just change the camera index and video file name. When displaying frames, select the appropriate cv2.waitkey () time. If this value is too small, the video will be very fast, and if it is too large, the video will be slow (this can be used to display the video in slow motion). Normally, 25 milliseconds will do.
import numpy as np
import cv2

cap = cv2.VideoCapture('vtest.avi')

while(cap.isOpened()):
    ret, frame = cap.read()

    gray = cv2.cvtColor(frame, cv2.COLOR_BGR2GRAY)

    cv2.imshow('frame',gray)
    if cv2.waitKey(1) & 0xFF == ord('q'):
        break

cap.release()
cv2.destroyAllWindows()
Saving a Video
save video:
creates a VideoWriter object, specifying the output file name (for example: output.avi). Then you specify the FourCC code (FourCC is the 4-byte code used to specify the video codec. List of available code. Next, pass in frames per second (FPS) and frame size. The last is the isColor flag. If it is True, the encoder encodes a color frame; otherwise, a grayscale frame.
import numpy as np
import cv2

cap = cv2.VideoCapture(0)

# Define the codec and create VideoWriter object
fourcc = cv2.VideoWriter_fourcc(*'XVID')
out = cv2.VideoWriter('output.avi',fourcc, 20.0, (640,480))

while(cap.isOpened()):
    ret, frame = cap.read()
    if ret==True:
        frame = cv2.flip(frame,0)

        # write the flipped frame
        out.write(frame)

        cv2.imshow('frame',frame)
        if cv2.waitKey(1) & 0xFF == ord('q'):
            break
    else:
        break

# Release everything if job is finished
cap.release()
out.release()
cv2.destroyAllWindows()
official document


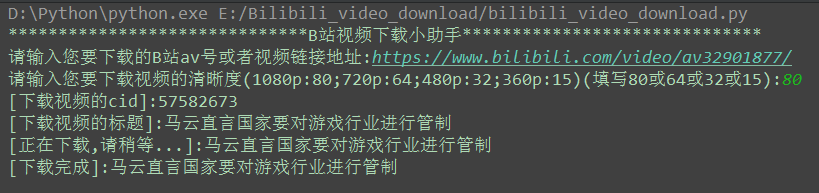 download complete
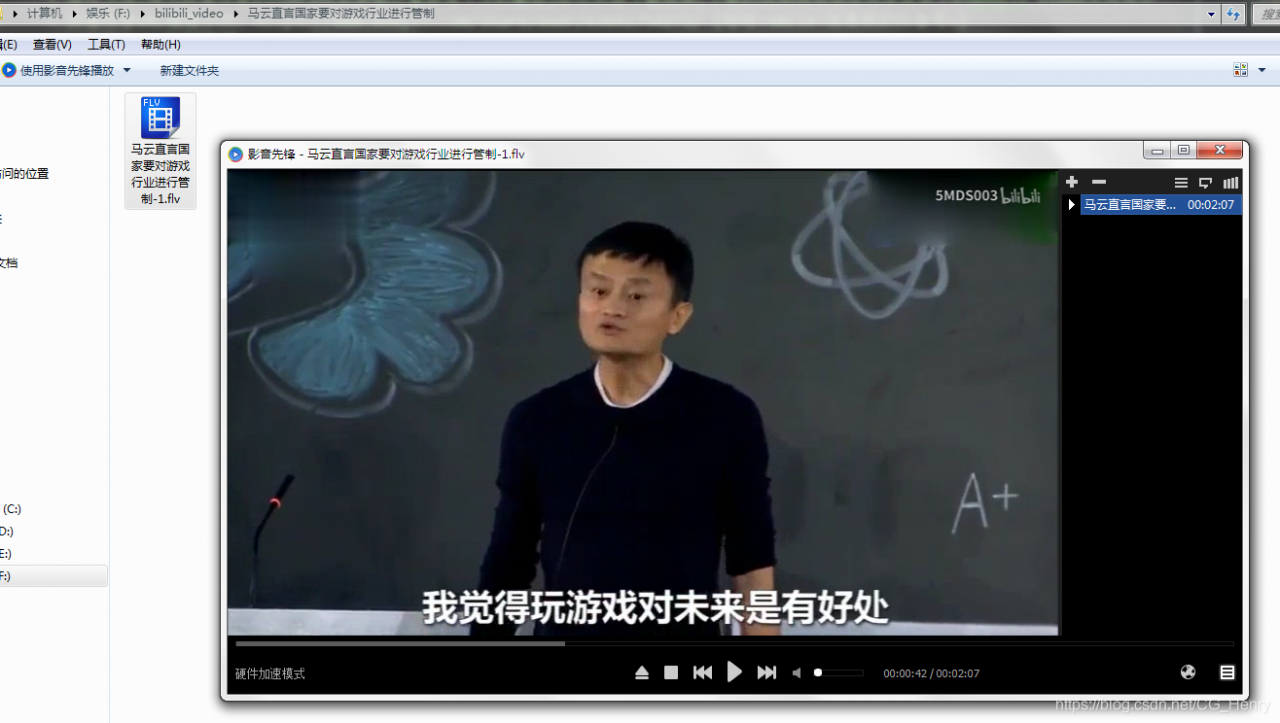
 is a perfect solution to the problem