Ubuntu14.04 Error:
fatal error: linux/videodev.h: No such file or directory
Solution:
sudo apt-get install libv4l-dev

sudo ln -s /usr/include/libv4l1-videodev.h  /usr/include/linux/videodev.h
Ubuntu14.04 Error:
fatal error: linux/videodev.h: No such file or directory
Solution:
sudo apt-get install libv4l-dev
sudo ln -s /usr/include/libv4l1-videodev.h /usr/include/linux/videodev.h
Raspberry Pi Error: VNC error “No configured security type is supported by 3.3 VNC Viewer”
# Command Line Configuration Startup
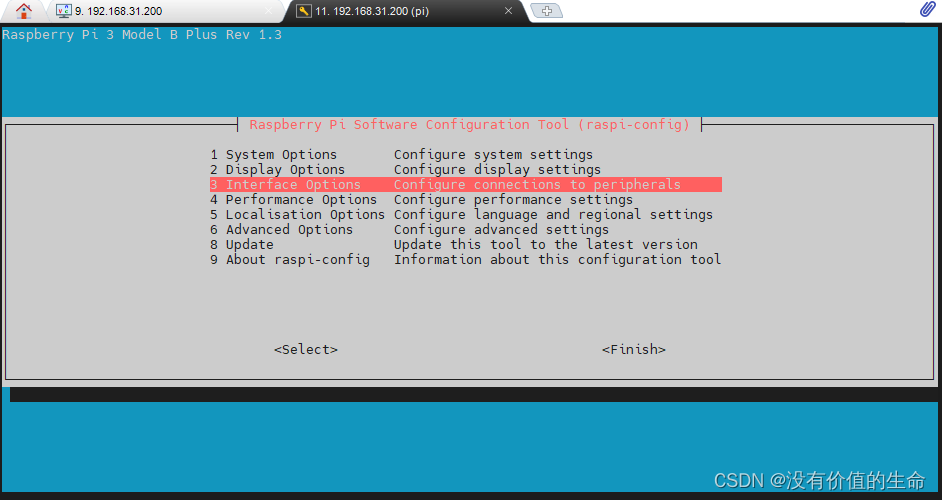
sudo raspi-config
Enter interface options
there are VNC options inside. Enter enable
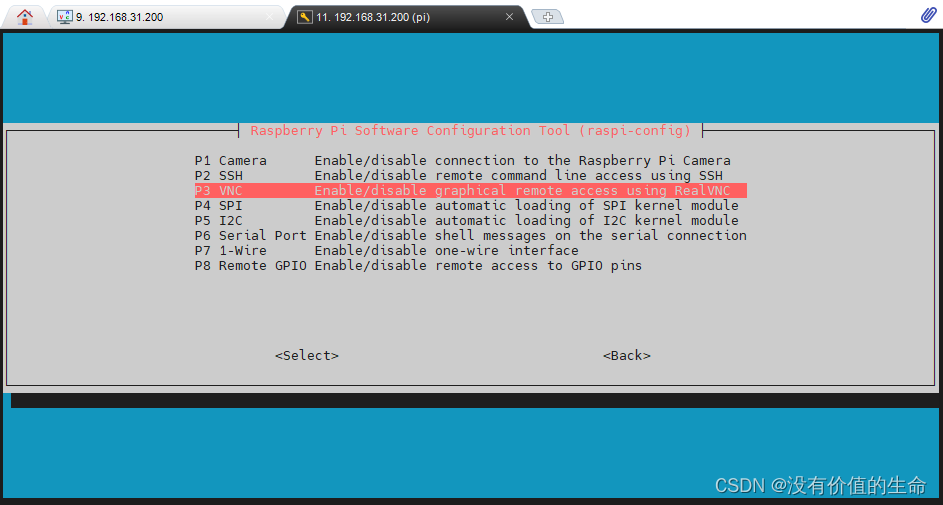
Step 2: modify VNC configuration (Note: the following command lines are executed)
# Note: Here the first step of the change password command line is also executed, change the password to the same password as your original start on the line
# Do not ask why, just change it
$ sudo passwd
passwd: password updated successfully
$ su root
$ sudo echo 'Authentication=VncAuth' >> /root/.vnc/config.d/vncserver-x11
$ sudo vncpasswd -service
# Execute here to enter the password (occasionally you have to wait a few seconds), here is to set the password to log in to VNC
Successfully set "Password" VNC parameter in /root/.vnc/config.d/vncserver-x11
$ sudo cat /root/.vnc/config.d/vncserver-x11
_AnlLastConnTime=int64:0000000000000000
_LastUpdateCheckSuccessTime=int64:01d7d31e1f95ea36
_LastUpdateCheckTime=int64:01d7d31e1f95ea36
Authentication=VncAuth
Password=c3abbea3b003a0b231737c0541892d72
Start VNC/mobaxterm again to connect normally
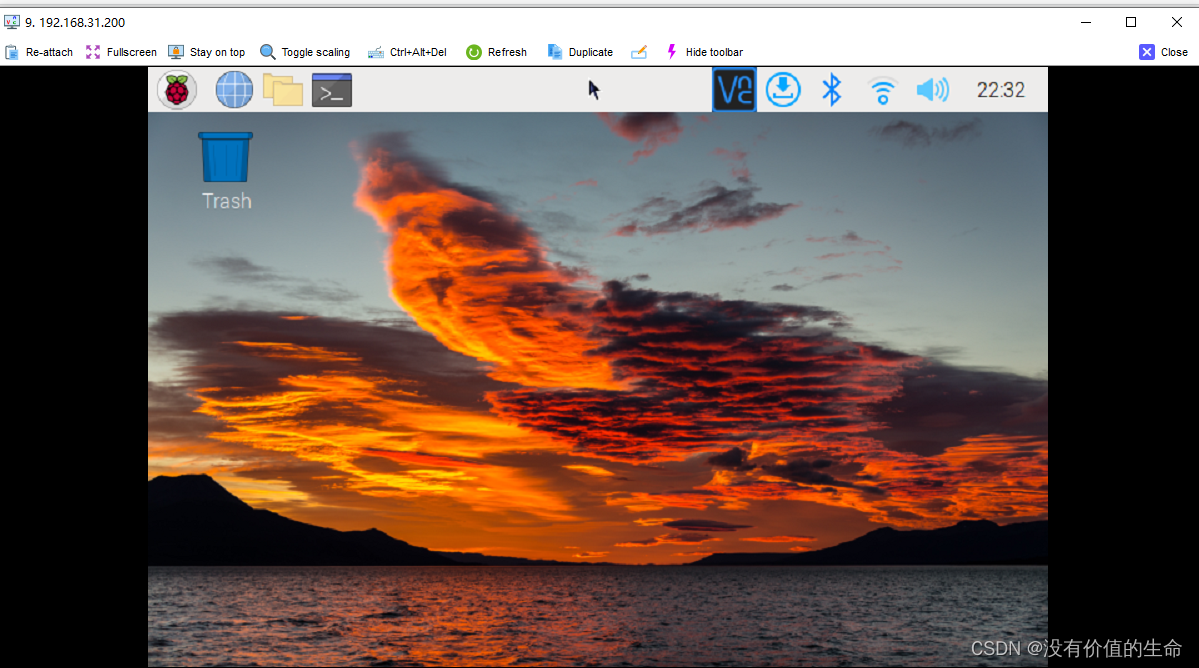
Problem Description:
Minio upload failed. The background controller reports an error. The error information is as follows:
The difference between the request time and the server's time is too large.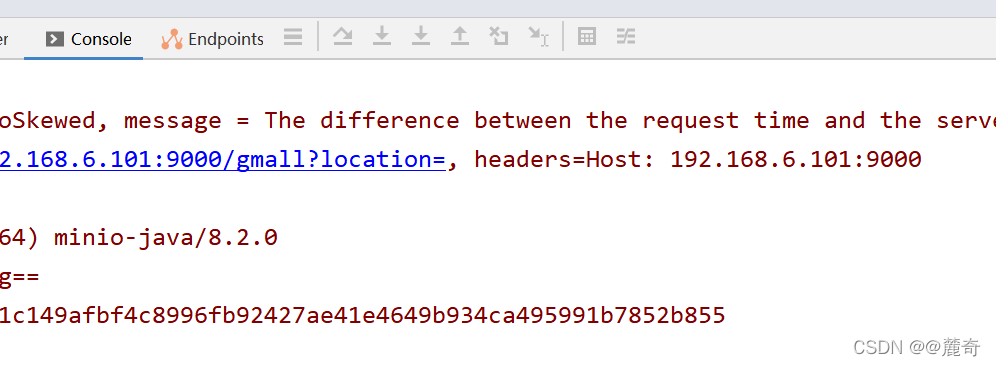
Cause analysis:
The system time zone is inconsistent with the hardware time zone
Solution:
Note: when uploading files, you need to adjust the time of Linux server to be consistent with that of windows!
Step 1: install NTP service
yum -y install ntp
Step 2: start the startup service
systemctl enable ntp
Step 3: start the service
systemctl start ntpq
Step 4: change the time zone
timedatectl set-timezone Asia/Shanghai
Step 5: enable NTP synchronization
timedatectl set-ntp yes
Step 6: synchronize time
ntpq -p
Finally, you can try to enter the command} on the console to check whether it is consistent with the windows system time
date

report errors
*** Unable to find the ncurses libraries or the
 *** required header files.
 *** 'make menuconfig' requires the ncurses libraries.
 ***
 *** Install ncurses (ncurses-devel) and try again.
 ***
make[1]: *** [scripts/kconfig/Makefile:202: scripts/kconfig/dochecklxdialog] Error 1
make: *** [Makefile:520: menuconfig] Error 2
Solution:
sudo apt-get install libncurses5-dev
When compiling netkit-ftp on linux ubuntu an error is reported: file not recognized: file format not recognized
[root@ubuntu /arnold_test/20211219_ftpCrossCompile/netkit-ftp-0.17]24# make
(cd  ftp && make)
make[1]: Entering directory '/arnold_test/20211219_ftpCrossCompile/netkit-ftp-0.17/ftp'
arm-linux-gnueabihf-gcc -O2 -Wall -W -Wpointer-arith -Wbad-function-cast -Wcast-qual -Wstrict-prototypes -Wmissing-prototypes -Wmissing-declarations -Wnested-externs -Winline  glob.c -c
arm-linux-gnueabihf-gcc -O2 -Wall -W -Wpointer-arith -Wbad-function-cast -Wcast-qual -Wstrict-prototypes -Wmissing-prototypes -Wmissing-declarations -Wnested-externs -Winline  main.c -c
arm-linux-gnueabihf-gcc -O2 -Wall -W -Wpointer-arith -Wbad-function-cast -Wcast-qual -Wstrict-prototypes -Wmissing-prototypes -Wmissing-declarations -Wnested-externs -Winline  ruserpass.c -c
arm-linux-gnueabihf-gcc  cmds.o cmdtab.o domacro.o ftp.o glob.o main.o ruserpass.o  -o ftp
cmds.o: file not recognized: file format not recognized
collect2: error: ld returned 1 exit status
Makefile:14: recipe for target 'ftp' failed
make[1]: *** [ftp] Error 1
make[1]: Leaving directory '/arnold_test/20211219_ftpCrossCompile/netkit-ftp-0.17/ftp'
Makefile:7: recipe for target 'ftp.build' failed
make: *** [ftp.build] Error 2
Solution: make clean
Or manually delete the files generated by the previous compilation
Question:
[root@dev-k8s-worker-server-05 node_exporter-1.2.2.linux-amd64]# ./node_exporter
Segmentation fault
Solution:
Download the tar package again and start the solution after decompression
Gunicorn timeout error: worker timeout
I. Problem Description:
One morning, the developer suddenly reported a failure and the container restarted inexplicably. After checking the business container log, the worker timeout field was found

II. Analysis of error reporting reasons:
It can be seen from the error message that the worker process of gunicorn timed out, causing the process to exit and restart. Check the official website. The official website explains that the default timeout of gunicorn is 30s. If it exceeds 30s, the worker process will be killed and restarted. 
III Solution:
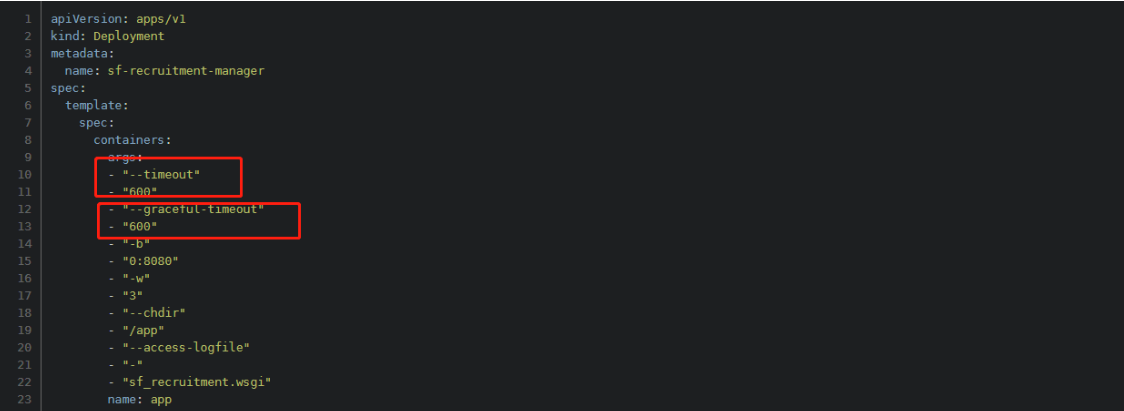
Add: -- timeout 600 to gunicorn’s startup command to set the timeout to 600 seconds– Graceful timeout 600 indicates that the graceful timeout is 600 seconds
After the setting is completed, it is verified through kustomize inspection and re-distribution. It is found that the problem does not occur in the follow-up
Solution:
Locate /usr/lib/Python 3/dist packages/rospkg/OS_detect.Py , replace all Ubuntu characters with deepin
Virtual machine startup error XFS
XFS: log mount mount/recovery failed: error – 117 when the virtual machine is started. In fact, the virtual machine cannot be mounted. The solution is as follows:
Solution:
① Restart the virtual machine. After entering the startup interface, press e to enter the editing interface
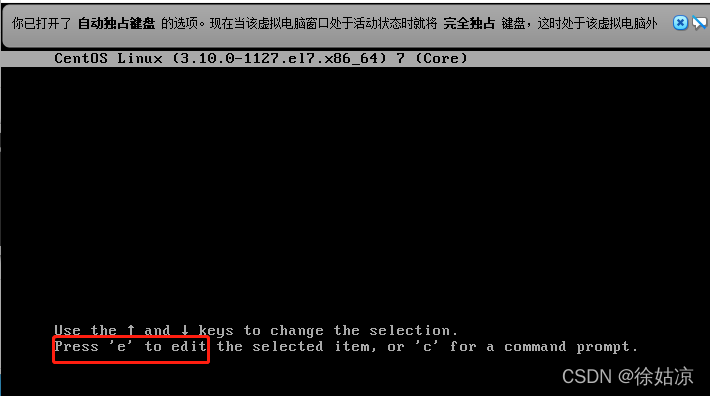
② Find the line of linux16 and make the following modifications
change RO to RW init =/sysboot/bin/sh, and delete console = ttys0


③ After modification, press Ctrl + X to start
④ a few minutes after startup, the command line will appear

⑤ On the command line, enter systemctl status sysboot Mount
⑥ enter XFS_ Repair – V – L path in the figure above
⑦ wait for the file to be cleaned before the command line appears. Enter the command reboot to restart the virtual machine
Because Mongo is abnormally closed, an error message of “error: child process failed, exited with error number 1” may appear when it is started again.
Step 1: delete the lock file
Find Mongo directory and delete mogod lock

Step 2: create a new log file
Find the log file directory of Mongo and delete or modify the original log file name
[because I don’t want to modify Mongo’s configuration file, I modified the file name and added a file with the same name as the original file. I can also take another name and modify Mongo configuration]

Step 3 try to restart
Generally, the restart is successful at this step.
If it still fails, take a look at Mongo’s log file
the errors reported in my log file are as follows:
2021-12-16T11:58:12.810+0800 I CONTROL  [main] ***** SERVER RESTARTED *****
2021-12-16T11:58:12.815+0800 I CONTROL  [main] Automatically disabling TLS 1.0, to force-enable TLS 1.0 specify --sslDisabledProtocols 'none'
2021-12-16T11:58:12.820+0800 I CONTROL  [main] ERROR: Cannot write pid file to /var/run/mongodb/mongod2.pid: No such file or directory
Then go to the prompt “/var/run” directory, create a new mongodb folder, and restart. Start successfully and solve the problem!
preface
An error occurs when installing PostgreSQL, as shown below
configure: error: readline library not found
If you have readline already installed, see config.log for details on the
failure.  It is possible the compiler isn't looking in the proper directory.
Use --without-readline to disable readline support.Solution:
Check whether the readLine package is installed in the system
rpm -qa | grep readlineInstall readline-devel pack
yum -y install -y readline-develExecute configure again successfully
The explanation of readLine comes from the official website
--without-readline
Prevents use of the Readline library (and libedit as well). Thisoption disables command-line
editing and history in psql, so it is notrecommended.
Note: when you execute configure, you can add “– without readLine” to avoid this error, but PostgreSQL officials do not recommend it