Tag Archives: javascript

JavaScript removes the number specified in the array

code

Method 1: return a new array
/ / remove all elements in array arr whose values are equal to item. Do not modify the array arr directly, and the result will return a new array
instead**

function clearArrItem(arr,item){
	var arrs=[];
	for(var i = 0;i<arr.length;i++){
		if(arr[i] !== item){
			arrs.push(arr[i])
		}
	}
	return arrs
}
var arrs = [1,2,5,4,2,1,5,2,1,2,5,42,1,4,11,1,1,1,1,11];
console.log(clearArrItem(arrs,1));

**

Method 2: operate in the original array
/ / remove all the elements in the array arr whose values are equal to the item, directly operate on the given arr array, and return the result
to the user**

function clearArrItem2(arr,item){
	var index;
	for(var i = 0;i<arr.length;i++){
		if(arr[i] === item){
			if(arr[i+1] === item){
				arr.splice(i,1);
				i--;
				continue;
			}
			arr.splice(i,1);
		}
	}
	return arr;
}
var arrs = [1,5,6,3,5,4,1,1,1,1,1,1,1,5,8,4,5,1,5,1,5,1,1];
console.log(clearArrItem2(arrs,1));

**
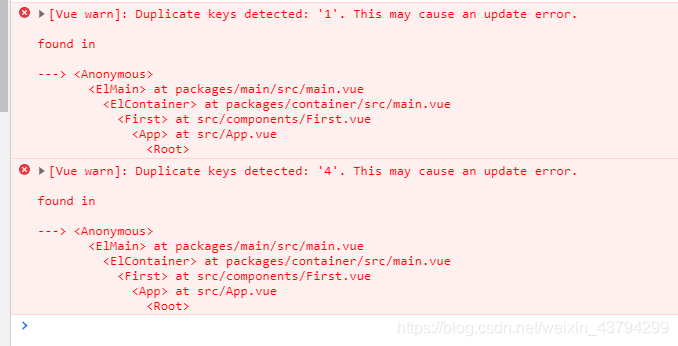
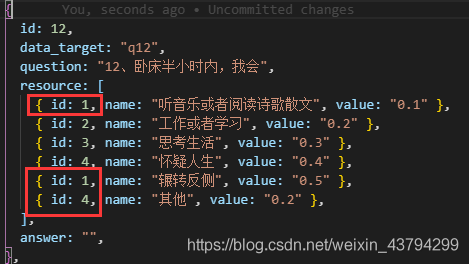
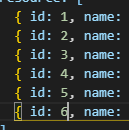
Vue warn: duplicate keys detected: ‘1’. This may cause an update error

[VUE WARN]: Duplicate keys detected: ‘1’. This may cause an update error. :

/ font>


Problem description:


Reason analysis:
> Keys value binding problem
My problem is my problem when doing the project binding:

here my page rendering is based on id to apply colours to a drawing


Solution:


br>

How to increase the effect of onchange event after adding readonly attribute to input tag and display time of laydate plug-in

Trial and error: It is not possible to bind the onChange event to the input tag directly in HTML and JS.
Reason: ReadOnly is read-only, and onChange events respond to value changes. However, the actual onChange event is only valid for the interface input value. Modified values through DOM objects are invalid.
Use onblur instead. Onblur events are triggered when an object loses focus. The measured effect can occasionally start, occasionally fail.
Solution 2: Given that the input box renders the event with layDate, in the done function on layDate, assign the input box to the selected value that needs to be executed during the execution of the onChange event.
Solution # 2 Perfect the problem.
Note: When searching the web, be careful to combine your own scene. For example, the input box has been rendered with laydate, which is equivalent to an event. Therefore, we should consider whether we can achieve our requirements in this event.


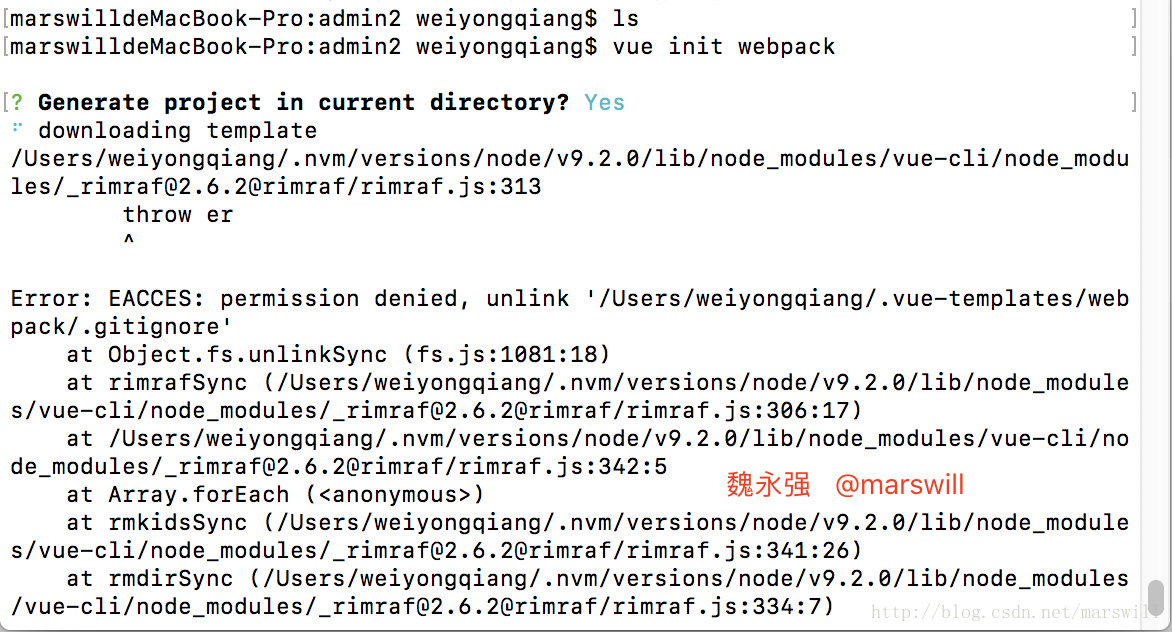
Vue init webpack command error Vue cli / node_ modules/_ [email protected]@rimraf/rimraf.js :313

This is a low-level error in Vue development that can be encountered but is shared here so that it can be resolved if encountered
To explain the development environment in which this problem occurs: native Mac + NVM-managed node uses Node V8.0.0 to install vue-cli globally: NPM install vue-cli-g

Error is as follows

/Users/weiyongqiang/.nvm/versions/node/v9.2.0/lib/node_modules/vue-cli/node_modules/[email protected]@rimraf/rimraf.js:313
        throw er
        ^

Error: EACCES: permission denied, unlink '/Users/weiyongqiang/.vue-templates/webpack/.gitignore'

Error analysis
This problem is actually relatively simple. The intuitive error is that an exception is thrown on line 313 of rimraf.js. Exploring the cause of this problem requires understanding the role of rimraf.js. It uses the rm -rf command of Unix for deep package deletions. RM-RF is required to operate the corresponding permissions.
Error resolution
Run the vue command with sudo

sudo vue init webpack

Although the solution to this problem is very simple but I believe that many people will encounter, the use of Windows system, of course, will not appear the problem of authority.

Image proxy settings Flash + JavaScript

The article directories
Problem description idea specific implementation front end back end

Problem description
If is request http://www.example.com/image1.png picture originally, now ask for pictures, https://www.petal.social/image/www.example.com/image1.png you will need to do an image proxy
(request pictures to our own when the server request, then our HTTP server request images, the result of the HTTP in the way back to the web site of the HTTPS)
Train of thought
First, add an API locally for the front-end request that returns the modified image URL
The specific implementation
The front end
Original version:

showImage(url) {
    if (url.startsWith('http://')) {
        if (url.includes('qpic.cn') || url.includes('gtimg.cn')) {
            return url.replace('http://', 'https://')
        } else {
            return return 'https://demo.cloudimg.io/v7/' + url
        }
    } else {
        return url
    }
}

Image URL contains /, so in Flask is mistaken for routing calls, so you need to for the original URL with Base64 encryption
modify after:

import {Base64} from 'js-base64'
const BASE_URL = 'http://localhost:5000'
// const BASE_URL = 'https://www.petal.social'
showImage(url) {
    if (url.startsWith('http://')) {
        if (url.includes('qpic.cn') || url.includes('gtimg.cn')) {
            return url.replace('http://', 'https://')
        } else {
            return BASE_URL + '/api/v1/image/' + Base64.encode(url)
        }
    } else {
        return url
    }
}

The back-end

from flask_restplus import Namespace, Resource
from flask import request, make_response
from maintenance import check_maintenance, not_under_maintenance
import requests
from flask import Response, stream_with_context
import base64
image_api = Namespace('image', description='image related public interface')

@image_api.route('/<image_url>')
@image_api.param('image_url', 'The original image url')
class Image(Resource):
    @image_api.doc('get_image_url')
    @not_under_maintenance
    def get(self, image_url):
        check_maintenance()
        image_url = base64.b64decode(image_url)
        res = requests.get(image_url, stream = True)
        return Response(stream_with_context(res.iter_content(2048)), content_type = res.headers['content-type']) 

window.open () several ways to open windows

    opens Baidu in the current window and makes the URL appear in the search bar.
window.open("http://www.baidu.com/", "_self");
    Open Baidu
a new window

window.open("http://www.baidu.com/", "_blank");
    Open a new window and name it “hello”
window.open("", "hello");
    > In addition, there are several options for the second argument of the open function :
_top: If there are framesets on the page, the URL replaces the top layer of framesets. That is, if there are no framesets, the effect is equivalent to _self._parent: the page pointed to by the URL is loaded into the parent of the current frame. If there are no framesets, the effect is equivalent to _self._media: the page pointed to by the URL is loaded into the HTML code area contained in the Media Bar. If there is no Media Bar, add it to itself.

    If you want to add something else to the new window, you need a third parameter :
Channelmode: yes | no | 1 | 0 (window display for theater mode [full screen displays the current web page, including the toolbar], or channel mode [general show]). Directories: yes | no | 1 | 0 (whether to add directory buttons, such as under the IE there could be a “link” button on the top) fullscreen: yes | no | 1 | 0 (the browser handle full screen mode, and hide the title bar and menu, etc.) the menubar: Yes | no | 1 | 0 (whether to display the menu bar of the browser by default) resizeable: yes | no | 1 | 0 (window can resize) scrollbars: yes | no | 1 | 0) (whether to allow a horizontal or vertical scroll bar titlebar: yes | no | 1 | 0 (whether to add a title bar) toolbar: yes | no | 1 | 0 (whether to add the default browser toolbar) status: Yes | no | 1 | 0 (whether to display the status bar) location: yes | no | 1 | 0 (whether to display the search bar) copyhistory: yes | no | 1 | 0 (seems to have been abandoned, if as long as the toolbars, according to the history button will be displayed) height: the height of the window, the minimum value of 100 pixels width: the width of the window, the minimum value of 100 pixels left: the window of the distance relative to the screen on the left

window.open("http://www.baidu.com/", "_self","height=400,width=400,top=10,left=10,resizable=yes");

There is one last argument to the open function, which is about history, whether the window being opened has the same history URL as the window being opened, or whether it is a separate memory.

NPM run dev error: cannot find module ‘webpack cli / bin / config yargs‘

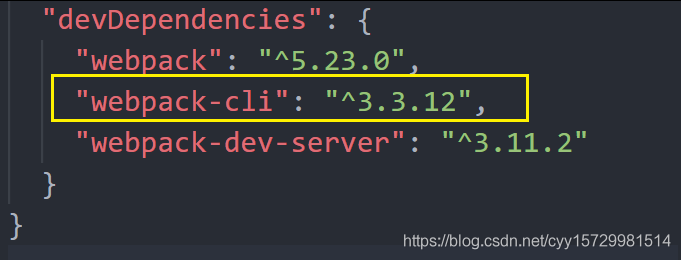
1- Open your package.json file

"devDependencies": {
    "webpack": "^5.2.0",
    "webpack-cli": "^4.1.0",
    "webpack-dev-server": "^3.11.0"
}

Webpack-cli: “^4.1.0”, which is version 4.*
2- Uninstall the current webpack-cli directive: NPM uninstall webpack-cli
3.* version directive: NPM install webpack-cli@3 -d

Just run NPM run dev!
 

Setter and getter of JS class attribute

You can use the GET and SET keywords inside the “class” to set the save and accessor functions for a property and intercept the access behavior of that property.

class A {
  constructor () {
    this._a = 'a'
  }
  set a (val) {
    if (Object.prototype.toString.call(val)  !== '[object String]') {
      this._a = 'error'
    } else {
      this._a = val
    }
  }
  get a () {
    return this._a
  }
}

let obj = new A()
console.log(obj.a) // a
obj.a = 123
console.log(obj.a) // error