Tag Archives: css

CSS Failed to decode downloaded font, OTS parsing error: Failed to convert WOFF 2.0 font to SFNT

Recently, I’ve been looking at some information about the web front end, and the following error occurred in processing a CSS, so as to record it.

I compiled a project under webstorm and loaded the index page on it. I got the following warning on the chrome console:

Failed to decode downloaded font: http://localhost:4200/assets/fonts/Simple-Line-Icons.woff2?v=2.4.0
OTS parsing error: Failed to convert WOFF 2.0 font to SFNT
Failed to decode downloaded font: http://localhost:4200/assets/fonts/Simple-Line-Icons.woff2?v=2.4.0
OTS parsing error: Failed to convert WOFF 2.0 font to SFNT
Failed to decode downloaded font: http://localhost:4200/assets/fonts/Simple-Line-Icons.woff2?v=2.4.0
OTS parsing error: Failed to convert WOFF 2.0 font to SFNT

Custom font and code used:

@font-face {
  font-family: 'simple-line-icons';
  src: url('../fonts/Simple-Line-Icons.eot?v=2.4.0');
  src: url('../fonts/Simple-Line-Icons.eot?v=2.4.0#iefix') format('embedded-opentype'),
       url('../fonts/Simple-Line-Icons.woff2?v=2.4.0') format('woff2'),
       url('../fonts/Simple-Line-Icons.ttf?v=2.4.0') format('truetype'),
       url('../fonts/Simple-Line-Icons.woff?v=2.4.0') format('woff'),
       url('../fonts/Simple-Line-Icons.svg?v=2.4.0#simple-line-icons') format('svg');
  font-weight: normal;
  font-style: normal;
}

The styleext I use is SCSS, and the stylesheet file suffix is. CSS.

There are two solutions

1. Will xxxx.css Change to xxxx.css.scss .

2. Change the format in the font declaration. Change format (‘woff ‘) to format (‘font woff’)

@font-face {
  font-family: 'simple-line-icons';
  src: url('../fonts/Simple-Line-Icons.eot?v=2.4.0');
  src: url('../fonts/Simple-Line-Icons.eot?v=2.4.0#iefix') format('embedded-opentype'),
       url('../fonts/Simple-Line-Icons.woff2?v=2.4.0') format('font-woff2'),
       url('../fonts/Simple-Line-Icons.ttf?v=2.4.0') format('truetype'),
       url('../fonts/Simple-Line-Icons.woff?v=2.4.0') format('font-woff'),
       url('../fonts/Simple-Line-Icons.svg?v=2.4.0#simple-line-icons') format('svg');
  font-weight: normal;
  font-style: normal;
}

Tailwind installation

I was really served, the installation of a day of various problems reported wrong, the installation of official website documents is completely not good, I search the tutorial on the net pull a lot of useless code.
Find out how it works and record it here.
1. Install tailwindcss

npm i tailwindcss

2. Install postcss

npm i postcss

3. Install postcss-loader (pay attention not to install too high version may cause compatibility problems)


npm i [email protected]

4. Add tailwindcss to postcss.config.js without creating a new tailwindcss

module.exports = {
  plugins: {
	tailwindcss: {},
    autoprefixer: {}
  }
}

5. New CSS is added and introduced

@tailwind base;
@tailwind components;
@tailwind utilities;

6. At this point you can use the official website style class name to test, if there is no problem with the other configuration of the official website.

Ueditor paste word image and upload image file automatically

Tinymce is a very good rich text editor, you can go to the website to download. https://www.tiny.cloud
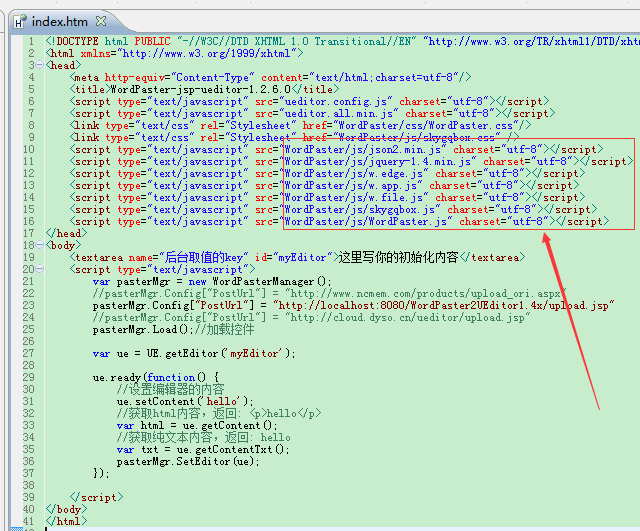
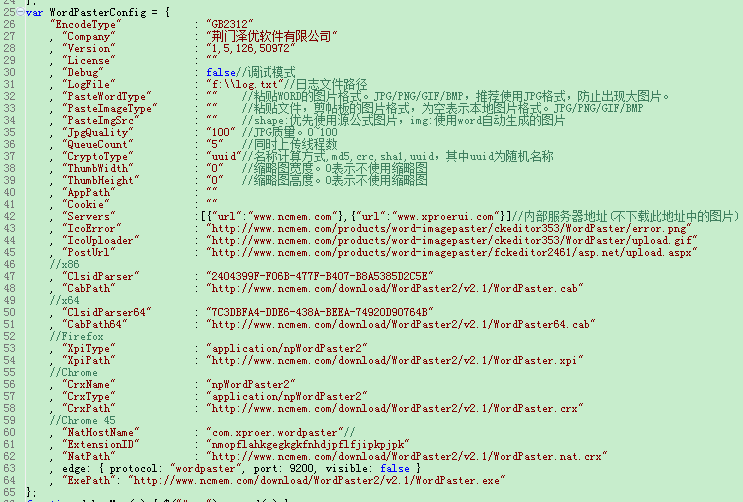
Here is the source code of PowerPaste, a paid plug-in on its official website, but it does not affect the use of functionality.

umeditor+粘贴word图片


Take Vue as an example:
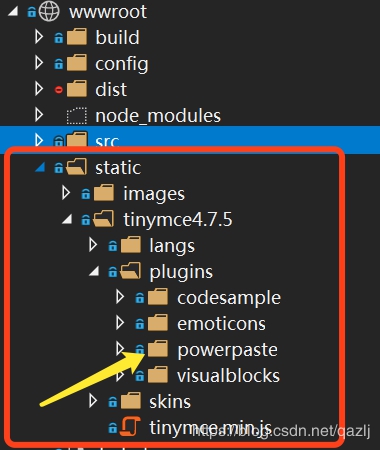
Install Tinymce under static directory instead of NPM.
PowerPaste is put in the \static\tinymce\plugins directory


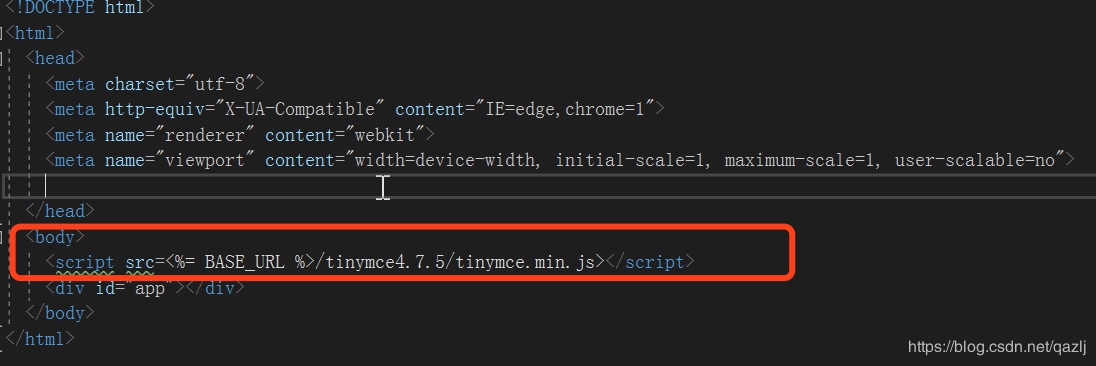
Introducing tinymce.min.js in index.html.


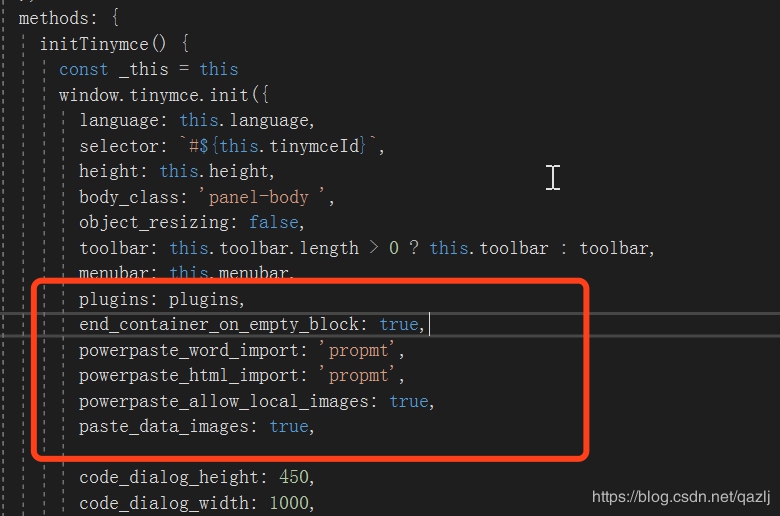
Code parameter configuration is shown in the figure below:


Replace paste in plugins with powerpaste and you’re done.
The final effect, can automatically batch upload all the images in Word

After the picture is uploaded, the image address in the editor is changed to the image address of the server.

Invalidation of margin top property of nested box in CSS style box

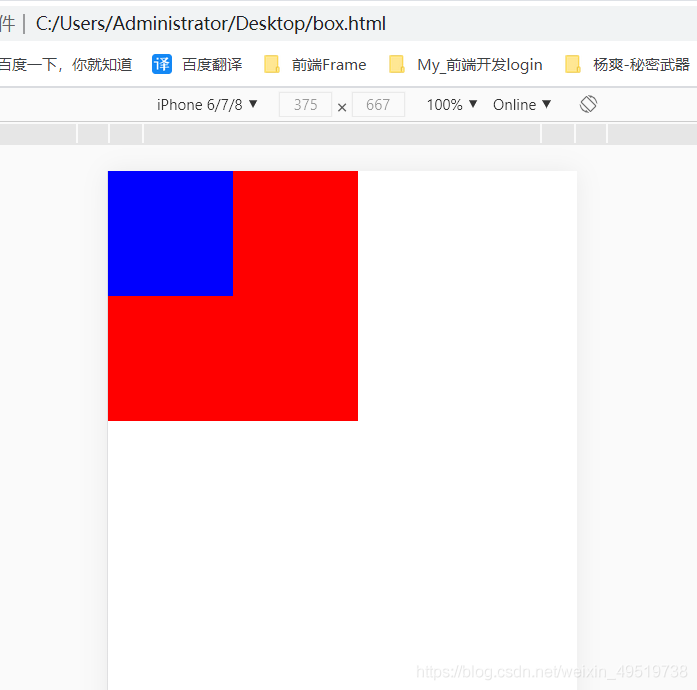
When we write CSS styles, when two boxes are nested together, the top of the inside box is placed on the top of the outside box, as shown in the figure below:

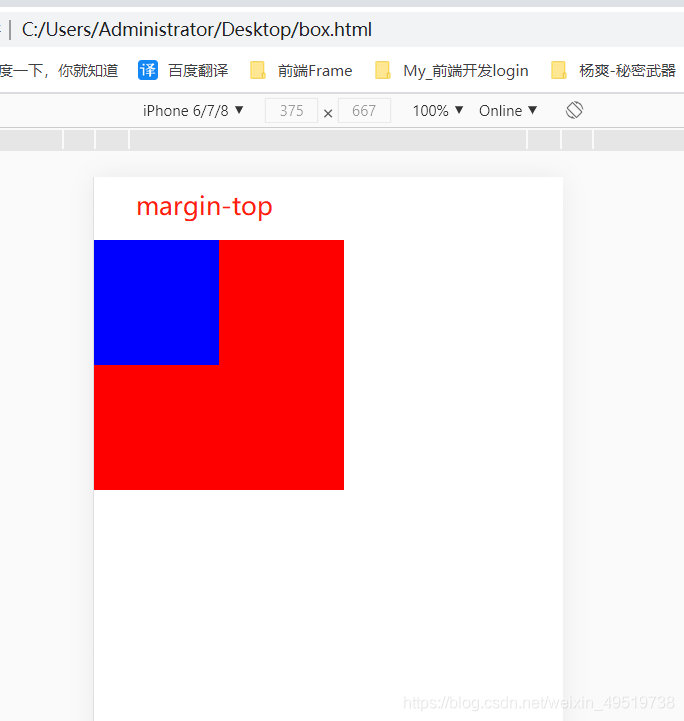
At this time, if the properties like margin-top are set for the inner box, there will be no space between the top of the inner box and the outer box, but the outer box is pushed down, as if margin-top property is set for the outer box.
set margin-top property for the inner box, as shown in the figure below:

<style>
* {
    margin: 0;
    padding: 0;
}
.wrap {
    width: 200px;
    height: 200px;
    background-color: red;
}
.wrap .box {
    width: 100px;
    height: 100px;
    background-color: blue;
    margin-top: 50px;
}
</style>
<body>
    <div class="wrap">
        <div class="box"></div>
    </div>
</body>


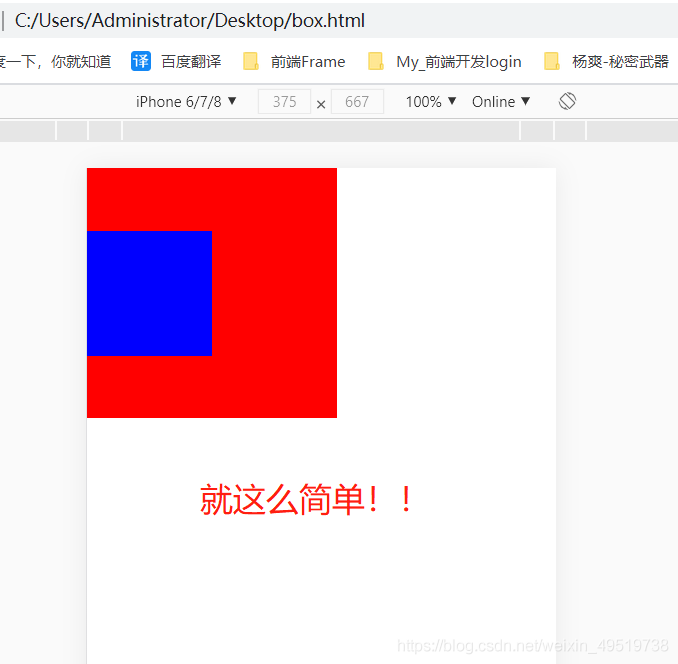
so the simplest way is to add a property to the outer box :

overflow: hidden;

The results are as follows:

Compatibility of mobile display frame

Border1 pixel problem
For example:
HTML:

<div class="content  border-1px"></div>

css:

.border-1px{
  position: relative;
}
.border-1px:before{
  position: absolute;
  top: 0;
  right: 0;
  bottom: 0;
  left: 0;
}
@media only screen and (-webkit-min-device-pixel-ratio: 2) {
  .border-1px:before {
    right: -100%;
    bottom: -100%;
    -webkit-transform: scale(0.5);
    transform: scale(0.5);
  }
}

@media only screen and (-webkit-min-device-pixel-ratio: 3) {
  .border-1px:before {
    right: -200%;
    bottom: -200%;
    -webkit-transform: scale(0.333333);
    transform: scale(0.333333);
  }
}
.content:before{
  border: 1px solid red;
}

Effect:

On and off of timer in JS

setInterval()
When a function
is called for a specified period of time:

setInterval(function,time,lang)

function: function to be called or code string to be executed
time: required parameters, every how long to call the function, in milliseconds
lang: optional parameters, running JScript | VBScript | JavaScript
clearInterval()
Means to stop the setInterval timer call function

function getTime() {
        console.log(123);
        if (true) {
            clearInterval(db)
        }
    }

let db = setInterval(getTime, 1000)

setTimeout()
Call a function after a certain time
syntax:

setTimeout(function,time,lang)

Function:
function: required, to be called
time: required, number of milliseconds to wait before executing code
lang: optional, script language: JScript | VBScript | JavaScript

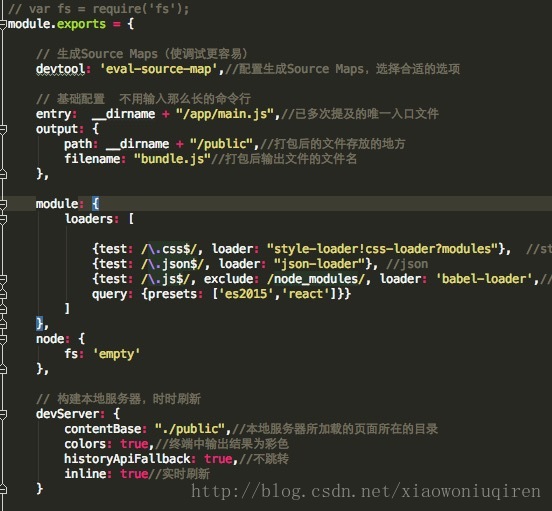
Error: can’t resolve ‘FS’ in (webpack 2 configures CSS loaders)

Preamble, CSS loaders in Webpack 2 have been configured before, but how incorrect
Error:

ERROR in ./~/convert-source-map/index.js
Module not found: Error: Can't resolve 'fs' in '/Users/ceshi/Desktop/webpack/node_modules/convert-source-map'
 @ ./~/convert-source-map/index.js 2:9-22
 @ ./~/css-loader/lib/css-base.js
 @ ./~/css-loader!./app/style.css
 @ ./app/style.css
 @ ./app/main.js


Fix this by modifying the webPack configuration file to add a single line of code

 node: {
        fs: 'empty'
    },


Test success

PHP big file upload problem (500m or above)

An overview,
 
A breakpoint is simply a download, which means to continue downloading a file from where it has already been downloaded. Breakpoints were not supported in previous versions of the HTTP protocol, and HTTP/1.1 has been since. The Range and content-Range headers are usually used for breakpoints. HTTP protocol itself does not support breakpoint upload, you need to implement their own.
 
Second, the Range
 
Used in the request header to specify the position of the first byte and the position of the last byte, in general format:
 
Range: For client-to-server requests, you can change a field to specify the size and unit of a download file. Byte offset starts at 0. Typical format:
Ranges: (unit=first byte Pos)-[last byte Pos]
Ranges: Bytes =4000- Download from the beginning of byte 4000 to the end of file
Ranges: Bytes =0~N to download contents in the 0-n byte range
Ranges: Bytes = M-n to download contents in the M-n byte range
Ranges: Bytes = -n to download the last N-byte content

 
1. The following points should be noted:
(1) The data interval is a closed interval with a starting value of 0, so a request like “Range: Bytes =0-1” is actually two bytes at the beginning of the request.
(2) “Range: Bytes =-200”, which does not represent the 201 bytes at the beginning of the request file, but the 200 bytes at the end of the request file.
(3) If the last Byte POS is less than the first Byte POS, then the Range request is invalid. The server needs to ignore the Range request, then respond with a 200, and send the entire file to the client.
(4) If the last Byte POS was greater than or equal to the file length, then the Range request was considered unsatisfiable and the server needed to respond to a 416, Requested Range not Satisfiable.
 
2. Example explanation:
Bytes =0-499 bytes
Bytes =500-999 bytes
Bytes =-500 bytes
Bytes =500- = range after 500 bytes
First and last bytes: Bytes =0-0,-1
Also specify a range: Bytes =500-600,601-999
 
Third, the Content – Range
 
Used in the response header to specify the insertion location of a portion of the entire entity, which also indicates the length of the entire entity. Before the server returns a partial response to the client, it must describe the extent of the response coverage and the entire entity length. General format:
 
Content-range: Bytes (Unit first Byte pos) – [Last Byte pos]/[Entity Legth]
 
4. Header examples
 
Request to download the entire file:
 
GET/test. Rar HTTP/1.1
Connection: close
Host: 116.1.219.219
Range: Bytes =0-801 // Bytes =0- Or don’t use this header
 
General normal response
 
HTTP/1.1 200 OK
The Content – Length: 801
The content-type: application/octet stream
Content-range: Bytes 0-800/801 //801: Total file size
 
The simplest breakpoint continuation implementation is as follows:
1. The client has downloaded a 1024K file, of which 512K has been downloaded
2. The network is interrupted, and the client requests the continuation of transmission. Therefore, it is necessary to declare the fragment to be continued this time in the HTTP header:
Range:bytes=512000-
This header tells the server to transfer the file from the 512K location of the file
3. The server receives the breakpoint to continue the transmission request, starting from the 512K position of the file, and adds in the HTTP header:
Content-Range:bytes 512000-/1024000
And the server should return an HTTP status code of 206 instead of 200.
However, in a real scenario, the content of the file corresponding to the URL has changed at the server side when the terminal initiates the continuation request, and the data of the continuation is definitely wrong. How to solve this problem?Obviously at this point we need a way to identify the uniqueness of the file. There is also a definition in RFC2616, such as last-modified to indicate the Last modification time of a file, so that you can determine whether any changes have been made during the continuation of the file. Also defined in RFC2616 is an ETag header that can be used to place a unique identifier for a file, such as the MD5 value of the file.
When a terminal initiates a continuation request, it should declare the IF-match or IF-modified-since fields in the HTTP header to help the server identify file changes.
In addition, there is also an IF-range header defined in RFC2616. If the terminal USES iF-range in continuation. The content in the IF-range can be the first ETag header received or the Last modification in the Last-ModFIED. When the server receives the continuation request, it verifies through the contents in the IF-range. If the verification is consistent, it returns the continuation reply of 206; If not, it returns 200. The content of the reply is all the data of the new file.

the relevant reference links: http://blog.ncmem.com/wordpress/2019/08/09/http%e6%96%ad%e7%82%b9%e7%bb%ad%e4%bc%a0/
welcome into the group to discuss: 374992201
How to center the box horizontally and vertically in HTML

for example:

<!DOCTYPE html>
<html lang="en">
<head>
    <meta charset="UTF-8">
    <meta name="viewport" content="width=device-width, initial-scale=1.0">
    <title>Document</title>
    <style>
        *{
            padding: 0;
        }
        ul{
            width: 400px;
            height: 300px;
            background-color: #ccc;
        }
        ul>li{
            width: 100px;
            height: 100px;
            background-color: red;
            list-style: none;
        }
    </style>
</head>
<body>
    <ul>
        <li></li>
    </ul>
</body>
</html>

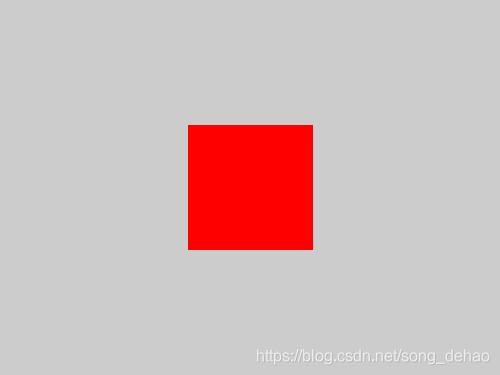
results as shown in the figure below,

method:

makes ul relatively positioned and li absolutely positioned, in two ways

        ul{
            position: relative; 
        }
        ul>li{
            position: absolute;
            /*1*/
            margin: auto;
            top: 0;
            right: 0;
            bottom: 0;
            left: 0; 
            /*2、 或者直接使用如下top和left */
            top:100px;/*父元素高度减子元素的高度的一半*/
            left: 150px;/*父元素宽度减子元素的宽度的一半*/
        }

results as shown below

Set ul display:flex

        ul{
            display: flex;
            justify-content: center;
            align-items: center;
        }