Directly at androidmanifest XML is added to the configuration of the application
android:supportsRtl="true"
that will do
Directly at androidmanifest XML is added to the configuration of the application
android:supportsRtl="true"
that will do
1. Explain
Recently, I encountered an error when writing the shuttle project:
The following assertion was thrown while handling a gesture:
ScrollController attached to multiple scroll views.
'package:flutter/src/widgets/scroll_controller.dart':
Failed assertion: line 109 pos 12: '_positions.length == 1'
Reasons for error reporting:
1 The drawing function added to the project needs to navigate to different pages through the menu items of the drawing
2. A bottom navigation bar is added to the home page to navigate to different pages through the pagecontroller
3. The project manages routing and status through geTx.
Description of the problem: navigate to the settings or other pages through the drawer, and then re-navigate to the home page through the drawer. Click the item item item of the BottomNavigationBar, and will appear the error messages:
Failed assertion: line 109 pos 12: ‘_positions.length == 1’


2. Solution:
1. Drawer navigation uses Get.offAndToNamed(‘12313’); to jump.
2. You need to reinitialize the pageController every time you jump to the homepage. Through the build method of GetView, the controller is reinitialized every time the homepage interface is redrawn.
Specific operation:
code for the navigation part of the drawer:
class AppRouteProvide {
  Future onRouteTo(String routeName) {
    switch (routeName) {
      case Routes.Auth:
        Get.toNamed(Routes.Auth);
        break;
      case Routes.Home:
        Get.offAndToNamed(Routes.Home);
        break;
      case Routes.Help:
        Get.offAndToNamed(Routes.Help);
        break;
      case Routes.Splash:
        Get.toNamed(Routes.Splash);
        break;
      case Routes.Connect:
        Get.offAndToNamed(Routes.Connect);
        break;
      case Routes.Setting:
        Get.offAndToNamed(Routes.Setting);
        break;
    }
    return Future.value();
  }
}
Code of home page view:
class HomeScreen extends GetView<HomeController> {
  @override
  Widget build(BuildContext context) {
    // print('HomeScreen build');
    if (controller.pageController.hasClients) {
      controller.onClose();
      controller.onInit();
    }
    return AppbarWidgetScreen(
      body: _buildBody(context),
      bottomBar: _buildBottomNavigationBar(context),
    );
  }
Home page controller part code
class HomeController extends GetxController {
  final ApiRepository apiRepository;
  RxInt selectedIndex = 0.obs;

  late PageController pageController;
  RxList<Widget> widgetPage = <Widget>[
    HomeMainScreen(),
    HomeBuyScreen(),
    HomeCertScreen(),
    HomeSellScreen(),
    HomeMineScreen(),
  ].obs;

  HomeController({required this.apiRepository});

  @override
  void onReady() {
    super.onReady();
  }

  @override
  void onInit() {
    print('HomeController onInit()');
    pageController = PageController(
      initialPage: selectedIndex.value,
      keepPage: true,
    );
    super.onInit();
  }

  @override
  void onClose() {
    super.onClose();
  }

Confirm whether the mobile phone settings – Developer options – USB debugging is enabled} be sure to enable the developer options
Android.mk
LOCAL_PATH := $(call my-dir)
include $(CLEAR_VARS)
# Module name should match apk name to be installed
$(shell mkdir -p $(TARGET_OUT_VENDOR)/operator/app/CTMPTT/)
$(shell cp $(LOCAL_PATH)/*.apk $(TARGET_OUT_VENDOR)/operator/app/CTMPTT/)
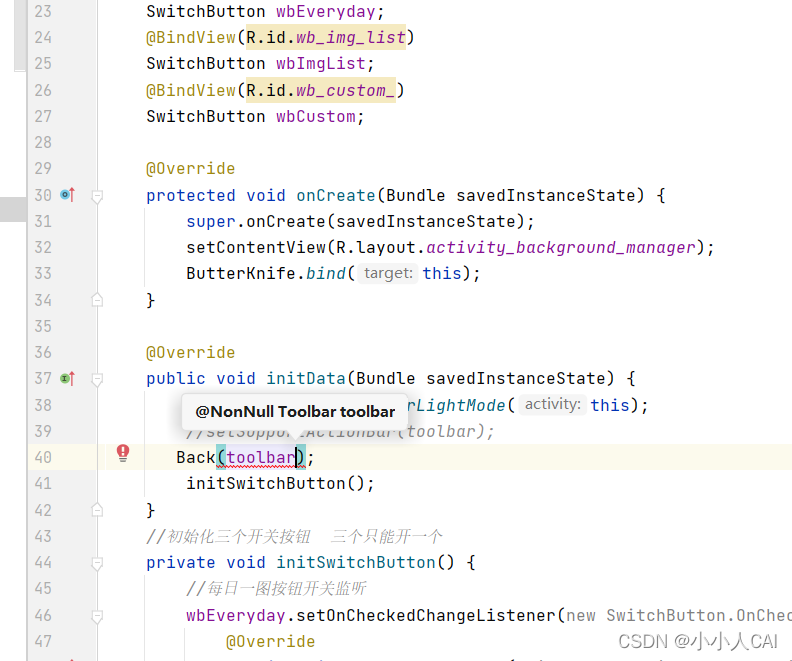
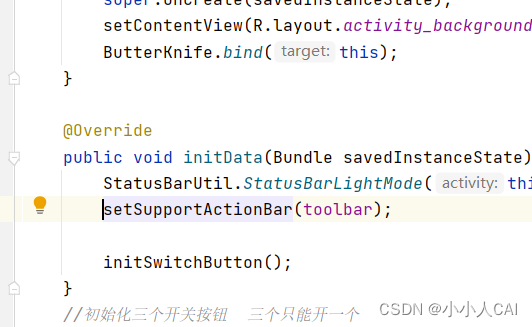
Solution: Change Back (toolbar) to setSupportActionbar(toolbar)
Use Android studio to automatically create a kotlin project. To automatically obtain the ID in the layout in the project, you need to follow the steps below
1. In the project build Add ‘kotlin Android extensions’ to gradle
plugins {
    id 'com.android.application'
    id 'kotlin-android'
    id 'kotlin-android-extensions'
}
2. To modify the configuration of sourcecompatibility, the default studio is automatically created using kotlin_version

 compileOptions {
        sourceCompatibility JavaVersion.VERSION_1_8
        targetCompatibility JavaVersion.VERSION_1_8
    }
3. Find gradle.properties file in the root directory of the project, Add android.enableJetifier=true:
android.enableJetifier=true
All right! Then you can use it.
when using it, you need to import the layout file.
normally, press and hold act + enter to select import for automatic import, or you can add it manually. For example, the name of my layout file is activity_main.XML that is import kotlinx android.synthetic.main.activity_main.*
import kotlinx.android.synthetic.main.activity_main.*
1. Use ADB to write in the package restart program ADB uninstall package name
if there is no ADB command:
(1) create a. Bash_profile file (input touch.Bash_profile)
(2) open the. Bash_profile file (input open – E.Bash_profile)
(3) edit in the open. Bash_profile file: export path = ${path} :/users/your own user name/library/Android/SDK/platform tools
after editing, save and exit
(4) execute the command source. Bash_profile;
(5) enter, and the ADB version will succeed if the version number appears. Finally, execute the ADB uninstall package name, output success, and restart the program
2 at manifest Does the XML declare two activities as launchers
3 in the listing, add your first startup class and filter code, copy the whole intent filter and add it to your first startup class
<activity android:name=".MainActivity">
  <intent-filter>
    <action android:name="android.intent.action.MAIN" />

    <category android:name="android.intent.category.LAUNCHER" />
  </intent-filter>
</activity>
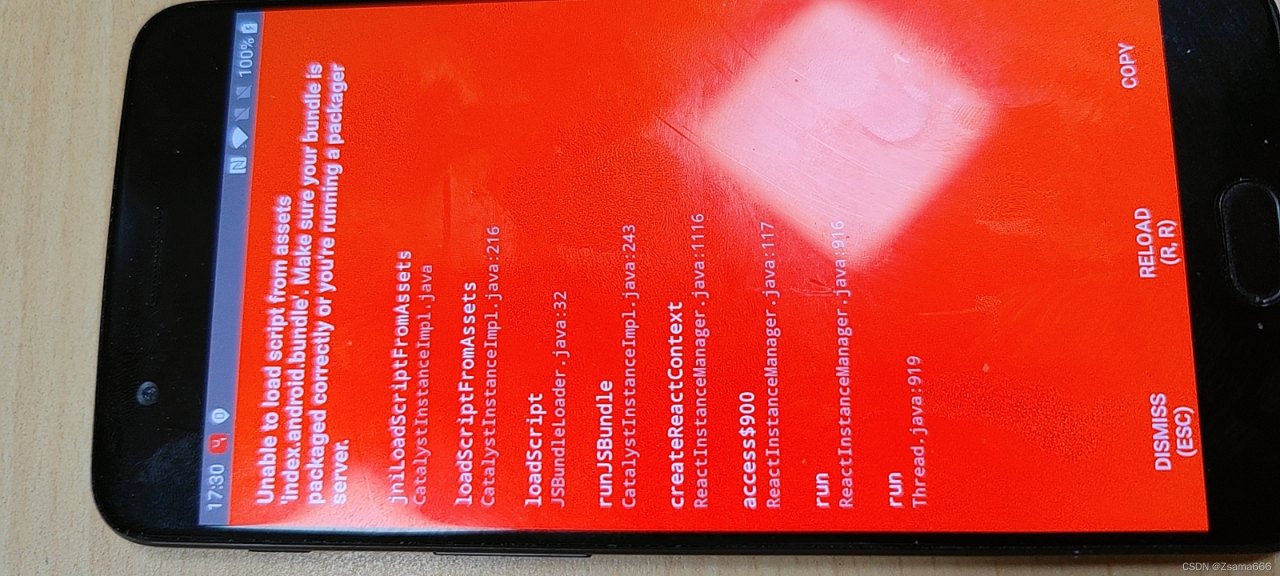
If the above error occurs, first confirm whether the RN service runs successfully
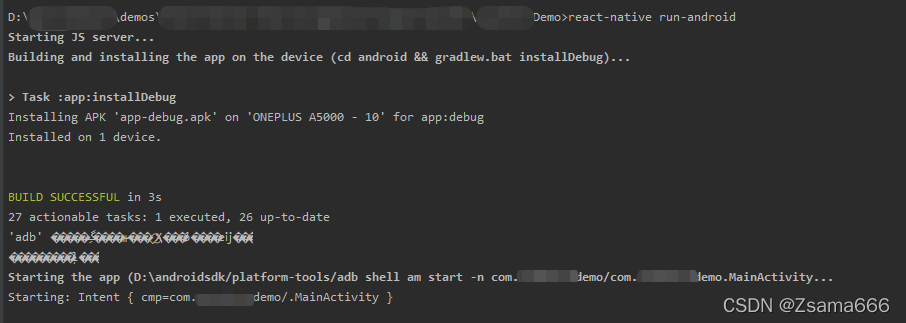
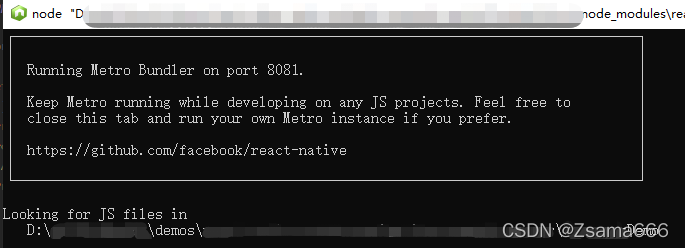
In some cases, the startup fails, or it is shut down unexpectedly after startup, or the ports are inconsistent.
Another situation is recorded here:
If it is a project from the new cluster on GitHub, the directory of Android\app\SRC\main\assets may be empty (the assets folder needs to be created). At this time, it needs to be run under the terminal of the project root directory:
react-native bundle --platform android --dev false --entry-file index.android.js --bundle-output android/app/src/main/assets/index.android.bundle --assets-dest android/app/src/main/res/ To create the missing file

After running, you will see the missing index on the red screen android. Bundle file.

Run it again and the problem is solved.
What went wrong: A problem occurred configuring project ‘:app’.
Failed to notify project evaluation listener.
No signature of method: org.gradle.api.internal.file.DefaultFilePropertyFactory$DefaultDirectoryVar.getFiles() is applicable for argument types: () values: [] Possible solutions: getAsFile(), getOrElse(java.lang.Object), getOrElse(java.lang.Object), getClass(), getType(), file(java.lang.String) > can’t find tinkerProcessReleaseManifest, you must init tinker plugin first!
Solution:
Go back to the original Gradle setup
Check the build.gradle file in the project
    dependencies {
        classpath 'com.android.tools.build:gradle:3.5.2'
        classpath "com.tencent.bugly:tinker-support:1.1.5"
    }
Put classpath “classpath ‘com.android.tools.build:gradle:3.5.2’’ is modified to the original version [modified at this time]
bugly is not compatible with the higher version of gradle. Basically, it should be in 3 X version
also, check the gradle folder under the app directory, open the wrapper folder, and find the gradle-wrapper.properties file
changes the distributionurl to the original version.
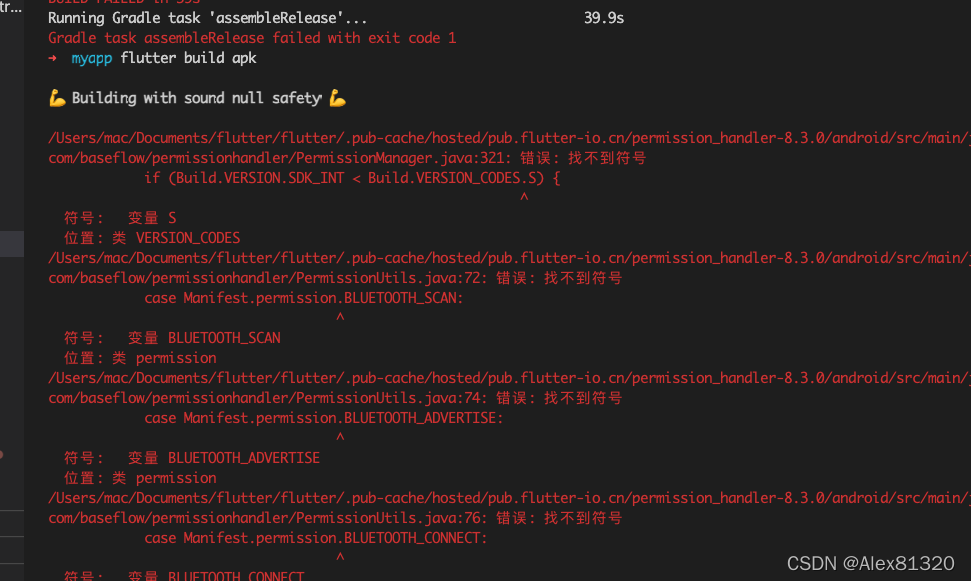
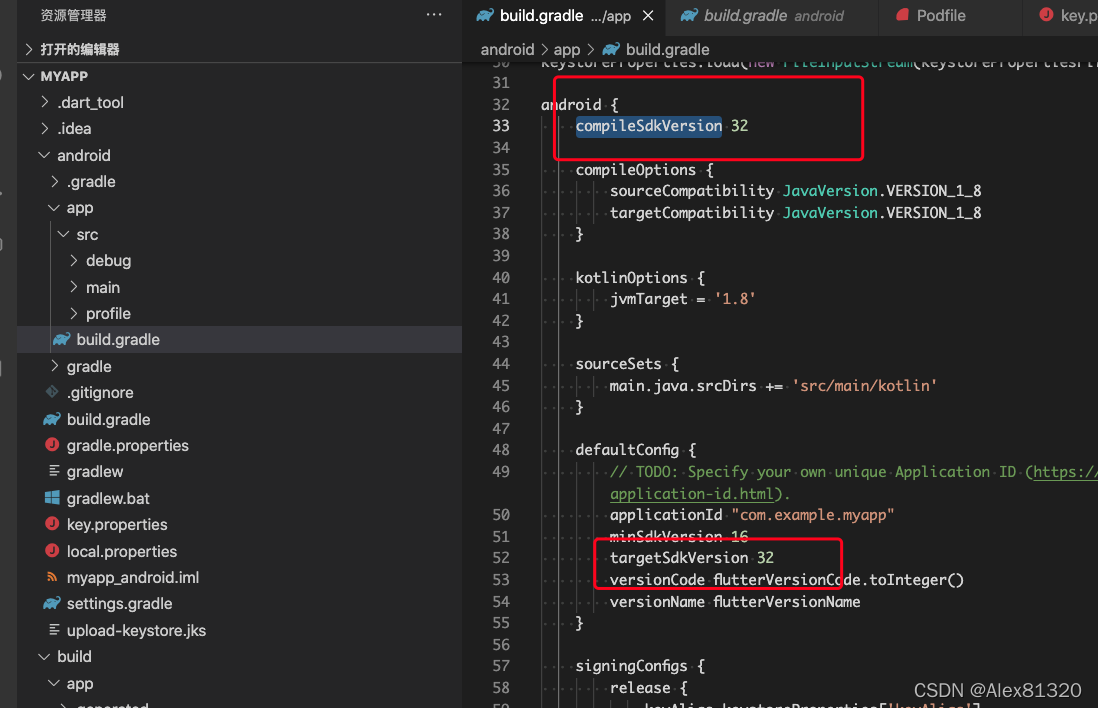
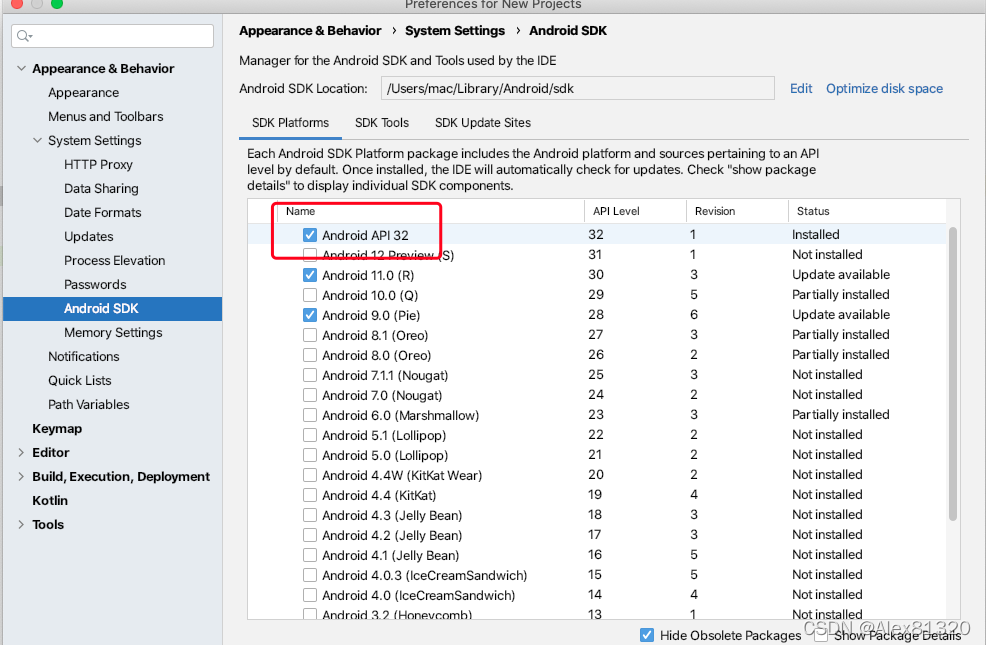
Check Android/APP/build Compile sdkversion version number in gradle document
Android API version under Android SDK in Android studio
The two should be consistent
Solution
// The module created before, by default, is appcompat:1.3.1, which corresponds to androidx.core:core:1.5.0
implementation 'androidx.appcompat:appcompat:1.3.1'

// The module created today, the template of the idea was changed to 1.4.0, corresponding to core:1.7.0
implementation 'androidx.appcompat:appcompat:1.4.0'
Change back to 1.3 1 can run
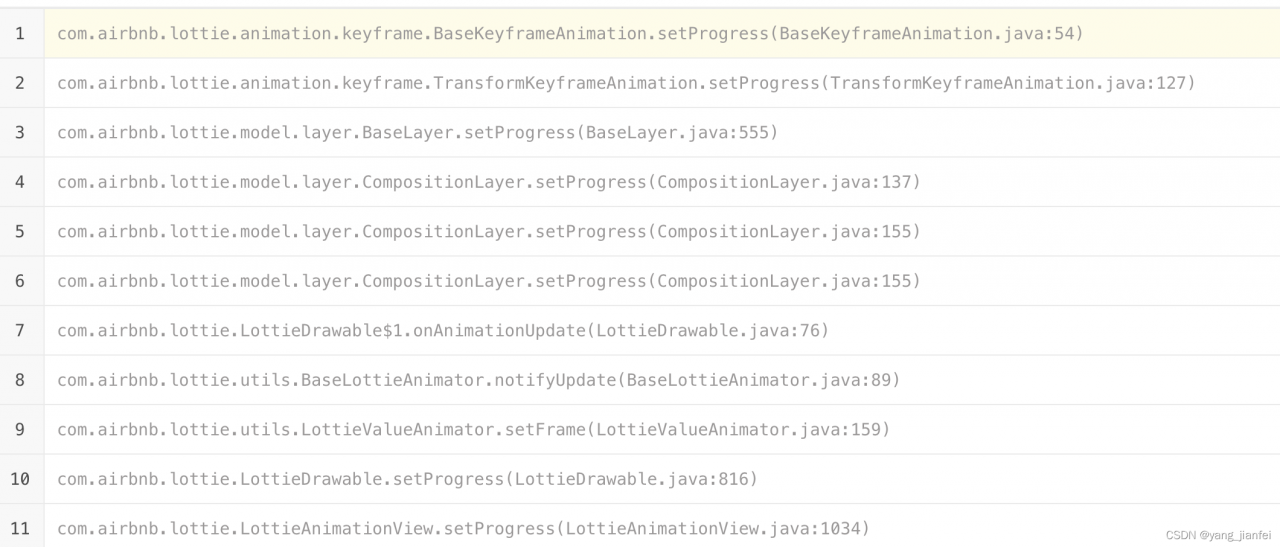
Change Lottie from 2.8.0 in the project Upgrade to version 4.2.0 After the 0 version, the stack memory error suddenly occurred. The last reason was to call the resumeAnimation() method in the onAnimationEnd callback method, and in the resumeAnimation() method, the onAnimationEnd callback method was finally activated into a dead loop.