[Solved] IDEA Maven Error: Cannot resolve xxx & Maven Dependencies Error

Prerequisites

Premise: Make sure the dependencies in Maven are correct, Don’t make mistakes such as missing letters.
If you are worried, you can go to the official website to search, and copy and paste it again.
Official website link: https://mvnrepository.com/

scene

Importing a new project,or other reasons,maven refresh is also useless, it reports error as show below:
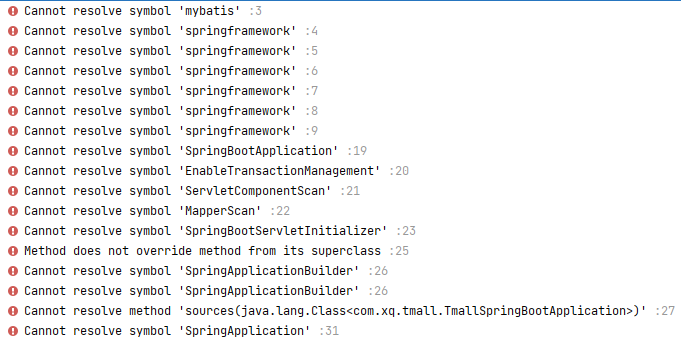
Solution:

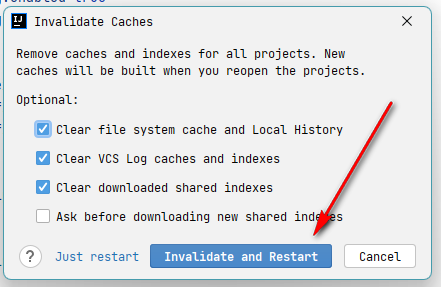
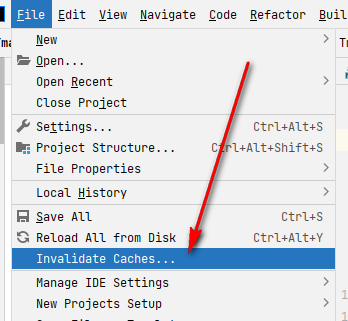
1. First, Clear the cache, Click and restart IDEA.
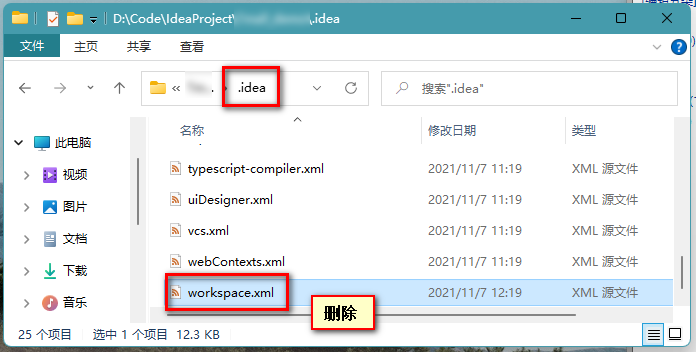
2. Close IDEA, Open the project folder

Find .idea in the project, delete workspace.xml
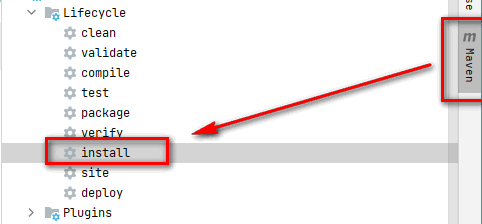
3. Re-open IDEA, find Maven on the right

Double-click clean
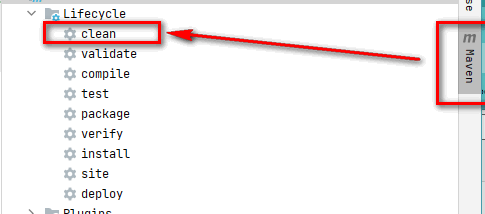
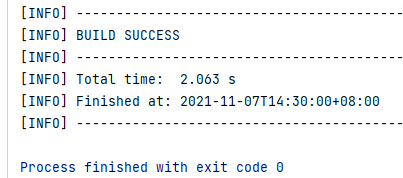
Wait for the console to appear BUILD SUCCESS
Find install under maven again, Double-click it and the download log shown below will appear.
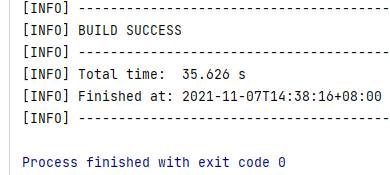
Wait it over, and BUILD SUCCESS will appear:
Click the Reload button in the Maven component again, wait for the bottom progress bar to end
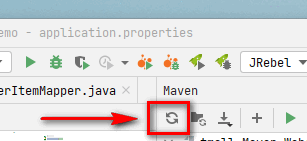
4. Solve the Dependencis report in Maven
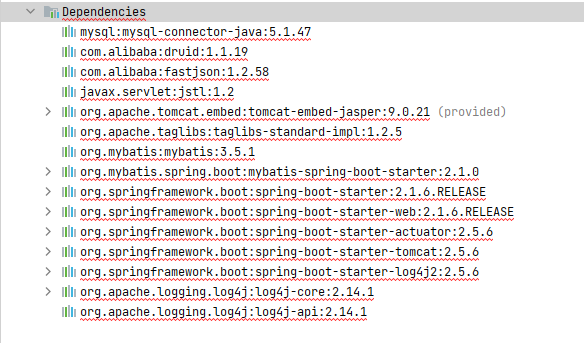
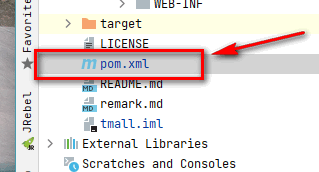
First, Open the file pom.xml
Then delete the content in the tag dependencies [recommended to use Ctrl + x]
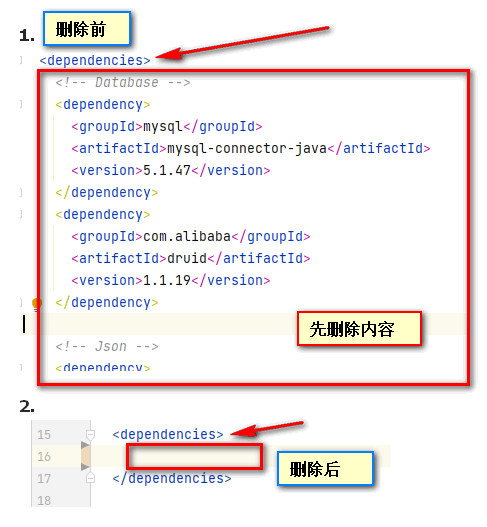
Click the Reload button in the Maven component again, wait for the bottom progress bar to finish. [dependencies disappears at this time]
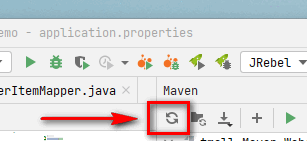
Then in pom.xml, use the shortcut key Ctrl + z to return

(If you are using Ctrl + x , you can use Ctrl + v to paste)

Let the dependencies content appear again,return to the previous state.

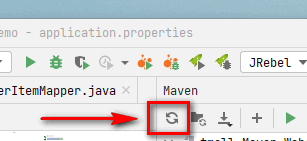
The last step: click the Reload button in the Maven component again, wait for the bottom progress bar to finish. [At this time,dependencies appears and no longer reports an error]
Final effect:
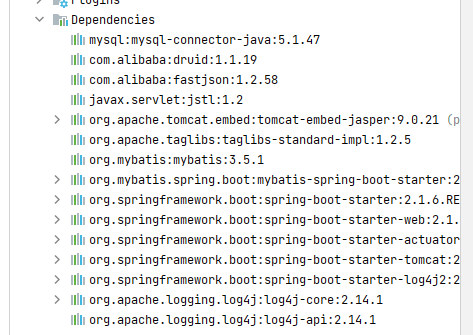
Finally, it is solved.
[Solved] ONNXImporter::handleNode DNN/ONNX和create layer “onnx::Gather_384“ of type “NonMaxSuppression“

Today I encountered a lot of OpenCV loading model errors when debugging the yolov7 model conversion and loading problemm There is no way to fully display it due to the title length limit, I will post it here in its entirety.

[ERROR:0] global D:\opencv-python\opencv\modules\dnn\src\onnx\onnx_importer.cpp (720) cv::dnn::dnn4_v20211004: :ONNXImporter::handleNode DNN/ONNX: ERROR during processing node with 5 inputs and 1 outputs: [NonMaxSuppression]:(onnx::Gather_384)
cv2.error: OpenCV(4.5.4) D:\opencv-python\opencv\modules\dnn\src\onnx\onnx_importer.cpp:739: error: (- 2:Unspecified error) in function 'cv::dnn::dnn4_v20211004::ONNXImporter::handleNode'
> Node [NonMaxSuppression]:(onnx::Gather_384) parse error: OpenCV(4.5.4) D:\opencv-python\opencv\modules\dnn\src\dnn.cpp:615: error: (-2:Unspecified error) Can't create layer "onnx::Gather_384" of type "NonMaxSuppression" in function 'cv::dnn::dnn4_v20211004::LayerData::getLayerInstance&# 39;

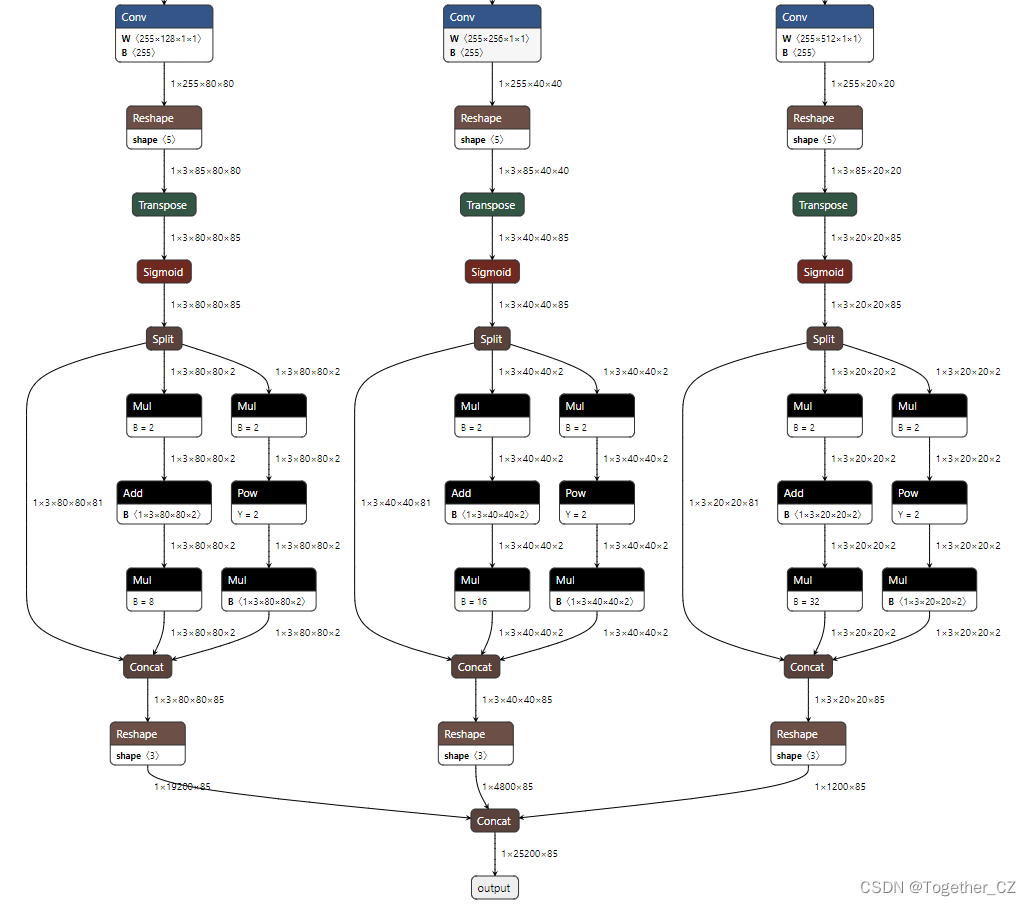
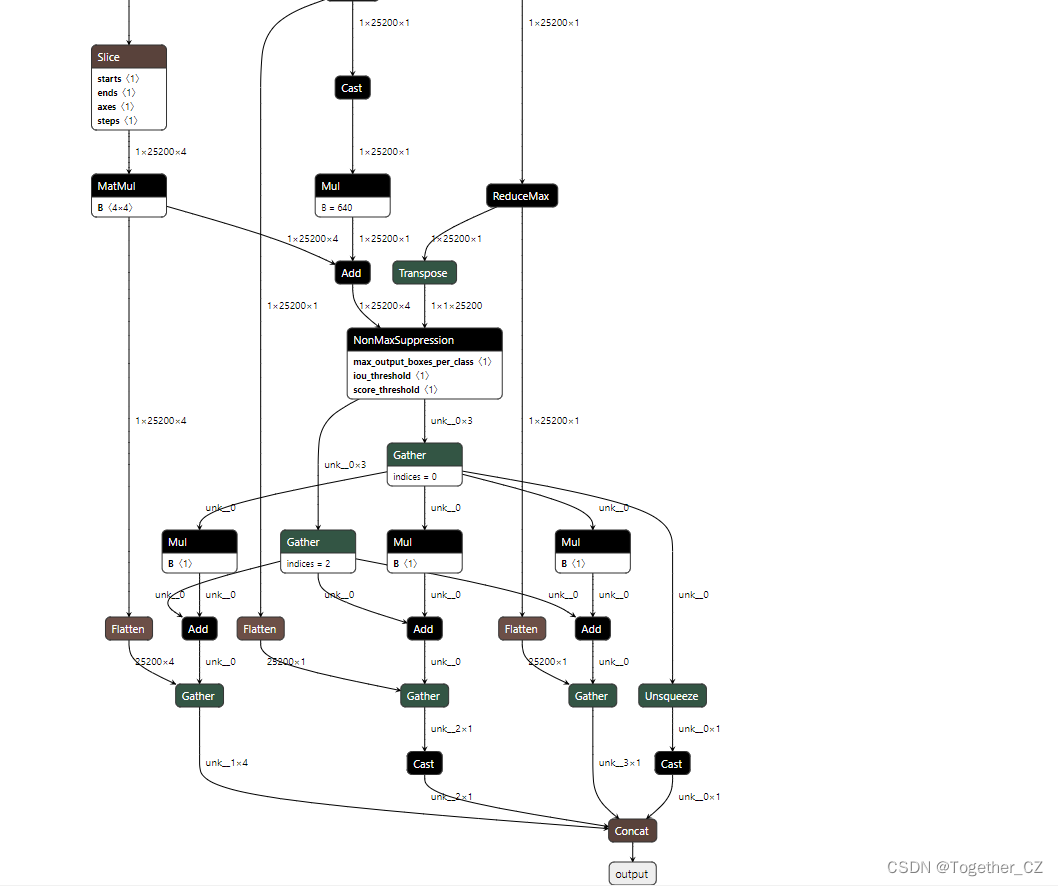
At this time, I think of a way to compare my own model with the official model one by one,Comparison of one node and one node, Finally found the problem at the end.

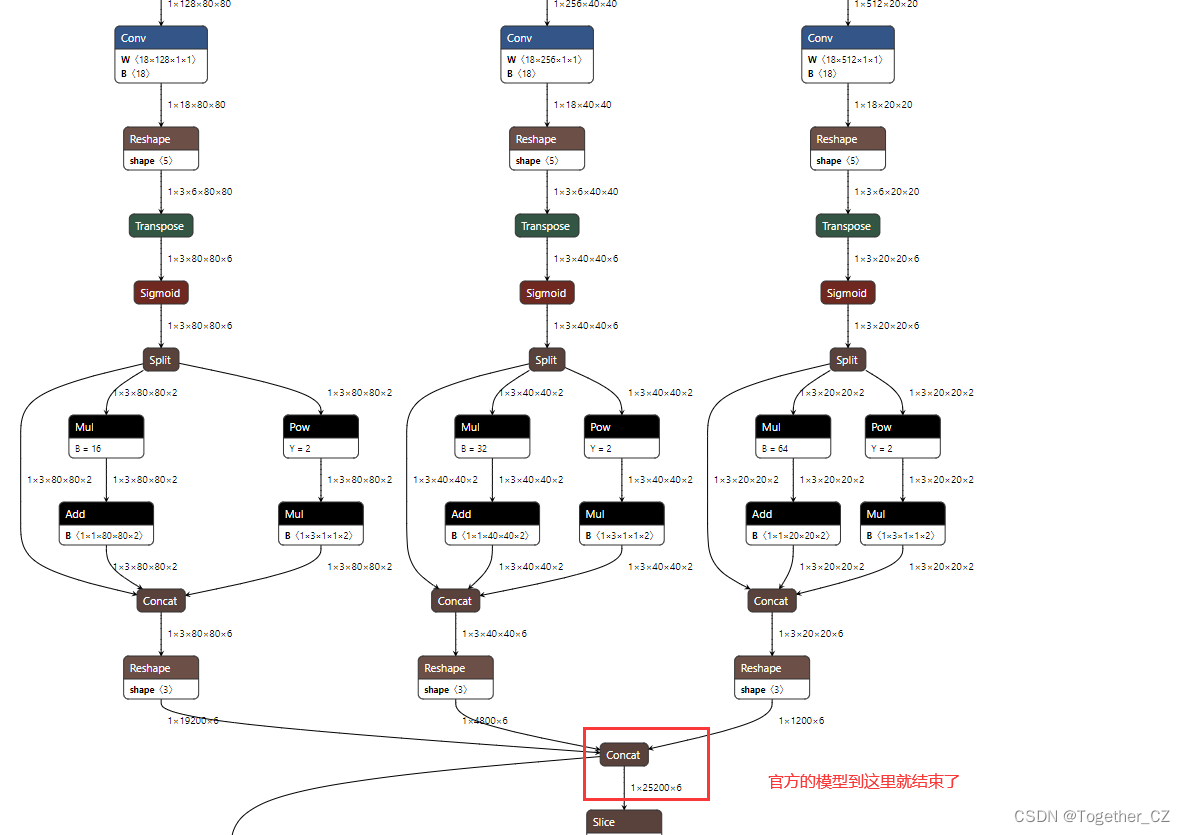
[Official Model]

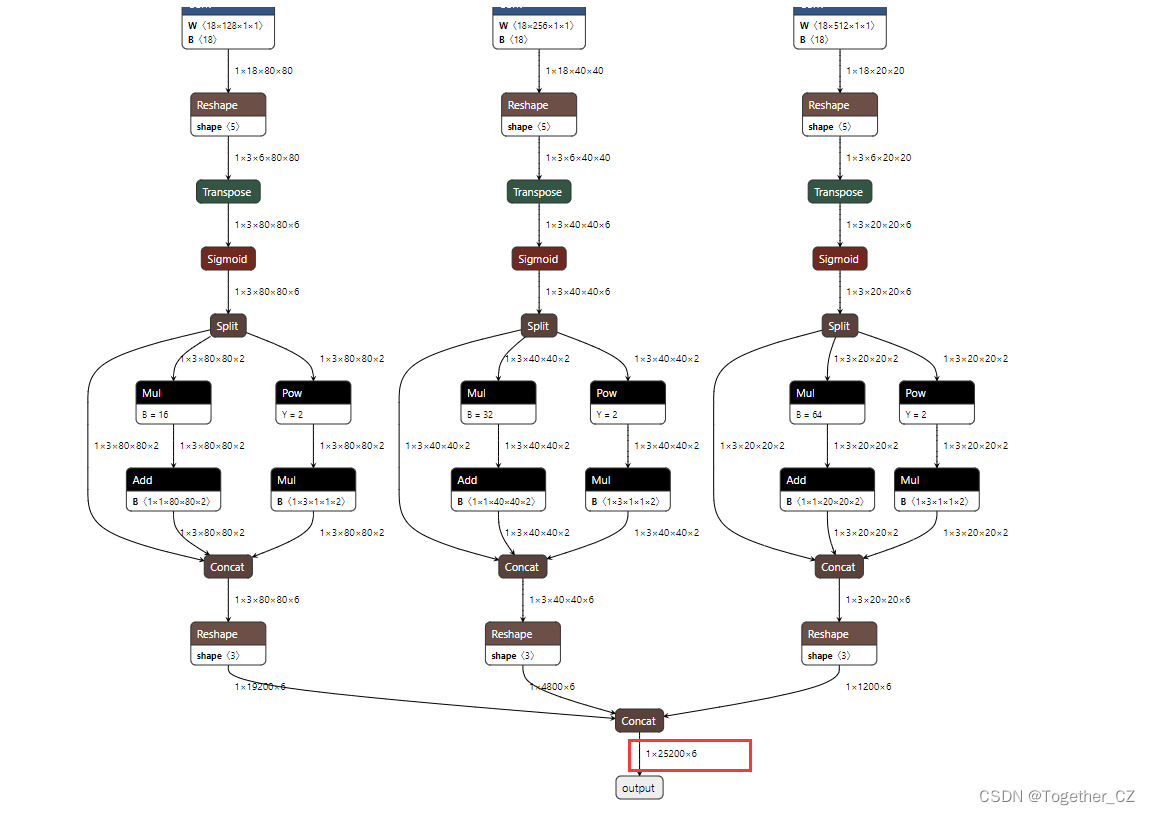
[My own model]

Seeing this, I’m wondering if there is such a big difference??It shouldn’t be,It’s all models built from the same code,So I started to trace the source,Sure enough Problem found.

At the position of my red frame, the official model ends here, and there is a large string of, tensor shapes for debugging both by printing, I guess that there may be a problem with the parameter settings during the model export process, So I tried to verify basically all the uncertain parameters, I found the problem.

In order to facilitate your understanding, I am giving my original conversion operation command here:

python export.py --weights best.pt --grid --end2end --simplify --topk-all 100 --iou-thres 0.65 --conf-thres 0.35 --img-size 640 640 --max-wh 640 

This is the command after:

python38 export.py --weights best.pt --grid --simplify --topk-all 100 --iou-thres 0.65 --conf-thres 0.35 --img -size 640 640 --max-wh 640 

See the difference, In fact, it is caused by the parameter end2end, After the modification, my model is as follows:

Because what I am doing here is the detection of the category, so the final output is: 1x25200x6, and the official one is: 1x25200x85.

How to Solve jmeter Install Error (Three Common Errors)

Error 1: jmeter is not an internal command

1. New environment variables

Variable name: JMETER_HOME

Variable value:location where jmeter is installed(such as: D:\othersoftware\jmeter\apache-jmeter-5.5)

2. Edit CLASSPATH(Separate with a semicolon when there are multiple CLASSPATHs)

CLASSPATH:%JMETER_HOME%\lib\ext\ApacheJMeter_core.jar;%JMETER_HOME%\lib\jorphan.jar

3. Edit path(If there are multiple Paths, separate them with semicolons)

path: %JMETER_HOME%\bin, then click OK

Enter jmeter -v on the command line to display the version number and the configuration is successful

Error 2: the Java executable or version could not be found, Please check your Java installation

1. Install jdk

2. Configure environment variables

Add JAVA_HOME: JDK installation location

EDIT CLASSPATH: %JAVA_HOME%\lib;%JAVA_HOME%\lib\tools.jar

edit path: %JAVA_HOME%\bin;%JAVA_HOME%\jre\bin

Save, Enter java -version on the command line to display the version number and the configuration is successful

Error 3: error: ‘findstr’ is not an internal or external command, nor a runnable program or batch file

Add: %SystemRoot%/system32;%SystemRoot%; to Path in the configuration environment

Save, Enter jmeter in cmd to start

Gephi cannot find Java 1.8 or higher [How to Solve]

Previously installed Gephi and configured the Java environment, but not used for more than a year, recently opened Gephi reported an error:

cannot find Java 1.8 or higher

I followed the [online tutorial] to set the jdkhome variable in Gephi.conf as follows:

jdkhome="C:/Users/username/AppData/LocalLow/Oracle/Java/jdk11.0.9_x64& #34;

Another error was reported:

Cannot locate java installation in specified jdkhome

I read a bunch of posts on the Internet again, guess that my Java is not installed in the default path, but installed in the D drive, And the Gephi.conf file should only use Associate to the installation path of Java to, reconfigure:

jdkhome="D:/Program Files/JAVA sdk"

Gephi can be opened normally.

[Solved] NTP Sync common error: no server suitable for synchrnization found

Project Scene:

Environment centos7.9


Problem description

Set a server as ntp server. The other is the client. Found an error. no server suitable for synchrnization found

Use: ntpdate -d 10.143.33.50

View the error

xxx.xxx.xxx.xxx: Server dropped: no data

Appears again during debugging

xxx.xxx.xxx.xxx: server dropped: strata too high


Cause Analysis:

1. Keepalived was originally installed on the server. I thought it was because of this effect. After closing it, the problem is still there.

2,–check from the server side
[root@timeserver ~]# ntpq -p
remote refid st t when poll reach delay offset jitter
==============================================================================
210.72.145.44 .ACTS. 1 u 971 8 0 0.000 0.000 0.000
202.120.2.101 .INIT. 10 u 8 64 377 0.000 0.000 0.000

Viewing is normal.

3, there may be network reasons

4. From the data, it is also related to conf. configuration , configuration such as restrict


Solution:

1. Make sure port 123 is connected

2. Modify the server configuration (202.120.2.101 This is the synchronization server)

vim /etc/ntp.conf

restrict default nomodify notrap noquery
restrict 127.0.0.1
server 202.120.2.101 prefer
server 127.127.1.0
fudge 127.127.1.0 stratum 10
driftfile /var /lib/ntp/drift
keys /etc/ntp/keys

3. Restart ntpd on the server side

service ntpd restart

[Solved] Mac Notebook M1 Chip Install Hashlips library npm error

Mac notebook M1 chip installs Hashlips library npm error problem

Foreword

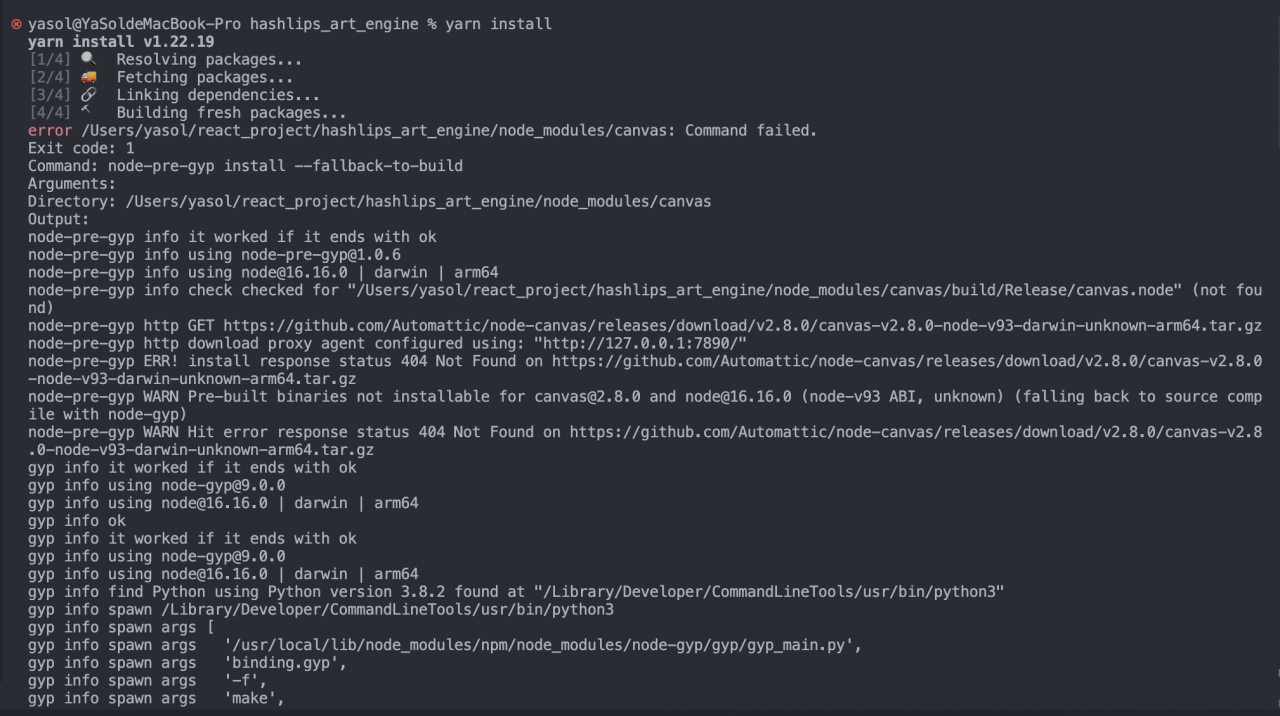
When generating NFT, we often prepare all the materials needed for NFT, and then stack each material on the same canvas to generate an NFT, but if we manually It’s too troublesome to stack one by one, because NFTs are often issued in thousands of ten thousand, so manual generation is unrealistic, So what can we do to generate It, Is to use the computer, There are many similar tools on the Internet, There are graphical and pure code, And many use Paython to generate NFT, But there is a node abroad The script tool Hashlips can directly use node to generate, and it is very convenient and powerful to use, There was no problem when using the windows system before, After changing the MBP later, I found that Hashlips reported an error when executing npm install

image-20220913144839078

Cause Analysis

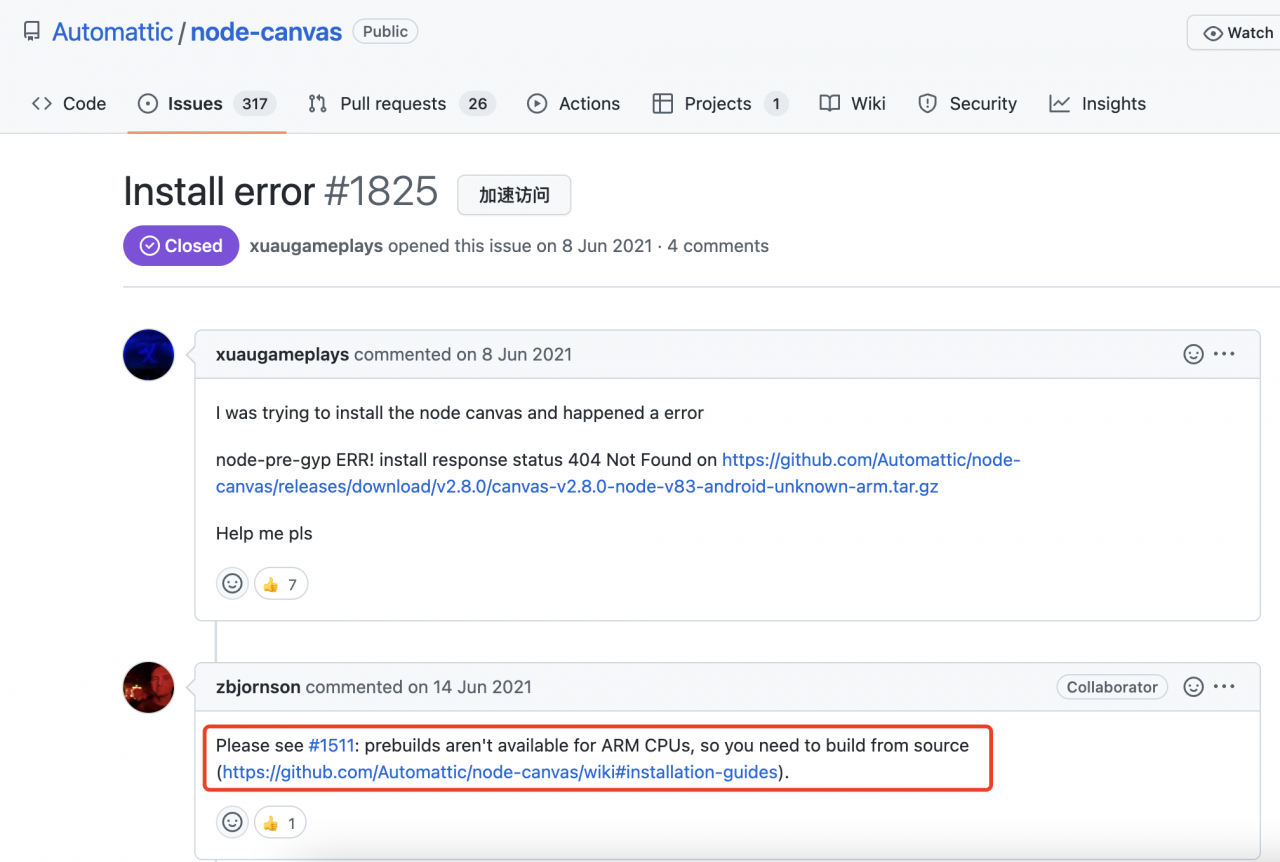
After various searches and research, I found that Hashlip is implemented with canvas canvas, Then I touched the node-canvas library, There is a very similar problem in the issue of this library, which probably means that the Mac with m1 chip cannot directly use npm to install the library to node-canvas, You need to use Homebrewto install what you need.

image-20220913145139869

Solution

Official solution

In fact, both node-canvas and hasllips have released solutions one after another,The solution is actually the same,The following is hasllips The method approved in the official issue

The correct method is as follows:

1. Download and install Node.js "Current" version, as opposed to the "LTS" (Long Term Support) version. This is now v18.0.0 as of the time of this post , but 17.x will work as well:
2. Ensure you have homebrew installed. You can go to or just use this command: /bin/bash -c "$(curl -fsSL https://raw.githubusercontent.com/Homebrew/install/HEAD/install .sh)" to install Homebrew.
3. Install the dependencies via Homebrew using this command: arch -arm64 brew install pkg-config cairo pango jpeg giflib librsvg
4. In your root folder for the art engine project, install the project: npm install

The correct way is as follows:

1. Download and install the latest version of Node.js , instead of the "LTS" (Long Term Support) version.
2. Install Homebrew.
3. Install dependencies via Homebrew using the following command :arch -arm64 brew install pkg-config cairo pango jpeg giflib librsvg
4. In the root folder of your art engine project ,install the project:npm install

My solution

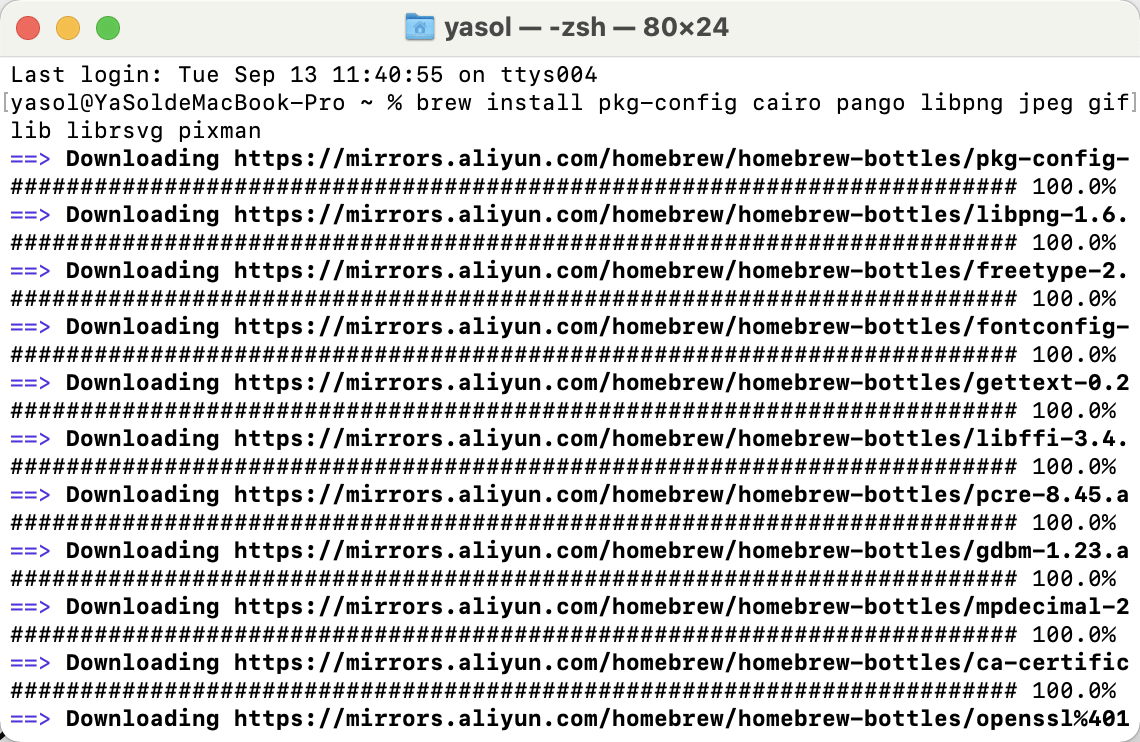
Combined with the above solution, The landlord did not upgrade the node version to the latest version, but used the LTS long-term support version of Node16.6, then Directly use Homebrew to execute the command brew install pkg-config cairo pango libpng jpeg giflib librsvg pixmaninstall

Wait for the above installation to complete,npm install or yarn install directly in the project

[Solved] Axis Failed to Import webService: No support for attachments

The client generated by Axis, Error when importing webService:

AxisFault
 faultCode: {http://schemas.xmlsoap.org/soap/envelope/}Server.userException
 faultSubcode:
 faultString: java.lang.RuntimeException: No support for attachments
 faultActor:
 faultNode:
 faultDetail:
{http://xml.apache.org/axis/}stackTrace:java.lang.RuntimeException: No support for attachments
at org.apache.axis.Message.setup(Message.java:372)
at org.apache.axis.Message.<init>(Message.java:235)
at org.apache.axis.transport.http.HTTPSender.readFromSocket(HTTPSender.java:779)
at org.apache.axis.transport.http.HTTPSender.invoke(HTTPSender.java:144)
at org.apache.axis.strategies.InvocationStrategy.visit(InvocationStrategy.java:32)
at org.apache.axis.SimpleChain.doVisiting(SimpleChain.java:118)
at org.apache.axis.SimpleChain.invoke(SimpleChain.java:83)
at org.apache.axis.client.AxisClient.invoke(AxisClient.java:165)
at org.apache.axis.client.Call.invokeEngine(Call.java:2784)
at org.apache.axis.client.Call.invoke(Call.java:2767)
at org.apache.axis.client.Call.invoke(Call.java:2443)
at org.apache.axis.client.Call.invoke(Call.java:2366)
at org.apache.axis.client.Call.invoke(Call.java:1812)

Problem Reason

Missing jars: mail.jar and activation.jar

Solution

Introduce dependencies


    javax.mail
    mail
    1.4.7


    javax.activation
    activation
    1.1.1

[Solved] Vscode1.71.0 terminal error: `sed: illegal option — r`

Problem description

In the Mac environment, the terminal that comes with Vscode will show a sed prompt no matter what command it is.,There is no problem with using the built-in terminal

$ echo 'hi'
sed: illegal option -- r
usage: sed script [-Ealn] [-i extension] [file ...]
       sed [-Ealn] [-i extension] [-e script] ... [-f script_file] ... [file ... ]
hi

System Environment

# system version
$sw_vers

ProductName: Mac OS X
ProductVersion: 10.14.4
BuildVersion: 18E2035

# vscode version
$ code -v
1.71.0
784b0177c56c607789f9638da7b6bf3230d47a8c
x64

Solution

Refer to the issue for a good solution to this problem

The official website also said that this problem will be fixed in the next version

Modify file /Applications/Visual Studio Code.app/Contents/Resources/app/out/vs/workbench/contrib/terminal/browser/media/shellIntegration-bash.sh

Replace line 125

# __vsc_current_command="$(builtin history 1 | sed -r 's/ *[0 -9]+ +//')"
__vsc_current_command="$(builtin history 1 | sed -E 's/ *[0-9]+ +//')"

How to Solve Xcode 14 Pod Signature Error

Background:

After pod install with Xcode 14, If there are bundle resource files in the library, an error will be reported during compilation, error: “igning for “xxxxx” requires a development team. Select a development team in the Signing & Capabilities editor.”

Solution:

Option 1:
Set the bundle identifier and team for the pod library that reported the error one by one.

Disadvantages: Our configuration will disappear after each execution of pod install, Need to manually set it again

Option 2:

Add the following configuration in Podfile, add and then re-pod update

post_install do |installer|
  installer.generated_projects.each do |project|
    project.targets.each do |target|
        target.build_configurations.each do |config|
            config.build_settings["DEVELOPMENT_TEAM"] = " Your Team ID &# 34;
         end
    end
  end
end

If you don’t want to set a specific team ID, try the following configuration:

post_install do |installer|
  installer.pods_project.targets.each do |target|
    if target.respond_to?(:product_type) and target.product_type == "com.apple.product-type.bundle" 
      target.build_configurations.each do |config|
          config.build_settings['CODE_SIGNING_ALLOWED'] = 'NO'
      end
    end
  end
end

The above solution comes from: https://github.com/CocoaPods/CocoaPods/issues/11402

[Solved] KeyCloak users check their profile error: “failed to initialize keycloak”

Whether it is an administrator, or a newly added Realm user, after logging in, checking your own account, will report the error failed to initialize keycloak, and cannot borrow KeyCloak The interface can modify the password and update personal information by itself.

Solution:

Modify the web orgine whose client name is account-console, add *

Refer to here

[Solved] Android Compile and Package Error: Invalid keystore format

Problem description

Running an old open source project, compiles the following error.

java.io.IOException: Invalid keystore format
Execution failed for task ':app:transformDexWithInstantRunDependenciesApkForDebug'.
> com.android.build.api.transform.TransformException: com.android.ide.common.signing.KeytoolException: Failed to read key AndroidDebugKey from store "C:\Users\a do\.android\debug.keystore": Invalide keystore format

Solution

According to the error message, there is a problem with the debug signature format.

We only need to open the c drive, in the current user’s directory, there is a .android directory, delete the debug.keystore inside.

If it prompts that the process is occupied, exit Android Studio first. Then delete it again.

Finally re-running the project, will automatically generate debug.keystore.