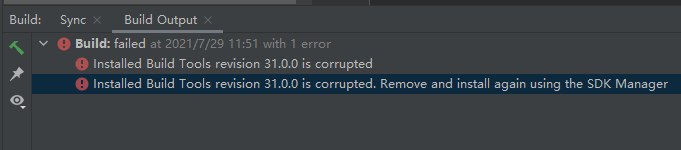
Installed Build Tools revision 31.0.0 is corrupted. Remove and install again using the SDK Manager
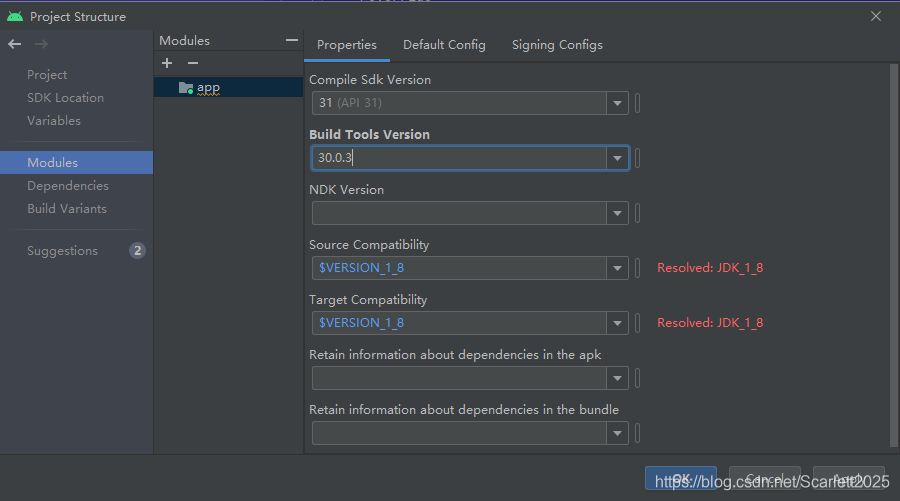
23558;”Build Tools Version 25913;” 30.0.3
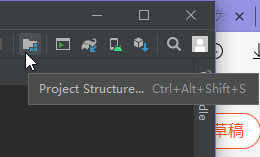
31561;”244533;” 35793;”23436;

Installed Build Tools revision 31.0.0 is corrupted. Remove and install again using the SDK Manager
23558;”Build Tools Version 25913;” 30.0.3
31561;”244533;” 35793;”23436;
main points:
By default, the scene comes with a camera to render all objects in the scene. The camera node can be regarded as an empty node, and a camera component is attached under it, so it is invisible. Each scene can have multiple cameras. The rendering levels of multiple cameras are grouped and rendered by associating group names. The rendering levels of multiple cameras comply with the node tree rules. First, the priority is divided according to the level of the camera node, and the lower camera, Its associated group is rendered later; For nodes under the same camera group, the lower the node, the later the rendering. The more you render, the closer the node looks to the top.
case
Camera practice: implementation of infinite parallax rolling map
1、 Camera group rendering
In the menu of Cocos creator, ` item ‘- & gt` Project settings ` – & gt` Changing or adding a group in group management is the same setting as the group management of physical collision.
Add multiple cameras in the scene, then add multiple groups in group management, and then set the settings of the camera cullingMask Attribute is the corresponding group. Each camera rendered object is filtered through this cullingmask.
The steps are as follows:
1. Create a camera node. Create an empty node in the hierarchy manager and add a camera component on this node, so that a camera node can be created. According to this method, two camera nodes, farcamera and nearcamera, are added to render the foreground and close-up respectively.
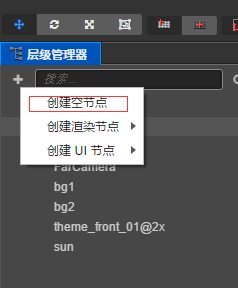
Empty node
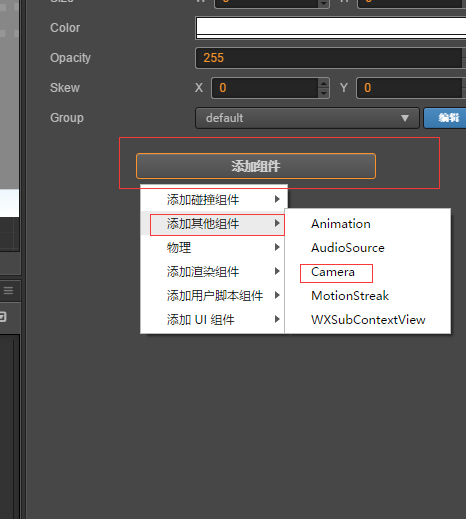
Add camera
2. Group management. Add two groups in group management, nearbg and farbg.
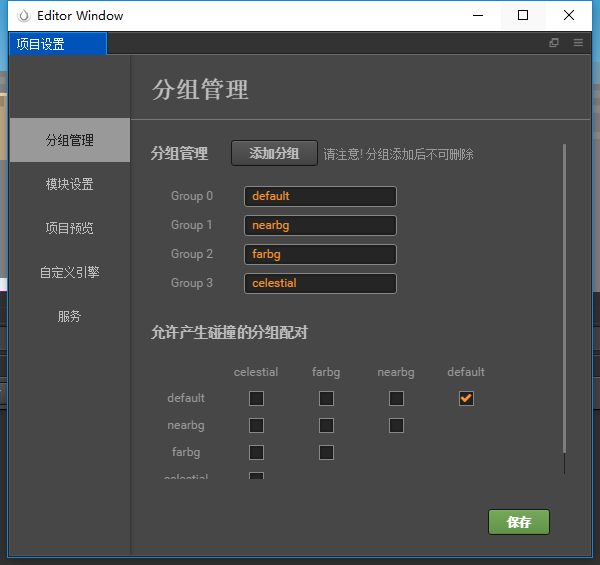
Add group
3. Add close view and long view nodes and set group names respectively
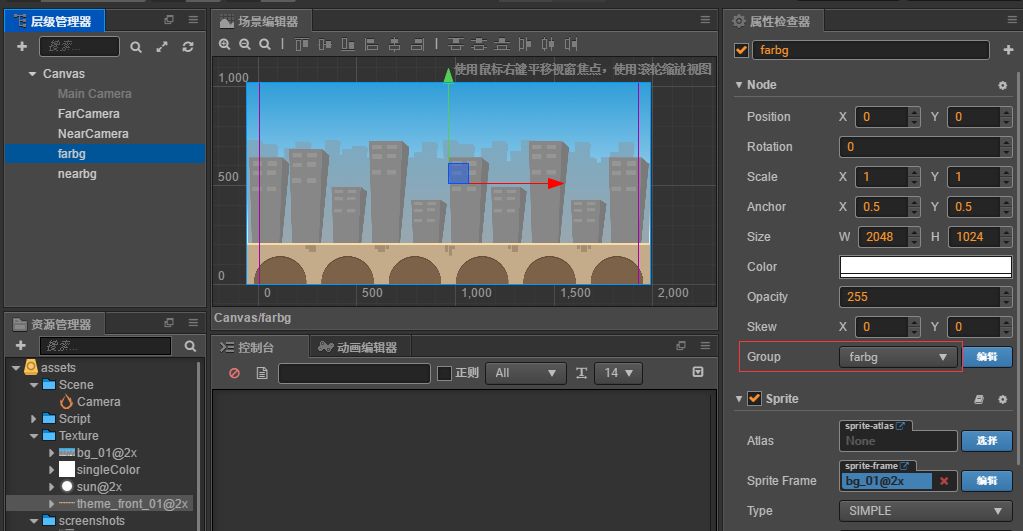
prospect
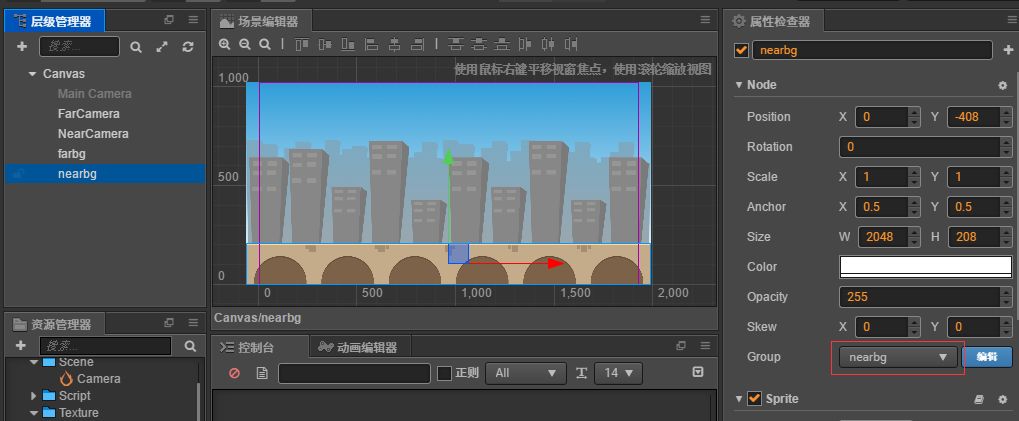
Close range
4. Set the cullmask property of camera, farcamera to farbg and nearcamera to nearbg.
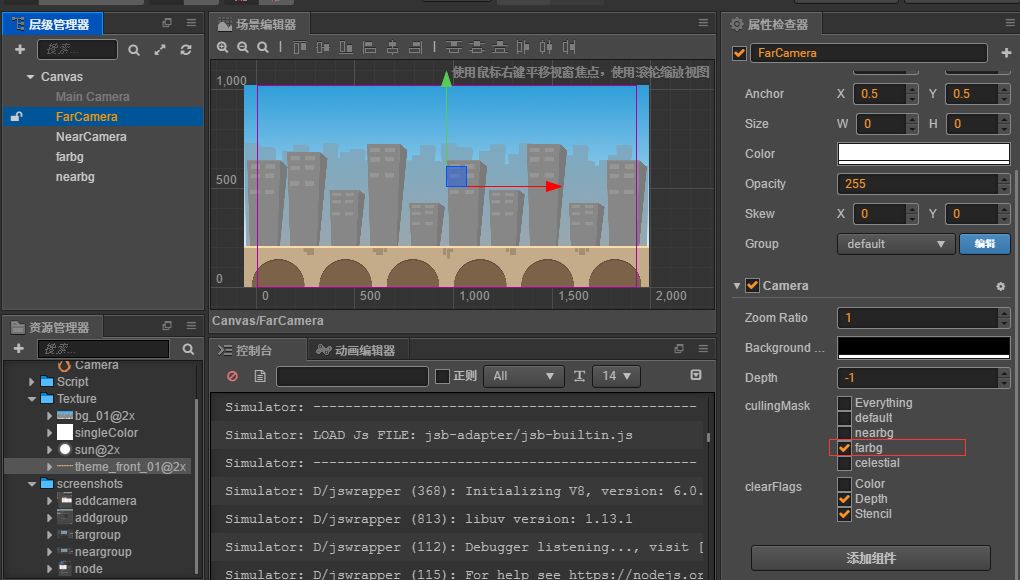
Perspective camera
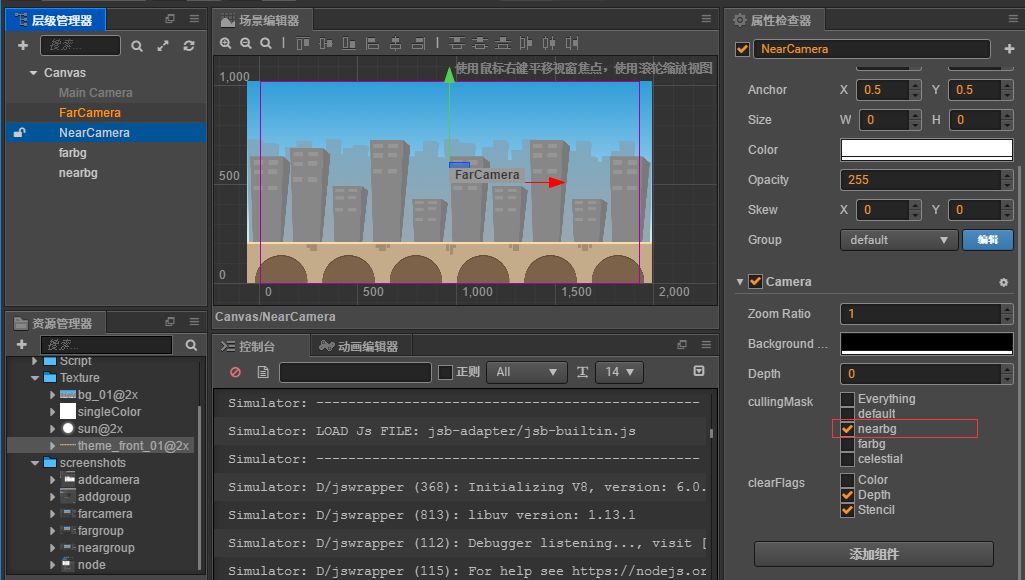
Close range camera
Here, the multi camera and group rendering settings are completed, and the interface can be seen by running the simulator.
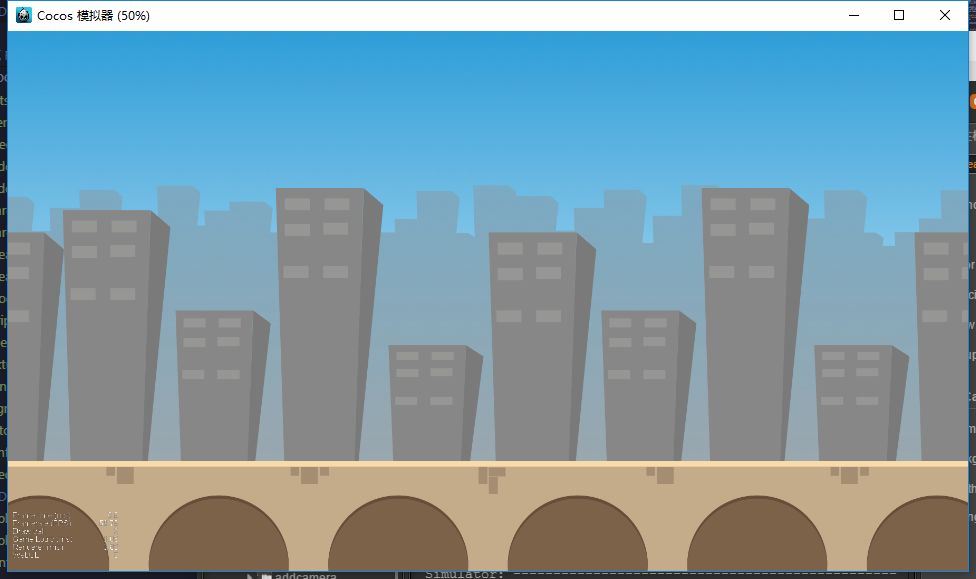
Operation results
2、 Parallax principle
There are two ways of parallax background. The traditional way is to keep the observation point unchanged, move the close view and long-range map, control the speed of close view and long-range map to produce parallax, and form an infinite rolling parallax background.
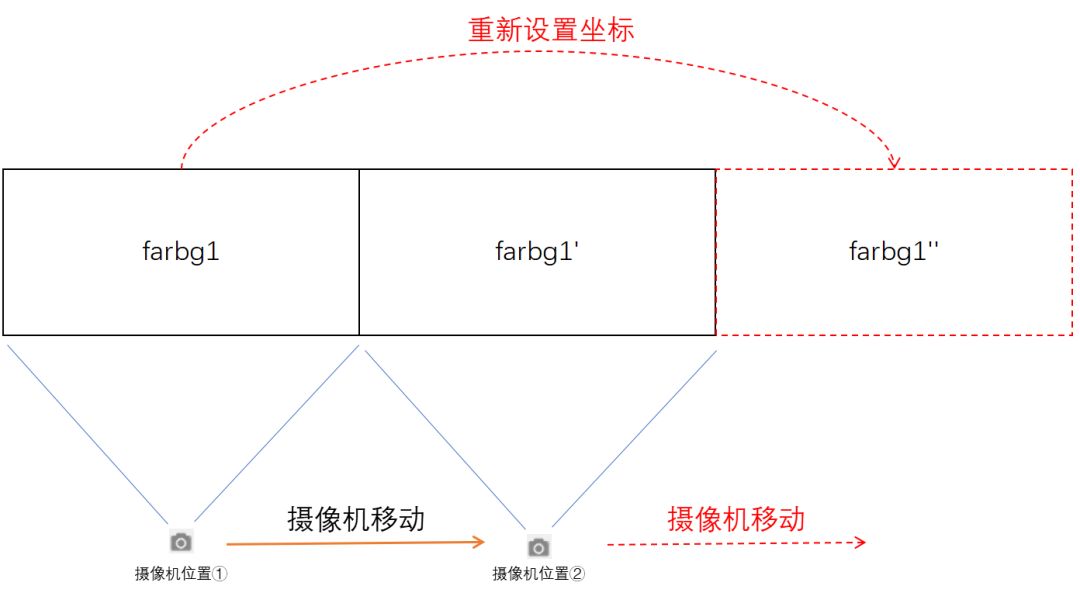
But what we are talking about here is the opposite process. The background picture is fixed and the observation point (camera) is moved. Due to the relativity of motion, the background picture moves in the opposite direction.
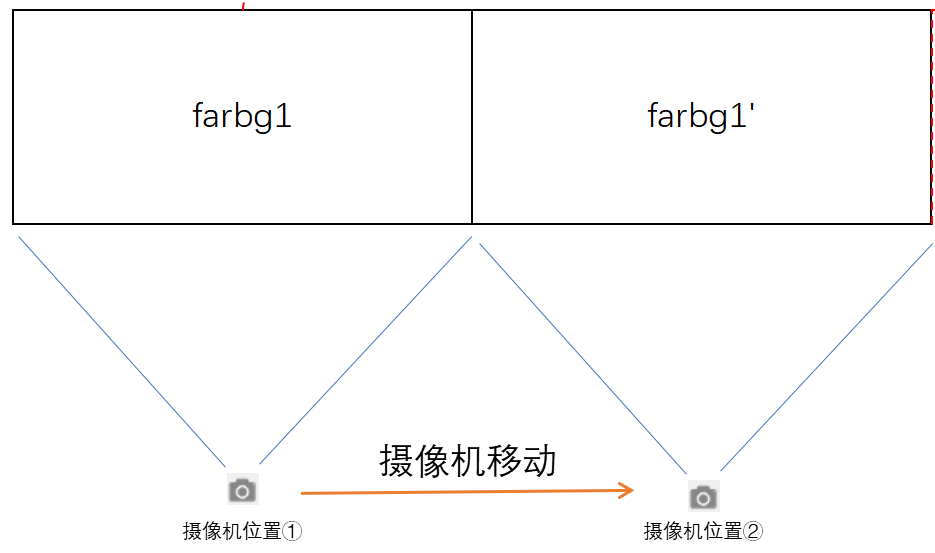
Principle I
As shown in the figure, if the camera keeps moving, it will soon exceed the visual boundary of farbg1. Therefore, two background images should be made. When moving to the boundary of farbg1, put another same background next to the boundary of farbg1. In this way, continuously set the position of farbg alternately, and you can scroll infinitely.
Principle I
The same principle sets the close range. The moving speed of the background is equal to the moving speed of the camera, and the direction is opposite. If the moving speed of the two cameras is different, an infinite rolling parallax background is formed.
3、 Jingjing
Some elements do not move. We call them static scenes, such as the sun and the moon. How to achieve them?
It’s actually very simple. Just use a camera to render them without moving the camera.
Implementation method: add a group celestial, turn on maincamera, set cullingmask to celestial, add a sun node, and set the group to celestial.
Also, when you play the characters, you need to set up a camera to render. This will make some special effects of lens, such as camera following, lens zoom, etc. This will be explained in detail in other articles. Please pay attention to the official account.
Implementation method: add a group player in the project settings, add a player node in the scene editor for character running, and set the group as player. A new node named playercamera is added to the scene editor. A camera component is added and cullingmast is set to player.
Playercamera only renders one player node, so you can see that the characters on the interface are running all the time. In fact, the characters are not moving at all, but the camera in the background is moving.
Final effect:

Effect preview
Single conversion
command
ffmpeg -i {input file} {output file}
Example
Mp4 to MP3
ffmpeg -i foo.mp4 foobar.mp3
flv 转 mp3
ffmpeg -i foo.flv foobar.mp3
mp4 transfer wav
ffmpeg -i foo.mp4 foobar.wav
wav transfer mp3
ffmpeg -i foo.wav foobar.mp3Batch conversion
For example, there are *. MP4 files under the folder. To batch convert them to XX. MP3 files, you can use the following methods
for i in ./*.mp4
do
ffmpeg -i $i ${i}.mp3
done
For another example, all files under the folder should be converted into XX. MP3 files in batch. You can use the following methods
for i in ./*
do
ffmpeg -i $i ${i}.mp3
done
Connect two videos
ffmpeg -i "concat:1.ts|2.ts" -acodec copy -vcodec copy -absf aac_adtstoasc output.mp4
Multiple audio merging
ffmpeg.exe -i "concat:1.mp3|2.mp3" -acodec copy output.mp3I did test in two Spartacus instances,one is setup locally, the other one is http://cx-qa.eastus.cloudapp.azure.com:4200/
OCC endpoint: https://20.51.210.49:9002/
Login with url http://localhost:4200/electronics-spa/en/USD/
Wait for 1 minute till the access token is expired.
Refresh the browser.
Login page is displayed. This is working as designed.
Wait for 1 minute till the access token is expired.
Refresh the browser.
No login page is displayed. Instead, blank screen is displayed.
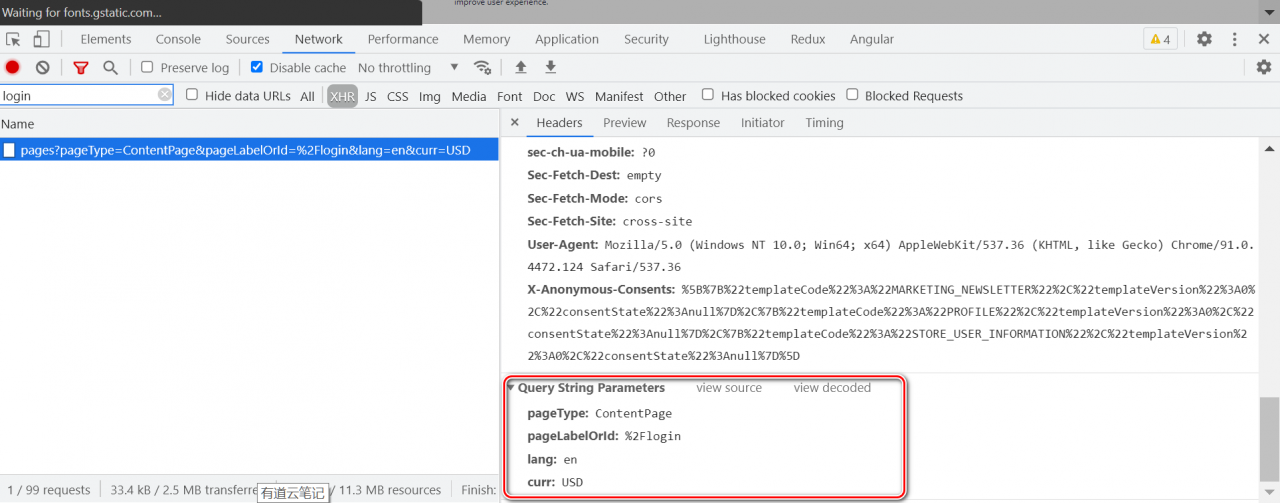
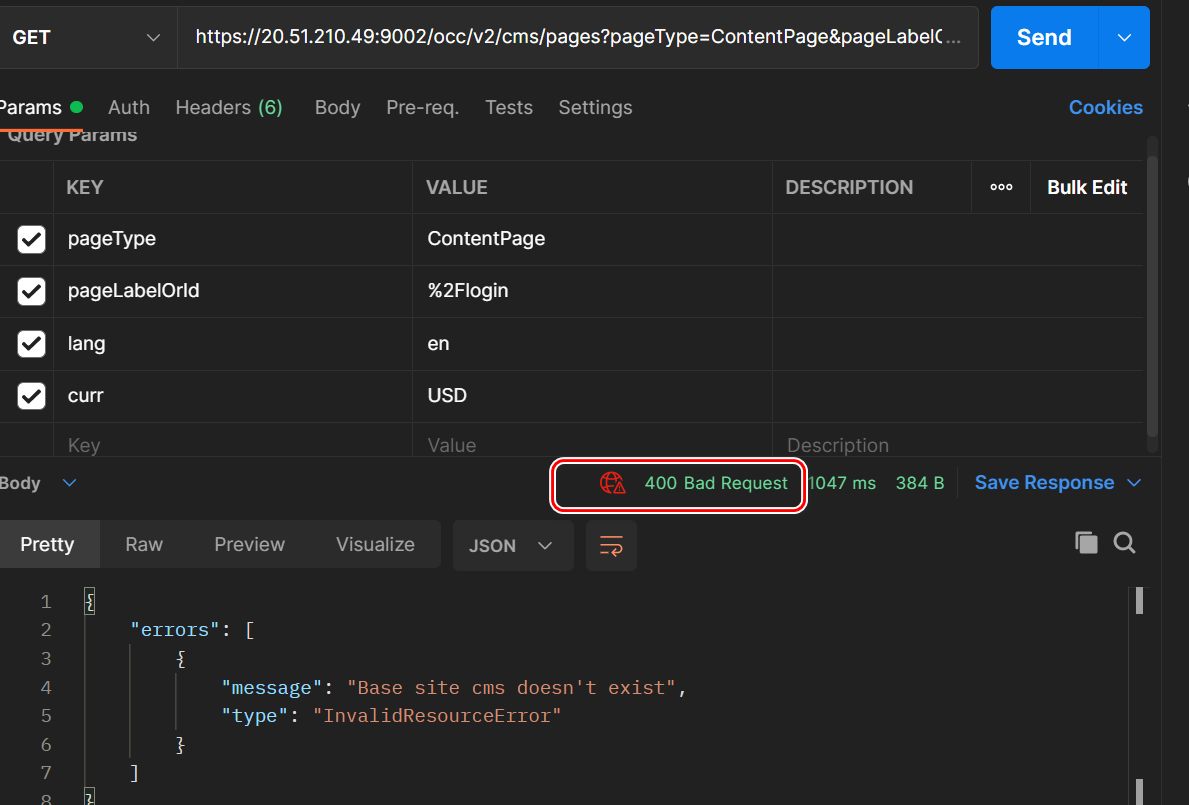
The cause of blank page is, the OCC API to retrieve CMS structure of login page fails with 400 response:
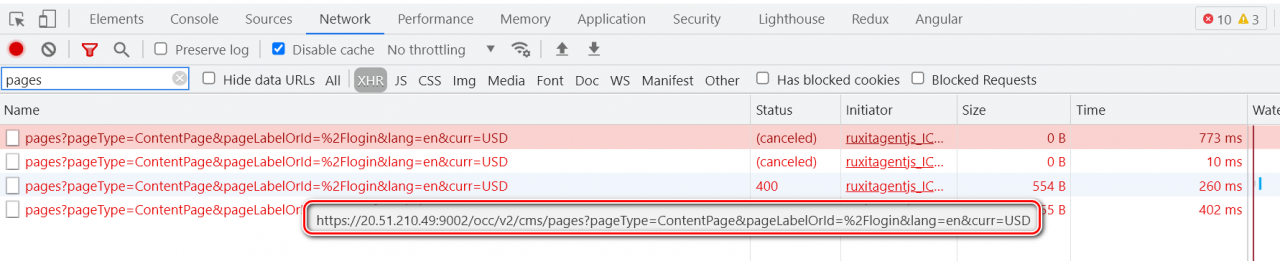
Because the url itself is wrong:
https://20.51.210.49:9002/occ/v2/cms/pages?pageType=ContentPage&pageLabelOrId=%2Flogin&lang=en&curr=USD
The base site is missing in url.
The correct url should be:
https://20.51.210.49:9002/occ/v2/electronics-spa/cms/pages?pageType=ContentPage&pageLabelOrId=%2Flogin&lang=en&curr=USD
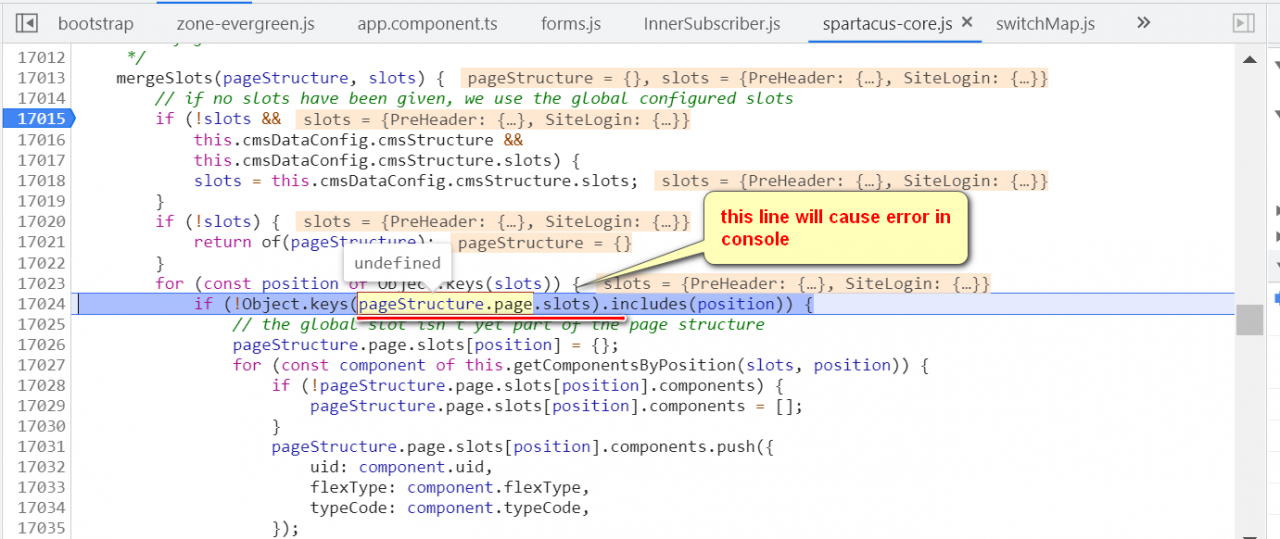
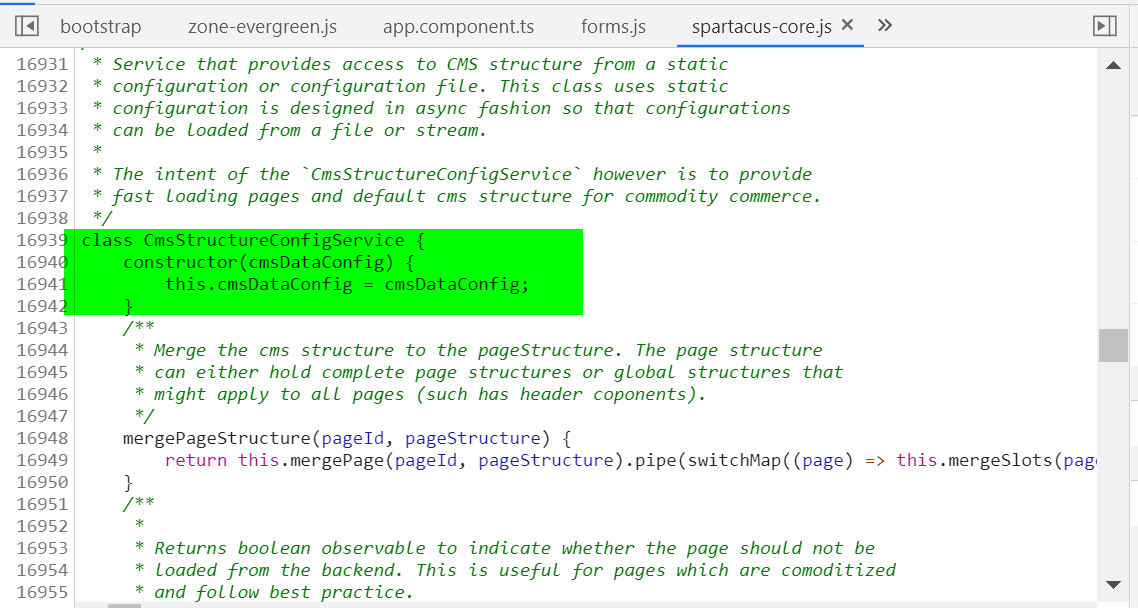
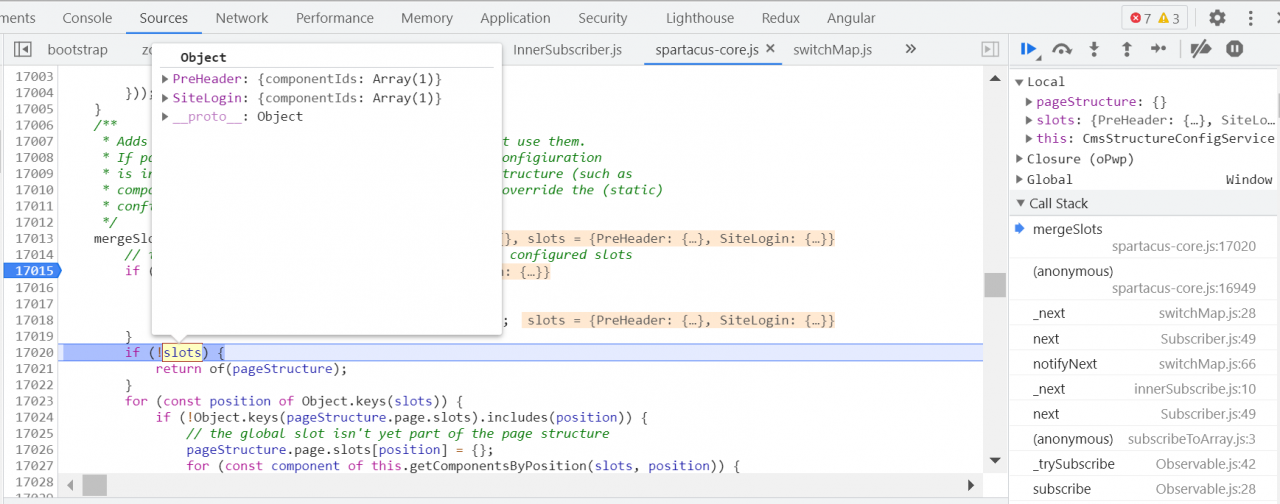
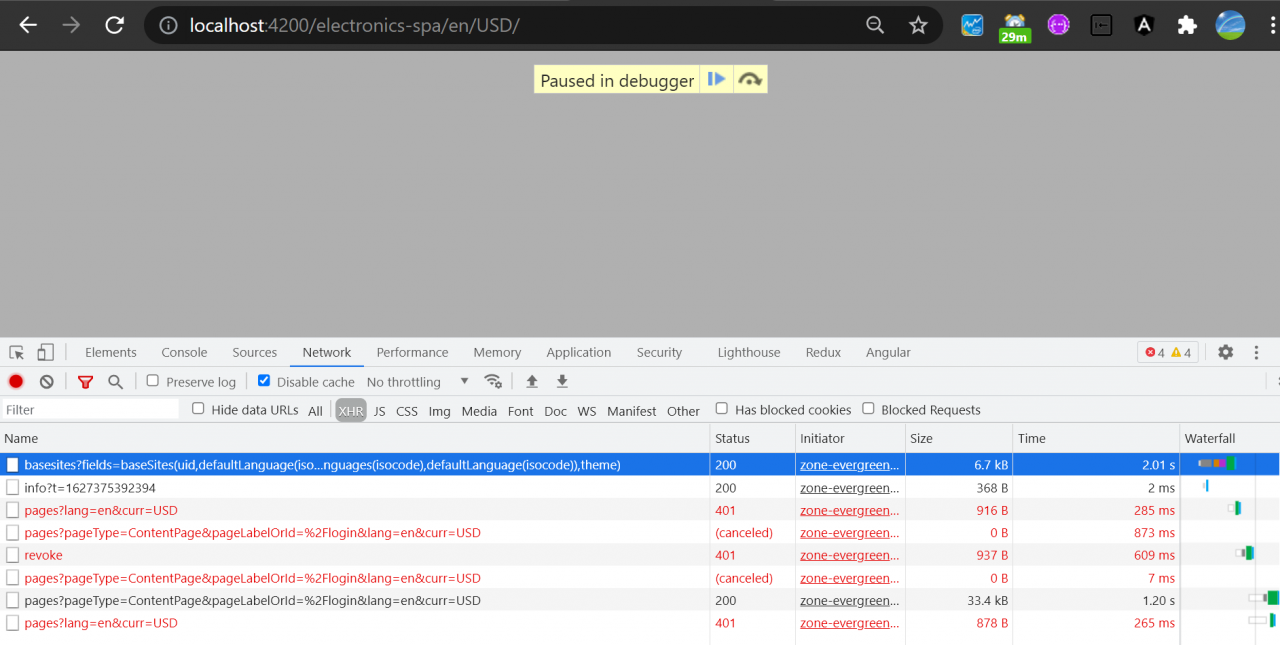
Due to this error, pageStructure.page is undefined, and the code below leads to JavaScript error in console. The login page fails to display. Then blank screen.
But why http://localhost:4200/electronics-spa/en/USD/ can work as expected?
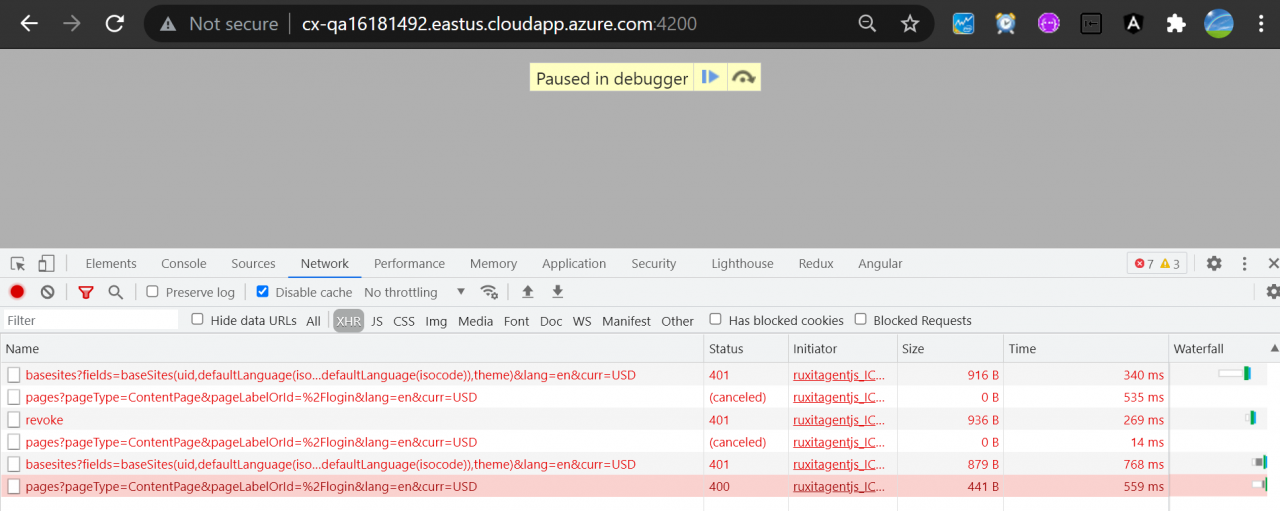
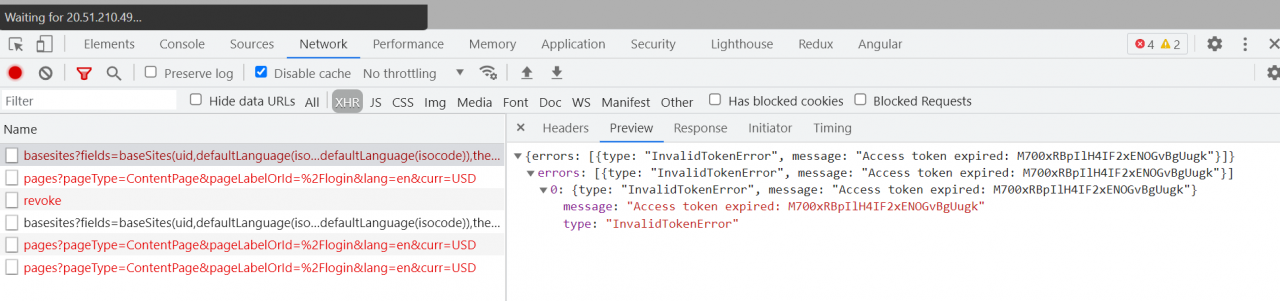
In Spartacus 3.1, there is no Authorization field appended to OCC API for base site request:
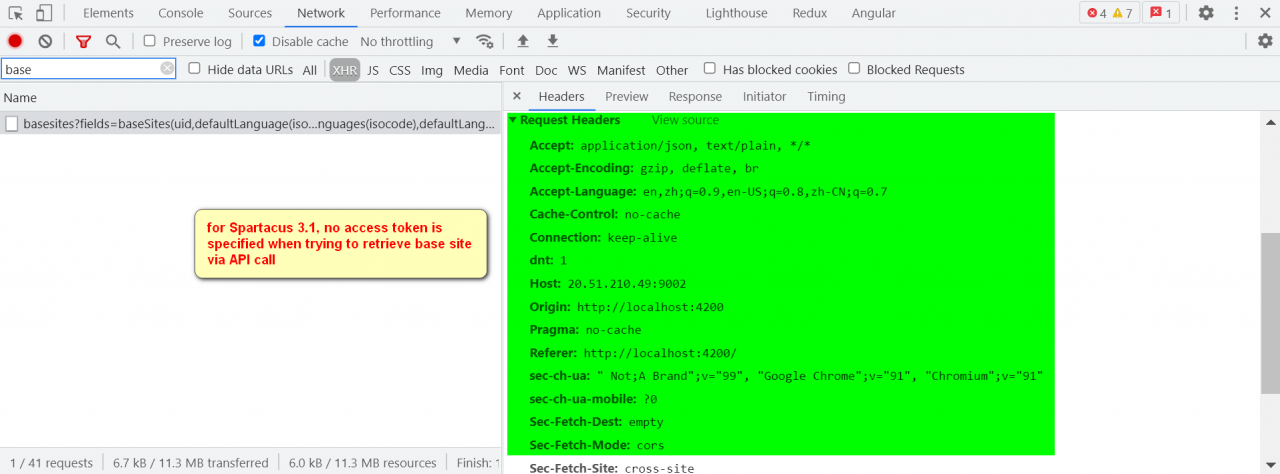
But in our QA instance, the access token is appended in API request headers, so 401 error occurs.
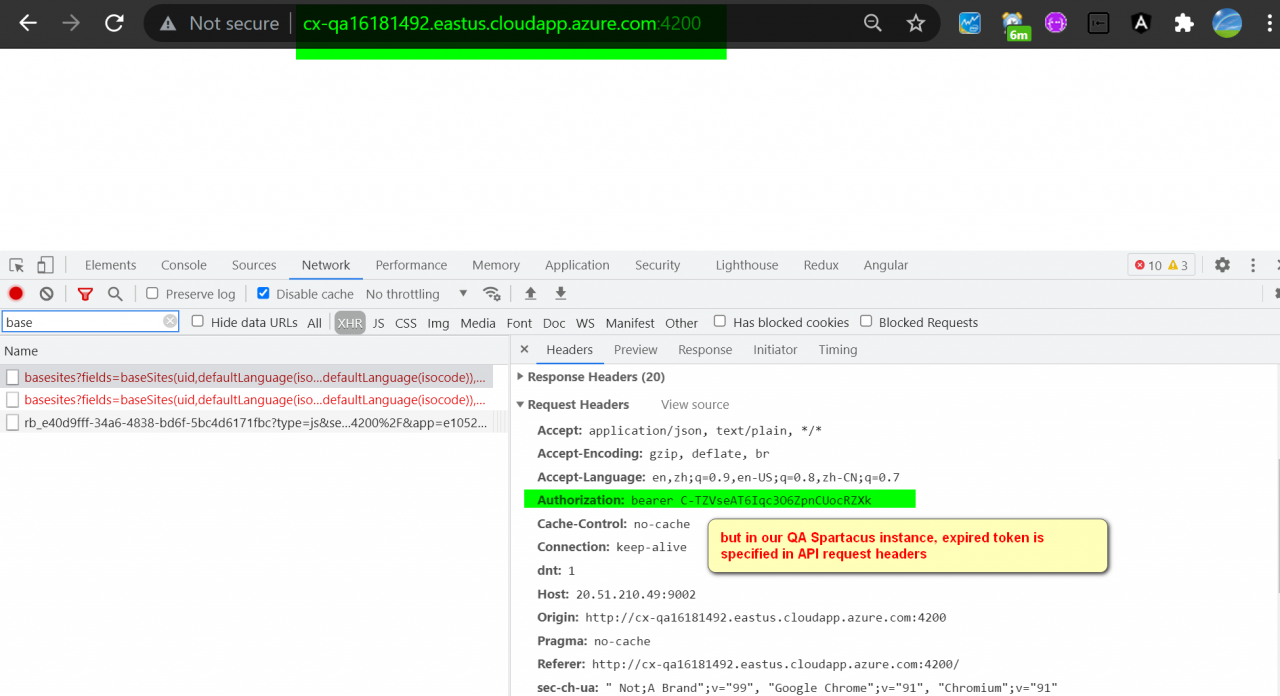
Due to this error, base site cannot be retrieved, so subsequent request for login page structure is failed as well. Finally no login page displayed.
Here is some specific debugging information.
http://cx.eastus.cloudapp.azure.com:4200/electronics-spa/en/USD/
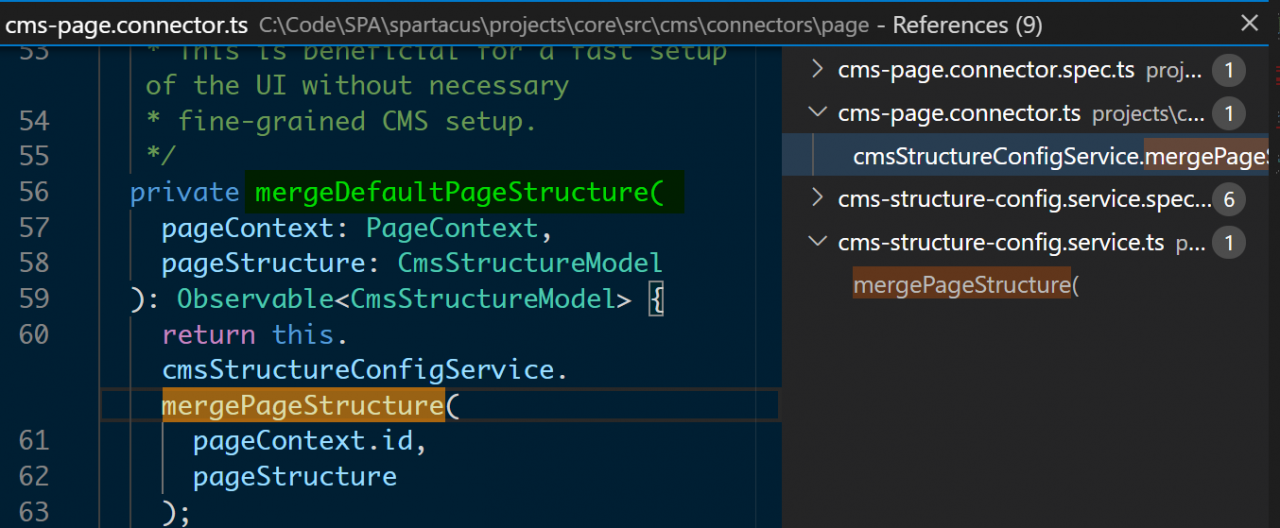
This method is called by cms-page.connector.ts.
Read the context of the login page.
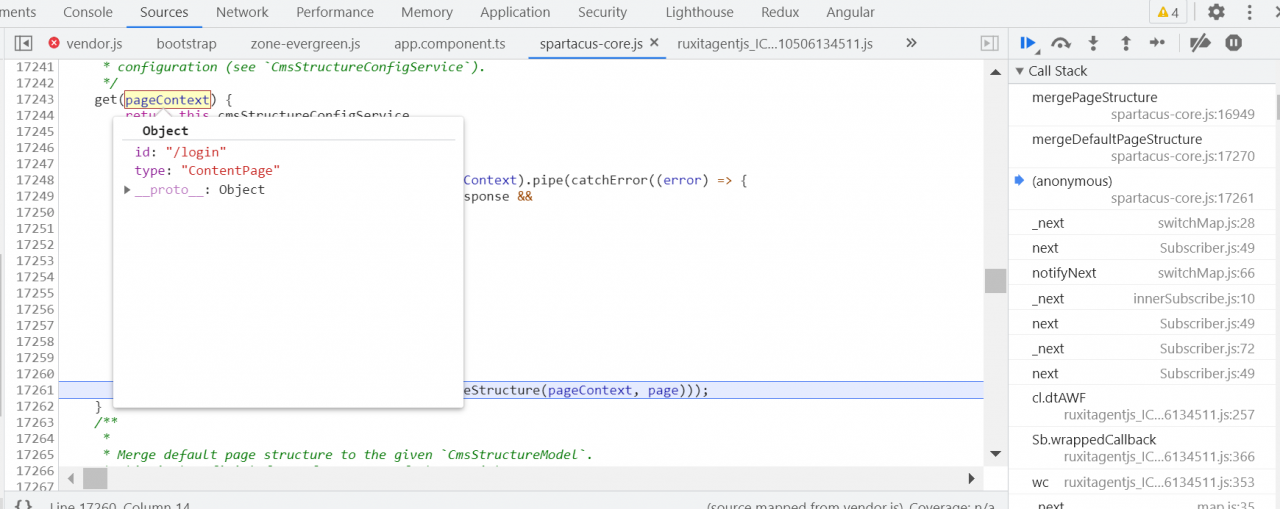
This request to read the page structure of the login page has succeeded.

Request parameters successfully read.
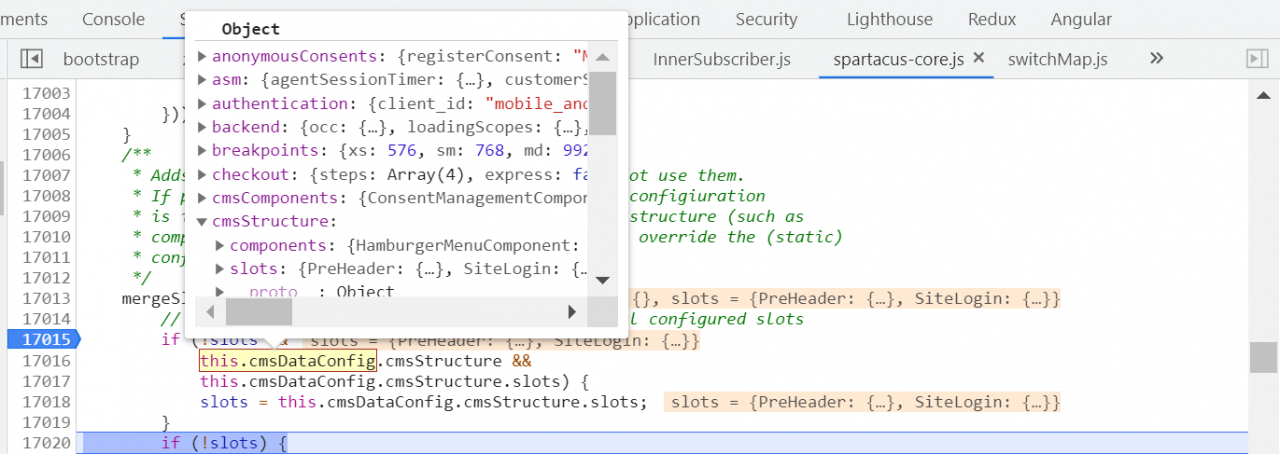
The context is now only PreHeader and SiteLogin.

On a properly working local Storefront, the basesite request returns success:
On the tensorboard command line, enter tensorboard — logdir = log (log is the name of the stored log, which is variable. If it is not written, it defaults to runs)
The following is the directory structure
The log storage location in the code

the generated directory structure
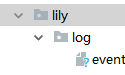
needs to enter the directory of the project. In Lily’s folder, the log of this article is saved as log, so execute the command tensorboard — logdir = log to enter and exit http://localhost:6006 You can see the visualization results

You want to use Python’s request library to call the company interface and create some data, but you finally report an error
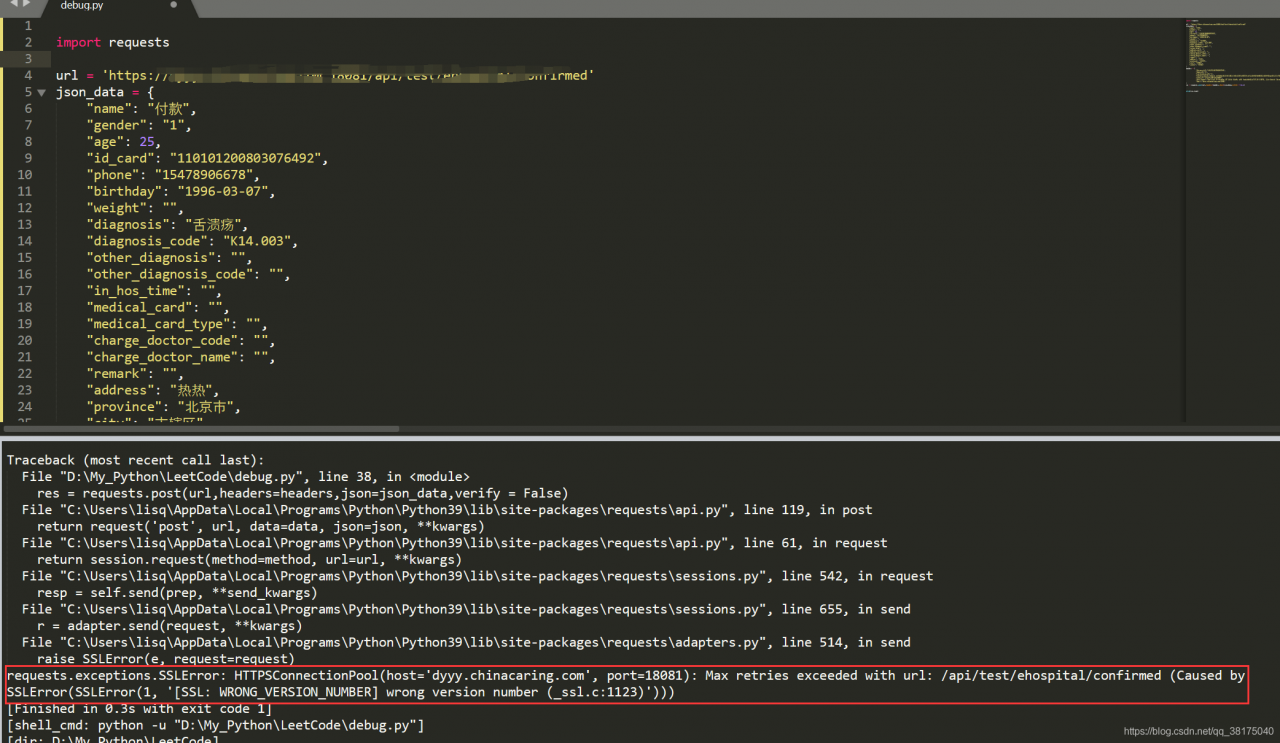
Traceback (most recent call last):
  File "D:\My_Python\LeetCode\debug.py", line 38, in <module>
    res = requests.post(url,headers=headers,json=json_data,verify = False)
  File "C:\Users\lisq\AppData\Local\Programs\Python\Python39\lib\site-packages\requests\api.py", line 119, in post
    return request('post', url, data=data, json=json, **kwargs)
  File "C:\Users\lisq\AppData\Local\Programs\Python\Python39\lib\site-packages\requests\api.py", line 61, in request
    return session.request(method=method, url=url, **kwargs)
  File "C:\Users\lisq\AppData\Local\Programs\Python\Python39\lib\site-packages\requests\sessions.py", line 542, in request
    resp = self.send(prep, **send_kwargs)
  File "C:\Users\lisq\AppData\Local\Programs\Python\Python39\lib\site-packages\requests\sessions.py", line 655, in send
    r = adapter.send(request, **kwargs)
  File "C:\Users\lisq\AppData\Local\Programs\Python\Python39\lib\site-packages\requests\adapters.py", line 514, in send
    raise SSLError(e, request=request)
requests.exceptions.SSLError: HTTPSConnectionPool(host='dyyy.chinacaring.com', port=18081): Max retries exceeded with url: /api/test/ehospital/confirmed (Caused by SSLError(SSLError(1, '[SSL: WRONG_VERSION_NUMBER] wrong version number (_ssl.c:1123)')))
I searched many methods on the Internet and tried to verify = false, but it didn’t work.
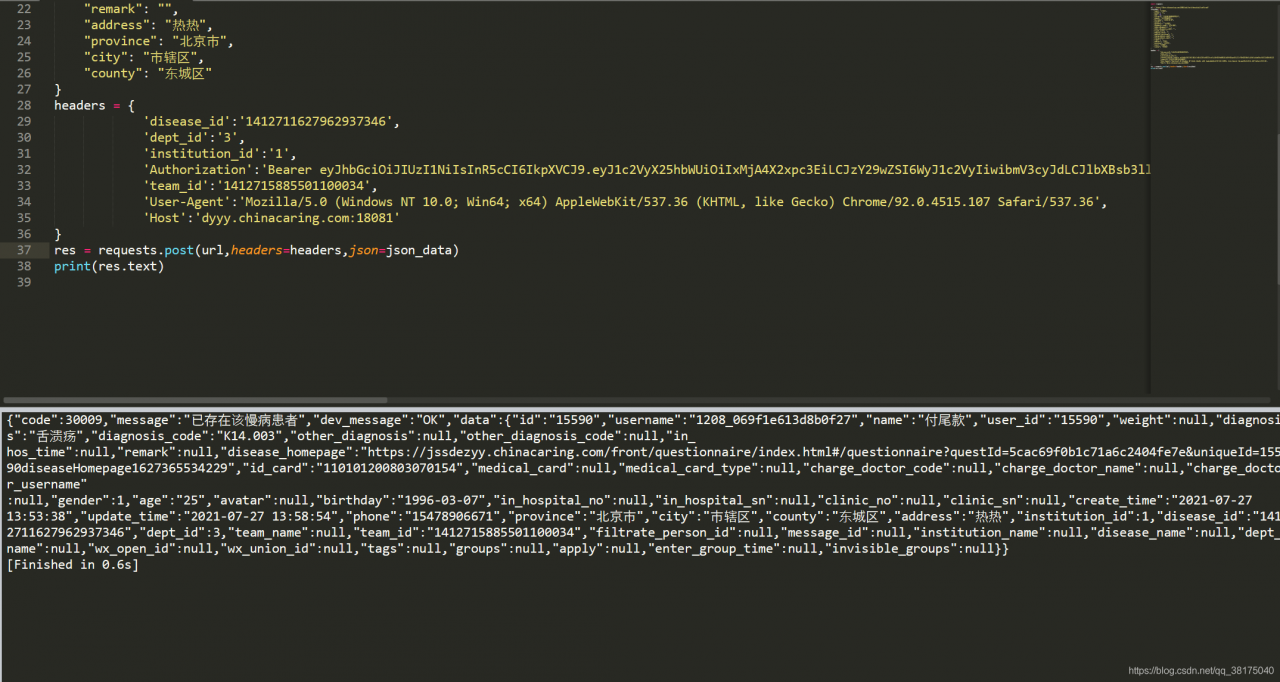
finally, I found that it was because my packet capture tool was on, because I first used the packet capture tool to catch the interface, and then used the requests library to operate. The packet capture tool Charles was not off.
just turn off the packet capture tool
Problem: an error is reported when proto unmarshal is used, and the following information is prompted:
cannot use promoRule (variable of type *db.PromotionRuleSet) as protoreflect.ProtoMessage value in argument to proto.Unmarshal: missing method ProtoReflect (compile)
Solution:
Import package from
"google.golang.org/protobuf/proto"
Change to
"github.com/golang/protobuf/proto"
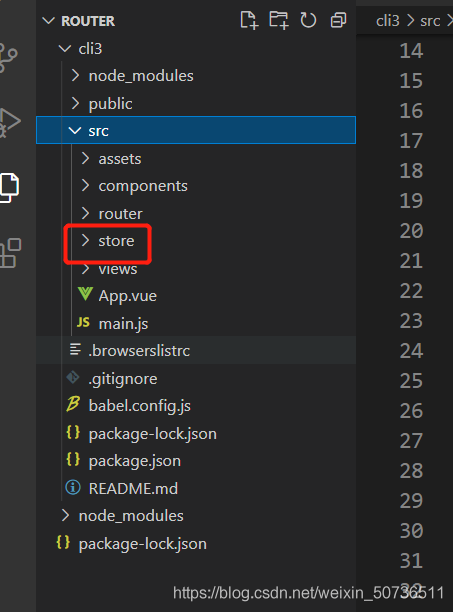
Sometimes vue3 downloading vuex
will not generate a store file, so you need to write it yourself
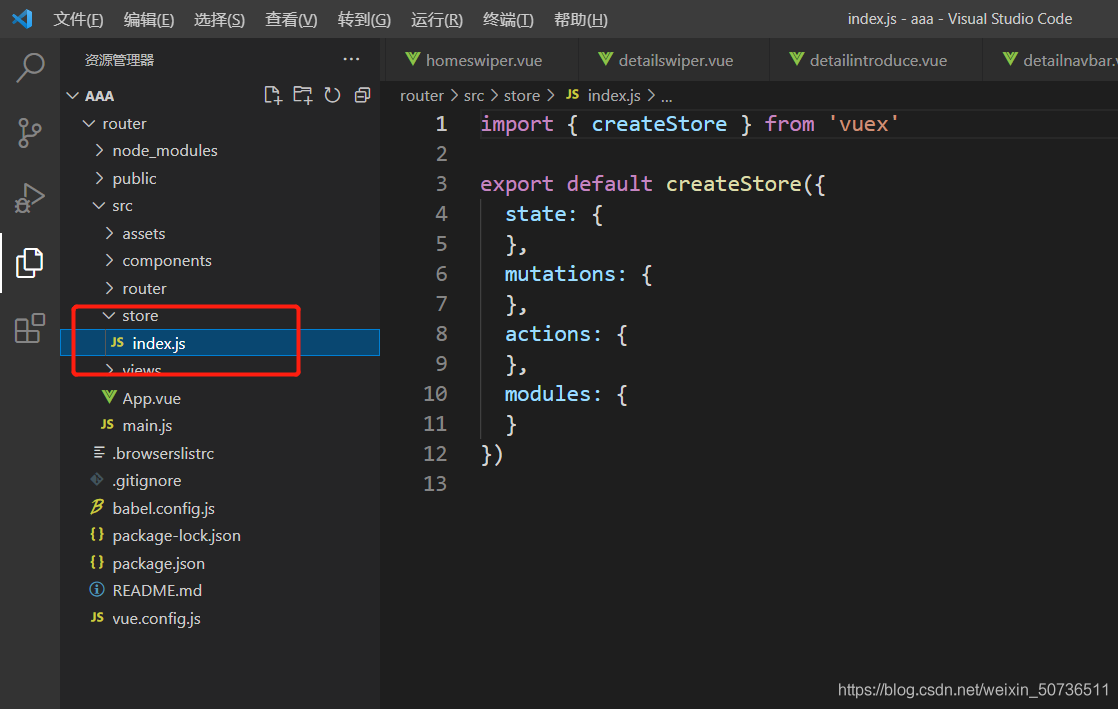
import { createStore } from 'vuex'

export default createStore({
  state: {
  },
  mutations: {
  },
  actions: {
  },
  modules: {
  }
})
Training times error
RuntimeError: Couldn't open shared file mapping: <torch_16716_3565374679>, error code: <1455>This may be because your graphics card is too old or the computing pressure is too heavy for your graphics card.
Just like multithreading on CUDA tensor, it cannot succeed. There are two methods to choose from:
1. Do not use multithreading. The num of the dataloader_ Set worker to zero.
2. Change to CPU sharing tensor. Ensure that your custom dataset dataset returns the CPU tensor.
Method 1 is effective
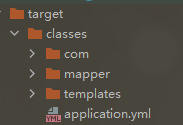
Problem Description: do not go to the port configured by yourself after the project is started?Just go 8080
Solution 1
Please check whether there is any in the target file after packaging Application profile
If not, add the following code to the POM file
         <resources>
            <resource>
                <directory>src/main/java</directory>
                <includes>
                    <include>mapper/*.xml</include>
                </includes>
                <filtering>true</filtering>
            </resource>
            <resource>
                <directory>src/main/resources</directory>
            </resource>
        </resources>
Solution 2
Check whether the configuration file format is aligned, whether there are redundant spaces, etc
GPG: KeyServer receive failed: connection timed out
Solution 1. Change your mobile hotspot
Solution 2 (switching network configuration):
Most of this is a network problem. If the virtual machine uses the bridge mode, it can access the Internet, but it may not be connected to these public networks. At this time, we can configure the network of the virtual machine to NAT mode( Try not to make the bridge mode automatic)
Solution 3 (modify network configuration):
sudo vi /etc/resolv.conf
Options edns0 trust-ad
Problem Description:
an error is reported when installing tensorflow GPU = = 1.4.1 in the virtual environment with Python version 3.6.0
AttAttributeError: module ‘typing’ has no attribute ‘NoReturn’
Cause analysis:
Python version is too low. Python has changed a lot since 3.6
Solution:
install a newer version of python, and you can solve the problem above 3.6.2