here’s why:
1, is the view of the problems
: switch back to the Java view

2, if there is no solution, click Windows , Find perspective in it, then click reset perspective to solve the problem.
Category Archives: How to Fix
U disk installation Linux system could not boot, / dev / root does not exist and the identified hard disk space is not available
UltraISO made U disk start disk
first use centos7, not successful, changed centos8 or not successful, then start to find the cause of the problem
1. Pay attention to the “easy start – write to new drive boot sector -Syslinux”
before writing2, could not boot, /dev/root does not exist
because the configuration path in the installation boot is wrong,
solution 1,
in the option to install the page, press TAB, “hd:LABEL= XXXXX” in the XXXXX into their own usb disk name
solution two,
in emergency mode, CD /dev into the directory, ls to see all, the hard disk name is generally sda, SDB, SDC so, my computer has two hard disks, u disk should be SDC, then SDC, sdc4, restart back to the installation page to “hd:LABEL= XXXXX” to hd:/dev/sdc4 is ok, if not successful, just try a few sd
3 to enter after installation, hard disk space is not available,
1 t my hard drive, display 1000 k is available, the other is unavailable, this is because the computer before you install a Windows system, hard disk has been allocated a
select the hard disk, check the automatic partition,
and check the order I like to make additional space available click done
the pop-up dialog box select delete all can recycling all space
NVIDIA docker failed to start normally
updated the nv driver to 450 last week, and then found that nvidia-docker could not start, error:
docker: Error response from daemon: OCI runtime create failed: container_linux.go:349: starting container process caused "process_linux.go:449: container init caused \"process_linux.go:432: running prestart hook 1 caused \\\"error running hook: exit status 1, stdout: , stderr: nvidia-container-cli: initialization error: driver error: failed to process request\\\\n\\\"\"": unknown.USES the command:
$ nvidia-container-cli -k -d /dev/tty infoalso gives an error:
-- WARNING, the following logs are for debugging purposes only --

I1001 02:01:39.488895 21811 nvc.c:281] initializing library context (version=1.0.7, build=b71f87c04b8eca8a16bf60995506c35c937347d9)
I1001 02:01:39.488944 21811 nvc.c:255] using root /
I1001 02:01:39.488952 21811 nvc.c:256] using ldcache /etc/ld.so.cache
I1001 02:01:39.488959 21811 nvc.c:257] using unprivileged user 1000:1000
W1001 02:01:39.490269 21812 nvc.c:186] failed to set inheritable capabilities
W1001 02:01:39.490334 21812 nvc.c:187] skipping kernel modules load due to failure
I1001 02:01:39.490648 21813 driver.c:133] starting driver service
E1001 02:01:39.490932 21813 driver.c:197] could not start driver service: load library failed: libcuda.so.1: cannot open shared object file: no such file or directory
I1001 02:01:39.491071 21811 driver.c:233] driver service terminated successfully
nvidia-container-cli: initialization error: driver error: failed to process request
so the corresponding version of cuda1
is upgraded
$ apt install libcuda1-450and then back to normal
Three ways to get form data in struct2
1. Use ActionContext class
//1获取ActionContext对象
        ActionContext context = ActionContext.getContext();
        //2.调用方法获取key-value值
        Map<String, Object> map = context.getParameters();
        Set<String> set = map.keySet();
        for(String key :set){
            Object[] o = (Object[]) map.get(key);
            System.out.println(Arrays.toString(o));
        }
. Use ServletActionContext
 //使用ServletActionContext对象获取request对象
        HttpServletRequest request = ServletActionContext.getRequest();
        //2.使用request对象获取表单数据
        String username = request.getParameter("username");
        String password = request.getParameter("password");
        String address = request.getParameter("address");
        System.out.println("username="+username);
        System.out.println("password"+password);
        System.out.println("address"+address);
3. Implement ServletRequestAware interface
public class FormDemo3Action extends ActionSupport implements ServletRequestAware {
    HttpServletRequest httpServletRequest;
    @Override
    public void setServletRequest(HttpServletRequest httpServletRequest) {
        this.httpServletRequest=httpServletRequest;
    }
    @Override
    public String execute(){
        String username = httpServletRequest.getParameter("username");
        String password = httpServletRequest.getParameter("password");
        System.out.println("username="+username);
        System.out.println("password="+password);

        return NONE;
    }
}
Maven download and configuration
maven download and configure
-
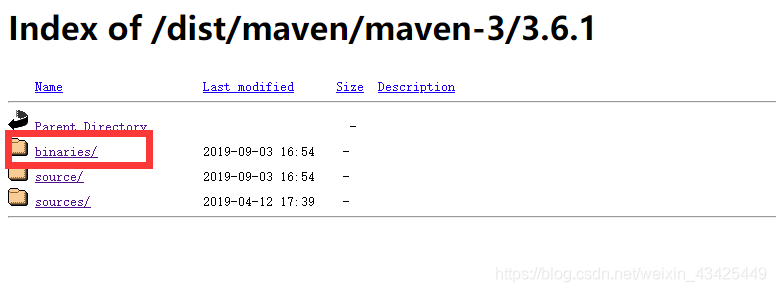
website https://maven.apache.org/
-
click on the download

-
in the Previous Choose archives of the Releases

-
choose to download the version of the
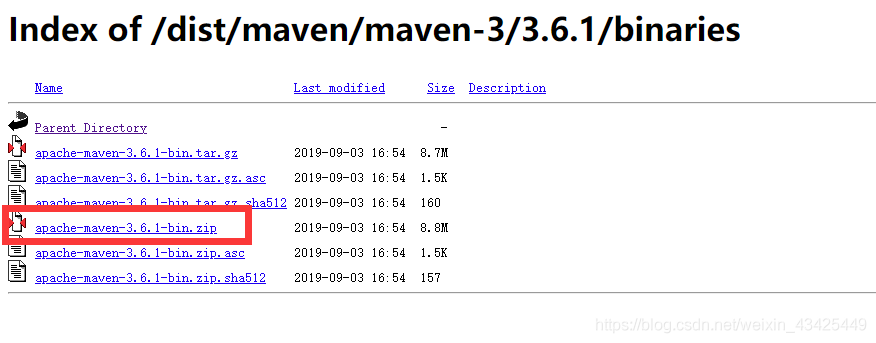
into to the directory selected binaries, click the apache maven – 3.6.1 track – bin. To download and unzip the zip
-
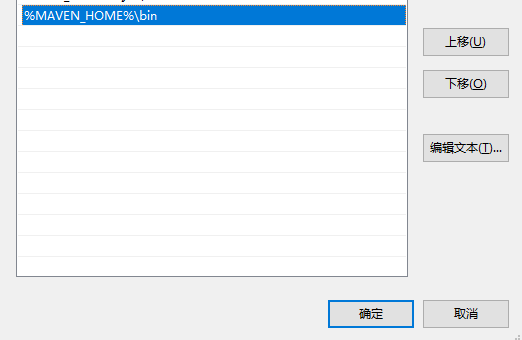
environment variable configuration of
add a new variable

in the path configuration MAVEN_HOME % % \ bin
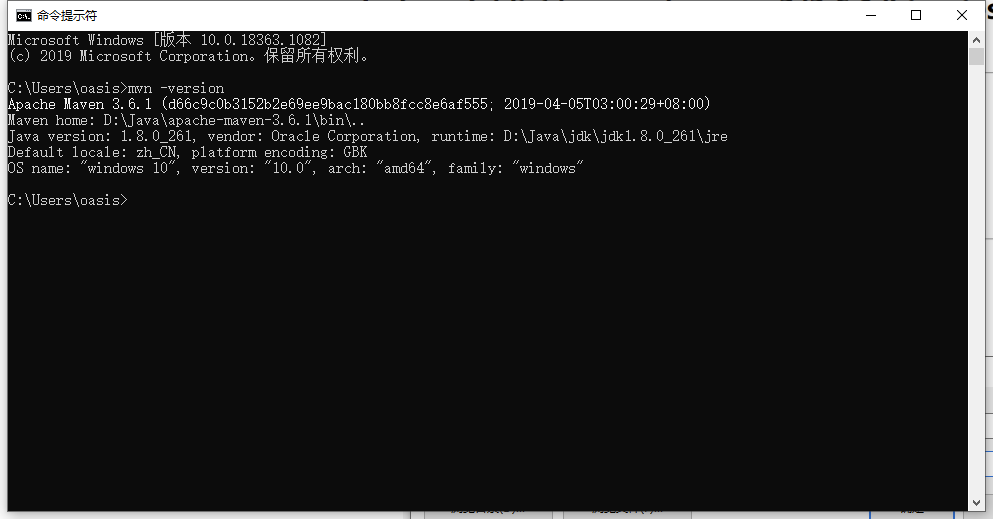
maven – input in the CMD version to see success
-
modify the configuration file
modify the apache maven – 3.6.1 \ conf \ Settings XML
-
specifies your warehouse location
<localRepository>D:\Java\apache-maven-3.6.1\repository</localRepository> -
configuration mirror
<mirrors> <!-- 阿里云仓库 --> <mirror> <id>alimaven</id> <name>aliyun maven</name> <url>http://maven.aliyun.com/nexus/content/repositories/central/</url> <mirrorOf>central</mirrorOf> </mirror> </mirrors> -
the idea of maven associated Settings
choose from the menu file – Settings

-
-
Cisco ASA prompt modifies the display name hostname priority state context
ASA#Conf t
ASA(config)# prompt hostname priority state
CN-BJ-WAN-FW01-ASA/pri/act(config)#
也显示上下文
CN-BJ-WAN-FW01-ASA#conf terminal
CN-BJ-WAN-FW01-ASA(config)# prompt hostname priority state context
CN-BJ-WAN-FW01-ASA/pri/act(config)#
CN-BJ-WAN-FW01-ASA/pri/act(config)# changeto context BJ- PRDO
CN-BJ-WAN-FW01-ASA/pri/act/BJ-PRODO(config)#
Linux CentOS installing protobuf
new version
Google protobuf-3.6.1 is now the latest version, adding new features, see the description
download address https://github.com/protocolbuffers/protobuf/releases
I downloaded the protobuf-all-3.6.1.tar.gz package
new version does not need to execute autogen.sh script, just./configure line
tar ZVXF protobuf-all-3.6.1.tar.gz
CD protobuf-3.6.1
./configure — prefix=/usr/local/
sudo make # take a long time to compile
sudo make check
sudo make install
protoc — version # view version
common errors:
protoc: error while loading Shared libraries: libprotobuf.so.0: cannot open
Shared object file: No such file or directory
solution:
export LD_LIBRARY_PATH = $LD_LIBRARY_PATH:/usr/local/lib
JSON and map convert to each other (using fastjson)
article directory
JSON String
- to Map, get leaf node
- Map to String String
JSON string to Map, get the leaf node
fastjson has two ways:
- json. parseObject (String, Class< T>)
//JSON subclass
- JSONObject.parseObject
String str ={
 "sign": "sign",
 "data": {
  "type": "第二层",
  "order": {
   "test": "第三层"
  }
 }
}

Map<String,String> parseObject = JSON.parseObject(str,Map.class);
	//获取sign节点
String sign=parseObject.get("sign");
	//获取data节点
String data=String.valueOf(parseObject.get("data"));
	//获取data集合
Map dataMap  = JSON.parseObject(data,Map.class);
	//获取order集合
Map orderMap = (Map)dataMap.get("order");
	//获取叶子节点
orderMap.get("test");
Map String String
String str = JSONObject.toJSONString(testMap);
– tools

Common errors and modification methods of findbug
- findbugs:EI_EXPOSE_REP
problem description: Getters and setters of the may expose internal representation by returning reference type
eclipse automatically generates reference type (Object, array, Date, etc.) will get or expose the inner implementation of the code by referring to the mutable Object. There are many solutions provided that the returned or assigned Object is not the original reference Object.
# Date
public Date getHappenTime() {
if(happenTime != null){
return (Date) happenTime.clone();
}
    return null;
}
# 数组
public String[] getStringArrary() {
if(stringArray != null){
return Arrays.copyOf(stringArray, stringArray.length);
}
    return null;
}
# hashTable
table = new HashTable(hashTable);
- findbugs: EI_EXPOSE_REP2
description: May expose internal representation by storing the an externally mutable object into a setter method returns a reference type
eclipse to automatically generate a reference type (object, array, the Date, etc.) or through the getter and setter methods get the variable object reference operation and internal implementation code, open the solution a lot, As long as the returned or assigned object is not the original reference object.
solution:
# Date类型为例:
public void setHappenTime(Date happenTime) {
if(happenTime != null){
this.happenTime = (Date) happenTime.clone();
}else{
this.happenTime = null;
}
}
# 数组
public String[] setStringArrary(String[] arr) {
if(arr != null){
this.stringArrays = Arrays.copyOf(stringArray, stringArray.length);
} else {
 this.stringArrays =null;
}
}
3.CN_IDIOM_NO_SUPER_CALL
clone method does not call super.clone()
a non-final class defined the clone() method without calling the super.clone() method. For example: B extends from A and if the clone method in B calls spuer.clone() and the clone in A does not call spuer.clone(), that results in an inaccurate result type. Spuer. clone() is called from A’s clone method.
- findbugs:DC_DOUBLECHECK
multi-threading – Possible double check of field
multi-threading double check of field
, solution, add volatile keyword decoration to the field.
- [NP_NULL_PARAM_DEREF]
description: Null passed for nonnull parameter passed to nonnull parameter
solution: add nonnull judgment
Ida batch processes virus share samples to obtain ASM files and bytes files
recently needed asm file and bytes file samples for analysis, see the see snow forum can have IDA batch mode! It smells so good!
without further ado code
import sys
import os
import subprocess

global idcScriptFileName
global ida32tFilePath
global ida64tFilePath
#global ida32wFilePath
#global ida64wFilePath

# File these feilds with ur own ida file path and the idc file u want to execute!

idcScriptFileName = "batchmod.idc"
ida32tFilePath ='"D:\IDA 7.0\idat.exe"'
ida64tFilePath = "D:\IDA 7.0\idat64.exe"


#the binary file list text
TargetList = "D:\\batch_disassemble\\target_file_list.txt"
TargetFile_object = open(TargetList,"r").readlines()
for eachline in TargetFile_object:
    eachline = eachline.replace('\n','').replace('\r','')
    print(eachline)
    if os.path.exists(eachline):
        tmpExecStr = ida32tFilePath +" -A -c -S" + idcScriptFileName + " " + eachline
        os.system(tmpExecStr) #single process with cmdwindow
print ("All Process have been started!")
Note:
so if you’re using IDA, let’s look at what’s in your IDA directory. Exe, some of them are idaw on the web, for example, I only have idat.exe.
The idc files used in the
code are as follows (I put them in the same directory)
//by obaby
#include <idc.idc>

static main()
{
	// turn on coagulation of data in the final pass of analysis
	SetShortPrm(INF_AF2, GetShortPrm(INF_AF2) | AF2_DODATA);
	Message("Waiting for the end of the auto analysis...\n");
	Wait();
	Message("\n\n------ Creating the output file.... --------\n");
	auto path = GetIdbPath()[0:-3] + "asm";  //change the data to the length of the file path
	auto byteFilePath = GetIdbPath()[0:-3] + "bytes";//change the data to the length of the file path
	auto file = fopen(path,"w");
	auto byteFile = fopen(byteFilePath,"w");
	GenerateFile(OFILE_LST,file,0,-1,0);
	auto addr = MinEA();
	auto i=0;
	for( addr; addr != BADADDR; addr = NextAddr(addr) ){
    		fprintf(byteFile,"%02X",IdbByte(addr));
    		if (i == 15){
        		fprintf(byteFile,"\n");
        		i=0;
    		} else {
        		fprintf(byteFile," ");
        		i++;
    		}
	}
	fclose(file);
	fclose(byteFile);
	Message("All done, exiting...\n");
	Exit(0); // exit to OS, error code 0 - success
}
The file name in the
code is the path to my file that I got myself, as follows:
import os
file_path='D:\\traindata_1\\bancos'
file_list=[i for i in os.listdir(file_path)]
fw=open('target_file_list.txt','a')
for file in file_list:
    fw.write('%s\\%s\n'%(file_path,file))
fw.close()
Error from server (alreadyexists) clusterrolebindings.rbac.authorization .k8s.io “kubelet
problem description
create bootstrap role to give permission to connect apiserver request signature error, modified as follows:
[root@localhost kubeconfig]# kubectl create clusterrolebinding kubelet-bootstrap –clusterrole=system:node-bootstrapper –user=kubelet-bootstrap
Error from server (AlreadyExists): Clusterrolebindings, rbac authorization. K8s. IO “kubelet – the bootstrap” already exists
problem analysis
this is because an incorrect signature has been created previously, the signature is occupied, and the occupied signature
needs to be deletedproblem solved
1. Delete signature
kubectl delete clusterrolebindings kubelet-bootstrap
2, recreate successfully
[root@localhost kubeconfig]# kubectl create clusterrolebinding kubelet-bootstrap –clusterrole=system:node-bootstrapper –user=kubelet-bootstrap
clusterrolebinding.rbac.authorization.k8s.io/kubelet-bootstrap created
Simple use of namedparameterjdbctemplate of spring
Spring JDBC package provides a JdbcTemplate and its two brothers SimpleJdbcTemplate and NamedParameterJdbcTemplate.
NamedParameterJdbcTemplate class is based on the JdbcTemplate class, and it is encapsulated to support named parameter feature.
NamedParameterJdbcTemplate mainly provides the following three methods: the execute method, method of query and queryForXXX, update and batchUpdate method.
Example in the
project:
String username = “root”;
String password = “root”;
String driver = “com.mysql.jdbc.driver”;
String url = “JDBC: mysql:// 127.0.0.1:3306/upwis_flow?CharacterEncoding = utf-8 “;
	Class.forName(driver);
	Connection conn= DriverManager.getConnection(url, username, password);

	DataSource dataSource=new SingleConnectionDataSource(conn,false);
	NamedParameterJdbcTemplate jdbc=new NamedParameterJdbcTemplate(dataSource);
	jdbc.getJdbcTemplate();
	List list = jdbc.queryForList("select * from fw_dir",new HashMap<>());
	System.out.println(list);