1. strip()
Strip (s[, chars]), which returns a copy of the string and removes the leading and suffix characters. means which characters you want to remove from the string, so you pass them in as arguments. This function only deletes the header and tail characters, not the middle ones. ) if the strip() parameter is empty, the blank character of the string header and tail (including \n, \r, \t, etc.) will be deleted by default.
#这里注意字符串a的两端都有一个空白字符,字符a和n之间也有一个。
a=" \rzha ng\n\t "
print(len(a))

b=a.strip()
print(b)
print(len(b))

输出:
11
zha ng
6
when the argument is empty, the whitespace, \r, \n, \t on both ends are deleted, but the whitespace in the middle stays the same. So let’s take a look at and what does look like when you have parameters:
a="rrbbrrddrr"
b=a.strip("r")
print(b)

输出:bbrrdd
, the middle character r has not changed, both ends have been deleted, now let’s look at passed in multiple character parameters :
a="aabcacb1111acbba"
print(a.strip("abc"))
print(a.strip("acb"))
print(a.strip("bac"))
print(a.strip("bca"))
print(a.strip("cab"))
print(a.strip("cba"))

输出:
1111
1111
1111
1111
1111
1111
, what do you see in this code?Contrary to what you might think, it doesn’t matter if you pass “ABC” or any other arrangement of ABC’s, what matters is that the function only knows that the characters you want to delete are “a”, “b”, “C”. The function takes the arguments you pass and breaks them down into characters, then removes the characters from the head and tail. Got it!
2. Lstrip () and rstrip()
these two functions are basically the same as the above strip(), and the parameter structure is the same, except that the left (head) is removed and the right (tail) is removed.
a=" zhangkang "
print(a.lstrip(),len(a.lstrip()))
print(a.rstrip(),len(a.rstrip()))

输出:
('zhangkang ', 10)
(' zhangkang', 10)
when there are no parameters, one gets rid of the white space on the left and one gets rid of the white space on the right. When passing parameters:
a="babacb111baccbb"
print(a.lstrip("abc"))
print(a.rstrip("abc"))

输出:
111baccbb
babacb111Android ADB simulates click events of sliding buttons
mock events are all implemented through the input command, starting with the use of the input command:
usage: input … input text & lt; string>
input keyevent & lt; key code number or name>
input tap & lt; x> < y>
input swipe & lt; x1> < y1> < x2> < y2>
1. Keyevent refers to the corresponding android keycode, such as the home key keycode=3 and the back key =4.
please refer to < Android Keycode Details & GT; http://blog.csdn.net/huiguixian/article/details/8550170
is easy to use, for example, if you want to simulate the home button:
adb shell input keyevent 3
please refer to the above article and edit according to the specific keycode.
2. For tap, it simulates events on the touch screen, giving only x and y coordinates.
this x and y coordinate corresponds to the real screen resolution, so it should be seen according to the specific phone. For example, if you want to click the screen (x, y) = (250, 250) position:
adb shell input tap 250 250
3. Swipe is the same as tap, except that it is a simulated sliding event, and the coordinates of starting point and ending point are given. For example, going from screen (250, 250) to screen (300, 300) is
adb shell input swipe 250 250 300 300
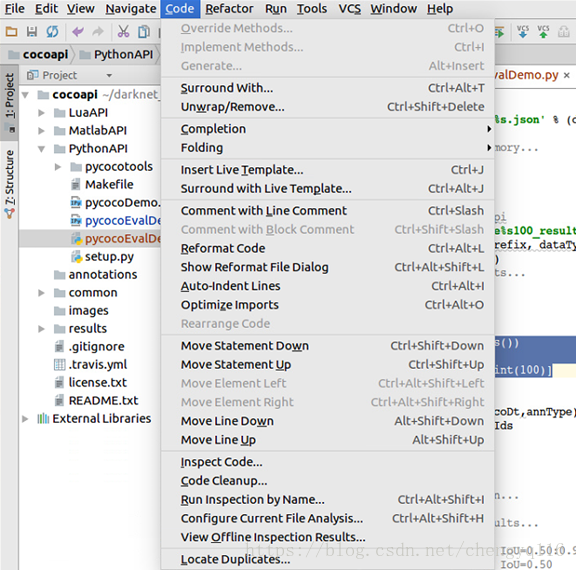
Pychar – transform code
PyCharm – formatting Code (Reformat Code)
1. Ctrl + A
.
2. Code -> Reformat Code
format shortcut Ctrl + Alt + L, but with the lock screen shortcut, should not be used.
Go test print no output
has a test file:
$ cat utils/utils_test.go
package utils

import (
        "fmt"
        "testing"
)

func TestGetProjAbsPath(t *testing.T) {
        projPath := GetProjAbsPath("github.com", "GerryLon", "go-crawler")
        t.Log(projPath)
        fmt.Println("projPath is:", projPath)
}
runs as follows:
$ go test -count=1 utils/*.go
ok      command-line-arguments  0.002s
does not see print, neither t.og nor FMT.Println.
Add the
plus -v(verbose) option to see the whole process :
$ go test -v  utils/*.go
=== RUN   TestGetProjAbsPath
projPath is: /var/workspace/go/src/github.com/GerryLon/go-crawler
--- PASS: TestGetProjAbsPath (0.00s)
    utils_test.go:10: /var/workspace/go/src/github.com/GerryLon/go-crawler
PASS
ok      command-line-arguments  (cached)
Reference:
https://stackoverflow.com/questions/23205419/how-do-you-print-in-a-go-test-using-the-testing-package
welcome to add correction!
Tensorflow in function tf.Print Method of outputting intermediate value
tensorflow because of its model based on the static map, lead to writing the code is hard to debug, besides using official debugging tools, the most direct way is to put the intermediate result output out of view, however, use the print function can only output directly the shape of a tensor variable, rather than numerical, want to use specific numerical output tensor needs tf. The print function. There are many instructions on the web about how to use this function. Here is a brief description:
Print(
    input_,
    data,
    message=None,
    first_n=None,
    summarize=None,
    name=None
	)
parameter:
- input_ : tensor that passes through this operation.
- data: list of tensors to print when calculating op.
- message: a string, the prefix for the error message.
- first_n: record first_n times only. Negative log, which is the default.
- : print only a fixed number of entries for each tensor. If not, each input tensor prints up to three elements. Name: name of the operation (optional)
however, most of the resources on the web describe how to set up an op in the main function and then open a Session to execute sess.run(op), but what if you want to output an intermediate value in the function that does not return to the main function?In this case, a new Session cannot be opened in the function, but you can still create an op using TF.print.
import tensorflow as tf
import os

os.environ["CUDA_VISIBLE_DEVICES"] = "0"

def test():
    a=tf.constant(0)
    for i in range(10):
        a_print = tf.Print(a,['a_value: ',a])
        a=a_print+1
    return a

if __name__=='__main__':
    with tf.Session() as sess:
        sess.run(test())
operation result:
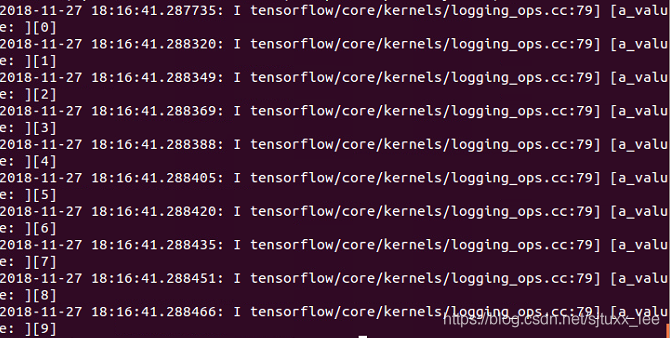
a_print can be understood as a new node in the figure. In the following code, when another variable USES a_print (example a=a_print+1), there will be data flowing from a_print node, and the value will be output. But how many times will the value be output?In fact, it is not how many times a_print is used in the following text, but how many times the data flow must flow from this node, which can be interpreted as how many times the OP of A_print is “defined”.
def test():
    a=tf.constant(0)
    a_print = tf.Print(a,['a_value: ',a])
    for i in range(10):
        a=a_print+1
    return a

if __name__=='__main__':
    with tf.Session() as sess:
        sess.run(test())
if the test () function to this way, the operation result is:
![]()
output is performed only once, because a_print the op is defined only once, although back in circulation has been a used, but the data from it after only once, so will only print once, and a_print value is 0, always ultimately return a value of 1.
then change the code to the following example:
def test():
    a=tf.constant(0)
    a_print = tf.Print(a,['a_value: ',a])
    for i in range(10):
        a_print=a_print+1
    return a

if __name__=='__main__':
    with tf.Session() as sess:
        sess.run(test())
The result of running
will not output anything, because the op of a_print is not related to any other variable, it is not used by any other variable, it is an isolated node in the graph, no data flow, it will not be executed.
and if I change this to
def test():
    a=tf.constant(0)
    a_print = tf.Print(a,['a_value: ',a])
    for i in range(10):
        a_print=a_print+1
    return a_print

if __name__=='__main__':
    with tf.Session() as sess:
        sess.run(test())
run result
![]()
returns an a_print value of 10, which is also correct, because a_print is returned later, so there is a data flow through it and it will be executed, while a_print is only executed once because the definition of a_print is only executed once.
Differences between length() size() and C strlen() of C + + string member functions
1. Function declaration
C++ string member function length() is the same as size(), but strlen() is different from C library function. First take a look at the declaration of the three functions:
//返回string长度,单位字节
size_t length() const noexcept;

//返回string长度,单位字节。作用等同于length()
size_t size() const noexcept;

//C标准库函数,返回C风格字符串长度,单位字节
size_t strlen ( const char * str );
2. Use example
in real projects, when C++ string gets the length, we often use the following two methods.
//方法一:调用length()或size()
string strTest="test";
strTest.length();			//结果为4
strTest.size();				//结果为4

//方法二:转为C风格字符串,调用strlen()
strlen(strTest.c_str());	//结果为4
the above code snippet takes a string length of 4 and makes no difference, so what’s the difference between method 1 and method 2?See the following code:
char buf[256]={0};
buf[0]='a';
buf[2]='v';
buf[3]='h';

string strTest(buf,6);
cout<<"strTest[0]:"<<(uint32_t)strTest[0]<<"_"<<(uint32_t)strTest[1]<<"_"<<(uint32_t)strTest[2]<<"_"<<(uint32_t)strTest[3]<<"_"<<(uint32_t)strTest[4]<<"_"<<(uint32_t)strTest[5]<<endl;
cout<<"strTest.length()="<<strTest.length()<<" strTest.size()="<<strTest.size()<<" strlen(strTest.c_str())="<<strlen(strTest.c_str())<<endl;
cout<<"strTest:"<<strTest<<endl;
output:
strTest[0]:97_0_118_104_0_0
strTest.length()=6 strTest.size()=6 strlen(strTest.c_str())=1
strTest:avh
Conclusion
3.
(1) when a string contains the null character ‘\0’, the length of the string is truncated using strlen(), and the member functions length() and size() are used to return the true length of the string.
(2) cout will filter out null characters when it outputs string, and the output will not be truncated.
(3) when constructing or stitching a string, it is recommended to specify the length of the string at the same time, such as
//构造时使用
string strTest(buf,6);
//而非,因为会被截断
string strTest(buf);

//拼接时使用
strTest.append(buf,6);
//而非,因为会被截断
strTest+=buf;
reference
[1] C++ reference
How to restrict input field to only input pure numbers in HTML
limit input input box can only enter pure Numbers
1, the onkeyup = "value, value = replace (/ [^ \] d/g,") "
USES the
onkeyupevent, and has thebug, that is, in the state of Chinese input method, after Chinese characters are input, enter directly, the letterwill be input directly
2, onchange = "value, value = replace (/ [^ \] d/g,") "
USES the
onchangeevent. After input content, only theinputloses focus will get the result, and the responsecannot be made when input
3, the oninput = "value, value = replace (/ [^ \] d/g,") "
USES the
oninputevent, which perfectly solves the above two problems. There are no other problems in the test for the time being.
code example
<!DOCTYPE html>
<html lang="en">
<head>
    <meta charset="UTF-8" />
    <title>input</title>
</head>
<body>
    只能输入纯数字的输入框:<input type="text" name="" oninput="value=value.replace(/[^\d]/g,'')">
</body>
</html>
above code has been tested in Google, firefox, baidu, UC, IE11, 360 fast, QQ, Edge browser, please feel free to use,
thanks for qq_38726717, xiao xiao xin feedback in the comments section.
Solutions to the problem of “symbol lookup error xxxxx, undefined symbol”
symbollookup error gxio_mpipe_init, undefined symbol problem.
symbollookup error _mpipe_init, undefined symbol problem. A large part of the problem with this issue is due to the fact that the dynamic library version is too old for the application to find the corresponding symbol.
However, analyzing Makefile files and updating the dynamic libraries on which gxio depends on the tilera platform will not solve this problem. Finally, the problem was solved by combining NM with LDD. The analysis steps are as follows:
- use LDD to test the dynamic libraries on which the application sequence depends
- use nm + grep to analyze whether gxio related dynamic libraries contain gxio_mpipe_init symbol
- 1 2 3 detection found that gxio related dynamic libraries do not contain gxio_mpipe_init, $nm libgxio.so | grep gxio_mpipe_init. but gxio static library (libgxio. A) contains gxio_mpipe_init
- modify the application’s Makefile , connect gxio’s static library to the application, compile test problem solved.
- the wish to cause the above problem is that the gxio dynamic library on which the application depends does not have a specific symbol corresponding to gxio_mpipe_init, causing a run-time problem.
0
summary: the reason for this problem is that the version of the dynamic library is too old, so the application cannot find the corresponding symbol. The problem can be solved by updating the dynamic library to support the exact symbol. Nm and LDD tools can be used in the analysis.

pay attention to the public, “running code tsai, access to more premium content
Three methods of JavaScript jump to new page
1. A tag
a tag : & lt; A href=”http://www.jb51.net” title=” Home of scripts “& GT; Welcome< /a>
< A href = “javascript: history. The go (1)” & gt; : : the previous page
< A href = “javascript: history. The go (1)” & gt; : the next page is
< A href=”http://www.jb51.net” title=” script house “target=”_blank”> Welcome< /a>
2. The location object href attributes:
window.location.href=”http://www.jb51.net”; // open a window
3.open :
Windows open ( “ http://www.w3schools.com ” , “ _blank ” ) ; // in another new window open the window
Exploring the streaming call of underscore
introduction
The
underscore is a JavaScript tool library that provides a full range of functional programming capabilities. It contains many utility functions such as each, Map, Reduce,filter, and so on. While es5,es6 already includes most of these, looking at the source code to see the underlying implementation of these functions will help you gain a deeper understanding of native js
The
underscore is defined as pure functions and supports chained calls to a one-way data source. In the chain of functions, data flows magically from one function to another as if passing through a pipe.
  const result = _([1, 2, 3, 4, 5, 6, 7]).chain().map((item) => {return item * 2;}).filter((item) => {
        return item > 10;
        }).value();
operation process is as follows:
- takes the array as the starting data source, runs _([1, 2, 3, 4, 5, 6, 7]) to generate instance objects, and then calls the method chain on the instance to enable it to chain call.
- runs the map function and multiplies each element of the array by 2 to form a new array. 14], filter out the value of less than 10
- value () method to obtain the final run results [12, 14]
the above process shows that the data source enters from the initial port and is passed back layer by layer. Each function will receive the result processed by the previous function and send the result run by itself to the next function. The data flows back like a stream of water as it enters a pipe, forming a streaming call. Next, implement its overall operation mechanism.
source implementation
create constructor
defines the constructor _, if obj is a piece of ordinary data, when running _(obj), this points to window, the result returns the instance object new _(obj), then the object contains the property wrapped, the corresponding value is obj.
(function (global) {

  function _(obj) {
    if (obj instanceof _) {
      return obj;
    }
    if (!(this instanceof _)) {
      return new _(obj);
    }
    this.wrapped = obj;
  }

  _.prototype.value = function () {
    return this.wrapped;
  };

  global._ = _;

})(window);
implements streaming calls
defines an object allExports, assigns the defined utility functions to the properties of the object, and passes in the mixin function to run
function chain(obj) {
    const _instance = _(obj);
    _instance._chain = true;
    return _instance;
  }

  function map(obj, iteratee) {...}

  function filter(obj, iteratee) {...}

  const allExports = {
    chain,
    map,
    filter,
  };

  mixin(allExports);
runs the mixin function, and the parameter obj is the allExports defined above. Key is the name of the function,func corresponds to the specific function.
func is not bound directly to the constructor, but to the constructor’s prototype object. As can be seen from here,_(data).chain().map().filter() calls chain,map,filter () during the execution process, it actually calls the function
defined in the mixin mounted on the prototype object
is executed as follows :
- assumption data = [1, 2, 3], _ (data) is the result of instance object {wrapped: [1, 2, 3]}
- call instance object chain method, below the running function. The result = [[1, 2, 3]].
- func points to the chain function and adds _chain attribute to the instance object.
- chainResult function determines that the current instance object branch does not support chain calls. If it supports subsequent newly generated instance objects, _chain is added as true. Return the new instance object
- the data of the new instance object is still {wrapped:[1,2,3]}. Func points to the map function. Map function returns result [2,4,6]. ChainResult finds support for chain call run _([2,4,6]) to generate a new instance object
- . At this point, this.wrapped has become [2,4,6]. It can be seen from here that every time a function is run, it will generate new instance object by taking the data processed by the function as parameter, and return this new instance object to continue calling other functions, and generate new instance object again. The new instance object continues to call with the processed data, forming the data flow.
function mixin(obj) {
    const array = Object.keys(obj);
    array.forEach((key) => {
      const func = obj[key];
      _.prototype[key] = function () {
        const result = [this.wrapped];
        Array.prototype.push.apply(result, arguments);
        return chainResult(this, func.apply(_, result));
      };
    });
  }

  function chainResult(_instance, obj) {
    return _instance._chain ?_(obj).chain() : obj;
  }
complete code
(function (global) {
  function _(obj) {
    if (obj instanceof _) {
      return obj;
    }
    if (!(this instanceof _)) {
      return new _(obj);
    }
    this.wrapped = obj;
  }

  _.prototype.value = function () {
    return this.wrapped;
  };

  function chain(obj) {
    const _instance = _(obj);
    _instance._chain = true;
    return _instance;
  }

  //map函数的简单实现,支持数组和对象
  function map(obj, iteratee) {
    const keys = !Array.isArray(obj) && Object.keys(obj);
    const len = keys ?keys.length : obj.length;
    const result = [];
    for (let i = 0; i < len; i++) {
      const current_key = keys ?keys[i] : i;
      result.push(iteratee(obj[current_key]));
    }
    return result;
  }

  //filter函数的简单实现,,支持数组和对象
  function filter(obj, iteratee) {
    const keys = !Array.isArray(obj) && Object.keys(obj);
    const len = keys ?keys.length : obj.length;
    const result = [];
    for (let i = 0; i < len; i++) {
      const current_key = keys ?keys[i] : i;
      if (iteratee(obj[current_key])) {
        result.push(obj[current_key]);
      }
    }
    return result;
  }

  function mixin(obj) {
    const array = Object.keys(obj);
    array.forEach((key) => {
      const func = obj[key];
      _.prototype[key] = function () {
        const result = [this.wrapped];
        Array.prototype.push.apply(result, arguments);
        return chainResult(this, func.apply(_, result));
      };
    });
  }

  function chainResult(_instance, obj) {
    return _instance._chain ?_(obj).chain() : obj;
  }

  const allExports = {
    chain,
    map,
    filter,
  };

  mixin(allExports);

  global._ = _;
})(window);
Python data cleaning — delete failed images__ Simple version
when using the caffe training algorithm to classify the model, during the training, it was suggested that the failure to read the pictures caused interruption, so I wrote a script to delete the failed pictures in advance. The script is as follows:
import os
import shutil
import warnings
import cv2
import io

from PIL import Image
warnings.filterwarnings("error", category=UserWarning)


base_dir = "/data/chw/images"
i = 0

def is_read_successfully(file):
    try:
        imgFile = Image.open(file)
        return True
    except Exception:
        return False


for parent, dirs, files in os.walk(base_dir):
    for file in files:
        if not is_read_successfully(os.path.join(parent, file)):
            print(os.path.join(parent, file))
            #os.remove(os.path.join(parent, file)) #真正使用时,这一行要放开,自己一般习惯先跑一遍,没有错误了再删除,防止删错。
            i = i + 1
print(i)
VIM search settings highlight
vim search Settings highlight
When Linux Vim opens the document search string, the Settings are searched to the string and highlighted.
There are two ways:
1. Temporary setting: ViM opens the document –& GT; Command line type
set hlsearch.
Cons: After closing the document, the next time you open it, you need to reset it again.
2. Permanent setting (recommended) : configured in ~/.vIMRC
vim ~/.vimrc
Add Set HLSearch to the file
Then save and exit.
Advantage: once set, permanent effect.