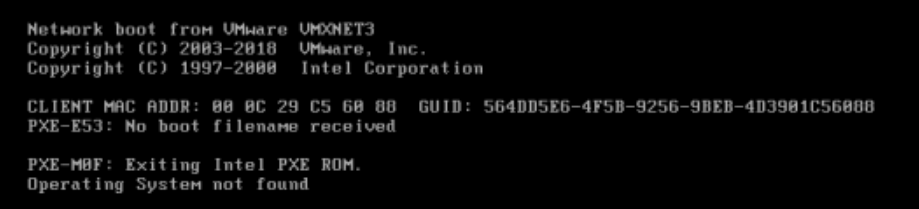
This error indicates that the boot code on the hard disk is missing
Experimental preparation steps
1) Preparation: dd if=/dev/zero of=/dev/nvme0n1 bs=446 count=1

2) Screenshot of system startup error report
The repair steps are as follows
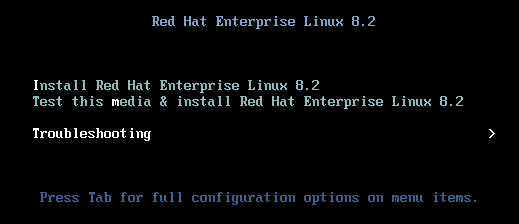
Step 1: select boot from CD to enter rescue mode
Select the third
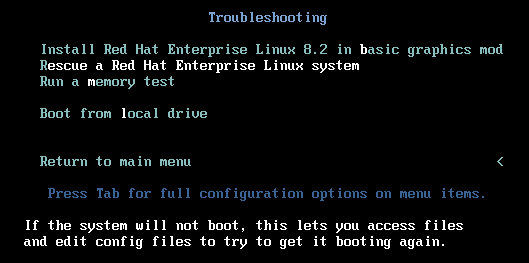
Select the second
Select 1) continue
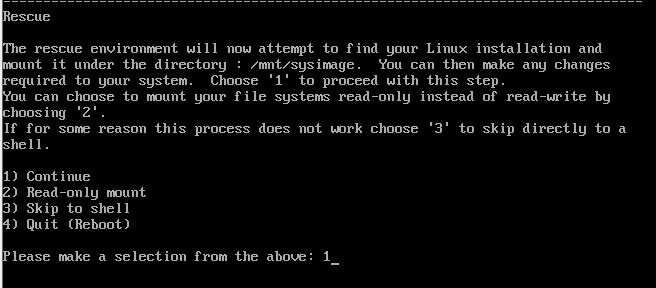
Enter directly

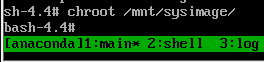
Step 2: switch to the real root file system
chroot /mnt/sysimage
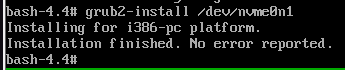
Step 3: repair the boot program
grub2-install /dev/nvme0n1
Step 4: exit twice, restart the test, and choose to start from the local disk
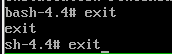
It has been repaired successfully