Recompile,
For. Cpp file: mex xxx.cpp
For. Cu file: mexcuda xxx.cu
Recompile,
For. Cpp file: mex xxx.cpp
For. Cu file: mexcuda xxx.cu
Elmentui form. When setting input type = number, remove the up and down arrows
<style lang="scss" scoped>
/deep/ input[type="number"] {
    -moz-appearance: textfield;
}
/deep/ input[type="number"]::-webkit-inner-spin-button,
/deep/ input[type="number"]::-webkit-outer-spin-button {
    -webkit-appearance: none;
}
</style>
This document records the process and steps of the initial report generation with allure.
Install allure first, download and configure the environment
reference documents:
https://www.cnblogs.com/wsy1103/p/10530397.html
After installation, the following steps begin:
Step 1: generate report data with assure. The generated report data includes two files: one JSON file and one TXT file.
Switch to D: Python/Test & gt; The following is implemented:
hrun test_post_api.json --alluredir=report
Step 2: create the report data generated just now with assure, generate the report2 folder, – O means to specify the folder to generate the report, – C means to clean up the previous report directory before generating the report.
allure generate D:\Python\test\report -o D:\Python\test\report2 -c
Then open the assure report using the default browser to view it.
allure open D:\Python\test\report2
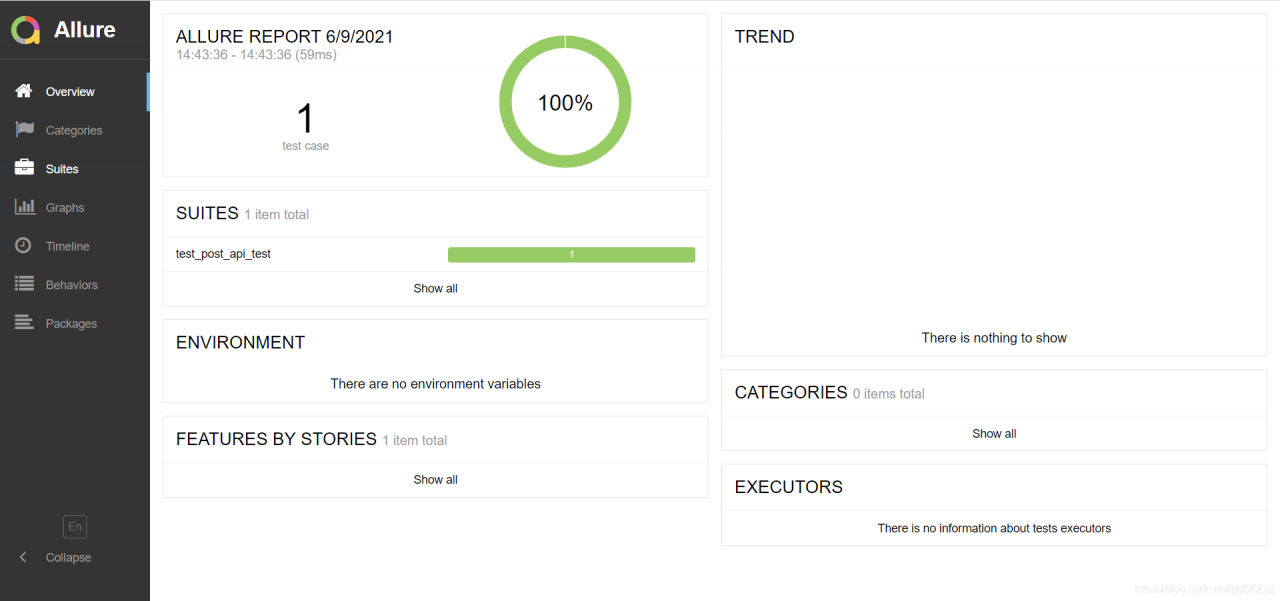
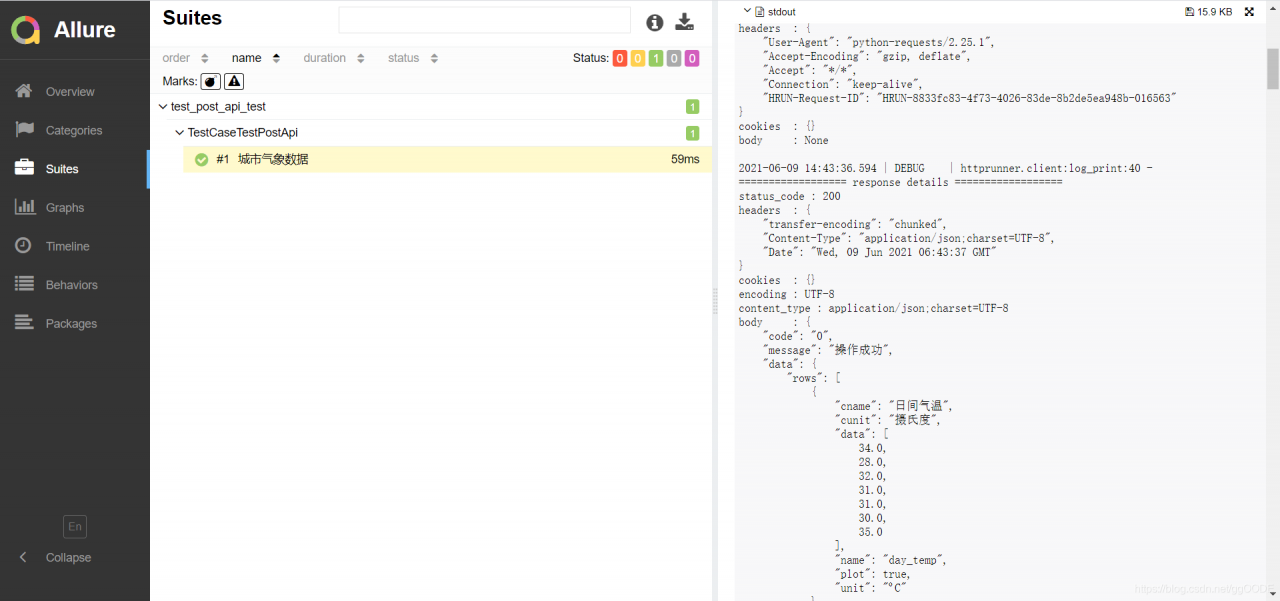
end. The effect of successful generation:
[frequently asked questions]
1. If the error prompt oserror: [winerror 6] handle is invalid, please refer to the document for solution:
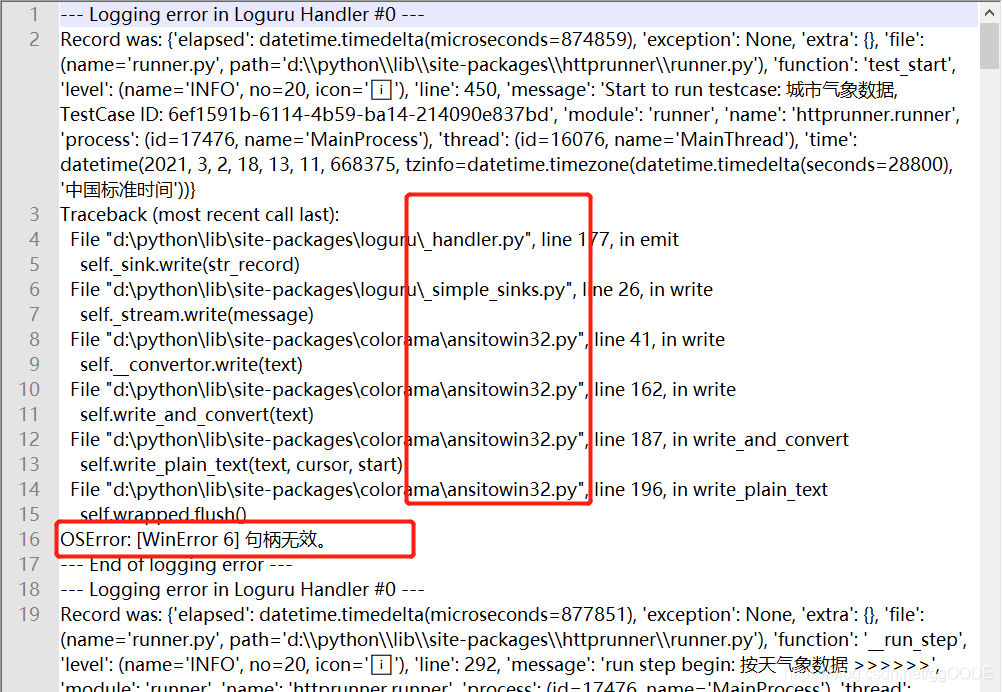
https://ask.csdn.net/questions/3017114
Add some code to runner. Py’s test_ Start method, and import colorama, Sys at the beginning of the file
2. If the Chinese encoding in the return body fails, please refer to the document for solution:
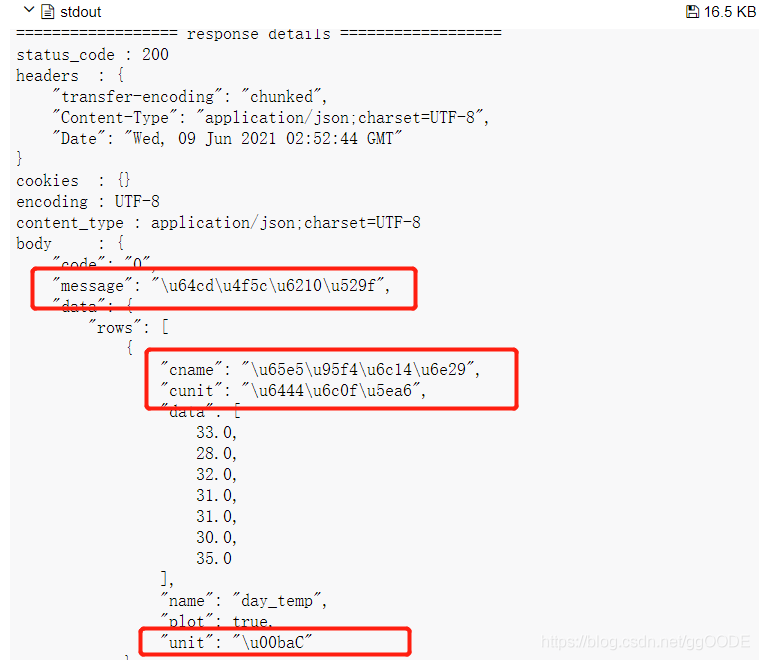
https://blog.csdn.net/zjxht62/article/details/116305944
Add some code to the log of client. Py_ In the print method, the default ASCII encoding is used for Chinese when json.dumps is serialized. To output real Chinese, you need to specify ensure_ ascii=False
[allure grammar]
$Hrun — alluredir allure results — clean alluredir # when the use case format is py file, you can replace “Hrun” with “pytest”, which has the same effect
– alluredir: generate the original data of allure report
allure results: save location of the original data
– clean alluredir: clear the historical data of allure results
$assure generate assure results – O assure report
– O specify the folder to generate the report
– C clean up the previous report directory before generating the report
Assure open assure report: start the default browser to open the assure test report
 solution
 net start MySQL MySQL - U root - P password select host, user, plugin, authentication_ string from mysql.user;
modify user password:
ALTER USER 'root'@'%' IDENTIFIED WITH mysql_native_password BY '123456';
ALTER USER 'root'@'localhost' IDENTIFIED WITH mysql_native_password BY '123456';
Connection successful
The following error occurred:
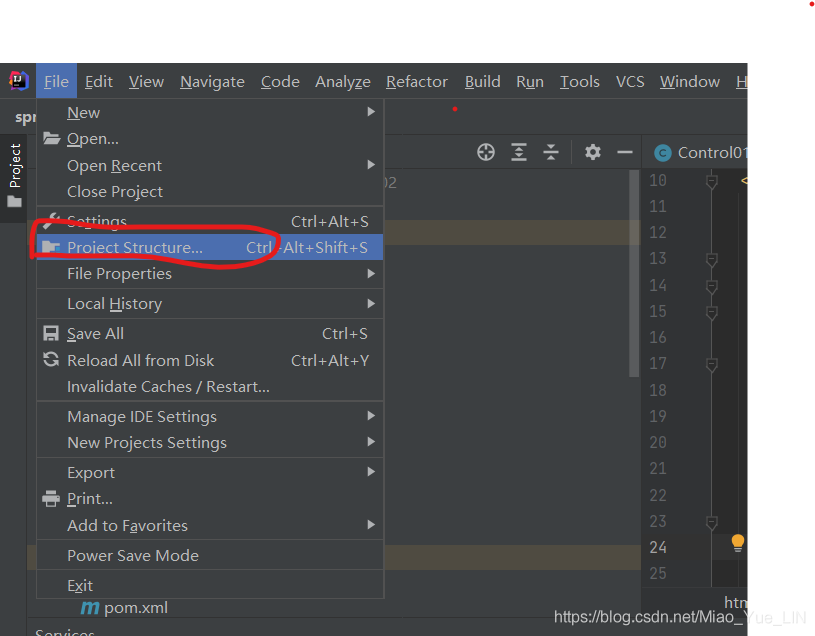
object apache is not a member of package org
Check whether there is a corresponding Scala SDK in Libraries in project structure. If the scala SDK is not configured in global libraries, right-click copy to project libraries
Today, when doing the xftp file transfer, the following situation appeared, as shown in the figure below
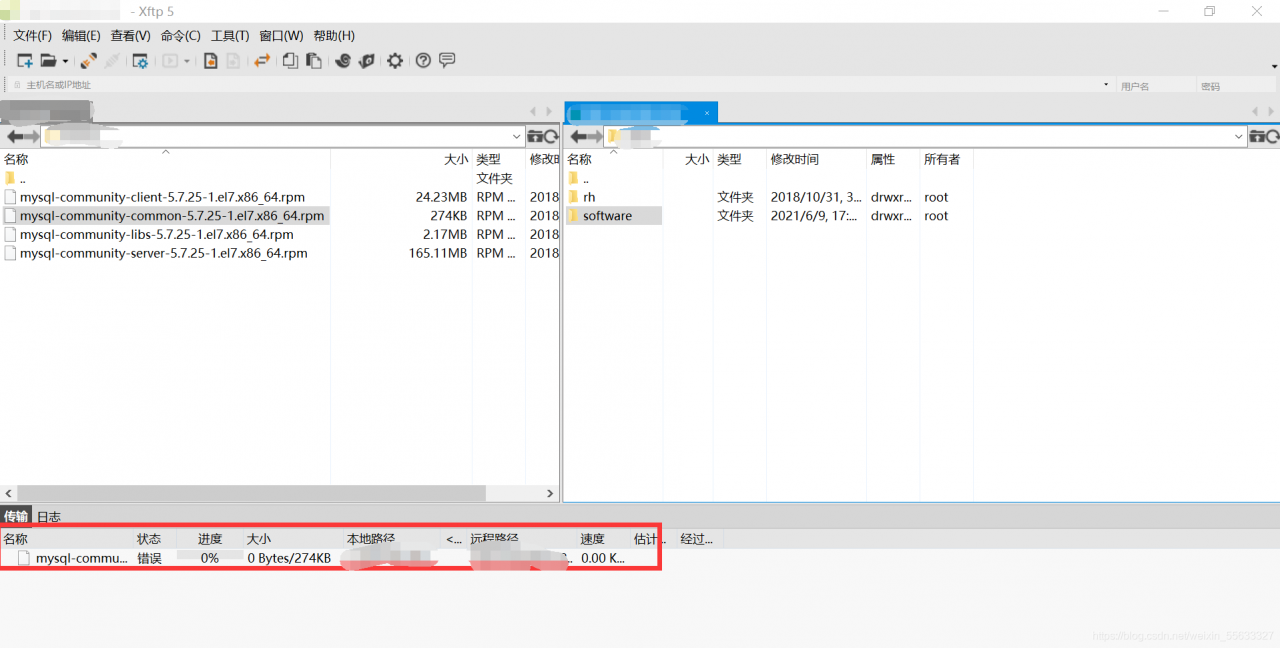
Problem explanation: This is the Linux folder that needs to be uploaded has insufficient permissions, so what should we do?
1. The first method: select the Linux folder to upload, right-click – change permissions – check all; You can upload it again. Here is the software file, as shown in the following figure:
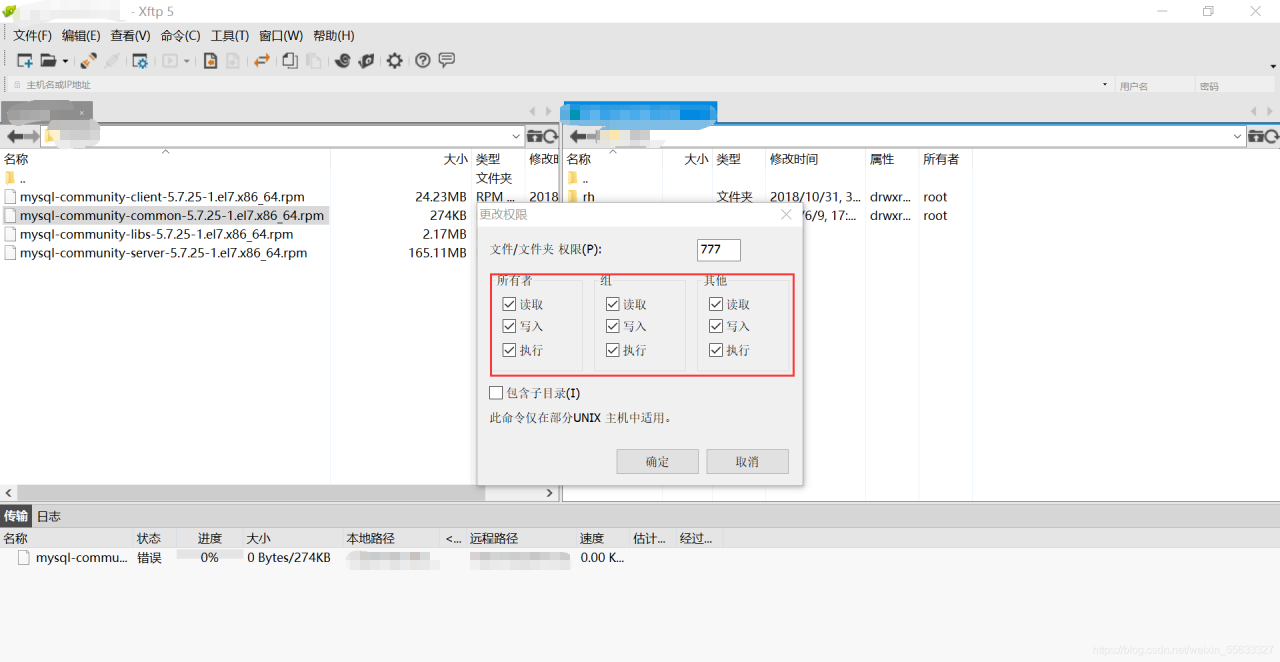
At that time, I couldn’t check this method. The reason I thought of was that I didn’t have permission to change the permission of this folder, so I tried to find a second method on the Internet
The second method: modify the folder permission with command: Chmod 777 software, the folder that software needs to give permission to
![]()
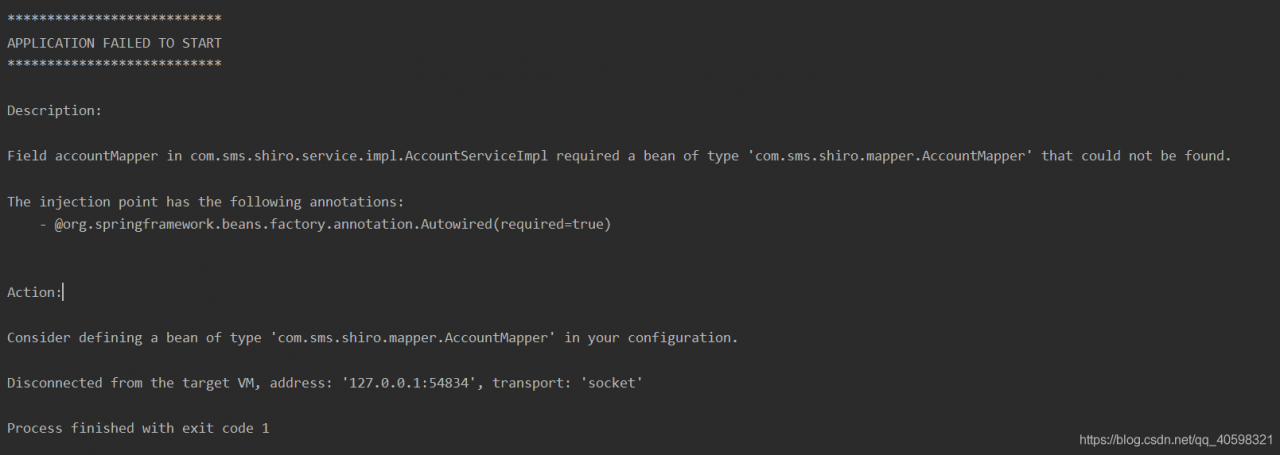
Problem: if you use @ repository annotation to annotate Dao layer alone, and do not use @ mapperscan scan, you will report an error when starting the project: field xxmapper in com.sms.shiro.service.impl.xxserviceimpl required a bean of type ‘com.sms.shiro.mapper.xxmapper’that could not be found.
 , the difference between @ mapper and @ Repository:
1, @Repository is the annotation of spring family
2. When using @ mapper annotation, spring doesn’t know it, and the mapper injected into service by @ Autowired will be popular.
2、 Back to the question, it is clear that componentscan in springboot scans all annotated components under the starter package, but why can’t we find @ repository components
reason: the reason for this problem is that springboot automatically filters out interfaces and abstract classes during scanning, so the mapper interface modified by @ repository can’t be called a bean, so it can’t be injected into the service.
3、 Solution:
3.1 do not use @ repository, use @ mapper directly in the mapper layer interface, but if the project is large, it will be very troublesome.
3.2 if you want to use @ repository because springboot can’t scan mapper interface, then use @ mapperscan to scan all mapper interface packages on the launcher, such as: @ mapperscan ("com. SMS. Shiro. *. Mapper")
3.3 in fact, after using @ maperscan annotation to scan the mapper interface, the mapper interface does not need @ repository and @ mapper to register beans. However, if you want the project structure to be clear, after using @ maperscan annotation to scan, both @ repository and @ mapper can be used, and no error will be reported.
In the practice of spring MVC, many people may encounter this annoying problem, it took a long time to solve, the code is right, but he just reported an error
content type ‘application/JSON’ not supported
I have found many articles on the Internet and used many methods, but they can’t solve this problem
finally, I remembered if I didn’t add the jar package required by JSON in lib, so I tried it… It was a success indeed
the following is my method
because I have added it, so here you can see that there are three jar packages in my lib package, 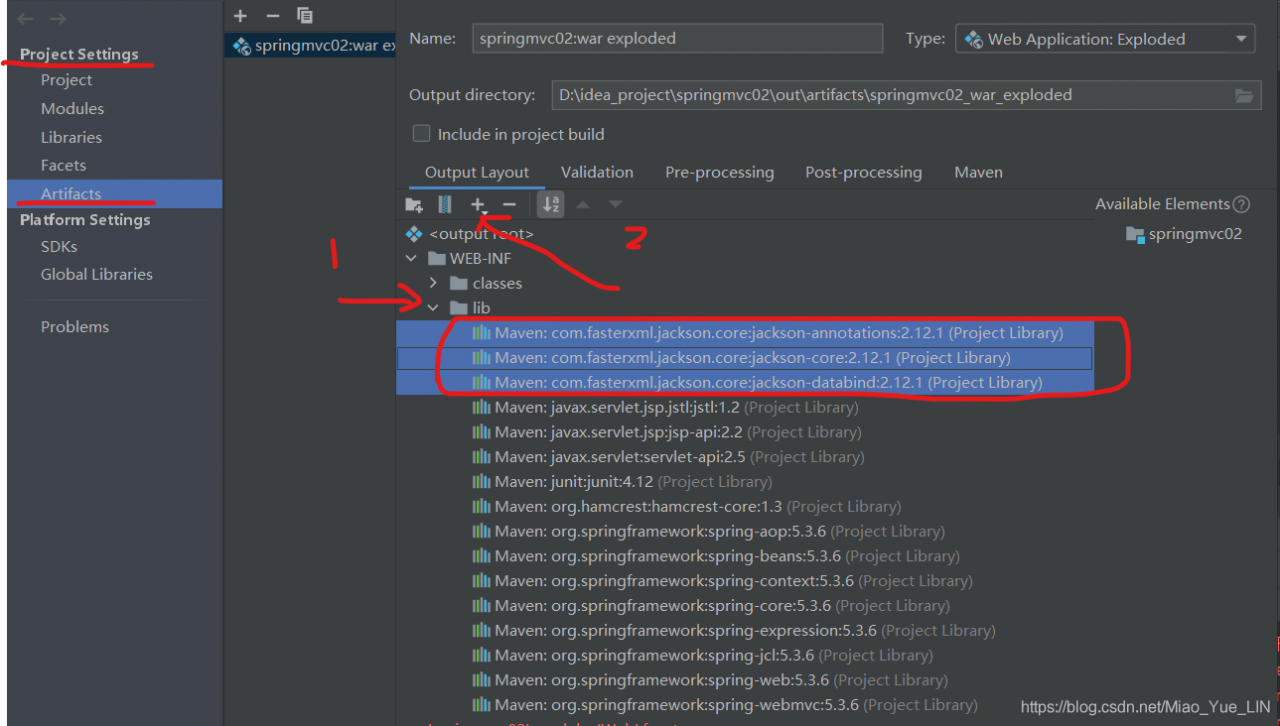
just add these three packages~~~
Recently, I encountered some mistakes as shown in the title when doing deep learning classification, but I don’t know how to modify them. Finally, after exploration, I successfully solved them
the problems and solutions are reported directly below.
Error 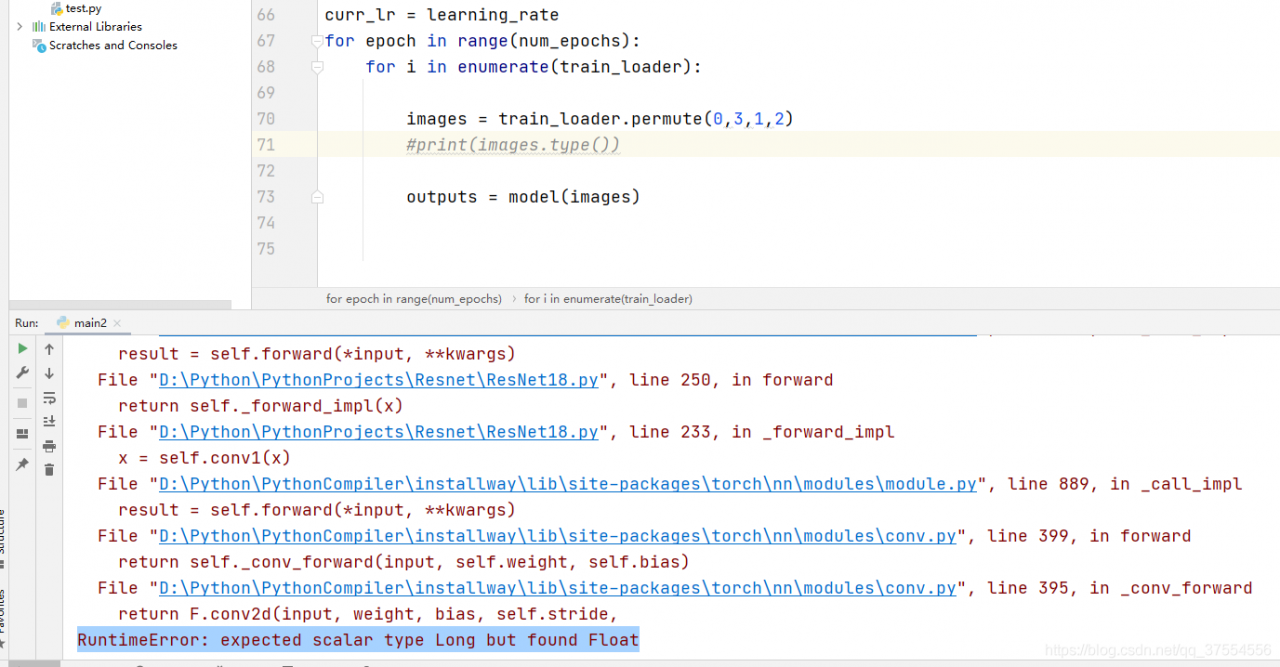
Solution
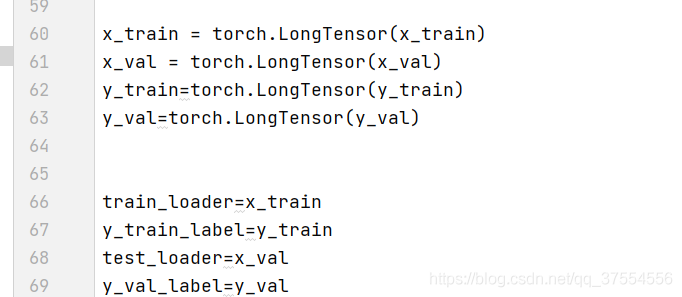
In practice, the label of classification should be long, and the image should be float32
therefore, modifying the data type will succeed
In the Intranet environment, the interface on the test server fails to connect. The returned information is as follows:
Unable to connect to remote host: Connection refused
The server system is Ubuntu 16.04. If you use sudo UFW disable to shut down the firewall, you still can’t because of iptables
According to the method described in the following article
https://blog.csdn.net/zuifeng503/article/details/8209441
Just use the following command to turn off iptables
sudo iptables -P INPUT ACCEPT
sudo iptables -P FORWARD ACCEPT
sudo iptables -P OUTPUT ACCEPT
sudo iptables -F


When you write the name to the component, you find this error. Take a closer look at the name of the introduced sub component

Solution: change name
Copyright note: This article is kept and original by the blogger. Please indicate the source for reprint
original address: https://blog.csdn.net/qq_ 38688267/article/details/117745441
Contents of articles
Scenario Description: find a solution on the network and use ‘mysqldump — all databases’ to back up the’ MySQL ‘library
Finally, the solution is summarized
Scene introduction
after installing mysql8, use mysqldump command to backup data from mysql5.7, and then synchronize to mysql8. The specific orders are as follows:
mysqldump -uroot -p --all-databases > /root/dump.sql
then import the data into mysql8 through source command. After the import, when querying the table list, mysql8 reports an error: MySQL E rror:The user specified as a definer (‘mysql.infoschema’@’localhost’) does not exist。
Looking for solutions on the Internet
a slightly more reliable solution: https://blog.wmsay.com/article/44 . But it still doesn’t solve my problem…
Do it yourself
after careful thinking, I think that the problem may be in dump. SQL , because I directly specified all databases libraries, which may be MySQL and information_ Schema and other libraries are backed up, and then the data of these libraries in MySQL 8 is covered, resulting in an error.
in order to confirm my idea, I tried the mysqldump -- all databases command locally and looked at the data in it:
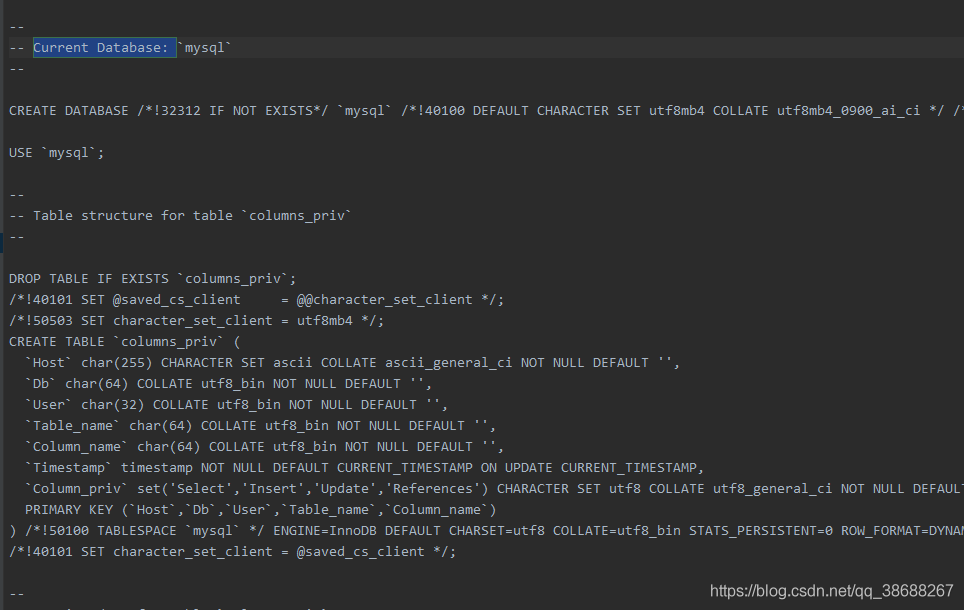
Using mysqldump -- all databases will back up the MySQL library
will not back up information_ schema、performance_ Schema library
Final solution
the reason is the data coverage of MySQL database data mysql5.7, which is bound to have problems. Simply re install MySQL 8. Then dump the data again and specify the library to dump
mysqldump -uroot -p --databases mydb1 mydb2 > /root/dump.sql
Summary
when using mysqldump , do not use the -- all databases parameter lazily, but use the -- databases db1 DB2 db3 method to specify. Using mysqldump -- all databases will back up the MySQL library, which is prone to problems!