Author Archives: Robins

How to Fix ERROR Couldn’t connect to Docker daemon at http+docker://localunixsocket

Ubuntu16.04 executes docker in the directory where the docker-compose. Yml file is located after installing docker:

jing@ubuntu:/tmp/docker$ docker-compose up -d

Error:

ERROR: Couldn’t connect to Docker Daemon at HTTP + Docker :// localunixSock-is it running?
If it’s at a non-standard location, specify the URL with the DOCKER_HOST environment variable.

Online all kinds of way seven eight bad solution, really ridicule.
What is correct is to add the current user to the Docker group

jing@ubuntu:/tmp/docker$ sudo gpasswd -a ${USER} docker

Then exit the current user and switch to, say, root and then switch to Jing again. Then execute Docker-Compose up-D and it will be ok.

jing@ubuntu:/tmp/docker$ sudo su
root@ubuntu:/tmp/docker$ su jing
jing@ubuntu:/tmp/docker$ docker-compose up -d

ERROR Unsupported method AndroidProject.getVariantNames().

ERROR: Unsupported method: AndroidProject.getVariantNames
Problem: Error cause: Solution:

Question:
Recently, the company asked me to connect to the function of one-button confidential-free login, and I also need to be familiar with client development. After opening the project with Android Studio, I reported an error, which was as follows:

ERROR: Unsupported method: AndroidProject.getVariantNames().
The version of Gradle you connect to does not support that method.
To resolve the problem you can change/upgrade the target version of Gradle you connect to.
Alternatively, you can ignore this exception and read other information from the model.

Translation:
Error: doesn’t support method: AndroidProject GetVariantNames (). The Gradle version to which
is connected does not support this method.
to solve this problem, you can change/upgrade the target version of the Gradle that you connect to.
or, you can ignore this exception and read additional information from the model.
Solutions:

    modify the build.gradle file under the project directory
classpath "com.android.tools.build:gradle:3.3.2" 
    project./gradle/wrapper/gradle-wrapper. Properties, see the address link
distributionUrl=https\://services.gradle.org/distributions/gradle-4.10.1-all.zip
    gradle sync once;

How to Fix pandas.errors.ParserError Error tokenizing data C error Buffer overflow caught

When wrapped pandas, pd. Read_csv (r. ‘\ data \ data. The CSV, encoding = “utf-8”, the header = None,)
Error message: pandas. Errors. ParserError: Error tokenizing data. C Error: Buffer overflow caught – possible malformed input file.
I read some blog posts saying that adding the parameter error_bad_lines=False
but I tried and failed
I read another blog that it may be caused by modifying the suffix name of the file, I did change the suffix name of.xlsx to.cvs
, so you can change the suffix name back to.xlsx, use pd.read_excel() function to
or you can use excl to build a table, copy the data over, and then you save is to save to.csv file
And then there’s the coding problem, which you’ll see in my previous posts

javac Task Error source release 1.7 requires target release

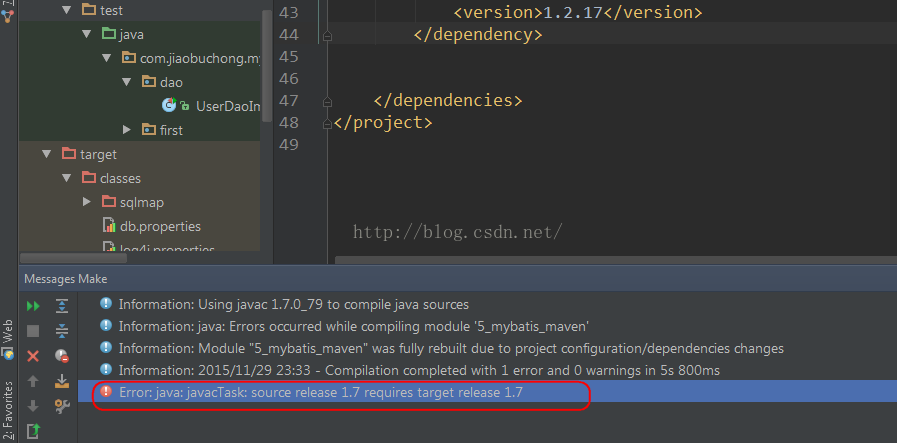
The following error occurred while compiling Java code using IDEA:
Error: Java: javacTask: source release 1.7 requires target release 1.7
Above:

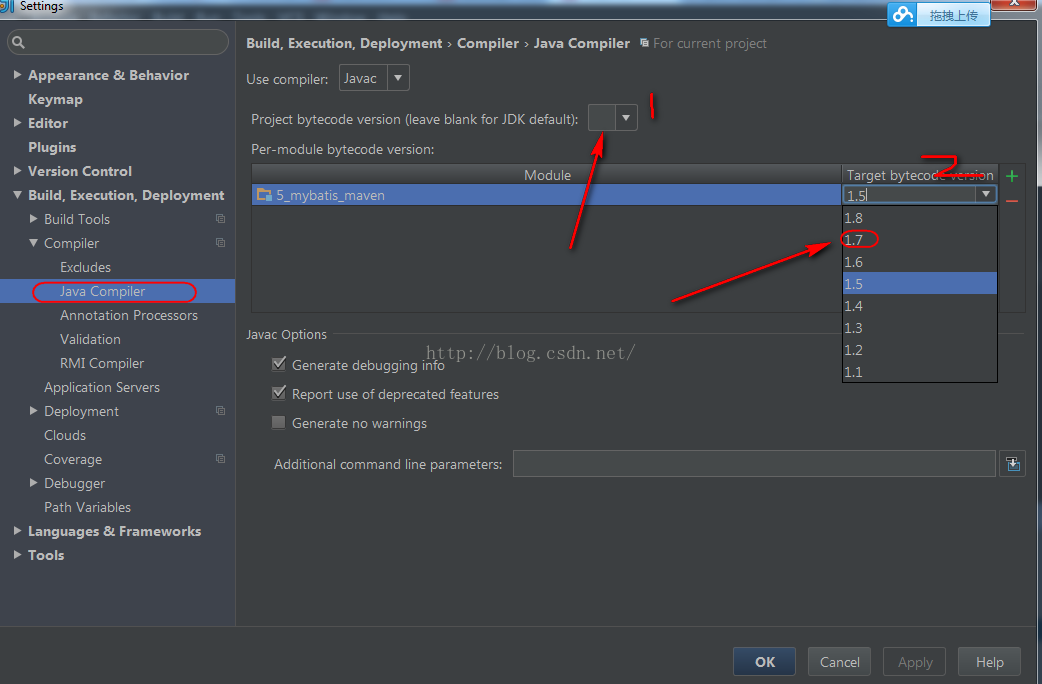
When such a problem occurs, you can set it in Settings:

Just set the compiler version to 1.7 here. The first place is where the project is set and the second place is where the module is set.

To build with Maven, specify the compiled version of Java directly in the POM, adding the following code:

    <build>
        <finalName>5_mybatis_maven</finalName>
        <plugins>
            <plugin>
                <artifactId>maven-compiler-plugin</artifactId>
                <configuration>
                    <source>1.7</source>
                    <target>1.7</target>
                </configuration>
            </plugin>
        </plugins>
    </build>

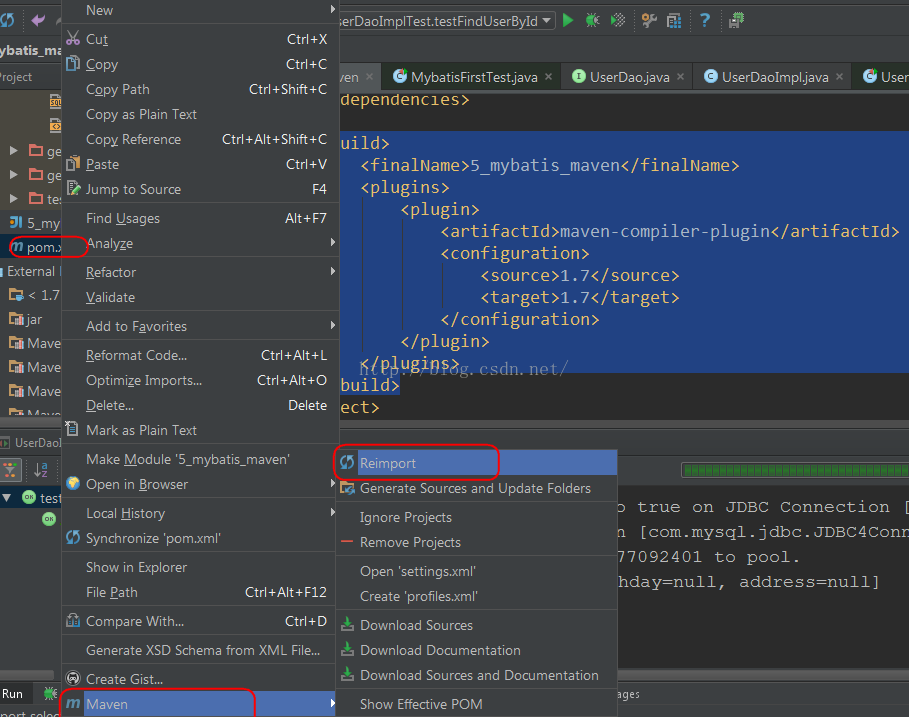
Then select pom.xml and right click, and Reimport will tell Maven to download the corresponding plug-in:


Now to compile, is not to see the rainbow in the wind and rain!
Reference link:
http://stackoverflow.com/questions/12900373/idea-javac-source-release-1-7-requires-target-release-1-7

codeblocks ERROR: You need to specify a debugger program in the debuggers’s settings.

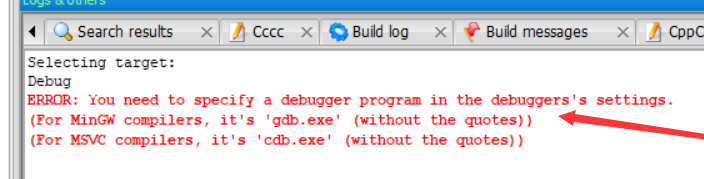
Codeblocks error:
Debug
ERROR: You need to specify a debugger program in the debuggers’s settings.
(For MinGW compilers, it’s ‘gdb.exe’ (without the quotes))
(For MSVC compilers, it’s ‘cdb.exe’ (without the quotes))

Solutions:
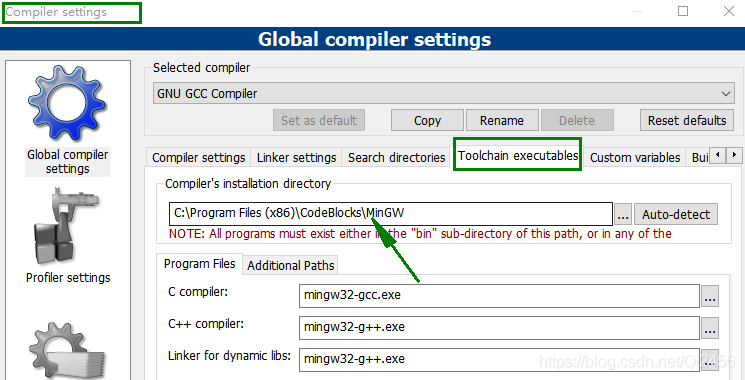
View compiler configuration:
setting -> compiler -> Toochain executables
Record the compiler installation path

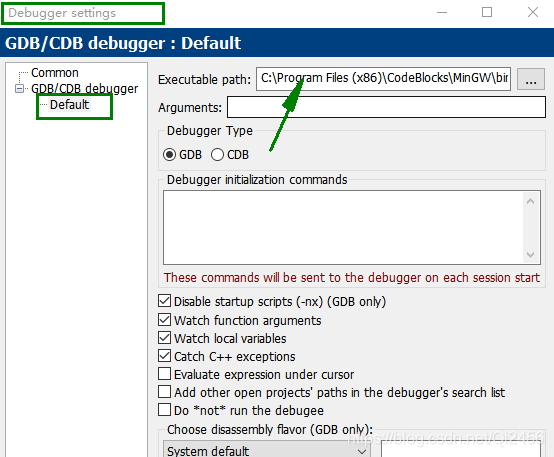
Check out the Debuger Setting
setting -> dubuger -> default
Add Executable Path: C:\Program Files (x86)\CodeBlocks\MinGW\bin\ gDB32.exe (note: select GDB.exe for 32-bit system and gdb64.exe for 64-bit system)

Once you confirm the addition, debug is ready.

Linux Fatal Python error: Py_Initialize Unable to get the locale encoding

Question.

python lx@lx-PC: ~ $
Can’t find a platform independent library & lt; prefix>
Platform Dependency Library Not Found& lt; exec_prefix>
Consider setting the dollar PYTHONHOME & lt; prefix> [: & lt; exec_prefix>]
python fatal error: Py_Initialize: cannot get region code
ModuleNotFoundError: No module is named “code”.

Similar problems:Commanded conda

The temporary solution is.

export PATH="/home/[your_name]/anaconda/bin:$PATH"

However, after the next restart, this problem will still occur, so we need acivate ~/.bash_profile

. ~/.bash_profile
#or
source ~/.bash_profile

That should get us there.

The first step is to find the Python directory

1. Default Python installation


Normally, Python comes pre-loaded with Linux, but at a lower level, for example, Python2.7.10 is pre-loaded with Ubuntu15.

Use the command: which Python to see the current Python installation path:
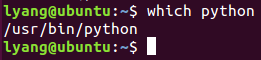
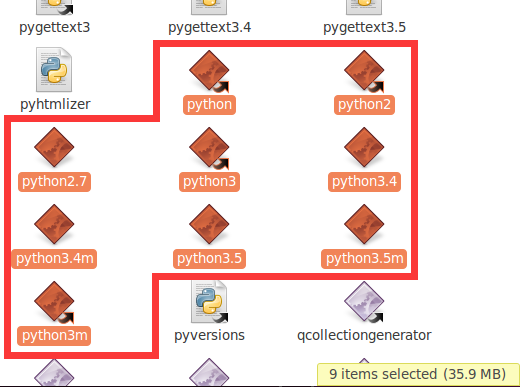
If you open the corresponding path, you can see that the python directory has these files, that is, the directory with similar files (Python, Python 2, Python 2.7) is the corresponding Python directory in your system:
If a version of Python3 is not explicitly required, the 2.7.10 version can be used instead.
It is explicitly required to use Python3 and then make changes.

One thing to note here is that python, Python 2, Python 3 exist in the figure above, which means that versions 2 and 3 are installed,

step 2:

Linux adds the command to PATH:
LinuxApacheBash
Simply put, PATH is a string variable for a set of paths. When you type a command that doesn’t have any paths, LINUX looks for that command in the PATH record. If there is, it will be executed, if there is no prompt command can not be found. For example, in the root directory/can enter the command ls, in the directory /usr can also enter ls, but in fact ls command is not in the two directories, when you enter ls command LINUX will go to /bin,/usr/bin,/sbin and other directories to find the command. PATH is the variable that defines the PATH strength such as /bin:/sbin:/usr/bin, where the colon is the separator between directories.
How to customize path:
if you new compiler installed an apache under/usr/local/apache, every time you want to start not to knock a string of characters (#/usr/local/apache/bin/apachectl start) to use it, but direct anywhere like ls direct input like this (# apachectl start) a brief command. In this case, you need to change the environment variable PATH, or to be more precise, add a value to PATH, /usr/local/apache/bin. There are three ways to add /usr/local/apache/bin to your PATH:
1, directly from the command line setup PATH
# PATH = $PATH:/usr/local/apache/bin
using this method, applies only to the current session, that is to say, whenever logout or cancellation of system, the PATH Settings will be failure.
2, set in the profile PATH
# vi/etc/profile
find export line, a new line below, content is: the export PATH = $PATH:/usr/local/apache/bin.
note: = no Spaces on either side of the equal sign. This is the best approach, and will not change unless you manually force the PATH value to change.
the change to PATH does not take effect immediately after you edit /etc/profile. If you want to take effect immediately, you can execute the # source profile command.
3, in the current user profile set PATH
# vi ~ /. Following the
modify the PATH line, the/usr/local/apache/bin added, such as: the PATH = $PATH: $HOME/bin:/usr/local/apache/bin.
# source ~/.bash_profile
for this change to take effect. Note: this method only works for the current user. The modification is invalid for other users.

When you find that the new path /usr/local/apache/bin is useless or not needed, you can delete your custom path in the /etc/profile or ~/.bash_profile previously modified.

Step 3:
Add the path to the.profile:
export PATH=”$PATH:/home/lx/anaconda3/bin”

$sudo gedit ~/.profile(or. Bashrc)

$sudo gedit ~/.profile(or. Bashrc)

$sudo gedit ~/.profile(or. Bashrc)
export PATH= “$PATH:your path1:your path2…”
save the file, log out and log in again, the variable takes effect.
variables added this way are only valid for the current user.
$sudo gedit /etc/profile

export PATH= “$PATH:your path1:your path2…”
after the file is edited and saved, restart the system and the variable takes effect.
variables added this way are valid for all users.
$sudo gedit /etc/environment
find the following PATH variable:
PATH=”<
$sudo gedit /etc/environment
PATH=”< . >”
modify the PATH variable by adding your own PATH, for example:
PATH=”< . > : your path1: your path2…”
paths are separated by colons. The file is also rebooted into effect, affecting all users.
note that you are not adding export PATH=… .

method 4: directly under the terminal input

$sudo export PATH=”$PATH:your path1:your path2…
variable takes effect immediately, but the Settings become invalid after the user logs out or the system restarts, suitable for temporary variable Settings. Note: modifications to methods 2 and 3 need to be made with care, especially through root, which can lead to some serious system errors if modified incorrectly. Therefore, I recommend using the first method. Also, embedded Linux development is best not done under root (unless you are already familiar with Linux!!). To avoid serious system errors due to improper operation.

the following is an error for the environment file changes lead to problems and solutions of example:

problem: because not careful in the/etc/environment in environment variables lead to cannot login
tip: don’t set in the/etc/environment export PATH that will lead to can not login system after restart
the solution:
enter command mode in the login interface Alt + CTRL +f1, if not root user need to type (root user is not allowed to be so verbous, gedit edit will not be displayed)
/usr/bin/sudo /usr/bin/vi /etc/environment
cursor move to export PATH** line, press d to delete the line twice;
input :wq save exit;
then type /sbin/reboot to restart the system (it may prompt you to need to boot, at this point direct power off)
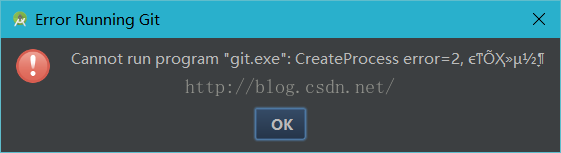
Cannot run program “git.exe”: CreateProcess error=2 the correct solution

Error cannot Run Program “Git.exe “:CreateProcess Error =2 when using Android Studio to check projects from Git
The operation steps are as follows:
Download Github For Windows client and install it.
after successful installation, connect to your account.
first check for error reporting

 
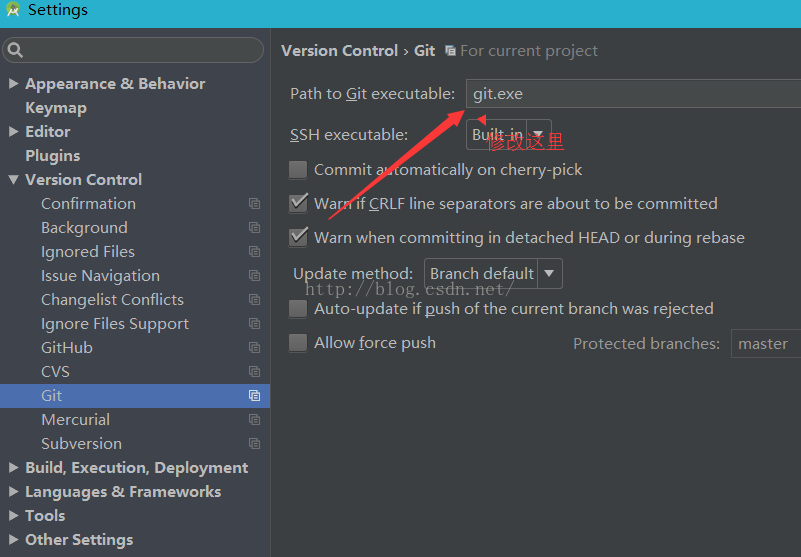
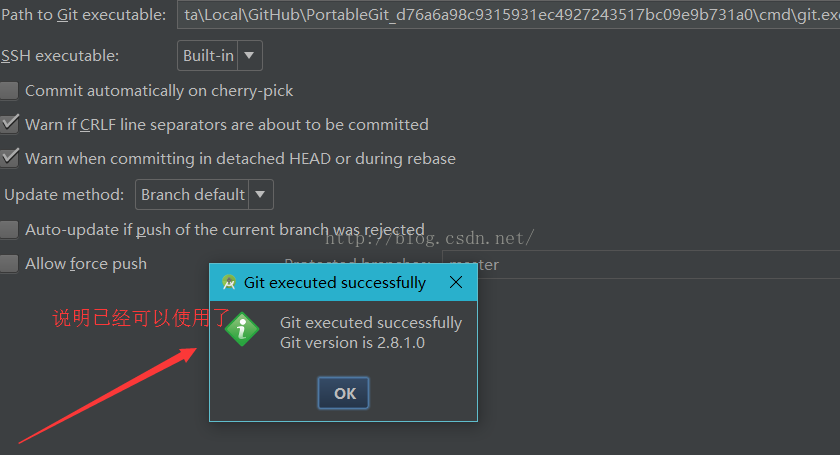
Setting–> VersionControl—> Git

 
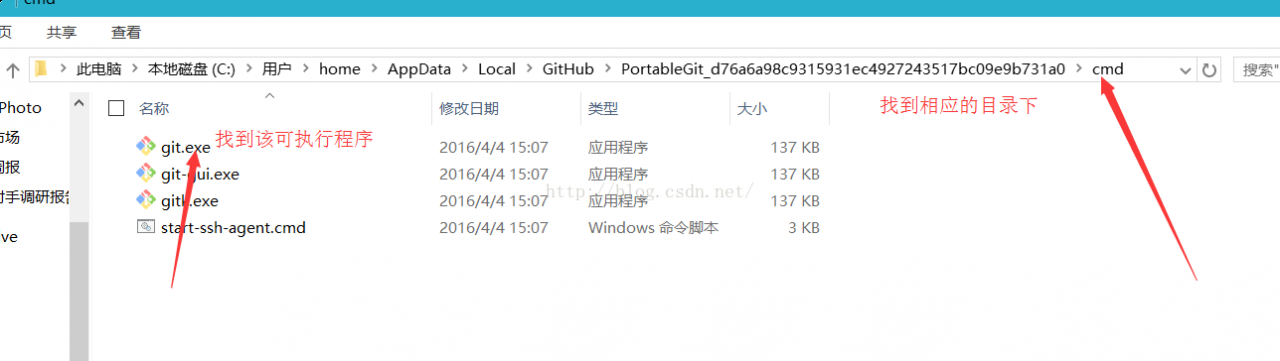
Find the GitHub installation directory (mine is the default)

 
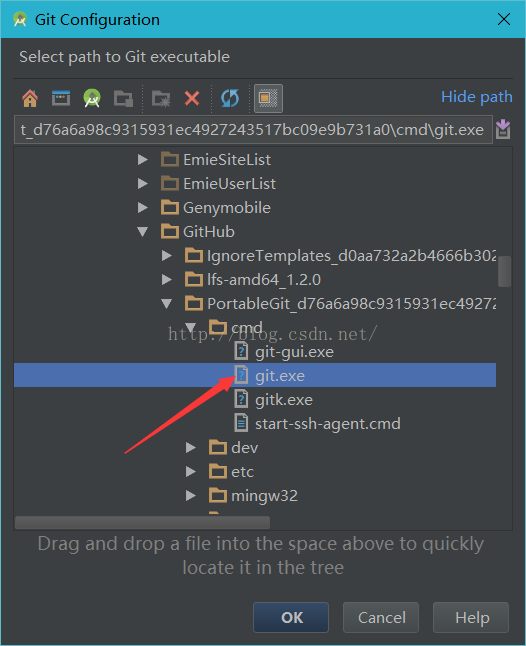
Point Gt.exe to the Android Studio reference

 
test

 
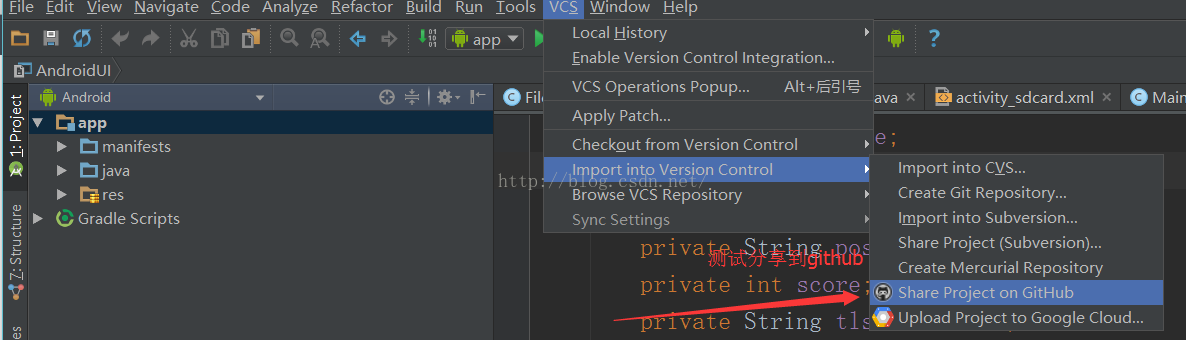
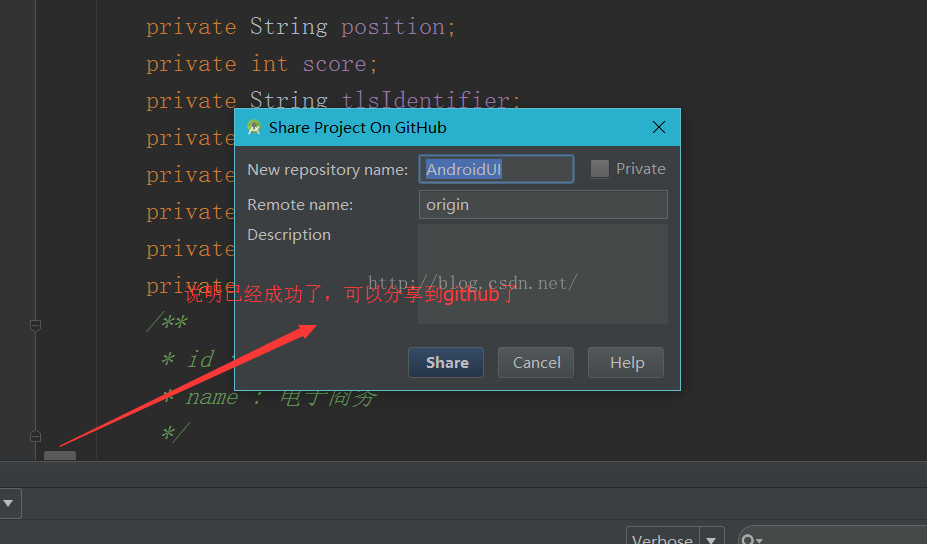
Next, test the project


Like this article friends, welcome to follow WeChat public “Java interview talent”, watch more exciting content

brew install node Error: No such file or directory @ dir_chdir Bottle installation failed

Enter the brew installation node in the terminal and the carriage return error is shown below.

brew installation node
==>Dependencies on the installation node:icu4c
==>Installation node dependency:icu4c
==>
Downloaded:
/Users/lvhongjian/Library/Caches/Homebrew/downloads/ 2ac5137342effaf79e199fb1612ebce7842df443578bcd61afd73767858aef – icu4c-62.1. mojave.bottle.tar>gz
Error: no such file or directory @ dir_chdir – /usr/local/Cellar
Warning: bottle installation failed: build from source.
== than; Downloaded:
/Users/lvhongjian/Library/ cache /Homebrew/downloads/ b79f5dd51110fb1096e57fc35ba03df84f69142b0374bae8a0381edde5a80448-icu4c-62_1- src. tgz
Error:An exception occurred in a subprocess:Errno::EPRM:
Operation not allowed @ dir_s_mkdir – /usr/local/Cellar
solution

As the log in user is not a HomeBrew installer, the above error is solved as follows.
1. reinstall HomeBrew /usr/bin/ruby -e "$(curl -fsSL https://raw.githubusercontent.com/Homebrew/install/master/install)" on the current user.
2. run brew install node prompt successful

When python installs pocketsphinx module (package), an error is reported: command ‘swig.exe’ failed: No such file or directory

Today, when installing Pocket Sphinx, the error command ‘swig.exe’ failed: No such File or Directory. I found a lot of content on the Internet, and finally I succeeded.
first of all, my computer is Windows10 system, the method is only available for Windows system, other systems do not know.
error is due to the fact that swig is missing from your computer, so you need to download and install it. I download from the website of the latest package swig 4.0.2, website address is: http://www.swig.org/download.html.
to unzip the downloaded files to C pan-gen directory. I want to emphasize the root directory here, because my previous attempts to put it in C:\Program Files (x86) still didn’t work (for unknown reasons). Finally, I just put it under C:\swigwin-4.0.2.
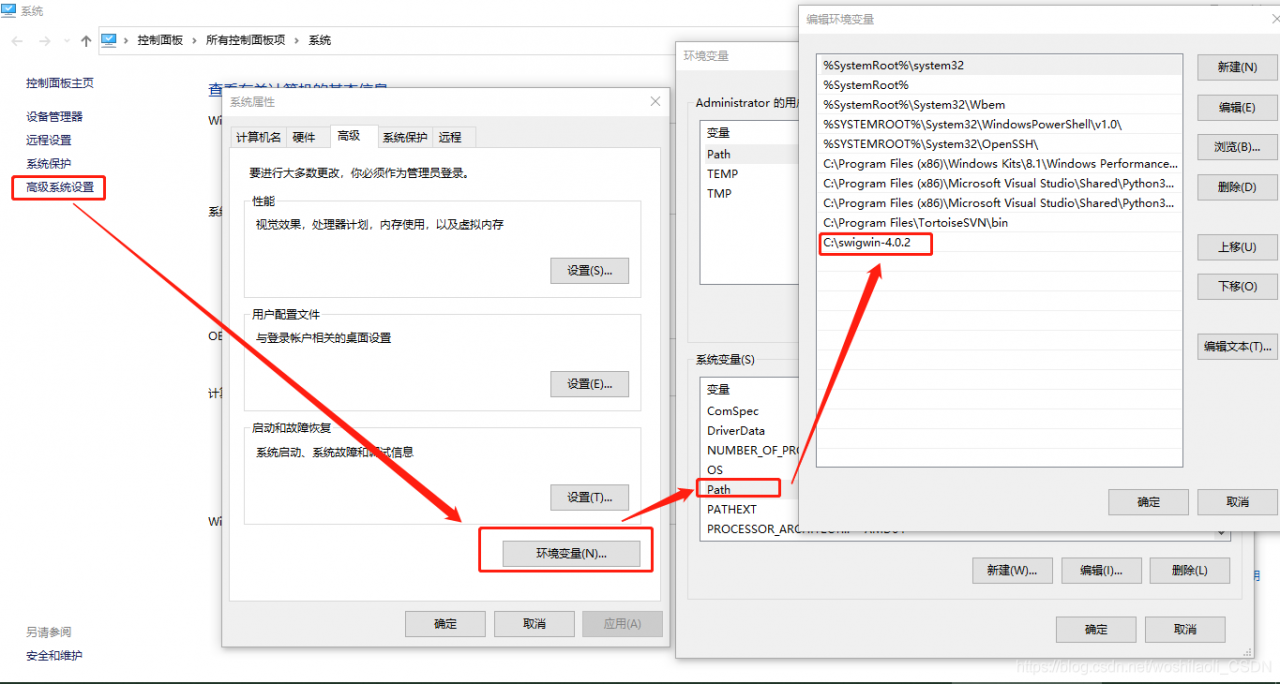
then add a new path path to the environment variable.

after the above steps are completed, then there is no problem with installing pocketsphinx.

could not open `C:\Program Files\Java\jre1.8.0_191\lib\amd64\jvm.cfg’

Running Java prompt error in CMd.exe Could not open ‘C:\Program Files\Java\ Jre1.8.0_lib \amd64\ JVN.cfg’
Note: Consider the following if the environment variable is configured correctly.
Solution a:
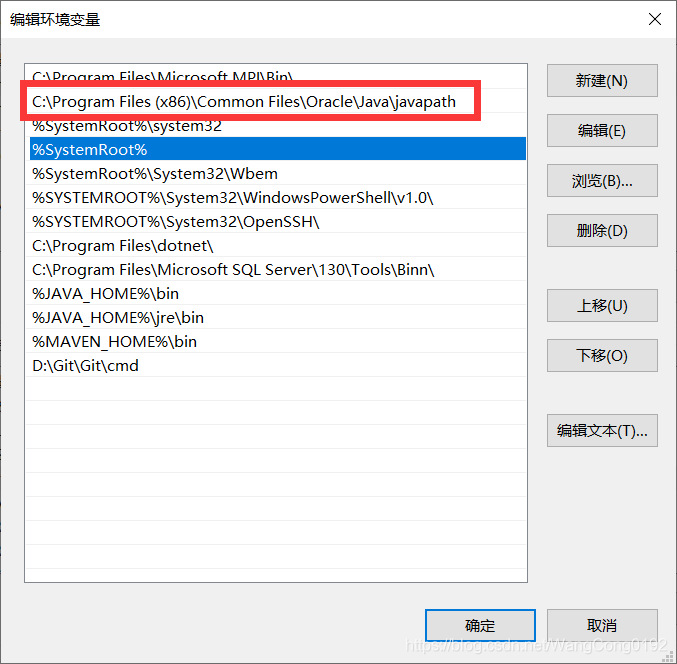
Find the following, my computer – properties – Advanced system Settings – environment variable – Path environment variable, above our %JAVA_HOME%\bin location, there is a C:\Program Files (x86)\Common Files\Oracle\Java\ Javapath, open this folder in the resource manager, there are three Files “Java.exe” “Javaw.exe” “Javaw.exe”, delete these three Files, Because they are high in the environment variables, the Java runtime finds them first and doesn’t go to our JAVA_HOME, so it reports an error.
Scheme 2:
Moving the two JAVA_HOMES up to the front will also solve the problem.
Problem: Probably caused by reinstalling the JDK.

Nginx error: nginx: [error] invalid PID number “” in “/run/nginx.pid”

After the server is restarted, it is OK to execute nginx-T, but an error is reported when executing nginx-S Reload
nginx: [error] invalid PID number “” in “/run/nginx.pid”
Solutions:
You need to do it first
Nginx – c/etc/nginx/nginx. Conf
The path to the nginx.conf file can be found in the return of nginx-t.
nginx -s reload