Tag Archives: ubuntu

PackageNotInstalledError: Package is not installed in prefix

use

conda create -f environment.yml

After creating a new environment, you can see all the installation packages by using CONDA list in the new environment, but you will report an error when opening Python import

according to

https://stackoverflow.com/questions/51712693/packagenotinstallederror-package-is-not-installed-in-prefix

I tried the suggestions in it

conda update --name base conda

Invalid, no attempt

conda update --all

Because all installed packages will be upgraded

Then try

conda install anaconda

A lot of new bags, but still invalid, finally

conda activate base
conda update --all

solve the problem

VirtualBox failed to start, prompt failed to open a session for the virtual machine windoze 7

1 environment:

Desktop system: Ubuntu 16.04 * x86

VirtualBox version: 5.0.36

Virtual machine installation system: win7 x86

2 phenomenon: unable to start. The following is the detailed information:

Failed to open a session for the virtual machine Windoze 7.

The device helper structure version has changed.

If you have upgraded VirtualBox recently, please make sure you have terminated all VMs and upgraded any extension packs. If this error persists, try re-installing VirtualBox. (VERR_ PDM_ DEVHLPR3_ VERSION_ MISMATCH).

Result Code: NS_ ERROR_ FAILURE (0x80004005) Component: Console

Interface: IConsole {db7ab4ca-2a3f-4183-9243-c1208da92392}

3 solution

① Reference link https://askubuntu.com/questions/386150/virtualbox-fails-to-start-machine-after-installing-extensions

② The command I used was sudo apt get — re install install VirtualBox ext pack, which successfully solved the problem

After entering the command, you will enter the confirmation interface, use the tab key to select the confirmation button, press enter, and then wait for him to finish the prompt

Successfully installed “Oracle VM VirtualBox Extension Pack”

A solution to the problem of “straight ‘\ 357’ in program” when compiling GCC

Link: http://blog.chinaunix.net/uid-23089249-id-61541.html

I took a few header files from my colleagues. It’s OK to compile them with GCC, but there are a lot of them when I compile them with arm linux GCC!

SerialPort.h:1: error: stray ‘\357’ in program

SerialPort.h:1: error: stray ‘\273’ in program

SerialPort.h:1: error: stray ‘\277’ in program

After looking at these errors, I found that some characters in the file are not supported by the compiler. If you look for these characters one by one, it will take a long time! The simplest solution:

Put the files in the windows system, open these files with Notepad, and then save them as. The code is Asni, and then compile them with the compiler under Linux. Generally, they can pass!

Experience:

The first time: unknown;

Second time: when compiling QT program, prompt this error; solve it according to the above method.

Troubleshooting of ROS rosdep init / update

Problem description
operating system: ubuntu16.04/ubuntu18.04/ubuntu20.04
ROS version: kinetic / melodic / noetic
recently, I was learning how to install and use orb-slam2. During the compilation process, I found that the rosdep command is needed under ROS

sudo rosdep init

The following error is reported:

ERROR: cannot download default sources list from:
https://raw.githubusercontent.com/ros/rosdistro/master/rosdep/sources.list.d/20-default.list
Website may be down.

Gu Yue bloggers have sorted out this problem, but according to the current network environment, there are still problems.
Reference article:
1 https://www.guyuehome.com/12640
https://blog.csdn.net/JanKin_ BY/article/details/105509383

The root cause is that the network is blocked. If the above articles are not helpful, please refer to the following solutions:
1. Take the computer to the University Campus (the suffix of the university website is edu.cn Use its campus network to use the rosdep command;
2. Try to use mobile hot spots (China Mobile, China Unicom and China Telecom).

Hope it helps!

Installing docker on Huawei Kunpeng server arm64

Installing docker on Huawei Kunpeng server arm64


1、 Download of installation package

The required version of the installation package can be downloaded according to the actual needs

https://download.docker.com/linux/ubuntu/dists/xenial/pool/stable/arm64/

2、 Installation procedure

1. Download the installation package

wget https://download.docker.com/linux/ubuntu/dists/xenial/pool/stable/arm64/containerd.io_1.2.6-3_arm64.deb

wget https://download.docker.com/linux/ubuntu/dists/xenial/pool/stable/arm64/docker-ce_19.03.8~3-0~ubuntu-xenial_arm64.deb

wget https://download.docker.com/linux/ubuntu/dists/xenial/pool/stable/arm64/docker-ce-cli_19.03.8~3-0~ubuntu-xenial_arm64.deb


2. Installation

Enter the location where the installation package is downloaded and install it

dpkg -i *.deb

Set boot up

systemctl enable docker

Start docker service

systemctl start docker

View docker status

systemctl status docker


The nvidia-smi has failed because it could’t communicate with the NVIDIA driver

I installed the driver successfully before. After a period of time, NVIDIA SMI found that the problem was still that one. Some blogs explained that the driver couldn’t work properly because of the kernel update of Ubuntu. The following method is effective without reloading NVIDIA driver.

    check drive

     nvcc -V 
    

    If the driver exists, the next step will be taken.
    2.

    sudo apt-get install dkms
    sudo dkms install -m nvidia -v 418.56
    

    418.56 is the version number of NVIDIA. When you don’t know, you can see the NVIDIA folder in the / usr / SRC directory, and the suffix is the version number.

    After success, NVIDIA SMI finds that the driver of the graphics card is normal.

    Reference: unable to connect NVIDIA driver: nvidia-smi has failed because it could’t communicate with the NVIDIA driver

Nvidia-smi has failed because it could’t communicate with the NVIDIA driver

NVIDIA-SMI error:
NVIDIA-SMI has failed because it couldn’t communicate with the NVIDIA driver. Make sure that the latest NVIDIA driver is installed and running
This is a common problem that often occurs in Ubuntu systems, mainly because the kernel has been upgraded and the new kernel does not match the old graphics driver
Solution 1:
Just execute two commands:
Sudo apt-get install DKMS

Set all the “1” in the double quotation marks to “0”, and save after modification.
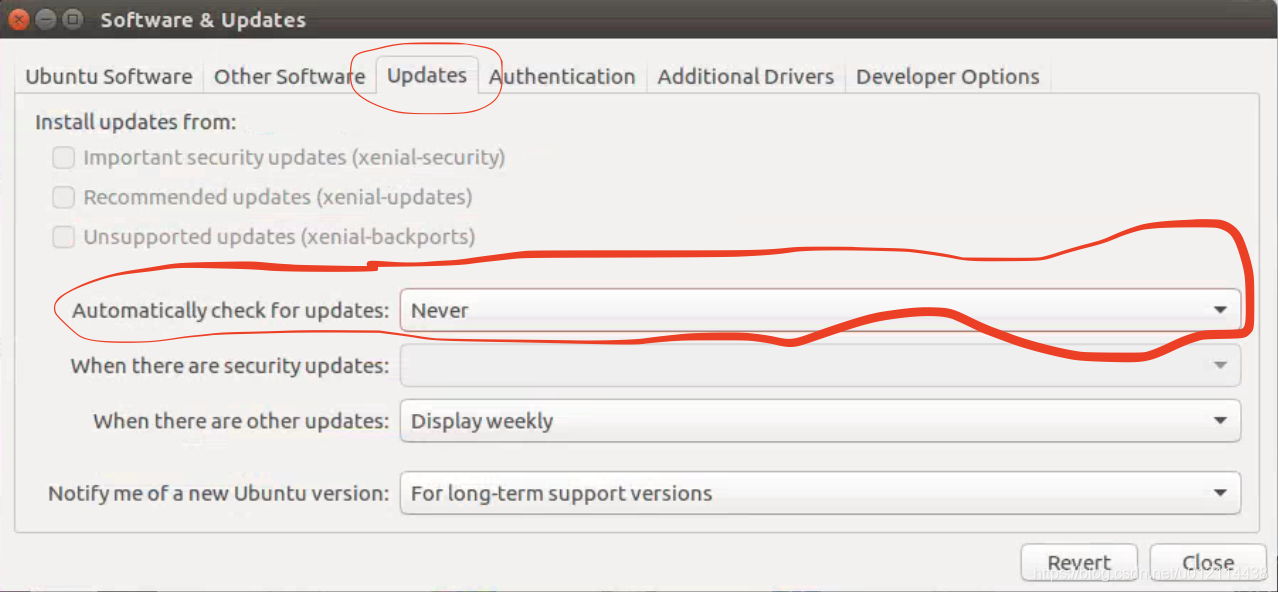
To turn off auto-update using a graphical interface, go to System Settings –>; Software Update (Software & Updates)

Setting the root password of windows 10 Ubuntu subsystem

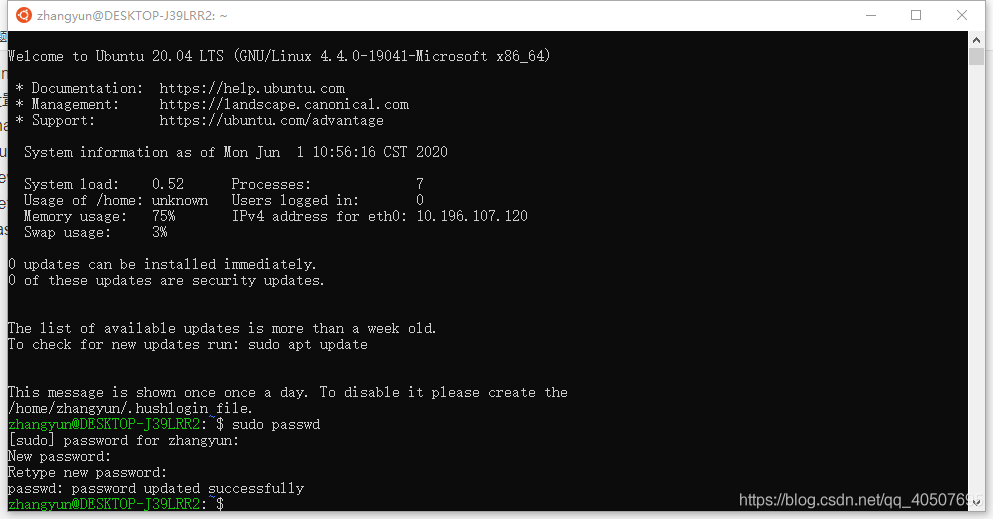
Windows 10 installs the Ubuntu subsystem. When it is opened for the first time, it will let the user set his or her own user name and password, but this newly created user is not root user.
>

> Here’s how:
zhangyun@DESKTOP-J39LRR2:~$sudo passwd
sudo] password for zhangyun:
n>assword:
Retype>password:
passwd:
4 passwd: password updated successfully

How to install postman tool in Ubuntu 16.04

Ubuntu16.04 postman installation: basic steps:

1) : official website to download software package: https://www.getpostman.com/apps

2) : unzip the installation:

sudo tar -xzf Postman-linux-x64-6.0.10.tar.gz

3): Enter the unzipped PostMan folder to open the terminal and start PostMan

./Postman/Postman

4): Create startup icon for quick startup
Create a soft link to create Postman from the extracted Postman file in /usr/bin/

sudo ln -s  /home/c/Downloads/Postman/Postman   /usr/bin/