Tag Archives: linux

Solution to permission denied

gets an installation file ending in.run, giving it executable permissions. If the SElinux module is enabled, disable it first!

Such as:

# chmod + x NVIDIA – Linux – x86_64-295.59. The run

When you paste

into a directory (myResources), this prompt appears:

Permission denied

is not set, just copy and paste a file, how can that be?

solution:

$ sudo chmod -R 777 myResources

-where
-r refers to all subdirectories and files cascading to the directory
-777 is that all users have the highest permissions

Centos7 view and close firewall

CentOS 7.0 defaults to firewall as a firewall

view firewall status

firewall-cmd --state

Stop is firewall

systemctl stop firewalld.service

firewall is prohibited to turn on

systemctl disable firewalld.service 

turn off from CentOS 6 and CentOS 7 firewall

close selinux
into /etc/selinux/config file

vi /etc/selinux/config

the SELINUX = instead of enforcing the SELINUX = disabled

confers the non-secret login command

ssh-keygen -t rsa 
ssh-copy-id root@master

scp -P 22 /Users/che/Downloads/jdk-8u161-linux-x64.rpm [email protected]:/software/

 安装: yum install -y jdk-8u161-linux-x64.rpm
 设置环境变量
 cd /usr/java/

 /usr/java/jdk1.8.0_161

 vi /etc/profile

 export JAVA_HOME=/usr/java/jdk1.8.0_161
 export PATH=$JAVA_HOME/bin:$PATH

install hadoop
download installation package
hadoop-26.5.tar.gz

cd /usr/
mv /software/hadoop-2.6.5.tar.gz  ./
解压
tar -xzvf ./hadoop-2.6.5.tar.gz

创建目录
   namenode目录:/data/hadoop/namenode
   data目录:    /data/hadoop/data
   tmp目录:     /data/hadoop/tmp
   mkdir -p /data/hadoop/namenode

配制
   core-site.xml
   hdfs-site.xml
   mapred-site.xml.template   mapred-site.xml
   cp mapred-site.xml.template   mapred-site.xml
   yarn-site.xml 

   slaves   (slave1,slave2)
   masters  (master)

   hadoop-env.sh
   export JAVA_HOME=/usr/java/jdk1.8.0_161

   将master的配制copy到slave1、slave2
   scp -r ./* root@slave1:/software/hadoop-2.6.5/etc/hadoop/

 格式化
   cd hadoop-2.6.5/bin
   ./hdfs namenode -format

 启动
   cd ../sbin/

   ./start-dfs.sh

   ssh-copy-id root@master 

   jps(检查一下)

   ./start-yarn.sh

   cd ../bin

   hadoop fs -ls /
   hadoop fs -mkdir /user

   /software/hadoop-2.6.5/bin

   vi/etc/profile

   export HADOOP_HOME=/software/hadoop-2.6.5
   export PATH=$JAVA_HOME/bin:$HADOOP_HOME/bin:$PATH

   source /etc/profile

   hadoop fs -put /software/hadoop-2.6.5.tar.gz /user

   测试2:
   cd share/hadoop/mapreduce
   hadoop jar ./hadoop-mapreduce-examples-2.6.5.jar pi 5 10

   192.168.1.100:50070
   192.168.1.100:8088

   修改ssh端口
   vim /etc/ssh/sshd_config  

set NTP time synchronization service
, install NTP
yum install -y NTP
2, set NTP service startup
chkconfig NTPD on
service NPTD start

Grep finds all files containing a string in Linux

In projects, it is common to encounter cases such as original table names that have been changed and need to be replaced in batches in scripts. But what tables are involved, looking them up one by one is a bit of a hassle and you might miss them; Replacing directly on Linux may not perform good version synchronization; So, consider using a combination of find and the grep command to find out which scripts need to be modified before unifying the processing.

--递归查找目录下含有该字符串的所有文件
grep -rn "data_chushou_pay_info"  /home/hadoop/nisj/automationDemand/

--查找当前目录下后缀名过滤的文件
grep -Rn "data_chushou_pay_info" *.py

--当前目录及设定子目录下的符合条件的文件
grep -Rn "data_chushou_pay_info" /home/hadoop/nisj/automationDemand/ *.py

--结合find命令过滤目录及文件名后缀
find /home/hadoop/nisj/automationDemand/ -type f -name '*.py'|xargs grep -n 'data_chushou_pay_info'

final: [
find/home/hadoop/nisj/automationDemand/-type f – the name ‘*. Py’ | xargs grep -n ‘data_chushou_pay_info’ 】 compared to meet the requirements of the query.

Grep

* : represents all files in the current directory, or a file name

-r is a recursive lookup

-n is the display line number

-r find all files contain subdirectories

-i ignores case

interesting command-line argument:
grep-i pattern files: search case-insensitive. The default case is case sensitive

grep-l pattern files: only the filenames that match are listed, not the path

grep-l pattern files: lists file names that do not match

grep-w pattern files: match whole words only, not parts of strings (for example, match ‘magic’ rather than ‘magical’)

grep-c number pattern files: the matched context displays [number] lines, respectively

grep pattern1 | pattern2 files : displays rows matching pattern1 or pattern2

grep pattern1 files | grep pattern2 : displays lines matching both pattern1 and pattern2

some special symbols for searching:
\< And \ & gt; Mark the beginning and end of each word.

such as:

grep man * will match ‘Batman’, ‘manic’, ‘man’, etc

grep ‘\< Man ‘* matches’ Manic’ and ‘man’, but not’ Batman ‘.

grep ‘\< man\> ‘matches only’ man ‘and not’ Batman ‘or’ manic ‘and other strings.

‘^’ : refers to the beginning of the matched string line

‘$’ : refers to the end of the matching string

How to generate and view SSH keys in Ubuntu 16.04

ubuntu 16.04 how to generate SSH key and how to view SSH key

check if SSH Key exists locally

enter

at the terminal

ls -al ~/.ssh

if output is:

No such file or directory

then there is no SSH key

, if you have it, it looks like this:

generates a new SSH key

first enter

in the terminal

ssh-keygen -t rsa -C "[email protected]"

[email protected] for your email address when registering on GitHub or GitLab

enter the terminal will display:

Created directory '/Users/xxx/.ssh'.
Enter passphrase (empty for no passphrase):

The path to save.ssh/ id_RSA is /Users/ XXX /.ssh/ id_RSA, press enter directly.

one thing to note here is that if you already have an SSH key and you want to recreate it using the above it will tell you that you don’t want to regenerate, just type y and press enter.

and the terminal will prompt:

Created directory '/Users/xxx/.ssh'.
Enter passphrase (empty for no passphrase):

You are prompted to set passphrase. You are required to enter passphrase every time you communicate with Git to avoid problems caused by some wrong operation. It is recommended to set it.

after success, the terminal will prompt:

Your identification has been saved in /Users/xxx/.ssh/id_rsa.

Your public key has been saved in /Users/xxx/.ssh/id_rsa.pub.

The key fingerprint is:

16:27:ac:a5:76:28:2d:36:63:1b:56:4d:eb:df:a6:48 [email protected]

The key's randomart image is:

心形图形

Then input at the terminal:

ssh-add ~/.ssh/id_rsa

You will be asked to enter the Passphrase entered in the above step

after success, the terminal display:

Identity added: /Users/xxx/.ssh/id_rsa (/Users/xxx/.ssh/id_rsa)

Finally, two files are generated in /Users/ XXX /.ssh/, id_RSA and id_Rsa.pub

input at the terminal:

cat /Users/xxx/.ssh/id_rsa.pub

terminal will display your SSH key, just copy it directly.

that’s all ~ ~ O (∩ _ ∩) O ha ha ~

Summary of k8s single master cluster deployment

fix warning:

1.[WARNING Firewalld]: firewalld is active, please ensure ports [6443 10250] are open or your cluster may not function correctly

answer: systemctl stop firewalld.service

2.[WARNING Service-Docker]: docker service is not enabled, please run ‘systemctl enable docker.service’

Systemctl enable docker.service

answer: systemctl enable docker.service

3.[WARNING IsDockerSystemdCheck]: detected “cgroupfs” as the Docker cgroup driver. The recommended driver is “systemd”. Please follow the guide at https://kubernetes.io/docs/setup/cri/

a:

official documentation indicates that changing the Settings so that the container runtime and kubelet use systemd as the cgroup driver makes the system more stable. Notice that under Docker, you set the option native. Cgroupdriver = Systemd.

two solutions:

1. Edit docker configuration file /etc/docker/daemon.json

1

2

3

“exec-opts”: [“native.cgroupdriver=systemd”]

systemctl daemon-reload

systemctl restart docker

2, edit the/usr/lib/systemd/system/docker. Service

1

2

3

ExecStart=/usr/bin/dockerd -H fd:// –containerd=/run/containerd/containerd.sock –exec-opt native.cgroupdriver=systemd

systemctl daemon-reload

systemctl restart docker

command:

vi /usr/lib/systemd/system/docker.service

–exec-opt native. Cgroupdriver =systemd (append)

After setting

, you can see that the Cgroup Driver is systemd

through the docker info command

1

docker info | grep Cgroup

4.[WARNING FileExisting-tc]: tc not found in system path

solution:

cannot be installed with yum, yum has a version, but has been unable to load down.

can be installed with yum, yum server is also this version:

yum command: yum install tc-y

note: the version is very important. I tried several versions. Only 5.3.0-1 works

download RPM package:

http://mirror.centos.org/centos/8/BaseOS/x86_64/os/Packages/iproute-tc-5.3.0-1.el8.x86_64.rpm

local installation:

yum localinstall – y iproute – tc – 5.3.0-1 RPM el8. X86_64.

5.[WARNING Hostname]: hostname “master” could not be reached

solution: see 6

6.[WARNING Hostname]: hostname “master”: lookup master on [fe80::1%ens33]:53: read udp [fe80::e0c:1711:9797:f6c7%ens33]:56921-> [fe80::1%ens33]:53: i/o timeout
error execution phase preflight: [preflight] Some fatal errors occurred:

solution:

The

command changes the host name

hostnamectl set-hostname k8s

change/etc/hostname

echo k8s > /etc/hostname

modifies the example

cat > > /etc/hosts < < EOF
192.168.100.4 master
192.168.100.5 node1
192.168.100.6 node2
EOF

, where IP is the address of the master node and the node node assigned to you

cleanup command:

sudo kubeadm reset

if

$kubeadm init \
– apiserver – advertise – address = 192.168.44.146 \
– image – repository registry.aliyuncs.com/google_containers \
– kubernetes – version v1.18.0 \
– service – cidr = 10.96.0.0/12 \
– pod – network – cidr = 10.244.0.0/16

that’s the step that’s going to go wrong, that’s the easiest step to go wrong. Master can’t boot up alive, so you can use this command.

caution, the test is nothing, it will not kill you (k8s) I am still a vegetable chicken, not only this command will bring side effects, but when the test, to solve the problem, it really works!

docker system prune -a

can be used to clean up disks, remove closed containers, useless data volumes, and networks

Linux virtual machine network “job for” network.service failed because the control process exited with error code”

problem description: ping occurrence Network is unsaid to be


restart network card: service network restart, error

Job for network.service failed because the control process exited with error code. See "systemctl status network.service" and "journalctl -xe" for details.

state is failed

sudo systemctl status network.service
● network.service - LSB: Bring up/down networking
   Loaded: loaded (/etc/rc.d/init.d/network; bad; vendor preset: disabled)
   Active: failed (Result: exit-code)
     Docs: man:systemd-sysv-generator(8)
  Process: 3253 ExecStart=/etc/rc.d/init.d/network start (code=exited, status=1/FAILURE)

solution:

systemctl disable NetworkManager

Centos7 forgot the root password and could not log in to the system

1. First, start the system, enter the power-on interface, and press “e” in the interface to enter the editing interface. As shown in figure:

2. Next, go to the edit screen and use the up and down keys on the keyboard to move the cursor down to the number of lines starting with “Linux16”. At the end of the line, type init=/bin/sh. As shown in figure:

3. Then, after typing, press the shortcut key: Ctrl+x to enter the single-user mode.

4. Next, in the position where the cursor is flashing (the position of the last line), type: mount -o remount,rw/(note: there is a space between mount and -o and a space between rw and /, cannot be omitted), and press Enter on the keyboard when finished. As shown in figure:

5. Then, in the pop-up is to change the password in the content of operation, in the position of the cursor blink Enter a new password (password when the input is not show, just like have no reaction, only need to remember your input password is correct, the password must be no less than 8 bits, otherwise it will fail to modify), after the completion of the press of the keyboard Enter key (Enter). As shown in figure:

solves this problem by linking

6. Then, after the password change is successful, passwd… , indicating that the password was changed successfully.

Next, in the position where the mouse is blinking (in the last line) type: touch /. Autorelabel (note: touch and/followed by a space). When finished, press the Enter key on the keyboard

8. Password changed successfully, you can log in

successfully

Solution to restart without showing eth0 connection after installing virtual machine

[environment configuration]

native: Windows10 virtual machine: Centos6 using VM12 software NAT mode network

[problem description]

after installing centos for the first time, you can find System eth0 in the following indication icon and click on network connection

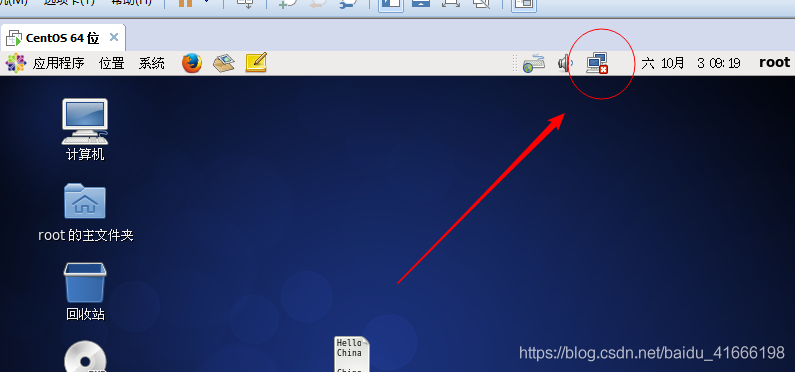
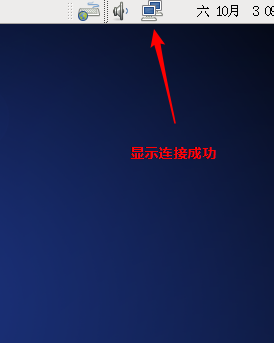
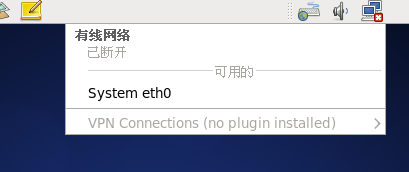
, but after the restart, mark not shown in the picture have eth0

[problem solved]

change the DHCP setting of VMnet8 network card in the virtual network editor, set the maximum rental time, and change the number of days 0 to greater than 0.

[self-summary]

we have a deeper understanding of the network setup in DHCP mode of Linux network NAT mode, but we still have a vague idea of the reason why eth0 fails to connect after restarting. We are waiting for further study.

Nginx configures different domain names to access different projects

# first method

# go to nginx configuration folder

cd /usr/local/nginx/conf

# edit configuration file

vim nginx.conf

# is modified as follows


......

http {
    ......

    server {
        listen       80;
        server_name  location;

        #charset koi8-r;

        #access_log  logs/host.access.log  main;

        location/{
            root   html/index/;
            index  index.html index.htm;
        }
        ......

    }

    # 访问 www.test1.com 网站,默认解析到 http://ip/test1 项目
    server {
        listen       80;
        server_name  www.test1.com;

        location/{
            root   html/test1/;
            index  index.html index.htm;
        }

        error_page   500 502 503 504  /50x.html;
        location = /50x.html {
            root   html;
        }
    }

    # 访问 www.test2.com 网站,默认解析到 http://ip/test2 项目
    server {
        listen       80;
        server_name  www.test2.com;

        location/{
            alias   html/test2/;
            index  index.html index.htm;
        }

        error_page   500 502 503 504  /50x.html;
        location = /50x.html {
            root   html;
        }
    }

    ......

}

domain name resolution address is the server’s IP, access to nginx will determine which site to request, and then match to the corresponding project

# the second method

# go to nginx configuration folder

cd /usr/local/nginx/conf

# new folder vhost

Create www.test.com.conf

under the folder vhost

server {
    listen       80;
    server_name  www.test.com;

    location/{
        root   html/www.test.com;
        index  index.html index.htm;
    }

    error_page   500 502 503 504  /50x.html;
    location = /50x.html {
        root   html;
    }

}

pay attention to change root path (www.test.com come in to visit the project path)
here new www.test.com can be named according to your domain name, according to the above template, Change server_name and root.
. Create a new project name for each project

# go to nginx configuration folder

cd /usr/local/nginx/conf

# edit configuration file

vim nginx.conf

# is modified as follows

......


http {
    ......

    #引入其它配置
    include       vhost/*.conf;

    ......

}

domain name resolution address is the server's IP, access to nginx will determine which site to request, and then match to the corresponding project

reference blog:

  1. configure different Nginx domain names to access different projects

U disk installation Linux system could not boot, / dev / root does not exist and the identified hard disk space is not available

UltraISO made U disk start disk

first use centos7, not successful, changed centos8 or not successful, then start to find the cause of the problem

1. Pay attention to the “easy start – write to new drive boot sector -Syslinux”

before writing

2, could not boot, /dev/root does not exist
because the configuration path in the installation boot is wrong,

solution 1,
in the option to install the page, press TAB, “hd:LABEL= XXXXX” in the XXXXX into their own usb disk name

solution two,
in emergency mode, CD /dev into the directory, ls to see all, the hard disk name is generally sda, SDB, SDC so, my computer has two hard disks, u disk should be SDC, then SDC, sdc4, restart back to the installation page to “hd:LABEL= XXXXX” to hd:/dev/sdc4 is ok, if not successful, just try a few sd

3 to enter after installation, hard disk space is not available,
1 t my hard drive, display 1000 k is available, the other is unavailable, this is because the computer before you install a Windows system, hard disk has been allocated a
select the hard disk, check the automatic partition,
and check the order I like to make additional space available click done
the pop-up dialog box select delete all can recycling all space