Tag Archives: Image Processing

[Solved] pytorch loss.backward() Error: RuntimeError: Function AddBackward0 returned an invalid gradient at index 1…

How to Solve pytorch loss.backward() Error

The specific errors are as follows:

In fact, the error message makes it clear that the error is caused by device inconsistency in the backpropagation process.
In the code, we first load all input, target, model, and loss to the GPU via .to(device). But when calculating the loss, we initialize a loss ourselves
loss_1 = torch.tensor(0.0)
This way by default loss_1 is loaded on the CPU.
The final execution loss_seg = loss + loss_1
results in the above error for loss_seg.backward().

Modification method:
Modify
loss_1 = torch.tensor(0.0)
to
loss_1 = torch.tensor(0.0).to(device)
or
loss_1 = torch.tensor(0.0).cuda()

[Solved] OpenCV Train the class Error: Bad argument & Error: Insufficient memory

OpenCV(3.4.1) Error: Bad argument (Can not get new positive sample. The most possible reason is insufficient count of samples in given vec-file.
) in CvCascadeImageReader::PosReader::get, file


Solution: reduce the number of positive samples

opencv_traincascade.exe -data data_2 -vec positives.vec -bg bg.txt -numPos 350 -numNeg 1963 -mem 8192 -numStages 20 -w 20 -h 20

Here, you can reduce the numpos value

OpenCV(3.4.1) Error: Insufficient memory (Failed to allocate 782736980 bytes) in cv::OutOfMemoryError, file C:\application\opencv\opencv\sources\modules\core\src\alloc.cpp, line 55


Solution: increase memory

Here, increase the value of -mem and decrease the value of numPos

Summary: these two errors mainly lie in that the value of the number of positive samples for each level of training is too large. Numpos must be less than the total number of positive samples. Modifying MEM value only improves the running speed

[Solved] cv2.xfeatures2d.SIFT_create() Error: module ‘cv2.cv2’ has no attribute ‘xfeatures2d’

Problem Description:

In the experiment of digital image processing course, SIFT algorithm is used in the feature matching experiment, and opencv4 is used for the first time with vscode 4 and python 3 8. An error is reported

module 'cv2.cv2' has no attribute 'xfeatures2d'

Then install the opencv Python 3.4.2.16 command in Anaconda prompt as follows, and an error occurs that the relevant version cannot be found

pip install opencv-python==3.4.2.16

And report an error as

cv2.error: OpenCV(3.4.8) C:\projects\opencv-python\opencv_contrib\modules\xfeatures2d\src\sift.cpp:1207: error: (-213:The function/feature is not implemented) This algorithm is patented and is excluded in this configuration; Set OPENCV_ENABLE_NONFREE CMake option and rebuild the library in function 'cv::xfeatures2d::SIFT::create'

Cause analysis

The reason for the first error is opencv4 Version 4 cannot be used due to sift patent; The second error is due to opencv4 2 and python 3 8 mismatch, need to be reduced to 3.6; This error is still a problem with the opencv version

Solution:

If it’s Python 3.6. You only need to install the package of the relevant version of OpenCV. Execute the following command in Anaconda prompt

pip install opencv-python==3.4.2.16
pip install opencv-contrib-python==3.4.2.16

Because I’m Python 3.8. Therefore, a virtual environment py36 is created for related configuration. For creating a virtual environment and activating a virtual environment, please refer to the creating a virtual environment – brief book in Anaconda blog, and then execute the above command in the activated virtual environment

Finally, run the PY file in the vs Code terminal

[Solved] error: (-215:Assertion failed) size.width>0 && size.height>0 in function ‘imshow‘

Error: cv2.error: OpenCV(4.5.4) /tmp/pip-req-build-w88qv8vs/opencv/modules/highgui/src/window.cpp:1006: error: (-215:Assertion failed) size.width>0 && size.height>0 in function ‘imshow’
Check if there is a problem with the image path:

It is found that None ==> You cannot use “~” to formulate the path, just modify it to the full path:

[Solved] Python project runs the open() function error: FileNotFoundError: [Errno 2] No such file or directory

Traceback (most recent call last):
  File "D:/Python/Practice/file_path_test01.py", line 10, in <module>
    open(path1, 'wb')
FileNotFoundError: [Errno 2] No such file or directory: './output/experiment_UNet_ResFourLayerConvBlock_ResTwoLayerConvBlock_None_fold-1_coarse_size-160_channel-8_depth-4_loss-dice_metric-dice_time-2021-11-20_16-14-52\\logs\\train\\events.out.tfevents.1637396155.DESKTOP-AHH47H9123456789012345678901234567890'

Reason 1: the parent folder of the file to be created does not exist. The open function will recreate the file when it does not exist, but cannot create the nonexistent folder.

Reason 2: the character length of file name + absolute path of file exceeds the limit of the operating system. Windows system has restrictions

Error: SaveRasterFile failed: IDLnaMetadata Error:naGetMetadata-GetMetadataJob failed

Today, during the image test in envi, I wanted to back up (save) the image, but the following error was reported
saverasterfile failed: idlnametadata error: nagetmetadata getmetadatajob failed


the reason is that Chinese cannot appear in the storage path, otherwise an error will be reported

When exporting to raster data, envi needs to read the metadata in the input file. If there is Chinese in the path, it will be unable to read and this error will be reported. At this time, you can change the storage path
the path where I read the image happens to have Chinese files, so I want to change it to English

Opencv Python realizes the paint filling function in PS, one click filling color and the possible reasons for opencv’s frequent errors

First of all, first solve the opencv error problem, once up on the error report headache
cv2.error: OpenCV(4.5.3) C:\Users\runneradmin\AppData\Local\Temp\pip-req-build-z4706ql7\opencv\modules\highgui\src\window.cpp:1274: error: (-2:Unspecified error) The function is not implemented. Rebuild the library with Windows, GTK+ 2.x or Cocoa support. If you are on Ubuntu or Debian, install libgtk2.0-dev and pkg-config, then re-run cmake or configure script in function ‘cvShowImage’

This version is probably not downloaded well, delete and start again


pip uninstall opencv-python

Then download the command

pip3 install opencv-contrib-python

Nice successfully solved the problem. Of course, there may be errors in the path with Chinese or spaces, and sometimes errors will be reported.

No more code, no more nonsense
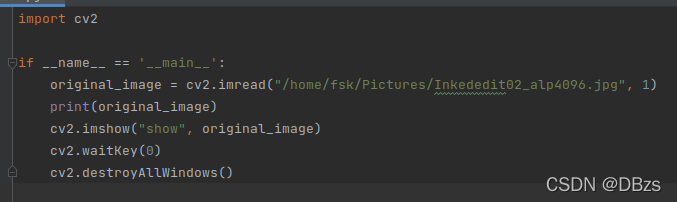
import cv2 as cv
import numpy as np

def fill_color_demo(image):    #Define the function to fill the color with one click
    Img2 = image.copy() # make a copy of the input image
    h, w = image.shape[:2] #Get the length and width of the image
    mask = np.zeros([h+2, w+2],np.uint8) #mask must be row and column plus 2, and must be uint8 single-channel array, fill the edges need more than 2 pixels, otherwise it will report an error
    cv.floodFill(Img2, mask, (100, 100), (127, 127, 127), (100, 100, 100), (50, 50 ,50), cv.FLOODFILL_FIXED_RANGE)
    #cv.floodFill, parameter 1,: indicates the input image, parameter 2: indicates the mask of a single channel, parameter 3: indicates the starting point of the flooding algorithm, parameter 4 indicates the color of the fill, and parameters 5,6 indicate the maximum positive and negative difference between the currently observed pixel point and the neighboring pixel points
    #x coordinates are from left to right, y coordinates are from top to bottom
    cv.imshow("result", Img2) # display the result image

img = cv.imread('. /1.jpg') # read in the image
cv.imshow('input', img) #Show the input image
fill_color_demo(img) #Transfer the input image into the defined fill color function
cv.waitKey(0)    

Then there is the result, as shown below

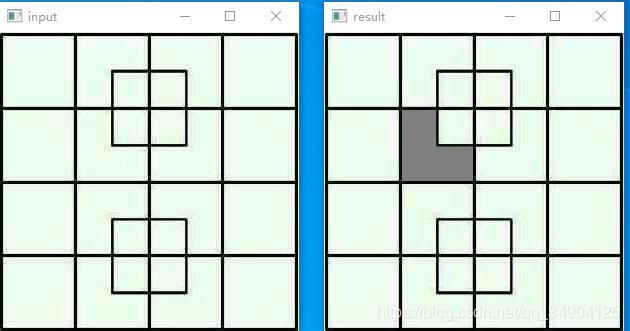
On the left is the original image of input and on the right is the output image. The color is (127127) gray and the coordinates are (100100). You can change the color coordinates as you like. It’s still very fun

Remember to like, pay attention to and collect
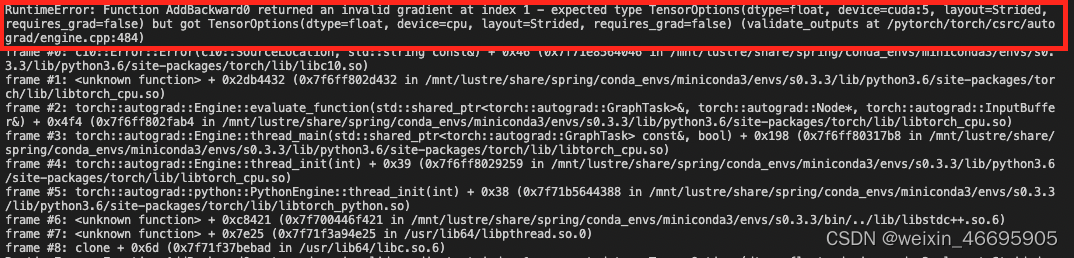
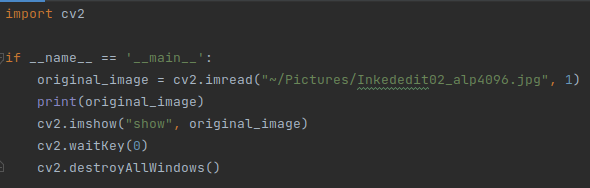
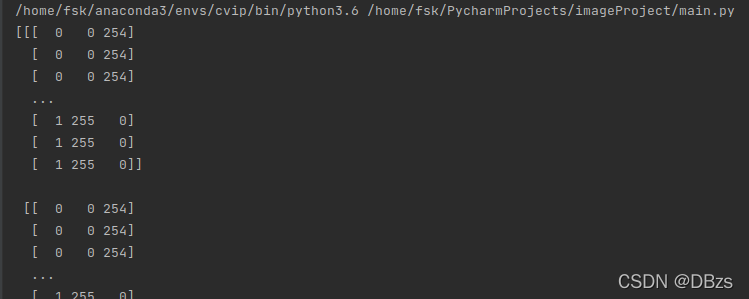
Python writes DICOM file (attributeerror: ‘filemetadataset’ object has no attribute ‘transfersyntax uid’ solution)

Write to DICOM file

import numpy as np
import matplotlib.pyplot as plt
import pydicom
import sys

def InitDicomFile():
    infometa = pydicom.dataset.Dataset()
    infometa.TransferSyntaxUID = pydicom.uid.ImplicitVRLittleEndian
    infometa.ImplementationVersionName = 'Python ' + sys.version
    infometa.MediaStorageSOPClassUID = 'CT Image Storage'
    infometa.FileMetaInformationVersion = b'\x00\x01'
    return infometa
    
filename = r'E:\34.dcm'
# ds = pydicom.dcmread(filename) # Read Tags from dicom image
ds = pydicom.read_file(filename) # Read Tags of the dicom image
info = pydicom.dataset.FileDataset({},ds) 
temp = pydicom.dcmread(filename).pixel_array # read in DICOM image and convert to numpy
img = temp.astype('uint16')
info.PixelData = img.tobytes()
infometa = InitDicomFile() # must be initialized otherwise read in will prompt an error
info = pydicom.dataset.FileDataset({},info,is_implicit_VR =True, file_meta=infometa)
# info = pydicom.dataset.FileDataset({},info) # Read without file_meta=infometa will prompt an error
info.save_as(r'M:\result.dcm')
# Verify that the newly stored DICOM can be read in
f = pydicom.dcmread(r'M:\result.dcm',force=True)
plt.imshow(f.pixel_array,'gray')
plt.show()

If there are not the following two lines, reading the stored DICOM file will prompt the following error:

infometa = InitDicomFile()
info = pydicom.dataset.FileDataset({},info,is_implicit_VR =True, file_meta=infometa)

AttributeError: ‘FileMetaDataset’ object has no attribute ‘TransferSyntaxUID’

Python failed to use PIL writer library. TTF, etc. oserror: cannot open resource

Error information

Read the error information,
return freetype (font),
return freetype font (font, size, index, encoding, layout)_ Oserror: cannot open resource
generally, an error is reported. The reason is that there is a problem in using the resource file
failure reason:
1. First of all, check whether the path you bind is correct. Some people directly bind to the font file in the path of C: (Windows) fonts. This is OK, but you need to use it in Python/
2. If you bind to the font file in the path of C: (Windows) fonts, you can’t use it. Reason: the name of the font may be too long. At this time, we can rename it, Then re install to the path, or directly put your own bound path
3. The bound path is correct, but still an error is reported. Trust the font library to C:// Windows/fonts to see if it is installed. If it is not installed, it may not work

File "./ClothStore/captcha/captcha.py", line 123, in <listcomp>
    for size in font_sizes or (65, 70, 75)])
  File "/home/ClothStore/venv/lib/python3.7/site-packages/PIL/ImageFont.py", line 655, in truetype
    return freetype(font)
  File "/home/ClothStore/venv/lib/python3.7/site-packages/PIL/ImageFont.py", line 652, in freetype
    return FreeTypeFont(font, size, index, encoding, layout_engine)
  File "/home/ClothStore/venv/lib/python3.7/site-packages/PIL/ImageFont.py", line 194, in __init__
    font, size, index, encoding, layout_engine=layout_engine
OSError: cannot open resource

error(-215) !empty() in function detectMultiScale solution

error(-215) ! Empty () In function detectMultiScale solution
Errors like this can occur when building a cascading classifier using OpenCV Python

error: (-215:Assertion failed) !empty() in function 'detectMultiScale'

Any discussion about this question on Stack Overflow at https://stackoverflow.com/questions/30508922/error-215-empty-in-function-detectmultiscale
The common perception is that XML or other files are missing or incorrectly routed.
The correct path would look like this:

cascade_fn = args.get('--cascade', "../../data/haarcascades/haarcascade_frontalface_alt.xml")
nested_fn  = args.get('--nested-cascade', "../../data/haarcascades/haarcascade_eye.xml")

cam = create_capture(video_src, fallback='synth:bg=../data/lena.jpg:noise=0.05')

There are also some references to this answer:
http://answers.opencv.org/question/52340/opencv-error-assertion-failed-empty-in-detectmultiscale/