Tag Archives: Android

[Solved] Resource compilation failed. Check logs for details.

Record the problems encountered that cannot be clearly answered by the search.

Error log:

Execution failed for task ‘:app:mergeDebugResources’.
> A failure occurred while executing com. android. build. gradle. internal. res.ResourceCompilerRunnable
> Resource compilation failed. Check logs for details.

* Try:
Run with –info or –debug option to get more log output. Run with –scan to get full insights.

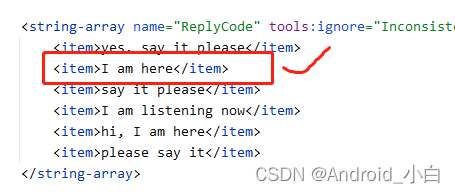
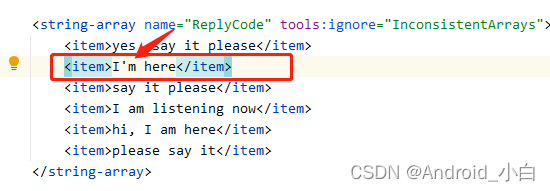
Error: I added a string-array resource file, and “I’m here” used the abbreviation, which is what caused the above error.

Solution: no abbreviation, directly use “I am here”


[Solved] Cordova Android Compile Error: Execution failed for task ‘:packageDebug‘

Execution failed for task ‘:packageDebug’

Background

Use ionic+cordova+gradle to package the Android program. The environment is as follows:

    cordova  :  7.1.0
    Gradle  :   7.4
    @ionic/cli-utils  : 1.19.0
    ionic (Ionic CLI) : 3.19.0
    

System:

    Node : v6.9.1
    npm  : 3.10.8
    OS   : Windows 10

Misc:

    backend : pro

problem

* What went wrong:
Execution failed for task ':packageDebug'.
> com.android.ide.common.signing.KeytoolException: Failed to read key AndroidDebugKey from store "C:\Users\11644\.android\debug.keystore": Invalid keystore format

Solution:

According to the second paragraph

 Failed to read key AndroidDebugKey from store "C:\Users\11644\.android\debug.keystore": Invalid keystore format

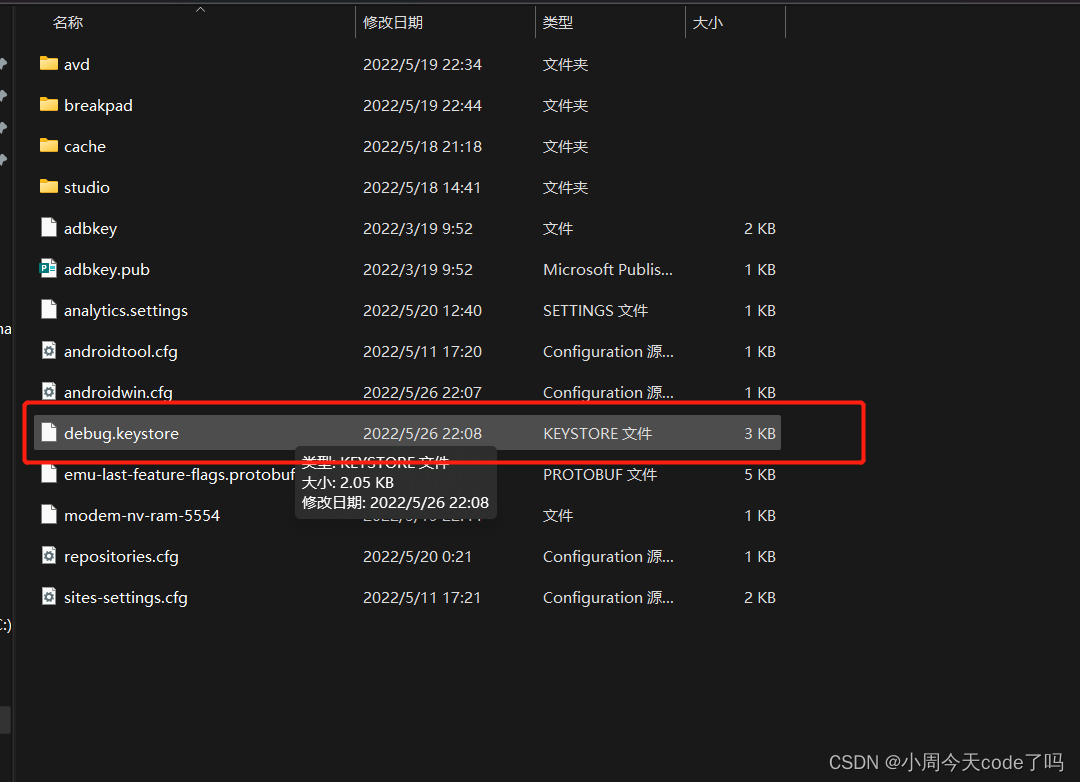
Find the debug.keystore file

delete this file and rerun the command
package successfully

BUILD SUCCESSFUL

Total time: 1.658 secs
Built the following apk(s):
        D:/ProjectFiles/CordovaProject/myapp/platforms/android/build/outputs/apk/android-debug.apk
ANDROID_HOME=D:\Programmer\AndroidSDKmange
JAVA_HOME=C:\Program Files\Java\jdk1.8.0_201
No target specified, deploying to device '26395863'.
Skipping build...
Built the following apk(s):
        D:/ProjectFiles/CordovaProject/myapp/platforms/android/build/outputs/apk/android-debug.apk
Using apk: D:/ProjectFiles/CordovaProject/myapp/platforms/android/build/outputs/apk/android-debug.apk
Package name: io.cordova.hellocordova
LAUNCH SUCCESS

Apk Failed to install Error: [install\u failed\verification\u failure]

Apk install failed: [install\u failed\verification\u failure]

When “myapp.apk” is installed, the following error is obtained:

[INSTALL_FAILED_VERIFICATION_FAILURE]

You must allow unsigned applications. Installation is blocked by Android. Allow non market applications to be installed in settings.

You need to disable verification of APK during ADB installation. If the security settings are grayed out or do not work properly, try shelling the device and running at each API level (global, system, security) according to the settings in the settings database

$ adb shell settings put global verifier_verify_adb_installs 0

If you can really set it, it will prevent APK checking through ADB.

Sometimes you need to disable the package verifier and use:

$ adb shell settings put global package_verifier_enable 0

You can see here that these settings are in the global database:

http://androidxref.com/4.4.2_r2/xref/frameworks/base/core/java/android/provider/Settings.java#5015

[Solved] Manifest merger failed: android:exported needs to be explicitly specified for element <activity#com

Manifest merger failed : android:exported needs to be explicitly specified for element < activity#***

com.tamsiree.rxui.activity.activityWebView***>. Apps targeting Android 12 and higher are required to specify an explicit value forandroid:exportedwhen the corresponding component has an intent filter defined.

**According to the hint, you need to add the dependency package com.tamsiree.rxui.activity.ActivityWebView to the
AndroidManifest.xml file under the activity to add android:exported **

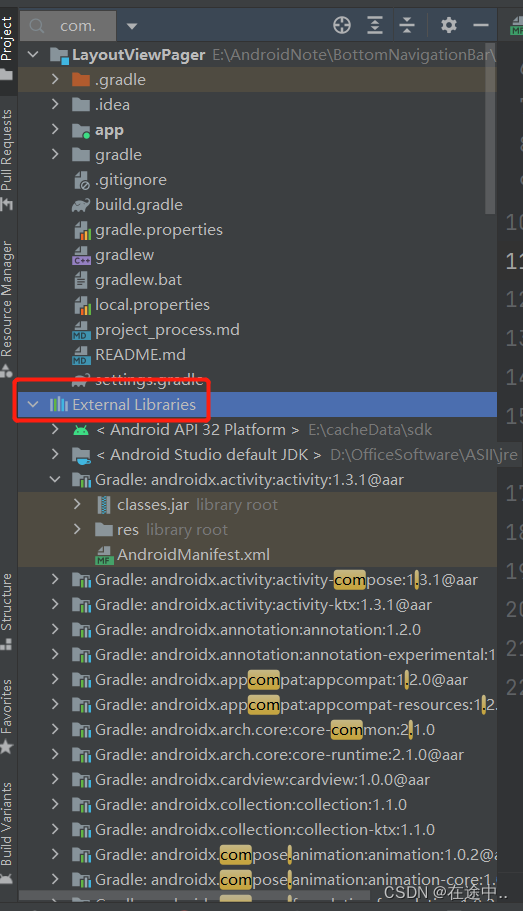
Note that the package name depends on whether it is in your own project or a dependent package. To find it, click on a file on the left and type in what you want to find

Using Jenkins to compile APK Error [How to Solve]

In the past, the project could be built on Jenkins normally. Today, it is suddenly found that the construction is wrong. The problems are as follows:

Could not determine the dependencies of task ':lint'.
> Could not resolve all artifacts for configuration ':releaseUnitTestCompileClasspath'.
   > Could not resolve junit:junit:4.+.
     Required by:
         project :
      > Failed to list versions for junit:junit.
         > Unable to load Maven meta-data from http://jcenter.bintray.com/junit/junit/maven-metadata.xml.
            > Could not get resource 'http://jcenter.bintray.com/junit/junit/maven-metadata.xml'.
               > Could not GET 'https://jcenter.bintray.com/junit/junit/maven-metadata.xml'.
                  > org.apache.http.client.ClientProtocolException (no error message)
      > Skipped due to earlier error

* Try:
Run with --stacktrace option to get the stack trace. Run with --info or --debug option to get more log output. Run with --scan to get full insights.

Gradle plug-in version 4.1.2, gradle version 6.5

The solution to this problem is as follows:

1. Find the build.gralle file of moudle.

Modify testImplementation 'junit:junit:4.+' to testImplementation 'junit:junit:4.12'

2. Find the following places in the gradle compilation file used by Jenkins server and modify it to the following information

allprojects {
    repositories {
        jcenter { url "http://jcenter.bintray.com/"}
        google()
        maven { url 'http://repo1.maven.org/maven2' }
    }
}

Then use Jenkins to build again, and the APK can be built normally.

[Solved] JNI DETECTED ERROR IN APPLICATION: GetStringUTFChars received NULL jstring

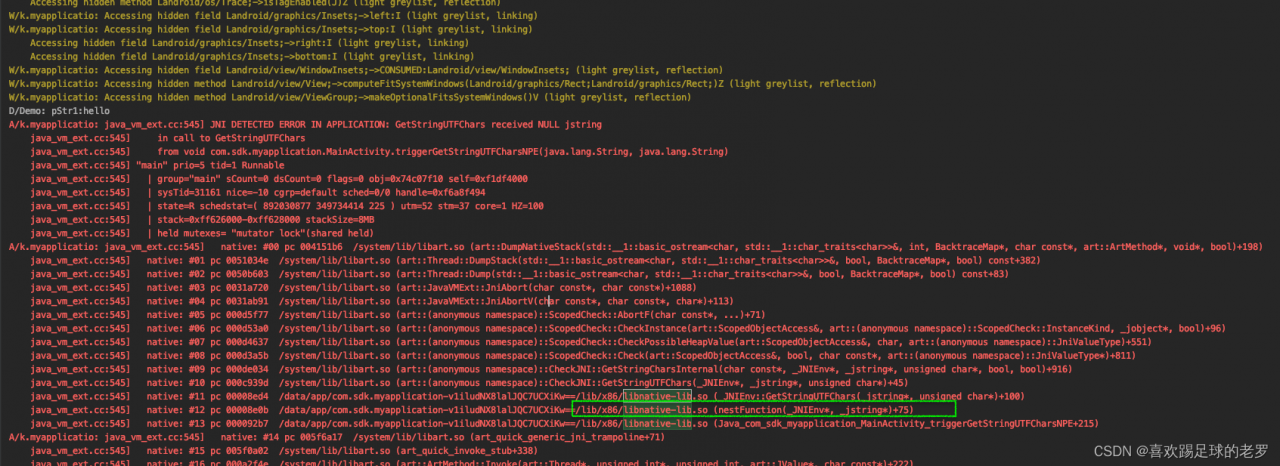
JNI DETECTED ERROR IN APPLICATION: GetStringUTFChars received NULL jstring

A/k.myapplicatio: java_vm_ext.cc:545] JNI DETECTED ERROR IN APPLICATION: GetStringUTFChars received NULL jstring
    java_vm_ext.cc:545]     in call to GetStringUTFChars
    java_vm_ext.cc:545]     from void com.sdk.myapplication.MainActivity.triggerGetStringUTFCharsNPE(java.lang.String, java.lang.String)

The reason for the above message, from a Jni method, refers to the case where the JVM calls the method and the GetStringUTFChars entry jstring is empty, it must not refer specifically to the method body where the GetStringUTFChars call has a NULl pointer, but includes other C/C++ method calls in the method that have a NULL pointer. NULL pointer. So we have to look at the crash stack carefully to quickly locate the place where the NULL pointer is generated to avoid invalid output.

the above example is extracted according to our own business code
the example code is as follows
java

public class MainActivity extends AppCompatActivity {

    // Used to load the 'native-lib' library on application startup.
    static {
        System.loadLibrary("native-lib");
    }

    @Override
    protected void onCreate(Bundle savedInstanceState) {
        super.onCreate(savedInstanceState);
        setContentView(R.layout.activity_main);

        // Example of a call to a native method
        TextView tv = findViewById(R.id.sample_text);
        tv.setText(stringFromJNI());
        triggerGetStringUTFCharsNPE("hello", null);//introduce a null
    }

    /**
     * A native method that is implemented by the 'native-lib' native library,
     * which is packaged with this application.
     */
    public native String stringFromJNI();


    public native void triggerGetStringUTFCharsNPE(String p1, String p2);
}

jni

#include <jni.h>
#include <string>
#include <android/log.h>

static const char* TAG = "Demo";


void nestFunction(JNIEnv *env, jstring p2) {
    //Here p1 is simply passed in via a parameter, but the actual business logic may be obtained by other methods/ways
    const char* pStr = env->GetStringUTFChars(p2, nullptr);
    __android_log_print(ANDROID_LOG_DEBUG, TAG, "pStr:%s", pStr);
    env->ReleaseStringUTFChars(p2, pStr);
}

extern "C" JNIEXPORT jstring JNICALL
Java_com_sdk_myapplication_MainActivity_stringFromJNI(
        JNIEnv* env,
        jobject /* this */) {
    std::string hello = "Hello from C++";
    return env->NewStringUTF(hello.c_str());
}extern "C"
JNIEXPORT void JNICALL
Java_com_sdk_myapplication_MainActivity_triggerGetStringUTFCharsNPE(JNIEnv *env, jobject thiz,
                                                                    jstring p1, jstring p2) {
    const char* pStr1 = env->GetStringUTFChars(p1, nullptr);
    __android_log_print(ANDROID_LOG_DEBUG, TAG, "pStr1:%s", pStr1);
    env->ReleaseStringUTFChars(p1, pStr1);
    //故意让nestFunction产生 JNI DETECTED ERROR IN APPLICATION: GetStringUTFChars received NULL jstring
    nestFunction(env, p2);
}

[Solved] UE4UE5 Package Android Error: UnrealBuildTool failed

Error:

Android\armv7\gradle\rungradle.bat……UnrealBuildTool failed

Solution:

1. Replace gradle package

Download address: http://services.gradle.org/distributions/

Replace with: C:\Users\your_user_name\.gradle\wrapper\dists\gradle-x.x-all\xxxxxxxxxxxxxxxxxxxxxxx

2. Update SDK
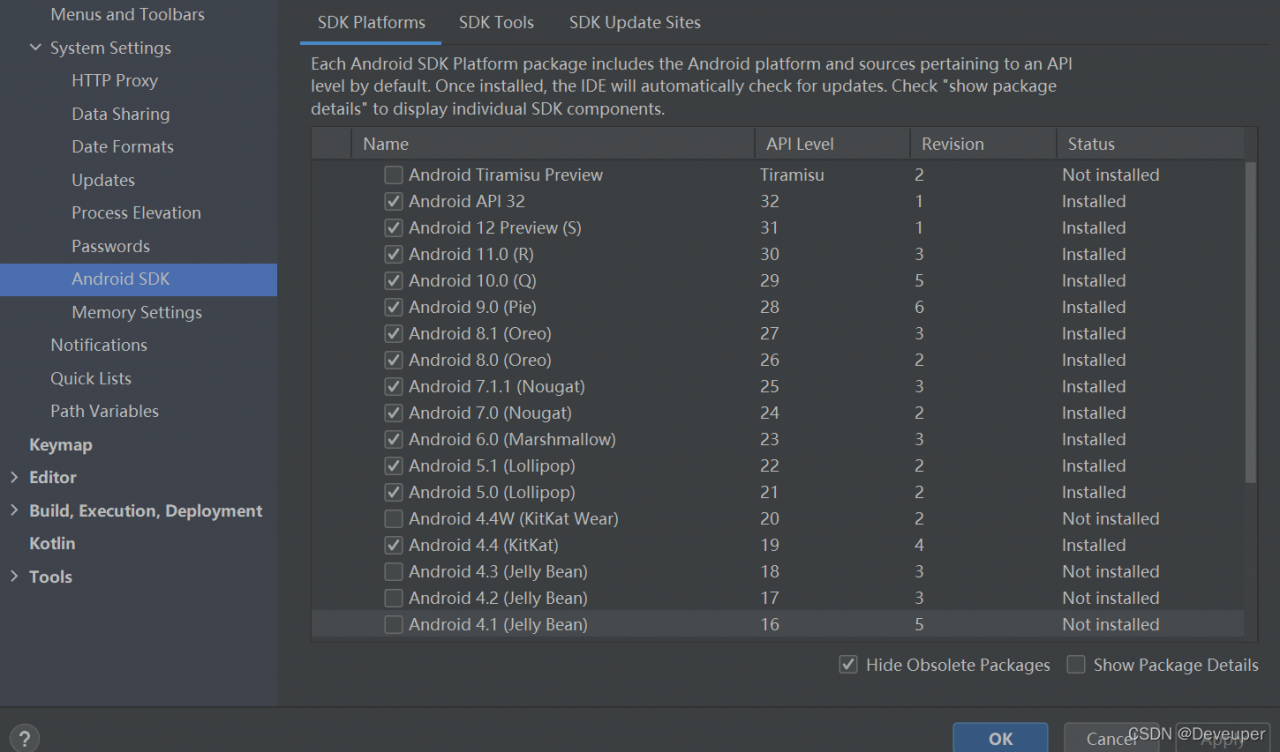
check the latest SDK in SDK manager in Android studio (you can download the update directly)

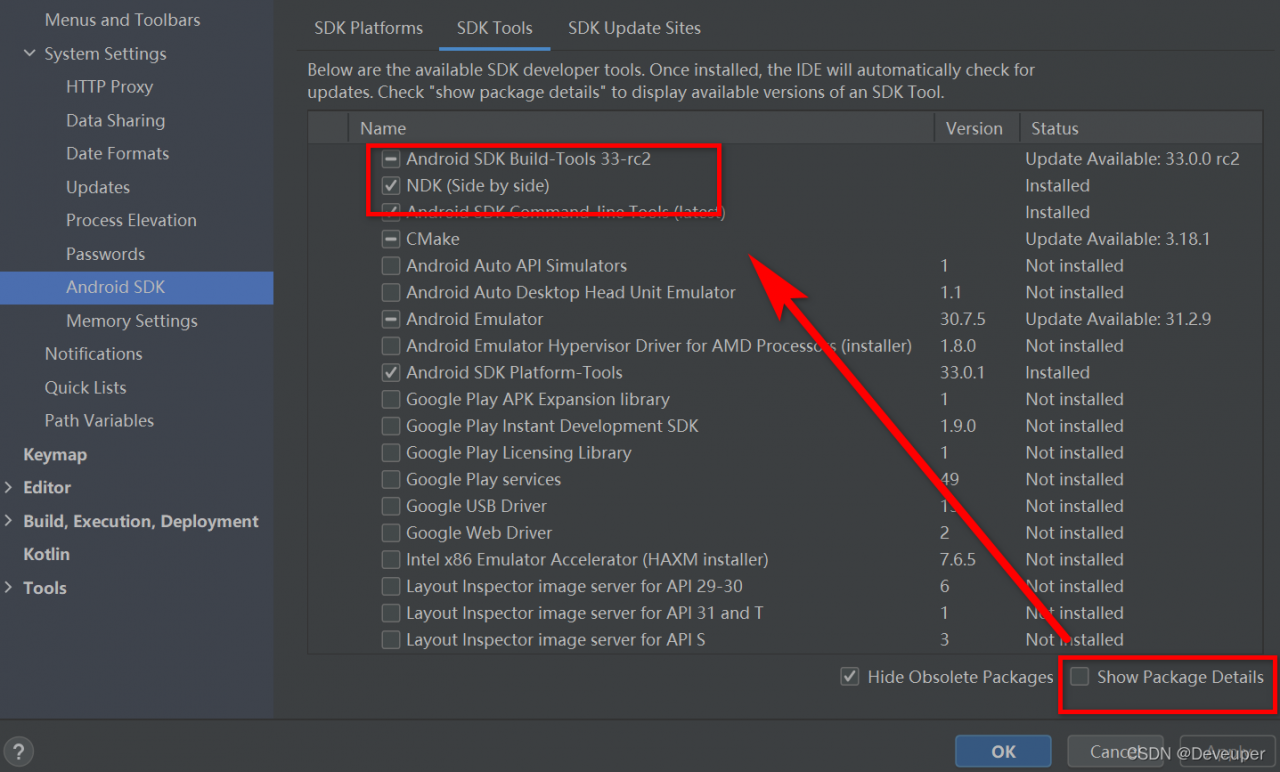
3. Update NDK and build tool

Error reported: XXXXXX\gradle\rungradle.bat” :app :assembleDebug

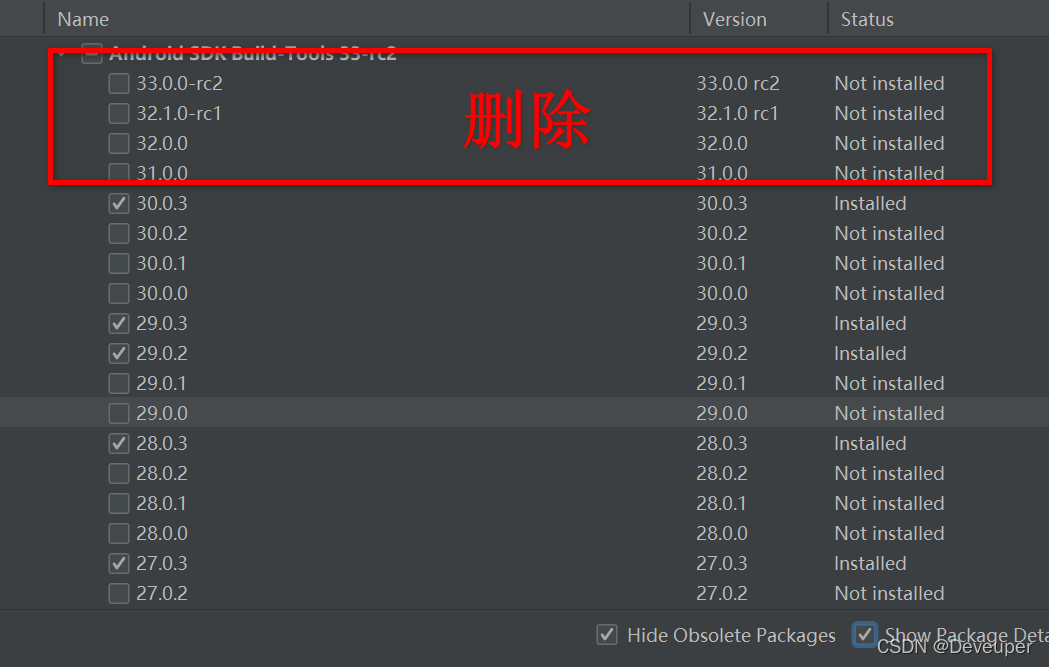
Solution: in the SDK manager, find SDK Tools – Show package details and delete the build tool version with relevant errors according to the error information.

Just pack it.

[Solved] XiaoMi Phone Uiautomator Startup Error: uiautomator2.GatewayError

check the error messages:

OSError: [WinError adb shell am instrument -w -r -e debug false -e class com.github.uiautomator.stub.Stub com.github.uiautomator.test/android.support.test.runner.AndroidJUnitRunner] uiautomator2.GatewayError(gateway error, time used 0.0s): 'https://github.com/openatx/uiautomator2/wiki/Common-issues'

It is said that app-uiautomator.apk or app-uiautomator-test.apk not installed. but if you use the following command:

 python -m uiautomator2 init

There are no errors, and you can see the successful installation of the above two apps, so the problem is not the failure of uiautomator app installation.

Solution:

Turn on the settings of Xiaomi mobile phone – turn on developer options – turn on USB debugging – turn on USB installation – turn on USB debugging (security settings) – turn on the application that passes USB verification (default on) – turn on wireless display authentication (optional). The key option is not to enable MIUI optimization. After operating the above settings, execute python -m uiautomator2 init (no error), and then you can execute the relevant scripts

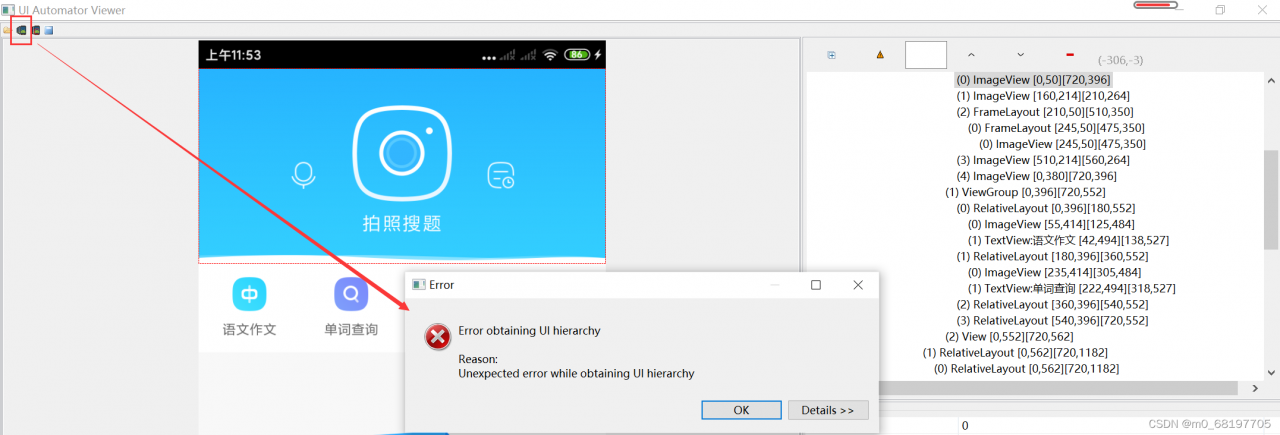
[Solved] uiautomatorviewer Error: Error obtaining UI hierarchy

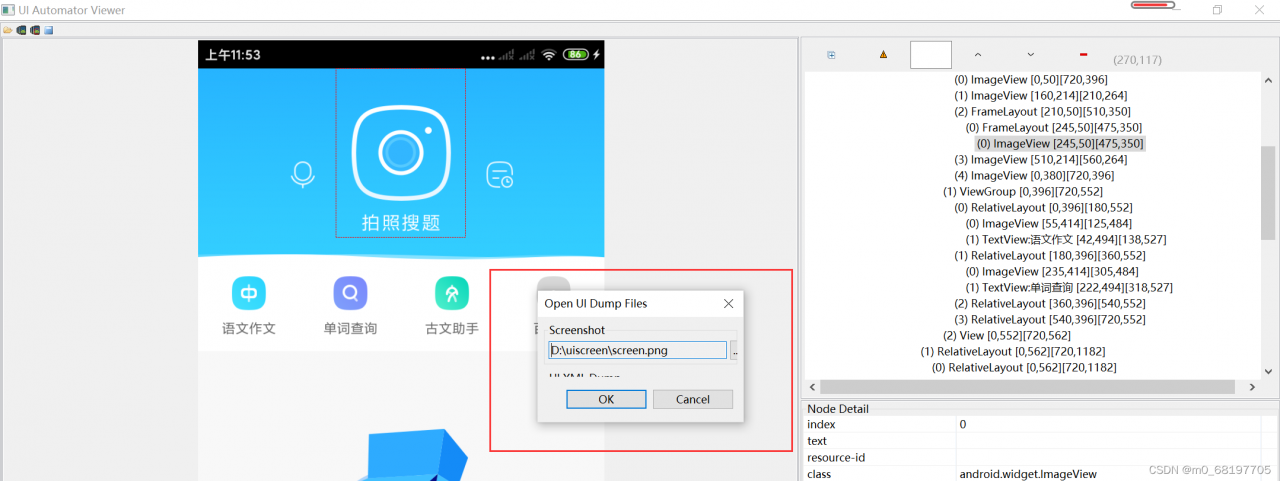
1. Problem reappearance: when learning appium framework and using uiautomatorviewer to locate Android App controls, directly selecting [device screenshot] will report an error:

2. Solution:

Create a new bat file with the following contents:

adb shell uiautomator dump /sdcard/screen.uix
adb pull /sdcard/screen.uix D:/uiscreen/screen.uix
adb shell screencap -p /sdcard/screen.png
adb pull /sdcard/screen.png D:/uiscreen/screen.png

In fact, these commands can also be directly input in CMD, but they need to be input every time, which is more troublesome. All commands can be written into bat files and run directly to obtain interface information.

3. Select the path of the picture and uix file in uiautomatorviewer:

My frame is too small. I can’t click the path of the second uix at all. The solution is to press the tab key, locate the button to select the file, and then enter can select it normally.

4. Then you can load the interface and locate the elements normally.

[Solved] Manifest merger failed with multiple errors, see logs

Manifest merge failed with multiple errors, see logs solution

In component-based development, when testing a single component, such problems sometimes occur in compilation


Simulate with my project:

The current test is lib_news
lib_news requires webView of lib_web

lib_news build gradle

if (isRelease) {
    apply plugin: 'com.android.library'
} else {
    apply plugin: 'com.android.application'
}

apply plugin: 'org.jetbrains.kotlin.android'
apply plugin: 'kotlin-android'
apply plugin: 'kotlin-kapt'
apply plugin: 'kotlin-parcelize'

android{
	……
	defaultConfig {
       ……
        kapt {
            arguments {
                arg("AROUTER_MODULE_NAME", project.getName())
            }
        }
        buildConfigField("boolean", "isRelease", String.valueOf(isRelease))

    }
	sourceSets{
        main {
            if (isRelease) {
                //if library,then compile AndroidManifest.xml in manifest
                manifest.srcFile 'src/main/manifest/AndroidManifest.xml'
            } else {
                //if application, then compile theAndroidManifest.xml in the home directory.
                manifest.srcFile 'src/main/AndroidManifest.xml'
            }
        }
    }
    ……
	dependencies{
		……
		implementation project(path: ':lib_web') //import lib_web
	}
	
}

project config.gradle

ext{
    isRelease = false
    //isUseWeb = true Comment first, the general configuration file is only configured with isRelease
	……
}

lib_web build.gradle

if (isRelease) {
    apply plugin: 'com.android.library'
} else {
    apply plugin: 'com.android.application'
}

apply plugin: 'org.jetbrains.kotlin.android'
apply plugin: 'kotlin-android'
apply plugin: 'kotlin-kapt'
apply plugin: 'kotlin-parcelize'

android{
	……
	defaultConfig {
       ……
        kapt {
            arguments {
                arg("AROUTER_MODULE_NAME", project.getName())
            }
        }
        buildConfigField("boolean", "isRelease", String.valueOf(isRelease))

    }
	sourceSets{
        main {
            if (isRelease) {
                manifest.srcFile 'src/main/manifest/AndroidManifest.xml'
            } else {
                manifest.srcFile 'src/main/AndroidManifest.xml'
            }
        }
    }
    ……
	dependencies{
		……
	}
	
}

In general, we only set isrelease to determine whether a single component test or integrated compilation
so the test lib_news, directly change isrelease to false, and also lib_web will also become Application, which is equivalent to us in lib_news importing Application instead of Library, will involve the problem of  androidmanifest.xml

Show me androidmanifest.xml
lib_web component mode
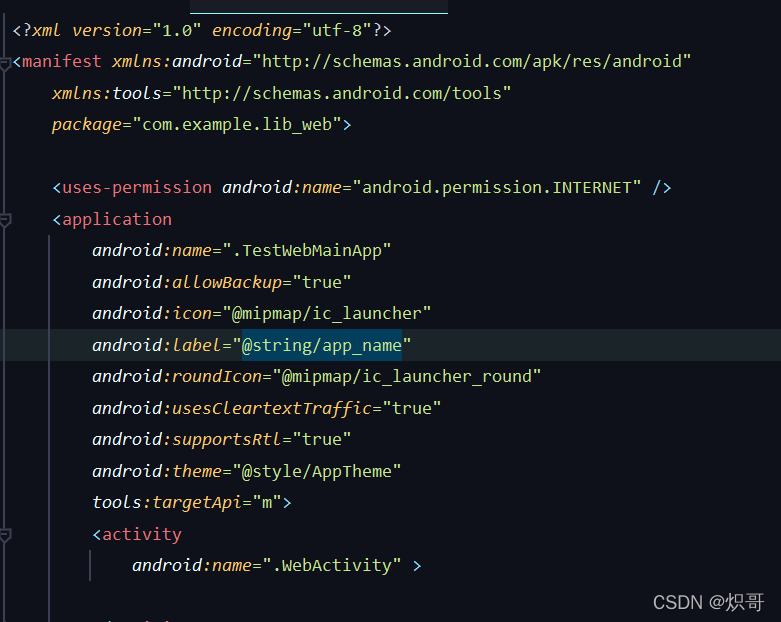
Lib_ Web integration mode
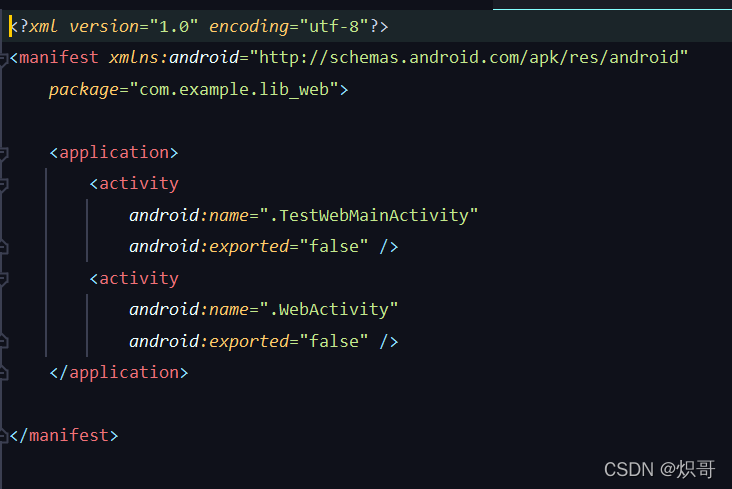

Solution:

project config.gradle
add a isuseweb to identify the lib_web to be used in the componentization mode

ext{
    isRelease = false
    isUseWeb = true 
	……
}

Modify lib_webbuild.gradle

if (isUseWeb) {
    apply plugin: 'com.android.library'
} else {
    apply plugin: 'com.android.application'
}
android {
	……
	defaultConfig {
		……
		buildConfigField("boolean", "isUseWeb", String.valueOf(isUseWeb))
	}
	……
	sourceSets{
        main {
            if (isUseWeb) {
                manifest.srcFile 'src/main/manifest/AndroidManifest.xml'
            } else {
                manifest.srcFile 'src/main/AndroidManifest.xml'
            }
        }
    }
	
}
[Solved] Android Studio Compile Error: Could not determine java version from ‘11.0.8‘.

There are two solutions to solve Error: Could not determine java version from '11.0.8'.

Method 1: downgrade Android Studio and use the historical version of Android Studio environment;

Method 2: upgrade Gradle version;

1. Error reporting information


Open an old project and report the following error:

Could not determine java version from '11.0.8'.

The project uses Gradle version which is incompatible with Studio running on Java 10 or newer.
See details at https://github.com/gradle/gradle/issues/8431
Possible solution:
 - Upgrade Gradle wrapper to 4.8.1 version and re-import the project

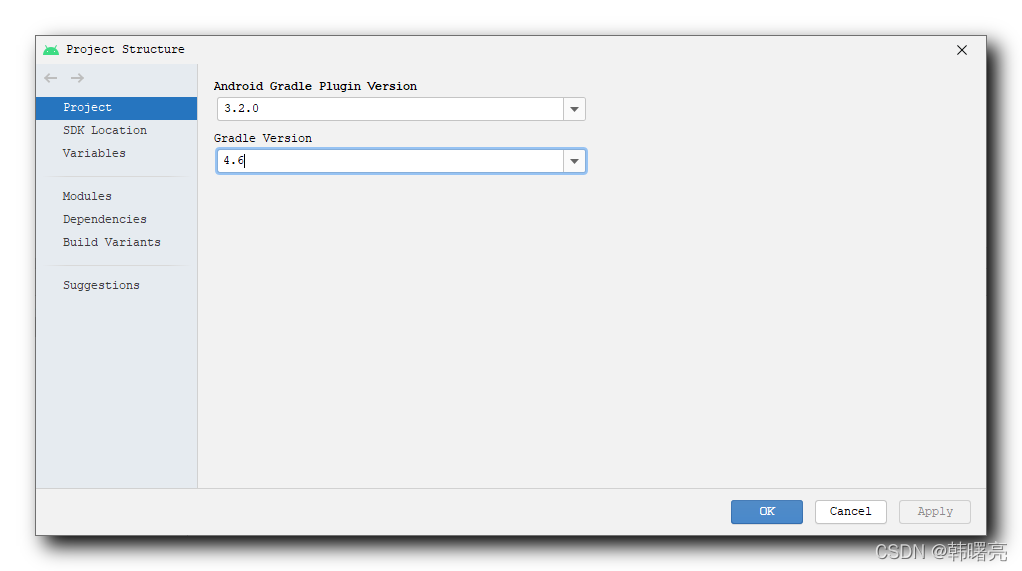
Select the “menu bar/file/Project Structure” option,

Check that the Android Gradle plug-in version of the Android project is 3.2.0 and the Gradle version is 4.6. This is the version used a few years ago. At present, the project cannot be compiled using the latest Android studio;


2. Solution

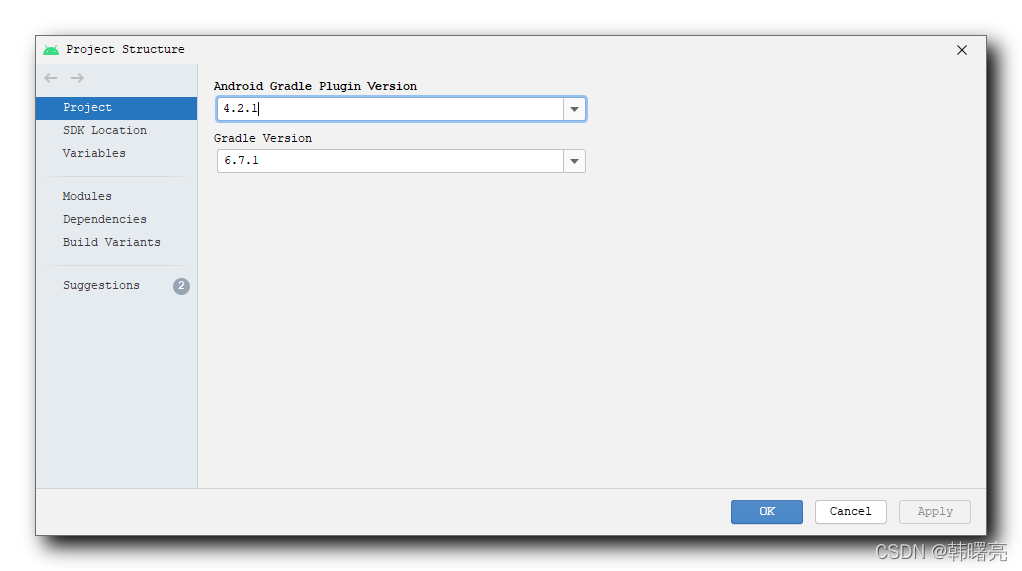
Select the menu bar/file/project structure option,

In the pop-up project structure dialog box, update the Android gradle plug-in version to 4.2.1 and the gradle plug-in version to 6.7.1;

[Solved] Execution failed for task ‘:app:mergeDebugJavaResource‘.

Execution failed for task ‘:app:mergeDebugJavaResource’.

> A failure occurred while executing com.android.build.gradle.internal.tasks.MergeJavaResWorkAction
   > 2 files found with path 'META-INF/library_release.kotlin_module' from inputs:
      - C:\Users\pc5\.gradle\caches\transforms-2\files-2.1\ce2b46fc1c5f5af8ed7abfa332710f84\zoomlayout-1.9.0\jars\classes.jar
      - C:\Users\pc5\.gradle\caches\transforms-2\files-2.1\a562c978ea1815ba0e02c6c6a3c46b97\egloo-0.6.1\jars\classes.jar
     Adding a packagingOptions block may help, please refer to
     https://google.github.io/android-gradle-dsl/current/com.android.build.gradle.internal.dsl.PackagingOptions.html
     for more information

* Try:
Run with --stacktrace option to get the stack trace. Run with --info or --debug option to get more log output. Run with --scan to get full insights.

When Importing the zoomlayou third-party library, the installation reports an error, Clean Project, clearing the cache and restarting are also invalid

Solution:
Add the following code to the module’s build.gradle under the android tab

android {
	packagingOptions {
      	pickFirst "META-INF/library_release.kotlin_module"
	}
}
or
android {
	packagingOptions {
      	exclude "META-INF/library_release.kotlin_module"
	}
}

Reference:
https://stackoverflow.com/questions/60684730/error-execution-failed-for-task-appmergedebugjavaresource.