Tag Archives: Android

Android studio reported an error, Error:SSL peer shut down incorrectly

When we import projects with Android studio, we often encounter all kinds of errors, resulting in the project not running.

Recently, I have encountered a problem. What’s wrong Error:SSL peer shut down incorrectly

After checking, it seems that we have to change various configuration files, which is very troublesome.

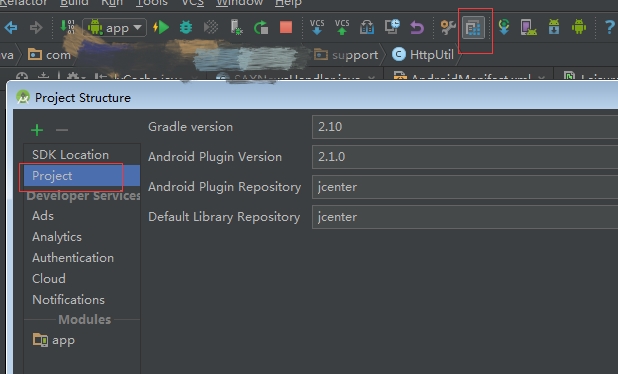
I took a look at it right here

Compare with the local project that can be compiled normally, change the parameters.

Then it’s ready to run.

Error executing Aidl: return code 1

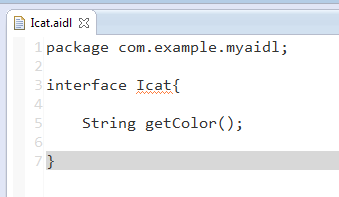
I learned from the video in Aidl studio, and then I used it to create a note file. The Aidl file created in the video has a set of templates. The Aidl file created in eclipse has nothing, even no code prompt. Error executing Aidl: return code 1.

After traversing various websites, even stackoverflow did not find the answer. There is only one similar eclipse that creates Aidl without generating a java file in the gen directory, and writes a standard Aidl format code according to it. After saving, the error disappears.

[Android] ImageView setting background image error: error inflating class ImageView

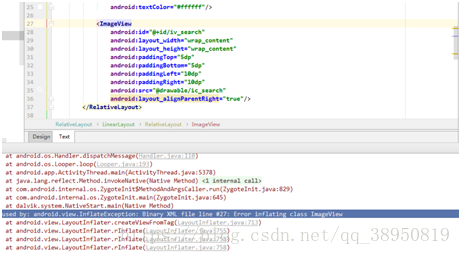
(Android studio 3.1) the ImageView control is used in the layout file, and Src refers to the vector asset file created by itself. When running on Android 4.42, an error is reported as follows:

I used it on Android 8.0 mobile phone before, but it didn’t appear this problem. When I ran it on Android 4.42, I made a mistake. The first time I met this problem, I didn’t know what was wrong. Later, when I solved another problem, I suddenly realized that this problem might come from:


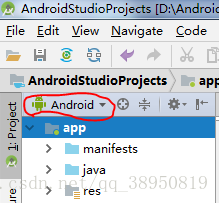
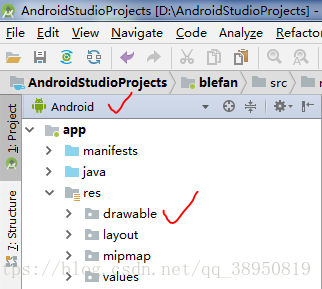
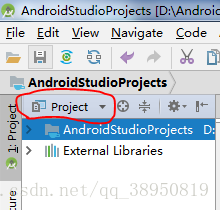
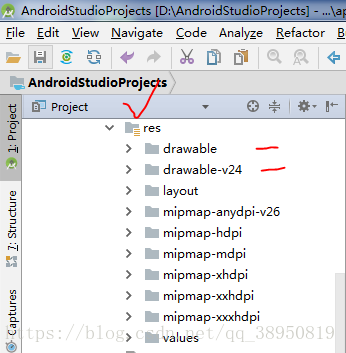
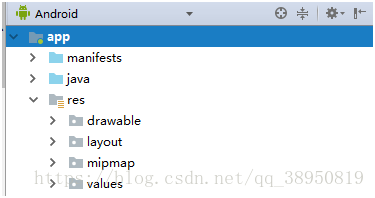
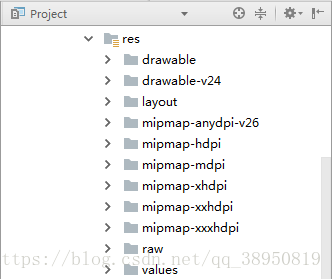
In the development process, I’m used to Android mode, and there are only a few folders in the res directory. Switch to project mode. In addition to the drawable folder, there is also the drawable-v24 folder in the res directory. I found that the vector asset file I created was actually placed in drawable-v24. Maybe that’s the problem. So I moved the vector asset file from the drawable-24 folder to the drawable directory, and then there was no running error.

Later, I went to the blog to search for information and found that Google only provided vector support when Android 5.0 was released. No wonder there was no error when I created the vector asset file to run in the drawable folder in Android 8.0. Maybe it was because vector was relatively mature in higher versions. Finally, a blog about vector written by Dashen is attached https://blog.csdn.net/eclipsexys/article/details/51838119 , I feel that I have learned a lot, which is convenient for further inquiry in the future.


Android dependency merge rules

  1. Remote dependency merge rule

If multiple modules depend on the library in the way of [implementation + coordinates], only one version will be compiled, and it is the latest version

module A: 
implementation "com.fengma.tool:gradle-tool:2.1.2"
...
module B:
implementation "com.fengma.tool:grdle-tool:2.3.3" //gradle default the latest version

If you want to change the default compile version selection, you can specify a version by using gradle’s dependency selection mechanism

configurations.all {
    resolutionStrategy.eachDependency { DependencyResolveDetails details ->
        if (details.requested.group == 'com.fengma.tool') {
            details.useVersion '2.1.2'
            details.because 'Use Lower version'
        }
    }
}

2. Local plus remote dependency mode

When module a introduces a jar package in the way of [local lib], and module B introduces the same library in the way of [implementation + coordinates], it will cause compilation conflicts and lead to compilation failure. Therefore, it is necessary to unify the dependency mode.

module A:
compile files('libs/fengma-tool-2.1.2-.jar')
...
module B:
compile "com.fengma.tool:grdle-tool:2.3.3"
... Compilation conflicts, class duplication

Android studio compilation error: style attribute ‘@ android:attr/windowEnterAnimation ‘not found the ultimate solution

Import project, compile error as follows:

error: style attribute '@android:attr/windowEnterAnimation' not found.
Message{kind=ERROR, text=error: style attribute '@android:attr/windowEnterAnimation' not found., sources=[/Users/***/projects/AndroidStudioProjects/treader-master/app/src/main/res/values/styles.xml:26:5-29:13], original message=, tool name=Optional.of(AAPT)}

Solution:
– in Project/ gradle.properties Add to android.enableAapt2=false
- search the reference location of the string windowenteranimation and remove the @ in item , as follows & lt; item name=“ android:windowEnterAnimation " >@anim/bottom</item >

[Android] button uses the custom drawable file to set the background, and runs “error inflating class button”

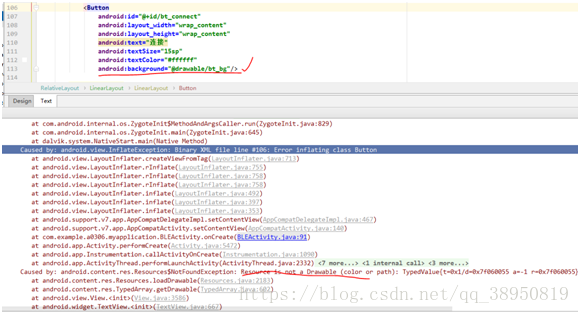
(Android studio 3.1) when setting the background for the button control, the user-defined drawable file is used. No error is reported when running on Android 8.0, but an error is reported when running on Android 4.42. The error is as follows:


Finally, we find that when we switch to project mode, we can customize our own drawable file BT_ bg.xml The file is placed in the drawable-v24 folder, so BT_ bg.xml Move the file into the drawable folder (drawable-v24 can only be seen in project mode, but not in Android mode, as shown in the figure above). Run it again and the problem is solved.

Solution of fileuriexposedexception for Android 7.0 behavior change

The source of this article is as follows http://blog.csdn.net/qq_ 27512671/article/details/71439571

When we develop functions related to [sharing files between applications], we often report this runtime exception on Android 7.0. Why do we run the code with no problem below Android 7.0 on Android 7.0 +?This is mainly from a behavior change in Android 7.0!

For Android 7.0-oriented applications, the strictmode API policy implemented by the Android framework prohibits the disclosure of file:// URI outside your application. If an intent containing a file URI leaves your application, the application fails and a fileuriexposedexception occurs. As shown in the figure:

To share files between applications, you should send a content:// URI and grant temporary access to the URI. The easiest way to do this is to use the fileprovider class.

Usage of fileprovider class:

Step 1: define a fileprovider list entry for your application. This entry can declare an XML file, which is used to specify the directory that the application can share.

<manifest xmlns:android="http://schemas.android.com/apk/res/android"
    package="com.example.myapp">
    <application
        ...>
        <provider
            android:name="android.support.v4.content.FileProvider"
            android:authorities="com.example.myapp.fileprovider"
            android:grantUriPermissions="true"
            android:exported="false">
            <meta-data
                android:name="android.support.FILE_PROVIDER_PATHS"
                android:resource="@xml/filepaths" />
        </provider>
        ...
    </application>
</manifest>

In this code, android:authorities Attribute should be unique. It is recommended to use [application package name + fileprovider]. It is recommended to write this android:authorities= ”${applicationId}.file_ The application package name can be found automatically.
The meta data tag specifies a path, which uses the XML file specified by resource to indicate the path:
the XML file is as follows:

<?xml version="1.0" encoding="utf-8"?>
<paths>
    <external-files-path name="bga_upgrade_apk" path="upgrade_apk" />
</paths>

The way to obtain URI should also be treated differently according to the current Android system version

      File dir = getExternalFilesDir("user_icon");
        if (Build.VERSION.SDK_INT > Build.VERSION_CODES.M) {
            icon_path = FileProvider.getUriForFile(getApplicationContext(),
                    "com.mqt.android_headicon_cut.file_provider", new File(dir, TEMP_FILE_NAME));
        } else {
            icon_path = Uri.fromFile(new File(dir, TEMP_FILE_NAME));
        }

So the problem is solved. Paste an example of installing APK adapter 7.0: http://blog.csdn.net/qq_ 27512671/article/details/70224978


Reference:
1 https://developer.android.google.cn/about/versions/nougat/android-7.0-changes.html#accessibility
https://developer.android.google.cn/training/secure-file-sharing/setup-sharing.html#DefineProvider
Error report in idea compilation Error:Android Dex : [Project] java.lang.OutOfMemoryError : GC overhead limit exceeded

Recommended website http://jingyan.baidu.com/album/9c69d48fa0290013c9024e3f.html

When using IntelliJ idea or Android studio to develop Android applications, if there is a large amount of code, there will be problems when compiling

java.lang.OutOfMemoryError : Java heap space

It’s a mistake. Let’s talk about how to solve this problem.

When using IntelliJ idea or Android studio to develop Android applications, if there is a large amount of code, there will be problems when compiling

java.lang.OutOfMemoryError : Java heap space

Error reported by:

When using IntelliJ idea or Android studio to develop Android applications, if there is a large amount of code, there will be problems when compiling

java.lang.OutOfMemoryError : Java heap space

Error report of:
0

To solve this problem, we need to increase the heap of the corresponding compiler.

Now in the file menu, open the settings interface,
and

Then, in the search box, enter “heap”, and the settings related to heap will be displayed below. Find the corresponding development language settings, and increase heap. In this case, Java heap is not enough, so click Android compiler to increase the corresponding heap.

If the heap of other languages is not enough, turn up the heap in the corresponding menu.

Android project error Error:found an Invalid color. Solution

Recently, I took an examination of an old project and found that I made a mistake in a new one Error:found an invalid color. 

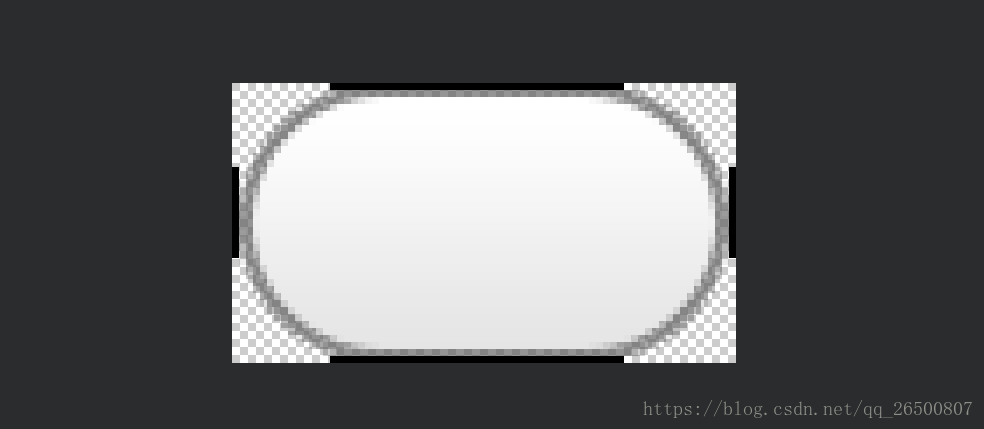
How to click is useless, found that is. 9 picture error, no black line

If you see the black lines around you, just click and drag them with the mouse. In Android studio 3.0.1, you can rebuild them again

Android error reporting: error inflating class android.webkit.WebView

The project reported an unexplained error. However, I met this error three months ago, and it was only today that I got away with it.

First of all, what happened to this error

The layout file writes a WebView control, loads it in the activity, and then crashes! Only some lower version mobile phones can work normally.

Looking puzzled, I know one thing, there is no problem without reason, and there is nothing that can not be solved. But in the face of this, I gave up, because sometimes the project time is very tight, even Baidu for a long time can not solve the problem, had to keep the problem. I rebuilt a project.

Solution summary:

1. If you encounter this WebView rendering exception on Android o, add it under the application of manifest:

<meta-data android:name="android.webkit.WebView.EnableSafeBrowsing"
           android:value="true"/>

2. Error in loading WebView:

reason:

Non native app stores will prompt you to update “Android system WebView”. Update is good, that part of the mobile phone brush machine, Google’s own WebView package lost.

3. A foreign brother said (the problem has been solved)

I had same problem and i solved this problem by changing its theme in manifest.

Modify the theme of Applaction.

I changed any attribute in the theme, that is, a color attribute. After completing this topic and modifying, the project can run normally, and the crash problem disappears. My heart is still full of doubts.

On the error report after the command of ADB shell error:device not A solution of found

When debugging Android development and connecting mobile phones, it is clear that the development mode has been turned on and USB debugging is allowed. After connecting the mobile phone, the device still cannot be found, and an error is reported after inputting the ADB shell in the console error:device not found。 The methods on the Internet can be roughly divided into:
1. ADB kill server to kill the ADB process, and then use the ADB start server command to start it;
2. Detect port 5037( adb.exe Whether the default port is occupied or not adb.exe For processes that occupy port 5037, restart the ADB service:
2.1. ADB nodeamon server: check whether port 5037 is occupied;
2.1 2.2, netstat – ano | findstr “5037”: check which process occupies port 5037;
2.3, tasklist | findstr “21152”: check which program created this process (21152 is the PID of a process occupying port 5037);
2.4, taskkill/F/PID 21152: turn off the process;
2.5, ADB devices: display the current connected devices.
Another solution is provided here, by manually viewing the hardware ID and installing Google native Android debug driver;
1. Right click my computer – & gt; management – & gt; device management – & gt; Android phone. Here we can see the corresponding Android device driver.
2. Right click the attribute of the driver, select the hardware ID in the attribute (P) option under the details option, and record the information in the following value (V). For example, the value of a device is:

USB\VID_2A45&PID_0C02&REV_????&MI_01
USB\VID_2A45&PID_0C02&MI_01

Focus on 2a45 and 0c02.
3. Find the SDK directory of Android development and download (assuming you have downloaded it through the SDK manager) in the computer, and enter into the system of ⁃ extras ⁃ Google ⁃ USB_ In the driver folder, find Android_ winusb.inf This is a Google configuration file for Android. Found in file[ Google.NTx86 ](for 32-bit platform, 64 bit is the same as adding) in this line, you can see a lot of Android device driver information below, for example:

;Google Nexus One
%SingleAdbInterface%        = USB_Install, USB\VID_18D1&PID_0D02
%CompositeAdbInterface%     = USB_Install, USB\VID_18D1&PID_0D02&MI_01

Here, we only need to copy the driver information in the format of this file, and modify it with 2a45 and 0c02 obtained in 2, as follows:

;MEIZU metal
%SingleAdbInterface%        = USB_Install, USB\VID_2A45&PID_0C02
%CompositeAdbInterface%     = USB_Install, USB\VID_2A45&PID_0C02&MI_01

Save and close.
4. Uninstall the original driver and restart the computer. Make sure that the mobile phone has entered the developer mode and allows USB debugging. Select the connection mode to transfer files. Then right click computer – & gt; manage – & gt; device management – & gt; other devices again. You can see a question mark on the ADB interface option, indicating that the driver is not installed correctly. Select the ADB interface and right-click to select Update Driver Software – & gt; browse the computer to find the driver software. In browsing, select Android, the hardware device driver information file that we added before_ winusb.inf The folder of (d): – Android – SDK – Extras – Google – USB_ In this case, you only need to select a folder, not a file). Next, choose always install.
5. After successful installation, an Android phone option will appear in device management.