Git xcrun: error: invalid active developer path (/Library/Developer/CommandLineTools), missing xcru

Question one

After upgrading the latest MacOS system, GIT, which had no problem, reported the following error:

Сannot Run Git
xcrun: error: invalid active developer path (/Library/Developer/CommandLineTools), missing xcrun at: /Library/Developer/CommandLineTools/usr/bin/xcrun

At this time, thanks to Baidu, I found a solution

resolvent

The solution to the above problem is to execute the command on the terminal

xcode-select --install

After the installation is successful, we can execute git command on the terminal. The magic thing happened. Git command can run normally

Question 2

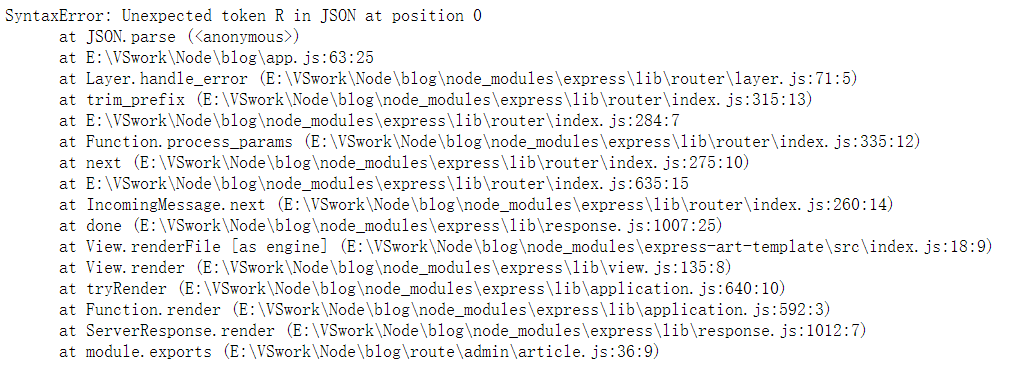
Next, let’s talk about another magical problem. If you are using the idea editor, when you open the idea, you may find that the idea will always prompt the following error message:

Cannot Run Git
xcrun:error:invalid active developer path...

The screenshot is as follows:

at a loss, we found a solution again

Solution

Click the preferences option in the system to enter the system configuration page, search git in the search box of the system configuration page, and configure the path to git executable option in the GIT configuration page as git, as shown in the following figure:
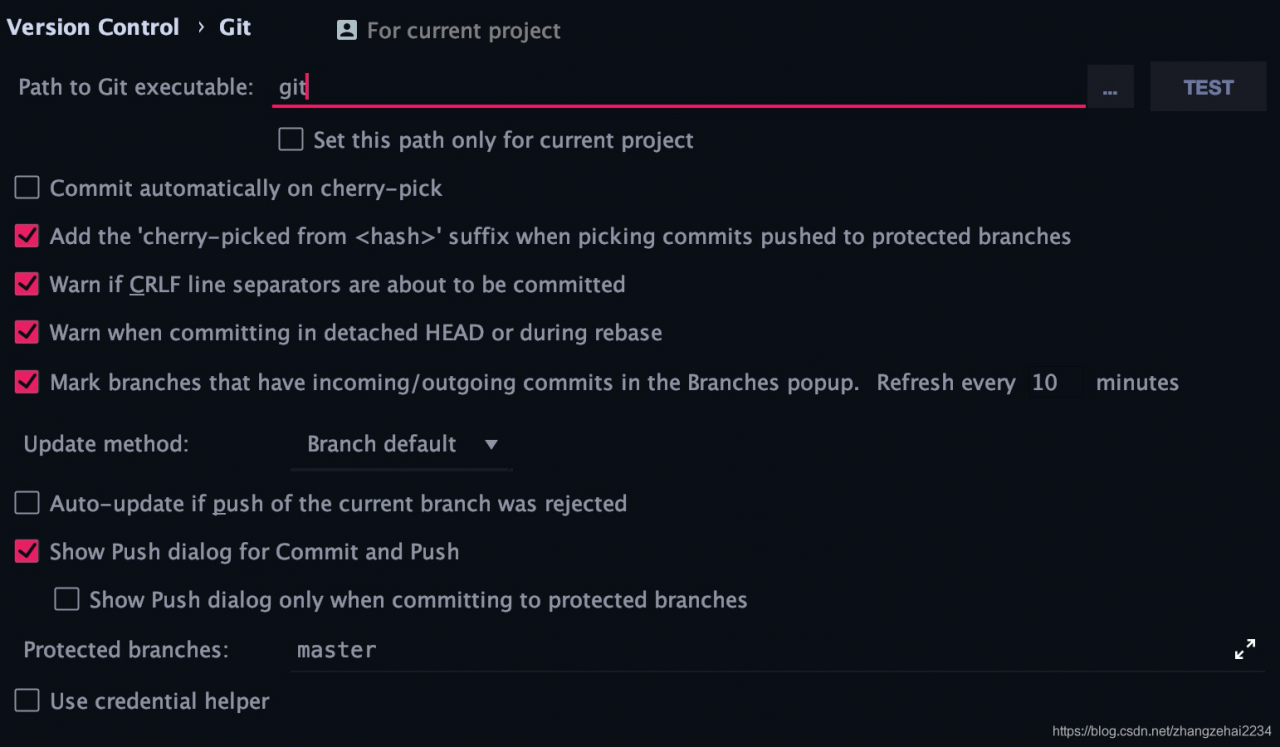
, and then click apply Submit the configuration information just now. Next, close the configuration page. It’s time to witness the miracle. The error message disappears. In this way, the configuration of GIT error message in the whole system is completed

Anaconda start error resolution navigator start error

navigator start error generally, anaconda is not updated or has not been opened for a long time, and the error is as follows:
in this case, anaconda is not updated


resolvent:

1)Run with administrator: conda prompt
2) Execute the command conda update anaconda-navigator
3) If that doesn't work, try the commandanaconda-navigator --reset


Start navigator again:
ignore Big Joe…


linux mysql ERROR 1820 (HY000): You must SET PASSWORD before executing this statement

1. Error information

ERROR 1820 (HY000): You must SET PASSWORD before executing this statement

2. Cause of error

This error means that the original password needs to be changed to execute a MySQL statement

3. Solutions

Log in to MySQL

mysql -u root -p

Change Password

mysql> SET PASSWORD = PASSWORD('123456'); 

4. Error report

ERROR 1819 (HY000): Your password does not satisfy the current policy requirements

It means that the password you set is not complicated enough. It’s better to use numbers + letters + special characters

How to Solve Azkaban Error Chung during uploading files to DB

Error:
Error Chunking during uploading files to db…
azkaban-web-server error:
azkaban.project.ProjectManagerException: Error Chunking during uploading files to db…
at azkaban.project.JdbcProjectLoader.uploadFileInChunks(JdbcProjectLoader.java:503)
at azkaban.project.JdbcProjectLoader.uploadProjectFile(JdbcProjectLoader.java:382)
at azkaban.project.JdbcProjectLoader.uploadProjectFile(JdbcProjectLoader.java:365)
at azkaban.storage.DatabaseStorage.put(DatabaseStorage.java:55)
at azkaban.storage.StorageManager.uploadProject(StorageManager.java:95)
at azkaban.project.ProjectManager.uploadProject(ProjectManager.java:503)
at azkaban.webapp.servlet.ProjectManagerServlet.ajaxHandleUpload(ProjectManagerServlet.java:1713)
at azkaban.webapp.servlet.ProjectManagerServlet.handleUpload(ProjectManagerServlet.java:1789)
at azkaban.webapp.servlet.ProjectManagerServlet.handleMultiformPost(ProjectManagerServlet.java:197)
at azkaban.webapp.servlet.LoginAbstractAzkabanServlet.doPost(LoginAbstractAzkabanServlet.java:319)
at javax.servlet.http.HttpServlet.service(HttpServlet.java:688)
at javax.servlet.http.HttpServlet.service(HttpServlet.java:770)
at org.mortbay.jetty.servlet.ServletHolder.handle(ServletHolder.java:511)
at org.mortbay.jetty.servlet.ServletHandler.handle(ServletHandler.java:401)
at org.mortbay.jetty.servlet.SessionHandler.handle(SessionHandler.java:182)
at org.mortbay.jetty.handler.ContextHandler.handle(ContextHandler.java:766)
at org.mortbay.jetty.handler.HandlerWrapper.handle(HandlerWrapper.java:152)
at org.mortbay.jetty.Server.handle(Server.java:326)
at org.mortbay.jetty.HttpConnection.handleRequest(HttpConnection.java:542)
at org.mortbay.jetty.HttpConnection$RequestHandler.content(HttpConnection.java:945)
at org.mortbay.jetty.HttpParser.parseNext(HttpParser.java:756)
at org.mortbay.jetty.HttpParser.parseAvailable(HttpParser.java:212)
at org.mortbay.jetty.HttpConnection.handle(HttpConnection.java:404)
at org.mortbay.jetty.bio.SocketConnector$Connection.run(SocketConnector.java:228)
at org.mortbay.jetty.security.SslSocketConnector$SslConnection.run(SslSocketConnector.java:713)
at org.mortbay.thread.QueuedThreadPool$PoolThread.run(QueuedThreadPool.java:582)

Problem Cause.
azkaban is unable to update the database.
Solution, restart the database.


The Usage of Np.random.uniform()

np.random.uniform (low=0.0, high=1.0, size=None)

Function: random sampling from a uniform distribution [low, high]. Note that the definition field is left closed and right open, that is, it contains low but not high

Low: sampling lower bound, float type, default value is 0; high: sampling upper bound, float type, default value is 1; size: output sample number, int or tuple type, for example, size = (m, N, K), then output MNK samples, default value is 1. Return value: ndarray type, whose shape is consistent with the description in the parameter size.

The uniform () method randomly generates the next real number, which is in the range [x, y]

Evenly distributed, left closed, right open

np.random.uniform(1.75, 1, 100000000)
#output
array([1.25930467, 1.40160844, 1.53509096, ..., 1.57271193, 1.25317863,
       1.62040797])

Draw a picture to see the distribution

import matplotlib.pyplot as plt
# Generate a uniformly distributed random number
x1 = np.random.uniform(-1, 1, 100000000) # output the number of samples 100000000

# Draw a graph to see the distribution
# 1) Create a canvas
plt.figure(figuresize=(20, 8), dpi=100)

# 2) Plot the histogram
plt.hist(x1, 1000) # x represents the data to be used, bins represents the number of intervals to be divided

# 3) Display the image
plt.show()

*

*

WPF: How to Reference Font Resource File

External font file

1. Background code reference font

We call it “Chinese” CharacterSpecialFont.ttf ”The TTF file is placed in the desktop path, and the background reference method is as follows:

1 var ttfFilePath = @"C:\Users\user\Desktop\";
2 HanziTextBlock.FontFamily = new System.Windows.Media.FontFamily(new Uri(ttfFilePath), "./#楷体_GB2312");

The path URI only needs a folder, and the next parameter family is “.”/# specify font type name “.

be careful:

The path URI is not the full path of the TTF file; the folder where the TTF file is located needs to be added with ‘/’ or ‘\ \’; any special character in the parameter family cannot be missing. Otherwise, the characters displayed in the interface will not be displayed in the specified font. The reference font has nothing to do with the name of the font file, only the font type name can be referenced.

#The font type name is indicated after it. You can double-click to open the TTF file

2. WPF XAML resource reference

Call it Chinese CharacterSpecialFont.ttf ”Ttf file, in the wpfapp2 project. The quotation is as follows:

1     <Window.Resources>
2         <FontFamily x:Key="HanziCharacterFontFamily">pack://application:,,,/WpfApp2;component/#楷体_GB2312</FontFamily>
3     </Window.Resources>
4     <Grid>
5         <TextBlock x:Name="HanziTextBlock" Text="a" FontFamily="{StaticResource HanziCharacterFontFamily}"
6                    FontSize="50" HorizontalAlignment="Center" VerticalAlignment="Center"/>
7     </Grid>

Install font files locally

The local installed fonts can be downloaded through Fonts.SystemFontFamilies obtain.

The XAML font goes without saying. You can set the font type in the background by:

1     var systemFontFamilies = Fonts.SystemFontFamilies;
2     var songTiFamily = systemFontFamilies.FirstOrDefault(i=>i.Source=="KaiTi");
3     HanziTextBlock.FontFamily = songTiFamily;

The system font is fontfamily data, and the source name is in English. How to get the corresponding font by Chinese name?

Familynames is a dictionary containing multi language items. Key is the language item and value is the font type name.

 1     var systemFontFamilies = Fonts.SystemFontFamilies;
 2     FontFamily filteredChineseFamily = null;
 3     foreach (FontFamily family in systemFontFamilies)
 4     {
 5         LanguageSpecificStringDictionary familyNames = family.FamilyNames;
 6         if (familyNames.ContainsKey(XmlLanguage.GetLanguage("zh-cn")))
 7         {
 8             if (familyNames.TryGetValue(XmlLanguage.GetLanguage("zh-cn"), out var chineseFontName)&&chineseFontName=="楷体")
 9             {
10                 filteredChineseFamily = family;
11                 break;
12             }
13         }
14     }
15     HanziTextBlock.FontFamily = filteredChineseFamily;

Keywords: TTF font referenced by background code, TTF font referenced by WPF front end

[Mybatis] How to Solve the problem of Oracle query processing more than 1000 in conditions

Go directly to SQL. The idea is very simple

select * from test_table
where 1 = 1 
 <!-- IdList -->
 <if test="IdList != null and IdList.size > 0">
     AND PK_ID IN
    <!-- Handle the case where Oracle does not support in when the set of in exceeds 1000 entries -->
    <trim suffixOverrides=" OR PK_ID IN()">    <!-- means delete the last condition -->
        <foreach collection="IdList" item="Id" index="index" open="(" close=")">
            <if test="index != 0">
                <choose>
                    <when test="index % 1000 == 999">) OR PK_ID IN (</when>
                    <otherwise>,</otherwise>
                </choose>
            </if>
            #{Id}
        </foreach>
    </trim>
 </if>

Springboot controls the startup of rabbitmq through configuration files

No, beep, code

Mainly for consumers to add configuration

1.Put the configuration in the configuration center (it can also be put on the consumer service)

listener.direct.auto -Startup is set to false,

Then add rabbitmq.start As startup property


spring:
  rabbitmq:
    host: 127.0.0.1
    port: 5672
    username: guest
    password: guest
    listener:
      direct:
        auto-startup: false

rabbitmq:
  start: true

Then in the consumer service startup class xxxxxApplication.class Add in

package com.test.service1;

import com.test.rabbitmq.RabbitmqApplication;
import org.springframework.amqp.rabbit.listener.RabbitListenerEndpointRegistry;
import org.springframework.beans.factory.annotation.Value;
import org.springframework.boot.SpringApplication;
import org.springframework.boot.autoconfigure.SpringBootApplication;
import org.springframework.cloud.netflix.eureka.EnableEurekaClient;
import org.springframework.context.ApplicationContext;
import org.springframework.context.annotation.Bean;
import org.springframework.data.jpa.repository.config.EnableJpaRepositories;
import springfox.documentation.swagger2.annotations.EnableSwagger2;

import javax.annotation.Resource;

@SpringBootApplication
@EnableEurekaClient
public class Service1Application {
    public static void main(String[] args) {
        ApplicationContext context=SpringApplication.run(Service1Application.class, args);
        RabbitMQStart rabbitMQRun = context.getBean(RabbitMQStart.class);
        rabbitMQRun.start();
    }

    @Bean
    public RabbitMQStart rabbitMQRun() {
        return new RabbitMQStart();
    }
    private static class RabbitMQStart {
        //In order to use the @value annotation in the static method in main only this way can be used
        @Value("${rabbitmq.start}")
        private Boolean rabbitmqStart;

        @Resource
        RabbitListenerEndpointRegistry rabbitListenerEndpointRegistry;
        public void start() {
            if(rabbitmqStart)
                rabbitListenerEndpointRegistry.start();
            else
                rabbitListenerEndpointRegistry.stop();
            System.out.println("=================== Rabbitmq:"+rabbitmqStart+"===================");
        }
    }
}

2.Test:

rabbitmq.start =When true

rabbitmq.start =When false

ElementUI implements front-end paging

To write pagination according to his documents, the most important thing is how to deal with the data displayed in El table

<el-table :data="AllCommodityList.slice((currentPage-1)*pagesize,currentPage*pagesize)" border style="width: 100%">

The most important thing is to deal with the red mark above

Allcommoditylist is the background data, CurrentPage is the current page, the initial value is 0, PageSize is the current data to be displayed, the initial value is 10

The slice() method returns the selected data from an existing array

//1.Paging component
<el-pagination
    @size-change="handleSizeChange"
    @current-change="handleCurrentChange"
    :current-page="currentPage"
    :page-sizes="[10, 20, 30]"
    :page-size="pagesize"
    layout="total, sizes, prev, pager, next, jumper"
    :total=parseInt(total)>
  </el-pagination>

//2.control methods
    handleSizeChange(val) {
        this.pagesize = val;
    },
    handleCurrentChange(val) {
        this.currentPage = val;
    },

How does Python output colored fonts in the CMD command line window

Method 1

The output mode consists of three parts

\033 [font display mode; font color; font background color M ‘character’ \ 033 [0m]

Display mode: 0 (default), 1 (highlight), 22 (non BOLD), 4 (underline), 24 (non underline), 5 (flicker), 25 (non flicker), 7 (reverse display), 27 (non reverse display) font color: 30 (black), 31 (red), 32 (green), 33 (yellow), 34 (blue), 35 (magenta), 36 (cyan), 37 (white) font background color: 40 (black), 41 (red), 42 (green), 43 (yellow), 44 (blue), 45 (magenta), 46 (cyan), 47 (white)

from colorama import init
init(autoreset=True)
name = '谢辰辰'
print(f"\033[0;31m{name}\033[0m")      #Output the red font
print(f"\033[0;31;42m{name}\033[0m") # Output the red font with green background color

Method 2

Setting colors with fore

from colorama import init,Fore
init(autoreset=True)
print (Fore.BLUE+'遇见你') 
print(Fore.RED+'谢辰辰')

Ffmpeg about Avio_alloc_Context application for memory release

Question:

Using ffmpeg to discover AV_ The memory requested by malloc can’t use AV in the end_ If the free function is released, it will crash.

Code example:

   unsigned char * iobuffer = NULL; 
    iobuffer = (unsigned char *)av_malloc(40000);
    if (iobuffer == NULL)
    {
        printf("iobuffer av_malloc failed.\n");
        return -1;
    }

    AVIOContext *avio = avio_alloc_context(iobuffer, 40000, 0, this, fill_iobuffer, NULL, NULL);
    if (avio == NULL)
    {
        printf(" avio_alloc_context failed.\n");
        return -1;
    }
    /*.........*/

Release Avio_ alloc_ Context memory

Method 1: use Avio_ context_ free

            avio_context_free(&avio );

Method 2: using AV_ freep

            // memory release
            av_freep(&avio ->buffer);
            av_freep(&avio);

Appendix:

/**
 * Free the supplied IO context and everything associated with it.
 *
 * @param s Double pointer to the IO context. This function will write NULL
 * into s.
 */
void avio_context_free(AVIOContext **s);


/**
 * Free a memory block which has been allocated with a function of av_malloc()
 * or av_realloc() family, and set the pointer pointing to it to `NULL`.
 *
 * @code{.c}
 * uint8_t *buf = av_malloc(16);
 * av_free(buf);
 * // buf now contains a dangling pointer to freed memory, and accidental
 * // dereference of buf will result in a use-after-free, which may be a
 * // security risk.
 *
 * uint8_t *buf = av_malloc(16);
 * av_freep(&buf);
 * // buf is now NULL, and accidental dereference will only result in a
 * // NULL-pointer dereference.
 * @endcode
 *
 * @param ptr Pointer to the pointer to the memory block which should be freed
 * @note `*ptr = NULL` is safe and leads to no action.
 * @see av_free()
 */
void av_freep(void *ptr);

Template cannot be rendered due to the joint query of populate in mongoose: syntax error: unexpected token r in JSON at position 0

Error information

Error code

    let articles = await Article.find().populate('author');
    res.render('admin/article', { articles });

Error reason

When the populate </ code> method is used in mongoose to realize the set association, the template engine cannot render. This is because when the set joint query and rendering page template are carried out at the same time, the two conflicts will result in the failure of rendering the page. For example, we change the above code to the following:

    let articles = await Article.find().populate('author');
    res.send('ok');    // The server side can respond to the client ok so there is a real conflict between template rendering and federated queries

resolvent

Using the lean () method

    let articles = await Article.find().populate('author').lean();
    res.render('admin/article', { articles });

Lean() method: it tells mongoose to return a normal object instead of a mongoose document object, which is used internally first JSON.stringify () this method converts the document object to a string, removes all other attribute formats, and then leaves only the required data string~

Using stringfy() and parse() methods

And the above method is essentially the same

    let articles = await Article.find().populate('author');
    let str = JSON.stringify(result);
    let json = JSON.parse(str);
    res.render('admin/article', { json });

When we continue the paging function, we use the JSON method

To achieve paging function, we use the mongoose sex page </ code> third-party module for paging, and then we change the code to:

let temp = await pagination(Article).find({})
    .page(page)
    .size(2)
    .display(2).populate('author')
    .exec();
let str = JSON.stringify(temp);
let articles = JSON.parse(str);
res.render('admin/article', { articles });

The problem will be solved 😀